As stated in the first Photoshop tutorial, you never stop learning new things in this program. There are always new methods and tools available for use. We decided to collect 25 more Photoshop tricks and tips that every designer needs.
Sit down, read carefully and enjoy the unknown!
Wizard for manipulating the tool "Puppet Warp" (Puppet Warp).
This tool is not used as often as other Photoshop tools, but if it works, it turns you into a design star! Puppet Warp allows you to set points (pins) on a layer and then manipulate and bend an object in a realistic manner. In other words, a kind of frame is created that allows you to control changes to the object, like a puppet.
Below is an image of a snake that I have extracted from the background and placed on my own layer.
Using Puppet Warp, I added some control points to the object and changed the position of the snake on the surface. Great, isn't it?
You can find more detailed information on this tool.

One-click editing using a set of adjustment layers (Adjustment Layers).
You are all familiar with adjustment layers and you know the incredible results you can get using them. But you might not notice that some of the adjustment layers contain some pretty interesting and useful settings. In my example below, I opened a Curves Adjustment Layer (Layer-New Adjustment Layer –Curves) and at the top of the Options dialog box, I opened a drop-down menu of presets.
more-img1.jpg
I especially like the set of settings inside the Black and White adjustment layer.

Did you know?
You can use an adjustment layer as a clipping mask to a specific layer by clicking the two rings icon (Clipping Mask) at the bottom of the adjustment dialog box. Otherwise, the adjustment will affect all layers below.
Full control over paths in the Paths panel.
If you spend time drawing paths in Photoshop, then the Paths panel is a must for you. The paths palette in Photoshop is essentially the same as the layers palette, but only serves to create paths.
In this panel, you can create new paths and delete them, load their selection, stroke and fill with any color.

Create and edit your own keyboard shortcuts.
Have you ever wanted to change the default keyboard shortcuts in Photoshop or create your own? This is easy to do. Go to the menu Editing-Keyboard Shortcuts (Edit | Keyboard Shortcuts).
In this panel, you can change the default settings and even add your own.

Perfect control over the Type Tool with the Character panel.
The Character palette contains all the features you need to edit text and paragraphs. The palette is accessed through the Window-Character menu or with the Type tool active, click the extreme right-hand icon in the top menu.


Streamline your workflow using the Workspace feature.
Photoshop presents five working window settings. One each for 3D images, design, motion, painting and photography. After choosing one of the work areas, you will see that Photoshop opens the most necessary panels for working in this area and organized in such a way that the necessary functions become easily accessible.
The choice of the working environment is carried out through the menu Window | Workspace

You can also create and save your own workspaces. Go to the Window | Workspace | New Workspace (Window-Working environment-New working environment), assign a name to the working environment. This is a very useful tip if you have multiple workflows.
Reality Bend with Liquify filter.
My favorite filter in Photoshop is Plastic (Filter | Liquify). You can create interesting warping effects here, but they look realistic.
In the example below, I used a brush in the Plastic filter to enlarge the girl's eyes and curl the hair to give the look a little crazy.


Eliminate the confusion with the Showing Layer Edges function.
A very useful feature to show the edges of layers during your work. It is useful if you are working in a document with many layers and it becomes difficult to tell where (at what level) a particular layer is. This function can be accessed through the menu: View | Show | Edges Layer.
Now when you click on a layer or several layers, they will be selected in the working window of the document.

Highlighting specific colors and shades with the Color Range function.
A huge part of working with Photoshop is selecting objects. And the "Color Range" function will help you to do this quickly and efficiently. It allows you to highlight any color or shade.
Access through the menu: Select | Color Range.
At the top of the dialog box, you can choose any color or range of highlights, shadows, and midtones.

As soon as you click OK, your selected area will be highlighted. In the example below, I've selected a range of highlights in the photo to highlight.

Organization and classification of documents.
In the very top panel of the program there is an icon for organizing files with a drop-down menu. This is a very useful feature if you have many documents open or if you are working with one or more documents at the same time.
The working area of the screen will display as many files as you select from the list.

Setting up Photoshop's default menus.
If you need an absolute rationalization of the process, then you can customize the program's default menu. Delete what you don't need in the process. To make the settings, go to the Edit | Menus (Edit-Menu).
To remove unnecessary parameters, simply click on the eye icon in the settings dialog box.

Did you know?
You will also burn highlighting certain menu items in any color on the menu bar. Just click on the word “None” in the column and assign any color from the drop-down list.
Editing and customizing your brush.
The Brush Preferences Panel (Window-Brush or F5) gives you full control over how your brush works. From here, you can make any changes to existing tool options, or create your own brushes and save those adjustments as a new brush.

Using the Masks panel.
Layer masks provide an incredible environment for non-destructive editing of layers. But if you have never researched the parameters of this method, then you do not know even half of the flexibility inherent in this tool.
A layer mask is added by clicking its icon at the bottom of the layers panel (Add Layer Mask). Open the "Masks" palette (Window | Masks). When you select a mask that you created on a layer, all functions in the masks panel are immediately activated. Below I created a mask with a copy of the Red channel in the photo.

By adjusting the Feather function in the masks panel, I can create a soft focus effect on the photo. The effect is fully preserved and can be edited without damaging the original photo.
Knowing these parameters gives you much more flexibility in the masking process.

Editing JPG images in Camera Raw.
There are a number of great tools found in Camera Raw, and they're not limited to native camera formats. You can open any JPG images in Camera Raw. Open Bridge (the icon in the top menu), select the image and click on it with the other mouse buttons, choosing from the menu - Open in Camera Raw (Open in Camera Raw).
One of my favorite Camera Raw tools is the Adjustment Brush. Below is an example of editing an image using this tool. You can watch a tutorial on using an adjustment brush.

Using Alpha channels for more precise selection.
An often overlooked method of isolating an object from the background to a mask using alpha channels.
For example, we have a bird on a white background that needs to be removed. Open the Channels Palette and select the most contrasting channel for our image. In this photo, the Blue channel is the most contrasting.
Copy this channel by dragging its thumbnail onto the new channel icon at the bottom of the palette.


If desired, we can remove the remaining black areas on the bird using a white Brush. Next, load the selection of this channel (Ctrl + click on its icon), return to the Layers panel and hide the background on the mask by clicking its icon at the bottom of the Layers panel.

Embossed design with Texturizer function.
This is one of the small filters in the program that can inspire experimentation from time to time. Load this filter through the menu Filter | Texture | Texturizer (Filter-Texture-Texturizer).
I used a photo of the tree to create the texture.

In the filter dialog box, select the canvas texture. The effect is good, but not particularly interesting.

It will be a real pleasure to use your own textures. You can load them into the filter by clicking on the arrow next to the "Texture" section. The only requirement is that the format of the loaded texture must be PSD.

In the example below, I have loaded the original image of this tree as my texture, which creates an interesting effect on the picture.

Creation of Gif-animation in Photoshop.
Making Gifs is not something I do often, but when possible, I use it. Making animation frames in Photoshop is not only incredibly easy, but also fun. Open the animation panel (Window | Animation) and create a new frame by clicking its icon at the bottom of the panel. You can edit, add and rearrange the document for each frame. Then select the frame display time by clicking the arrow at the bottom of the frame thumbnail. To view the animation, use the player keys at the bottom of the panel. To save the animation in Gif format, go to the File | Save for Web & Devices. Choose Gif as the file format.

Clarification with the Info panel.
You may be asking what this Info panel is and why it takes up screen space. I've asked myself this question many times too, but the truth is that the Info panel contains a lot of useful information to get your work done.
Take a look at the screenshot below and you will see what data is reflected in this panel.

Working with color schemes through the Kuler extension.
If you were interested in color schemes beyond the default program settings, you probably know about the Adobe's Kuler project. This is an online color community with tons of interesting options and color ideas. The Kuler extension is accessed through the Window | Extensions | Kuler (Window-Extensions-Cooler). Using the "Cooler" panel, you can search and view any color options, and you can also visit the site page. Once you find the colors you like, you can add them to your Swatches palette for further work.

Editing video in Photoshop.
I bet you didn’t know that the video can be modified within the Photoshop program. This is very easy to do. You can import video through the menu: Layer | Video Layers | New Video Layer From File All video frames are edited like a regular layer. To access individual frames, you need to open the animation timeline (Window | Animation). Alternatively, you can make global changes to your video by adding adjustment layers in the layers panel.

A quick video tutorial on using video layers is presented.
Create a vignette using adjustment layers.
I recently discovered a way to create a vignette using a Gradient Fill adjustment layer. I love adjustment layers, so I put this method in my bag of tricks.
Open any of your photos. I used the photo you see below.

Now add an adjustment layer "Gradient" (click on the adjustment icon at the bottom of the layers panel and select from the list - Gradient Fill). Set the direction of the gradient color from white to transparent to black. Change the blending mode of this layer to Soft Light (Soft Light).

Next, on the "Gradient Fill" layer, open the layer styles (click on the "Add Layer Style" icon) at the bottom of the layers panel and add the "Gradient Overlay" style, but with a radial style. Use a color from semi-transparent white to black again.

The good thing about this method is that the vignette is always editable and the adjustment layer can be transferred to a new document with automatic resizing.

Original photo.
Ideal placement when using alignment objects.
This tip may be obvious to some, but you'd be surprised how long I used Photoshop before I noticed these tools.
When the Move Tool (V) is activated, alignment icons appear in the top panel. When you select multiple layers (Ctrl + click on the layer thumbnails), then try clicking on any of these icons and see what happens.
Knowing these features can save you tons of time in your workflow.

Using the "Offset" filter to create a repeating pattern.
Often you have to create your own textures and patterns, so you need the filter function "Offset".
To create a repeating pattern, you need to select a square from your texture file. One that has a uniform tone is preferred. Copy (Ctrl + C) the selected square into a new file of 500 × 500 px size.

Now go to the menu: Filter | Other | Offset (Filter-Others-Shift) and set the shift to the right and down horizontal and vertical at +250.
I entered the value +250 because my document size is 500 px, i.e. shift by half the size of the document.

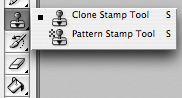
Now, using the Clone Stamp Tool (S), delete the lines in the center of the document. This file can be saved as a repeating pattern and will look like a 500px seamless file.

Organizing your layers panel by grouping.
You can know well this feature of the program, but there are some nuances. I usually do not flatten layers, so the result of my projects can consist of dozens of layers. To maintain order in my work, I group the layers into structural parts. This is an important point in the work, because grouping allows you to avoid confusion in details when sharing files and working in a group.

Did you know?
Within groups, you can create new groups to further organize the layers in the panel.
When reading articles about Photoshop, I am often amazed at how many authors make it difficult to solve inherently simple processing tasks. Many "monumental" writers suffer from this, for example Dan Margulis. But this is forgivable to him - his task is to write about all the subtleties and nuances of the processing process, to consider it from all angles and sides. Although it is precisely this feature of the presentation of material in his books that repels many readers.
In fact, the roots of these "40-step sharpening" techniques have their roots in a very simple thing - the people who write these tutorials have never worked with a lot of photographs. That is, as a rule, they have a couple of photos and they are ready to kill an evening or two in the process of processing them. But when you have constant orders, and from each photo session you need to seriously process several dozen frames, you start thinking about simpler and more convenient ways of processing.
We will talk about them today. I'm going to tell you about five simple yet very effective Photoshop tools that I use all the time in my work.
Before editing photos in Photoshop, I always work with the frames in the RAW converter first. It is there that I do the main color correction and primary processing of photos. Basically, I create a "skeleton" of processing, and in Photoshop I work with the details of the photo.
So, we have worked with the photo in the RAW converter and open it in Photoshop. Photoshop meets us with a huge number of processing tools for all occasions. But we'll talk about the simplest and most effective ones.
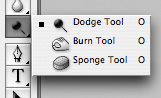
The main function of the Dodge Tool / Burn Tool is to lighten / darken individual areas of the image. Basically, you can "paint" the darkening, or vice versa - lighten the picture. It's very simple, give it a try: I am sure you will appreciate this tool. The Dodge / Burn Tool has only two, but very important settings.
Range - Select a field of application
You can use this tool on dark (Shadows), light (Highlights) or neutral (Midtones) areas of the photo. For example, you want to lighten the dark areas of the chin (when processing a portrait), and leave the light ones untouched. In this case, we set the Shadows mode to the Dodge Tool, and it will only lighten the dark areas of the places where we apply it.
Exposure - force of impact
It is very important to correctly set the strength of the impact. Many people experimenting with Photoshop try 100% Dodge / Burn. And, darkening the image, get black "holes", and lightening - solid overexposures. Of course, when they get such a result, they no longer come back to this tool. But Dodge / Burn is a subtle tool. If you are working with shadows or highlights, try the application strength of 7-10%, if with neutral areas - 10-20%. For each case, the strength of the impact is selected separately, but after working a little with this tool, you will begin to feel what kind of power is needed in each specific case.
Usage
Dodge / Burn has a ton of uses:
- Lighten the iris of the eyes
Just apply the Dodge Tool to the iris - this is the easiest way to lighten it. Thus, you focus the viewer's attention on the model's eyes.
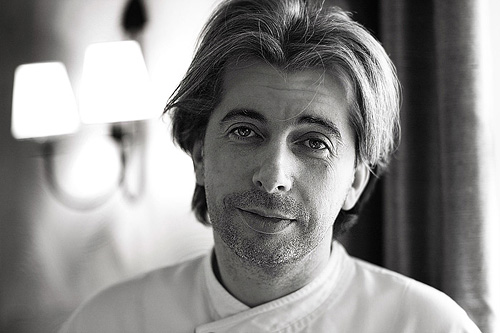
In all these portraits, I brightened the iris of the eyes precisely in order to draw the viewer's attention to the eyes and add psychology to the frame.

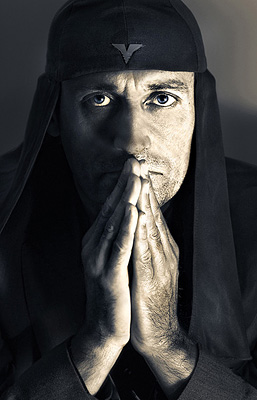
- Darken the lines of the face in a male portrait
Cheekbones, jawline, nose line, eyebrows - any facial lines, if darkened a little, will acquire greater volume and contrast. The man in the photo will look more tough and strong-willed.
I use this technique when processing almost all male B / W portraits. For color, this technique is not always suitable, as it “destroys” colors, but it works just fine in B / W picture.

In a woman's portrait, this technique must be used very carefully, since a woman will be adorned only by accentuating those facial lines that give her femininity. Otherwise, you will receive a portrait of a masculine creature.
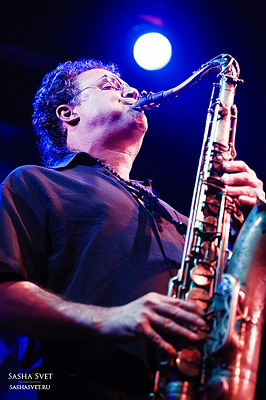
- Brighten backlight areas
Backlight is a wonderful thing in itself. But if you use the Dodge Tool to enhance its effect, the picture will become even better. It looks especially great in concert photographs, when the musicians are illuminated by good backlighting.
- Whiten teeth for your models
It is using the Dodge Tool that it is easiest and most effective to whiten teeth in a photograph. A little later, I will definitely write a separate lesson on correct teeth whitening with the Dogde Tool.
2. Clone Stamp
There are several tools for retouching images in Photoshop, and each of them is good in its own way. But "Stamp" is the most versatile tool to use.
Its function is to take a certain area of the image and copy it. Thus, we can, for example, retouch wrinkles - simply "replacing" them with areas of smooth skin. To do this, press Alt and select the area where the picture will be taken from, and then, simply by clicking on the necessary areas of the image, we will copy it to them.
It is important to pay attention to two parameters in the stamp settings:
Mode
These are the modes in which the stamp will work. For example, in Darken mode, the stamp will only "replace" areas that are lighter than the selected area. In fact, you can darken the light areas of the image, which is why the name of the mode is Darken. And, accordingly, in the Lighten mode, the stamp will work only on the darker areas of the image, lightening them.
Clone Stamp has many modes of operation - experiment with them, I'm sure you will get interesting results.
In my opinion, it makes no sense to describe the operation of each mode - in Photoshop for all tools, essentially the same principles of operation of the modes operate, only slightly changing for the specifics of a particular tool.
Opacity stands for opacity. Simply put, the lower you put the percentage in this setting, the more transparent the "work" of the stamp will be. For example, at 100% the stamp will completely replace the selected area, and at 50% it will be semi-transparent. For face retouching, as a rule, 10-30% is used, otherwise the stamp mark will be too clearly visible.
Using the Clone Stamp
- Retouch
Retouching in all its forms is the main purpose of the stamp. First of all, the stamp is used for skin retouching - to remove wrinkles, bruises under the eyes, swelling and other beautiful creations of Mother Nature.

You can also retouch, for example, an unwanted subject in the frame. Unless, of course, it takes up half of the photo.
It is very convenient to use a stamp to eliminate small overexposures. For example, your model has a small speck of overexposure on the tip of her nose. We take a stamp, set the Darken mode and darken this speck in a couple of clicks.
3. History Brush

History Brush is a time machine for photo processing. You can take any stage of processing and paint with a brush from it according to your image.
The History Brush is fraught with tremendous possibilities. I have already written in detail about the operation of this tool in a separate article. In it, you will find a detailed tutorial on the use of history brushes and learn how to sharpen only the areas of the image you need.
Sharpening is certainly not the only area of application. In future articles, I will tell you how to work with color in a photo using the History Brush.
4. Black & White
The Black & White tool is located in the Image-> Adjustments tab. Or you can just create an Adjustment layer on your photo.

The main function of the Black & White tool is the "correct" translation of a color image into b / w. Correct because you can change the black and white display of each color. Thus, you can get a beautiful and "tasty" b / w picture.
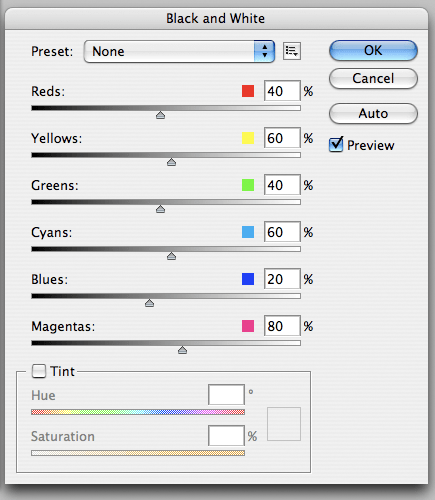
But the functionality of B&W is not limited to this.
With this tool, you can get a very interesting and colorful picture. Apply a B&W to our image and then turn on the Overlay layer mode.
Now, by manipulating the B&W controls and layer transparency, we can get a very interesting picture. For better clarity, I set the Opacity of the B&W layer to quite high - 62% and turned the Greens, Cyans, Blues and Magentas controls to the maximum.
As we can see, the picture immediately became richer and more contrasting (click on the picture to enlarge).

Now let's pay attention to the check mark Tint... By enabling it, we will be able to tint the image in the color we need.

Usage
The options for using B&W in both color and B / W are a lot.
In one of the following articles, I will, using the example of processing several photos, talk about all the main nuances of working with Black & White.
5. Shadow / Highlights

Shadow / Highlights is also located in the Image-> Adjustments tab (by the way, there are many interesting tools there, I advise you to experiment with all of them)
This tool is designed to darken overexposed areas and draw highlights from shadows. Apart from the most obvious application of eliminating overexposures and under-highlights, S / H also works great for creating a sense of greater depth in a picture. We can add dark tones to the light areas, and light ones to the dark ones. Thus, the picture will become more voluminous and deep.
For example, in this photo using S / H I added volume to the puppy's coat and the picture immediately became more interesting.

In fact, Shadow / Highlights are an absolutely indispensable tool for any serious editing. Almost any photo can be made better with the right S / H.
I would like to talk about all the S / H settings and its functionality, but this is really a topic for a separate article. In the future, I will definitely return to the Shadow / Highlights theme, but for now, just try experimenting - try different settings and see the result. In my experience, this is the most effective way to learn new things.
As we can see, all these tools are very easy to use, but at the same time they are amazingly effective. Try experimenting with them and you will feel how many possibilities they give when processing.
I think it's worth doing a series of articles on simple yet very effective tools in Photoshop. And in the next article I will talk about tools for seriously working with color in photography.
From the series "Pfff, I knew that for a long time!"
In fact, these are rather useful tools and techniques that help in working on projects in CG, identity and the web that you might not know about.
Let's start with some useful tricks in Photoshop, and let's go!
1 - Content-aware fill
Edit> Fill or Shift + Backspace
A convenient tool for removing objects from the image, taking into account the content, just select the object with the lasso, click Shift + Backspace and OK.
2 - Blending Options
fx> Blending Options

It happens that the usual blending modes are not suitable for the task, in this case, you can use the sliders in the layer blending properties to help you. Hold down the key Alt pull the triangles depending on what you want to get.
3 - Defringe
Layer> Matting> Defringe

A tool for processing the edges of an image. A simple trick to get rid of light or dark edges in a layer. This command recolours the pixels on the border of the selection to match the color of pixels located at a certain distance within the area to help better fit the subject.
4 - Rubber Band
Top control panel> Rubber Band

Surely many do not know that there is such a check mark in the pentule settings, try it, you will like it :)
5 - Normal noise
Filter> Camera RAW Filter or Shift + Cmd (Ctrl) + A

The standard noise filter is often not suitable for compositing, it is too "digital" and has no settings, so it is better to use Grain v Camera RAW Filter, the settings of which allow you to change the grain size and its sharpness. This often helps in final post-production to give the image an optical naturalness.
6 - Nik Collection by Google

An excellent plug-in for Photoshop with various effects and presets, there is point editing. It's not without trash, of course, but there are also some good tools. For example, in Analog efex pro there is a section Classic Camera, where you can simulate the optical distortion of the camera, there is a fairly correct Boke effect, blur at the corners and other tools that will help make the picture more realistic and vivid. And in Color Efex Pro there are convenient tools for increasing the contrast and detailing of images (Tonal Contrast, Pro Contrast, Detail Extractor).
7 - Chromatic aberration
Filter> Lens Correction or Shift + Cmd (Ctrl) + R

If it is customary to remove chromatic aberrations in the photo, then when composing, especially scenes using 3D, these distortions, on the contrary, make the picture more natural, bringing raw renders to life. Just keep yourself in control, do not abuse it :)
8 - View a specific layer
Alt + left mouse button while on a layer

Sometimes you need to look at the original of a specific layer, so as not to copy it on top of all layers, just hover over the eye icon next to the layer and hold down the key Alt click on left mouse button, pressing it again returns to its original state.
9 - Crop taking into account the content
Crop Tool> Top Control Panel> Content-Aware

Starting with the version of Photoshop CC (2015.5), it became possible to crop taking into account the content, to do this, click C key and check the box Content-Aware in the top control panel. By the way, in the same panel there is a wonderful tool Straighten, which helps to align the horizon, just draw a line along the object and the algorithm will do everything by itself.
10 - Fast export of layers
Right mouse button on selected layers> Export As ...

To save several layers at once into separate files, simply highlight them and clicking right mouse button, select Export As... and in the window that appears, you can change the size, select the required format and
New to Photoshop? We will help you figure out what's what!
Learning Photoshop can take a long time, and there are many things that I, unfortunately, did not know about when I started doing it. Therefore, today I present to your attention ten useful notes, thanks to which it will become much easier to work with Photoshop! You will learn about the most important tools and tricks that even a beginner can master.
1. Get to know the Tools
This is the Photoshop toolbar.
Click on the double arrow to arrange the tools on the panel in one or two rows.
Did you know that you can customize it for yourself?
While there are many useful tools you can always see, you may be missing out on the additional tools hidden behind the triangles in the lower right corner, using only those located “on the surface”.
So customize the toolbar for yourself - make it a helpful reminder to try new tools!
Click on Edit> Toolbar(Edit> Toolbar ...) to manually select tools. Group them according to priority levels - for example, one group may be composed of tools that have yet to be mastered, and another - those that you use regularly.

Don't overload the panel with tools you don't use; put your favorite instruments in it instead!
Decide on the Core Toolbox
All tools will not be needed in every job, and therefore it is important to build a strong base, with several flexible tools that are good at different types of work.
Here you see two different projects: drawing on a tablet and photo manipulation. Notice that the tools for both projects are identical?

While the first project is all about drawing, the second is very dependent on my illustrative skills. So don't worry if you are not familiar with these tools yet! Your main set should reflect your interests, be it design, photography, or illustration.
Also, keep in mind that many of Photoshop's tools can be used for different purposes. For example, the tool Pen(Pen) can be used to separate the model from the background or to create a vector illustration.

There are other tools that you will need, but consider them secondary. For example tools Pen(Feather) and Move(Moving) may not seem particularly creative at first glance, but they are needed (and sometimes needed very often) to improve the workflow.
What are your main tools?
In the beginning, you will always have favorites. But as your skills improve, challenge yourself to try new tools and creative effects.
2. Introduction to the Layers Panel
Simultaneous keystrokes Control-Shift-N creates a new layer.

Layers panel very effective and helpful. It will change the way you think about development, opening up countless possibilities in Photoshop.
But how?
Well, in general, the panel allows you to control several parameters. Opacity(Opacity), Fill(Fill) and Color(Color) are just a few. With these options, you can modify your layers to create many cool effects.
Text effects, for example, are often created with incredible Layer Styles(Layer styles).

In the beginning, you will probably use the Layers panel for its primary purpose - to keep your work on separate layers, but I highly recommend getting into it in more detail. Explore the panel as much as you can and you will discover new ways to create detailed artwork.
Experiencing color problems? Try to work with Layer Blend Modes(Layer Blending Modes). Want to get a brighter result? Perhaps your solution is Adjustment Layer(Adjustment layer).
3. Save time with Layer Masks
Now is the time for an important conversation - the conversation about layer masks.
Layer masks can be confusing for beginners, but they are vital to effective editing.
To use a layer mask:

Here I drew a circle in the middle of the mask to show the white background under the layer filled with blue.
Use layer masks in any artwork! Incorporate them into your regular work so that any adjustments can always be painlessly undone.
Most of the time, difficulties with this function arise from a misunderstanding of when to use it. Beginners will often just use the tool. Eraser(Eraser) as this is the fastest solution.
You can also use masks to create isolated objects and then insert them into your artwork.
4. Control-S Right?
Quality matters, so before you save your work and close the program, consider the following:
- Why do I need this file?
- Where can I store it?
- What format do I need it in?
- How to keep it in the best quality?

Above you see a comparison of different quality levels, 1 - 83%, 2 - 1%. Image via Envato Elements.
What and Where
The answer to the first question is whether your work will be used online. In graphic materials for online posts, quality is not so important, while printed materials must be saved in high resolution. Explore the printing guidelines to understand why important settings such as Color modes(Color Profile) and how to manage them.
Store your files in a location on your computer where you have quick access. Photoshop can throw an error if the file is missing some elements (for example, fonts), so try to keep everything in order.
Format and quality
Now that you know what your work is for, you can move on to saving it in a suitable format. Many designers save their work in multiple formats for added flexibility.
Click on File> Export> Save for Web(File> Export> Save for Web).

Check how your work looks like with different compression settings. Avoid losing quality!
How good will your design look when printed?
You also need to save your work in different formats in order to understand the print quality. If, for example, your drawing, design or other work contains bright neon colors, then you may be disappointed with the physical result.
Minimalist design is a huge trend, in part because it allows for greater printability. This design is often easier to print and therefore is used more frequently.

What looks good on screen doesn't always look good on paper. There are many reasons for this, and one of them is how the ink is applied to the paper. This step also requires an understanding of the difference between color profiles. RGB and CMYK.
Work according to your situation. To open / change Color Mode(Color Profile) of your file, click Edit> Color Settings(Editing> Adjusting Colors ...).

Test your work by printing them in the printing industry! For best results, learn the intricacies of the printer for a specific printing industry.
6. Sets! Sets! Sets!
In the real world, there are such things as tight deadlines and daunting tasks. So save precious time by using Photoshop's built-in presets!
There are sets of brushes, shapes, patterns and more. You can quickly add a filter to your photo or create a brochure with abstract elements.
To view all of them, click Edit> Presets> Preset Manager(Editing> Sets> Manage Sets).

Some of my favorite sets are the brush sets. Brush sets from your favorite artists are cool too, but use the ones you already own!
These sets include various textures, beautiful gradients, and more.

In the screenshot you can see an example of the Wet Media brush set.
Use the kits to create amazing effects! They are already organized for your convenience, so all you have to do is download them and get started.
7.Easy to change colors with adjustment layers
Create incredible lighting schemes with just a couple of clicks!
Adjustment Layers(Adjustment Layers) are just perfect for those new to Photoshop. They allow you to seamlessly change many of the visual aspects of your work.
Need to keep your original photo? No problem. Tools that allow you to undo any changes, such as Adjustment Layers, can help you create stunning effects without losing quality.
To use an adjustment layer Color Lookup(Search for color):
Click on Layer> New Adjustment Layer> Color Lookup(Layer> New Adjustment Layer> Find Color). Select the set for the file 3DLUT File from the dropdown menu. Click OK and enjoy the result.

Stock photo from Envato Elements.
Adjustment layers are one of my favorite tools, and I am thrilled to know that they work just as well for tablet illustrations!
Photoshop artists use these adjustments to try different color palettes before making a final decision. Explore different lighting schemes and more with incredible tools like Curves(Curves).
8. Learn to Organize Your Workspace
Chefs love to keep their kitchens tidy as this contributes to their neatness and productivity. So why not create yourself a clean workspace in Photoshop?
The organization contributes to the creation of a good working atmosphere. And even if sloppiness seems to be very creative, an organized workplace can improve your work.
First, close all unnecessary tabs!

After that, there are still many ways to make everything even neater. For example, you can pin and unpin your favorite panels and toolboxes.
Then press Window> Arrange(Window> Arrange).

Choose one of the following layout options to keep all of your documents neatly displayed. Keep sources of inspiration close at hand to make them easier to reach.
The standard solution is Consolidate All to Tabs(Combine all in tabs), but you can also choose, for example 2-up Vertical(2 up, horizontally) to place the sample next to your work.
Need to return your workplace to its original form? Click on Window> Workspace> Reset Essentials(Window> Workspace> Reset Main Workspace).

Each artist's workplace will be different. Some people like to see more dashboards than others. I, for example, do not belong to such, as I prefer to minimize the clutter. But whatever your liking, you can always customize the work environment the way you want.
9. Master the Pen Tool
Tool Pen(Feather) (P) can be intimidating at times, however, over time you will be able to fully master it.
First, study the tool itself. Option Path(Outline) is needed to select an area, and Shape(Shape) allows you to create your own shapes.

Then get to know Path operations(Operations with a contour), Alignment(Outline alignment) and Arrangement(Contour ordering). Designers who are familiar with Adobe Illustrator may find it easier to get comfortable with this tool.

The best way to learn something is to experiment! Create a bunch of lines and curls and then play with settings like Blending options(Blending options). The possibilities are truly endless! Don't forget to use the Pen Tool when creating text effects, illustrations, and more!

10. Remember Hot Keys
Hotkeys are nothing new.
However, designers sometimes have trouble remembering them. Want to learn a little trick to help you remember these keys?
Try this old trick to help you think about tools. When you think of a hotkey, imagine an image that explains what it is, or how to use it.
By pressing the letter B, which calls the tool Brush(Brush), I automatically render this:

Remember these keys in order of priority. As in the first part of the lesson, here it is important to figure out which hotkeys you need the most. You will also need to memorize additional keys related to your favorite instruments.
To increase the size of the brush, for example, click the right or left square bracket: [ or ] .
Your favorite keyboard shortcuts are easy to remember as you will use them frequently, but it's worth exploring the possibilities.
You won't master Photoshop overnight, and that's totally fine! Just think of it as a creative adventure that gets better over time.
Before you close this tutorial, remember:
- Decide on your core toolbox
- Get to know the layers panel
- Save time with Layer Masks
- Save files correctly
- Know the difference between print and web recommendations
- Use the kits ...
- ... and adjustment layers.
- Organize your workplace.
- Examine the Pen tool.
- Remember the hotkeys.
Give these tips a try and tell us in the comments what you find best for you!
1. You can delete the current layer by holding Alt and pressing L. 3 times.
2. Working with the Move Tool, you can select any layer by clicking on a part of the object while holding down Ctrl.
3. Double-click on the upper blue bar in any palette window to minimize it.
4. Double click on the gray background will open a dialog box to open the file, Shift + double click will open the Adobe Bridge browser.
5. Tired of having a gray background around your image? Take the Paint Bucket Tool (Bucket), hold Shift + click on the gray background and it will change to any color that you have chosen as the foreground color.
6. Press Alt + Ctrl + A to select all layers.
7. Caps Lock will change your cursor to a clearer cross.
8. Press the F key and you can choose one of 3 different screen modes, which will make the work area larger.
9. To draw a straight line with a brush or pencil, make one click at the start point, then hold down Shift + Click at the end point.
10. Pressing Ctrl will turn any tool into a Move Tool (Move) while holding it.
11. Ctrl + Alt + click will create a copy of the image and move it as you move the mouse.
12. Pressing Space (Space) will turn any tool into a Hand Tool (Hand), while holding it.
13. Ctrl + Space + click will zoom in on the image, Alt + Space + click –– will zoom out.
14. Pressing Ctrl and "+" or "-" will change the scale of the image in percent.
15. If you use the Eyedropper Tool (Eyedropper) with pressed Alt –– this will take a color swatch for the background color.
16. Tool Measure Tool (Ruler) - make a line, and then hold Alt and create another line from the end of the first - this will help you determine the angle between them.
17. Use Ctrl + Alt + Z and Ctrl + Shift + Z to undo and redo a series of actions.
18. Alt + Backspace and Ctrl + Backspace will fill the image with the foreground and background colors, respectively. Shift + Backspace will bring up a dialog box for filling the image. Alt + Shift + Backspace and Ctrl + Shift + Backspace will fill the image with the foreground and background colors, respectively, but leaving the transparent places transparent.
19. If you hold down Alt and call a free transformation with Ctrl + T, then it will be performed over the copy of the object. Ctrl + Shift + T will repeat any recent transformations.
20. The size of the canvas can be easily enlarged using the Crop Tool, drag it outside the canvas and click OK.
21. Ctrl + J will create a copy of the current layer.
22. Ctrl + Shift + E will merge all visible layers into one, Ctrl + Shift + Alt + E will merge a copy of the visible layers into one new layer.
23. While using the Marquee Tool (Selection), hold down Alt to make the starting point the center of the selection.
24. Ctrl + D to deselect, Ctrl + Shift + D to return the selection.
25. When you create a selection with the Marquee Tool, hold down Space to move the selection, release to continue the selection.
26. Pressing Shift and "+" or "-" will change the layer blending mode to: Normal, Dissolve, Multiply, Screen, Overlay.
27. If the tool Brush or any other is selected, the transparency of the layer can be changed by clicking on the corresponding number on the keyboard:
- when you press one digit
- to set a more accurate% transparency [hold down 7 and then 2, which will give 72% as a result].
28. Hold Alt and click on the eye icon next to the layer thumbnail on the layers palette to hide all other layers except the current one.
29. A color sample can be taken not only from an image in Photoshop, but also outside the program. Reduce the Photoshop window so that you can see the image on which you want to determine the color, take the Eyedropper Tool (Eyedropper), make a click inside Photoshop and, without releasing, bring it out of the window.
30. Select the layer, hold Alt and click on the border between the top and the current layer to create a Cliping Mask. the upper layer will be visible within the lower one, and the lower one will replace the mask.
31. Hold Alt and click the "Create a new layer" button on the layers palette to open a dialog box with settings for the new layer.
32. Select the layer and, while holding down Alt, click on the trash can on the layers palette, thus. the layer will be removed without further question. Make selections for transparency where you want, go to the Channels tab and press Ctrl + click on the "Create new channel" button. will create an alpha channel for the selected areas only.
33. File> Automate> Contact Sheet II –– will create small previews for each file currently opened in Photoshop in a separate document in a row and sign them.
34. The Move Tool has an option of auto-selection of the layer "Auto Select Layer" in the settings, depending on the place of the click.
35. Working with the Move Tool, pressing Alt + Shift + right-clicking on various image objects located on different layers will select all these layers.
36. Working with the Grid, drag the upper left corner where the scales for the Grid are located, and the origin for them will be at the point where you release the mouse button. Double click in the upper corner will reset the reference point to its original position.
37. Having created a path using the Pen Tool, you can hide / show it again using the Ctrl + Shift + H combination.
38. Key navigation can often be more efficient than a mouse:
Home = scroll to top left corner
End = scroll to bottom right corner
PageUp = scroll up one page
PageDown = scroll down one page
Ctrl + PageUp = scroll left one page
Ctrl + PageDown = scroll right one page
Shift + PageUp = scroll up 10 pixel
Shift + PageDown = scroll down 10 pixel
Ctrl + Shift + PageUp = scroll left 10 pixel
Ctrl + Shift + PageDown = scroll right 10 pixel
39. Ctrl + Tab will switch you between different windows with images.
40. F12 will return the state of the image that was at the last save.
41. Hotkeys for Channels: RGB, CMYK, Indexed color
Ctrl + "~" = RGB
Ctrl + 1 = red
Ctrl + 2 = green
Ctrl + 3 = blue
Ctrl + 4 = other path
Ctrl + 9 = other path
Ctrl + "~" = CMYK
Ctrl + 1 = light green
Ctrl + 2 = pink red
Ctrl + 3 = yellow
Ctrl + 4 = black
Ctrl + 5 = other path
Ctrl + 9 = other path
Ctrl + 1 = Indexed
Ctrl + 2 = other path
Ctrl + 9 = other path
42. Holding Ctrl on the Navigator palette, you can stretch the red rectangle, thereby scaling the image.
43. Hold Alt and click on any step in the history, thus. the step is copied.
44. Press Alt and drag a step from one Action to another, get a copy of the action.
45. In the Lens Flare filter (Filter> Render> Lens Flare), you can set the exact coordinates by holding Alt + clicking on the preview window.
46. Holding Shift + Alt the object will be transformed proportionally –– from the center.
47. If you have the Move Tool selected and you want to copy something, just hold down Alt and drag the image. Holding Shift + Alt the object can be easily moved along the Grid lines.
48. If you want to align the horizon or uneven edges after scanning, then take the Measure Tool (Ruler), draw a line along your curve, then go to Image> Rotate Canvas> Arbitrary, Photoshop will substitute the rotation angle values by itself, it remains to click OK and the image rotated.
49. If you create something in Illustrator, copy and paste it into Photoshop, it will ask you in what form to paste: pixel or Shape.
50. Press Ctrl + R to display the Rules panel.
51.To make the image clearly in the center Ctrl + A, Ctrl + X, Ctrl + V.
52. Ctr + E will merge the current layer with the underlying one.
53. If the Brush Tool is selected, you can control the brush diameter using the [and] buttons.
54. Double click on the Zoom Tool will return the image scale to 100%, and on the Hand Tool will stretch the image onto the screen area.
55. Working with text:
Ctrl + H will hide the selection of the selected characters.
If you have selected symbols, click in the font type selection line, and you can use the arrows on the keyboard to select the font type.
Alt + left or right arrow will change the indentation between characters to 10.
Ctrl + Alt + Left or Right Arrow will change the indent between the symbols to 100.
56. Ctrl + Alt + T will create a copy of the object you want to transform.
57. Ctrl + Alt + Right, Left, Up or Down Arrow will skew the current layer and nudge it by 1px.
58. Change the active layer with Alt + [or].
59. Move the active layer up or down using Ctrl + [or].
60. To hide the Grid guides, press Ctrl +
61. Ctrl + [plus key] will zoom in on the image, Ctrl + [minus key] –– will zoom out. Ctrl + Alt + [plus key] will increase the scale and size of the window, same as for Ctrl + Alt + [minus key].
62. Using the Polygonal Lasso Tool, press Backspace to undo the last step.
63. Press X to switch the foreground and background colors in places.
64. Press D to reset the foreground and background colors to the default black and white.
65. Press F5 to display the Brushes palette.
66. Press F7 to display the Layers palette.
67. Ctrl + click on the layer thumbnail on the layers palette will create a selection of the layer's contents.
68. If you want to see the contents of the layer mask, then hold down Alt and click on the layer mask.
69. Alt + click on the layer mask creation icon will create a black mask.
70. When using the Polygonal Lasso Tool, hold down Shift to create straight lines at an angle in 45 degree increments.
71. In order to move around the visible part using the grip, use the clamped spacebar in the selection mode (V).
72. Ctrl + Shift + N will create a new file, displaying a dialog box; Ctrl + Shift + Alt + N will create a new layer in the working file.
73. Back to brushes, the [and] keys increase and decrease the diameter of the brush, and Shift + [or] change the hardness of the brush.
74. Press Alt to make the Burning Tool perform the function of the Dodge Tool, and vice versa.
75. Stamp Tool clones parts of the image (Alt + click –– to define the area for copying). This also works if several images are open in Photoshop and you can also clone any areas from other images, you just need to position the images within sight on the screen.
76. Ctrl + click on the layer thumbnail creates a selection of the object on this layer. If you need to select more than 1 object on several layers, also hold down Shift.
77. To combine palettes in one, drag the tab of any tab to another palette to other tabs and it will move.
78. When you create text, pressing Enter will create a new line, to finish writing press Ctrl + Enter or Enter on the numeric keypad.
79. You can move the layer to any other open image in Photoshop, i.e. a copy of the layer will be created. Hold down Shift while dragging and the content of the layer will be pasted clearly in the center.
80. Create a new document in Photoshop, size 500x500px, create a new layer, take the Brush Tool, select a standard round brush of any diameter and put a point at the top center (position as at 12 o'clock). Press Ctrl + Alt + T, this will create a copy of the point and allow it to transform. Drag the Pivot Point in the center of the transformable object and set it clearly in the center of the image, at the top, write the rotation angle of 30 degrees and click OK. And now the trick - press Ctrl + Shift + Alt + T 10 times and you will see what happens.
81. Shift + click on the blue top bar near the toolbar or palettes, move them to the side border of the window.
82. How to select a group of layers without using the layers palette? We know how to select one layer from point 81, and you can add another layer to the group by holding Ctrl + Shift and clicking on a part of the object located on another layer.
83. You can delete several layers at once by dragging a group of layers onto the trash can icon on the layers palette, we know how to select a group from paragraph 82.
84. Press Tab to hide the toolbar and palettes, Shift + Tab will hide only the palettes.
85. After applying the filter, its effect can be softened using the Fade function by pressing Shift + Ctrl + F.
86. To copy a layer mask, you can drag it with pressed Alt to another layer.
87. From the vertical Grid you can easily get the horizontal one by selecting the Move Tool, hold down Alt and click on the guide itself. And vice versa.
88. When saving a document using Save for Web, the information about the document is lost, to save the information use Save As.
89. For better organization of layers –– group the selected ones by pressing Ctrl + G.
90. To display the Rules panel, press Ctrl + R
Learn to process your images with the course quickly and efficiently "Fast processing of photos in Photoshop from A to Z" Course link: