Introduction
The main purpose of this paper is to describe and study the popular IDS application Snort. Snort is a large open source project that is used by many network administrators to capture malicious signatures and alert network attacks. Snort intercepts all traffic from network interfaces, checking packets for suspicious requests, intrusion attempts.
Its main advantage is accessibility, and the ability to edit its work for your specific work network. The program is designed to work in both small and large organizations. Also important is the ability to edit your own unique rules based on the security requirements of a particular organization (for example, a ban on staff access to social networks).
Of the minuses, one can single out the inconvenience of setting up and installing on some operating systems (for example, Windows), the lack of a single sufficiently complete and detailed description of the settings and the development of their own set of rules.
Also, it is very difficult to cut off false alarms, since it is not uncommon for different enterprises to have different restrictions, and quite fine tuning of the rules is required. Many application launch modes using case-sensitive keys are very difficult to remember and can lead to erroneous output.
The main task of this work is to understand the functional features of IDS Snort, to check the operation of the application by making various kinds of network attacks on it. Find out if there are similar IDS in a more convenient format. How Snort interacts with databases. Develop some unique rules and test them for efficiency.
Installing and configuring IDS Snort
Snort: Installation on Windows XP
When installing Snort on a Windows operating system, some difficulties may arise. Therefore, this work is devoted to a fairly detailed part of the installation and configuration options. First you need to download the required programs to your working computer.
Rules for Snort.
All of the above is downloaded from the official websites of these applications.
Winpcap is an application that captures and filters packets at the kernel level. It is analogous to the built-in Unix driver libpcap. The installation will not bring any special inconvenience, it is launched through a regular installer. After that, you need to download the IDS itself from the official website, after that we download a fresh archive with the rules from there. The next step is to completely copy all the folders that were in the archive with the rules to the root directory of the application with a complete replacement of the content where it is required. Then, for the correct operation of the program, it will be necessary to make important changes in the configuration file.
var RULE_PATH c:snort ules
var SO_RULE_PATH c:snortso_rules
var PREPROC_RULE_PATH c:snortpreproc_rules
dynamicpreprocessor directory c:snortlibsnort_dynamicpreprocessor
dynamicengine c:snortlibsnort_dynamicenginesf_engine.dll
#dynamicdetection directory /usr/local/lib/snort_dynamicrules
We find similar lines in the configuration file and replace them with those provided above. After that, we try to test the application. We start the command line and go to the application directory in the "bin" section. Enter the command "snort -W"
Rice. 1.1.
With this command, we check the health of the application to view our interfaces. After making sure that there are more than one of them, we select the one that is connected to the working network in order to start intercepting packets and monitoring the operation of IDS.
C:Snortinsnort -i 3 -c C:snortetcsnort.conf -l C:snortlog -A console
Let's now analyze the command that we entered. "-i 3" means that we will look at the interface that has ID= 3 in our list of interfaces. Then we specified the path to the configuration file and the path to the directory where the "log" of captured packets should be written. "-A console" means that alarm packets will be detected in our console. If any problems arise during processing, we eliminate them in the course of detection. Snort specifies the string and kind of build error. If everything worked, then we will not see anything until one of the running rules works. To use one of them, let's try to simulate a network attack and launch a suspicious packet over our local network. To do this, for example, open a command prompt and enter the following: "Ping 192.168.1.16". Snort will intercept an attempt to listen on the host at 192.168.1.1624 and print a message and information about suspicious network activity. Unfortunately, such IDS systems have a strong drawback - these are false positives. In this regard, in order for Snort to be useful and not misleading, it is necessary to clearly and concisely prescribe the rules and delimit the networks being viewed in order to avoid these false positives.

Rice. 1.2.
Now in the console where our IDS is running, there will be messages about a suspicious package that resembles "listening". This rule involved showed that Snort is fully functional. Consider the modes of its operation and the syntax of the rules for further work.
1. What is IDS.
Today, when there are a lot of sites with descriptions of hacks, as well as articles, exploits, programs on the same topic, attempts to hack servers have become much more frequent. After all, any user who imagines himself a hacker can try a freshly downloaded exploit on you and gain control over your server. It's really not that easy, but still...
In order to find out about attacks, or just to keep abreast of all the events taking place on the server, many admins look through logs every day. But when the log file, for example, of the Apache web server, grows by 10 Mb per day, then you have to automate the process of monitoring the server's security. One of the solutions is IDS - intrusion detection systems, whose effectiveness has increased significantly over the past few years, and now they are an integral part of any network protection.
Of the many varieties of IDS (Intrusion Detection System), two can be distinguished: based on protocol analysis(detecting packets that do not conform to the standards), and based on signature analysis(in packets, an attack signature is searched - a string (sample) indicating that this packet belongs to harmful traffic. Such IDS are called NIDS (Network Intrusion Detection System). In general, the principle of operation of NIDS can be described as follows: all traffic is analyzed for the presence of packets containing malicious data, and if such a packet is found, then various signaling actions are performed (a message is displayed on the console, mail is sent, written to the log, a Winpopup message is sent, etc.) Both types of IDS have their advantages and disadvantages, for example, protocol analysis is slower due to the conversion of the package into a form available for analysis.But there are much fewer false alarms, since really real deviations from the standards are recorded.IDS based on signature analysis are faster, and besides, they are easy to configure and update (I saw a new vulnerability, added it to base, and your IDS will find it.) But it's better to use IDS based on two methods of analysis, this will give a really great result.
2. Overview of IDS
At the moment, there are a huge number of IDS, each of which has its own qualities and disadvantages. I will give a brief description of some of them (this information about the programs is taken from the site www.opennet.ru, where you can also find all these IDS):
PortSentry
A program that allows you to detect and block attempts to scan the UDP and TCP ports of the server in real time. Hidden port scan attempts (SYN/half-open, FIN, NULL, X-MAS, oddball) are also detected.
A system for analyzing and tracking (logging) passing packets, such attacks as "buffer overflows, stealth port scans, CGI attacks, SMB probes, OS fingerprinting attempts" are recognized. There is a possibility of real-time notification of the administrator when an attack is detected
Needsbench
The system for testing the network for typical vulnerabilities and finding out the reaction of the installed system for detecting unauthorized access attempts. There is a good selection of documentation on NIDS.
Monitor TCP / IP traffic, is able to log on passing traffic, detect port scans, floods and some types of attacks.
A library for building NIDS systems that emulates the TCP / IP stack of Linux 2.0.x, which allows not only to capture packets (a chaotic set of packets), as most sniffers do (for example, libpcap, tcpdump), but also to track individual sessions (for example, to intercept SMTP traffic and separate each SMTP session) taking into account the defragmentation and assembly of TCP pieces of packets. Runs under Linux, *BSD and Solaris.
The program allows you to track and put in a log file all the data passing through the serial port.
These are not all IDS, and not even the most famous ones, but these are easy to find.
Of all these programs, Snort- my favorite. Why? Here are its advantages: two analysis modes, by signature and protocol analysis, easy installation and configuration of the program, small size and system requirements, detection of a huge number of attacks.
3. Installing and configuring Snort
To get started, download Snort from www.snort.org. Here is a direct link to the latest version at the moment http://www.snort.org/dl/binaries/linux/snort-1.9.1-1snort.i386.rpm . There are also various modifications of Snort, for example, with support for MySQL, postgresql, snmp, you can download all this from the same site, and I chose our version of the program as the easiest to install.
Installation is quite simple:
rpm –i snort-1.9.1-1snort.i386.rpm
After that, all the necessary files will be copied to the system.
Now you need to customize the program for yourself, which we will do now ... Let's go to the directory /etc/snort, here you can find the signature databases (more precisely, they can be called the rules by which Snort determines harmful traffic) and several configuration files, we need snort.conf. Here we set up variable variables like HOME_NET, EXTERNAL_NET and others ... It will not be difficult to figure it out, since each option is accompanied by fairly intelligible comments, albeit in English. At the very end of the configuration file, there are plug-in signatures, unnecessary ones can be commented out to improve performance.
Here's an example of my config:
# Step #1: Setting Network Related Variables
# Change the IP to your local network addresses
# You can specify multiple ranges by separating them with commas
var HOME_NET 192.168.168.0/24
var EXTERNAL_NET !$HOME_NET
var DNS_SERVERS $HOME_NET
var SMTP_SERVERS $HOME_NET
var HTTP_SERVERS $HOME_NET
var SQL_SERVERS $HOME_NET
var TELNET_SERVERS $HOME_NET
var ORACLE_PORTS 1521
var HTTP_PORTS 80
var SHELLCODE_PORTS !80
# Path to signatures
var RULE_PATH /etc/snort
#Include the necessary files containing the classification of the detected attack and links to
# bag trucks
Include classification.config
include reference.config
###################################################
# Step #2: Set up the attack detection mechanism
Preprocessor frag2
preprocessor stream4: detect_scans, disable_evasion_alerts
preprocessor stream4_reassemble
preprocessor http_decode: 80 unicode iis_alt_unicode double_encode iis_flip_slash full_whitespace
preprocessor rpc_decode: 111 32771
preprocessor portscan: $HOME_NET 4 3 portscan.log
# I had to add this option because of some specific software used in my
# networks that often caused false positives
preprocessor portscan-ignorehosts: 192.168.168.0/24
preprocessor arpspoof
preprocessor conversation: allowed_ip_protocols all, timeout 60, max_conversations 32000
preprocessor portscan2: scanners_max 3200, targets_max 5000, target_limit 5, port_limit 20, timeout 60
####################################################################
# Step #3: Specify which signatures we need
Include $RULE_PATH/bad-traffic.rules
include $RULE_PATH/exploit.rules
include $RULE_PATH/scan.rules
include $RULE_PATH/finger.rules
include $RULE_PATH/ftp.rules
include $RULE_PATH/dos.rules
include $RULE_PATH/ddos.rules
include $RULE_PATH/dns.rules
include $RULE_PATH/web-cgi.rules
# I left the next option for statistics - my server is regularly scanned for IIS bugs,
# More precisely, not my server, but a range of addresses, which I also fall into :)
include $RULE_PATH/web-iis.rules
include $RULE_PATH/web-client.rules
include $RULE_PATH/web-php.rules
include $RULE_PATH/sql.rules
include $RULE_PATH/icmp.rules
include $RULE_PATH/netbios.rules
include $RULE_PATH/misc.rules
include $RULE_PATH/attack-responses.rules
include $RULE_PATH/mysql.rules
Include $RULE_PATH/pop3.rules
include $RULE_PATH/pop2.rules
include $RULE_PATH/other-ids.rules
include $RULE_PATH/web-attacks.rules
include $RULE_PATH/backdoor.rules
include $RULE_PATH/shellcode.rules
Now everything is ready to start Snort. Write it in inittab and it will start with the system.
4. Adding your own signatures
Snort is very flexible and easy to set up IDS. One of its qualities allows us to add attack signatures ourselves (or as I said, it's more like rules). We have such rules in *.rules files. The syntax of the rules is quite simple:
ACTION PROTO IP_ADDR1 PORT1 DIRECTION IP_ADDR2 PORT2 [ (OPTIONS) ]
Let's look at the rule fields in more detail:
The Action field has three main directives that define actions when a network packet is found that matches a certain rule: pass, log and alert.
pass- ignore packet
log- the packet must be passed to the logging routine to be written to the log file
alert generates a notification when a packet is found that matches the rule
Packet protocol, can be tcp,udp,icmp
As it is clear from the name of the option, this field means the IP address. any allows you to set all possible addresses. Symbol! inverts the condition, i.e. !192.168.168.0/24 means any non-subnet 192.168.168.0/24. You can list multiple IP addresses separated by commas
In addition to a single port number, you can specify a range of ports separated by a colon, for example, 6000:6010, symbol ! inverts the condition, and any stands for all ports
DIRECTION
Specifies the direction of the package movement:
-> (one-way) - the rule will be applied only to packets coming from IP_ADDR1 to IP_ADDR2;
(two-way) - the direction of movement of the package does not play a role
The parameters enclosed in parentheses are an optional part of the rule, but they define the text of the message notifying about the threat, specify additional actions when the rule is triggered, and additional conditions for the parsed packets to match this rule. Parameters are separated from each other by a semicolon, and a parameter's keyword is separated from its argument by a colon.
Parameters that specify additional conditions for matching the rule:
ttl- sets the value of the TTL field in the IP packet header;
tos- sets the value of the TOS field in the IP packet header;
id- sets the value of the fragment number field in the IP packet header;
ipopts- sets the value of the IP packet parameters field;
fragbits- sets the fragmentation bits of the IP packet;
dsize- sets the conditions for the size of the IP packet;
flags- sets conditions for the presence or absence of certain TCP flags;
seq- sets the number of the TCP packet segment in the sequence;
ack- sets the value of the acknowledgment field in the TCP packet;
itip- sets the value of the ICMP packet type field;
icode- sets the value of the ICMP packet code field;
icmp_id- sets the value of the ICMP ECHO ID field in the ICMP packet;
icmp_seq- sets the number of the ICMP ECHO packet in the sequence;
content- specifies the desired template in the package content, not in the header (the template can be specified both in text form and in hexadecimal);
content list- this parameter is similar to the content parameter, except that the list of searched templates is taken from the given file;
offset- works in conjunction with the content option to determine the offset in the packet from which the content will be parsed;
depth- similar to the offset parameter and defines the position in the packet up to which the content will be analyzed;
no case- disables case sensitivity when parsing the contents of the package;
rpc- this parameter allows you to more accurately specify the characteristics of program or procedure calls to RPC services.
As you can see, the listed parameters allow you to create rules for intercepting almost any packets that can somehow threaten security. And if you consider that Snort can intercept packets at the link layer, then its use is especially interesting on hosts protected by a firewall, since packets dropped by the firewall will still be in Snort's field of vision.
Parameters whose values make sense if the analyzed packet meets all the conditions:
msg- contains the message text;
logto- specifies an alternative file for writing the contents of the package into it;
session- this option allows you to enable a very interesting Snort feature - extracting user data from a TCP session, for example, for subsequent analysis of what commands the user entered during a telnet session;
resp- if the packet matches the rule, then Snort will perform one of the specified actions - for example, close the connection by sending a TCP-RST packet to one of the hosts.
react- blocks the websites specified in the rule by closing the connection with them and/or sending the specified message to the browser from which an attempt was made to enter the site.
Here are a couple of examples of building your own rules:
If a request to the Napster server is found, the connection is forcibly closed. As you can see, with the help of Snort, it is possible to organize filtering of unwanted traffic more efficiently than simply closing the corresponding ports on the firewall, since it is possible to introduce an additional condition on the contents of the packets.5. Testing Snort
To test the performance of Snort, let's take a simple example. At the command line, type ping -s 65507 . Now we go to /var/log/snort, logs are stored here by default. Open the alert file and see the following lines:
[**] ICMP Large ICMP Packet [**]
01/06-07:37:37.119752 192.168.168.99 -> 192.168.168.9
ICMP TTL:255 TOS:0x0 ID:18479 IpLen:20 DgmLen:63028
Type:0 Code:0 ID:512 Seq:19456 ECHO REPLY
The first line tells us which action triggered the alarm, in this case an ICMP packet too large. The second line shows the attack class and its priority (this information is determined from the classification.config file). The third line contains the time of the attack, as well as the IP addresses of the host that sent the packet, and the host that the packet was intended for. Next come the rest of the packet fields, such as TTL, TOS - by which, by the way, you can determine the OS of the attacker, and others ...
6. Conclusion
From all that has been said above, it seems to me that one can conclude that Snort is extremely useful. In any case, using this program will make life a little more difficult for hackers. And isn't that the goal pursued by any system administrator?
This article does not pretend to be a complete guide to Snort, but I hope it will help you understand its installation, configuration and operation. A lot of the thoughts come from various documents, mostly English, that I've come across on various security sites, but this is mostly the result of my experience with Snort.
Today, the security of wireless networks is talked about often and a lot, but hacking the network is perceived as something very far away. We already published material about how to crack WEP protection. In addition, after some time continuation about how to secure the network. Today, our attention will be devoted to tools for checking the security of a wireless network. As well as intrusion detection systems - a kind of "fire alarm" for your WLAN.
By the way, if we talk about WLAN hacking, then users of home and small office networks seem to be especially vulnerable to us. This is primarily due to the fact that they have other tasks than to protect their wireless network. And, unlike large companies, they do not have the opportunity to hire professionals.
However, not everything is as sad as it seems. In nature, there are ways to assess the security of a wireless network, despite the seeming absurdity of combining the words "security" and "wireless network". Intrusion Detection Systems (IDS) detect possible intrusions before they happen, while the enemy is looking for a loophole. Of course, such systems cannot guarantee complete security (and what, by the way, can?), But in combination with firewalls and other security measures, they can be very useful. It is generally accepted that IDS is a kind of security alarm: that is, it only notifies about an attack, leaving work with the attacker to other systems and means (up to physical ones).
Rice. 1. Snort IDS.

Rice. 3. Linksys WRT54G.
Below we will give examples based on WRT54G with firmware OpenWRT RC 2(codenamed "White Russian"). In fact, there are many Linux distributions for wireless routers, but we settled on the OpenWRT firmware because it is simple, "light" and comes packaged like Debian Linux.

Rice. 4. OpenWRT in action.
Warning. Loading OpenWRT, Snort Wireless, or other alternative firmware versions into the WRT54G will void the warranty. Before you start flashing an alternative version, we recommend download a copy of the current firmware version
We will not go into detail about installing OpenWRT, since the OpenWRT website can be found great installation guide. After the installation is completed, you can connect to the router using Telnet () and enjoy the result.
After installing OpenWRT on the router, you can download and install the program Snort Wireless. All this can be done through the mentioned OpenWRT package system - run the command ipkg with the following settings.
| ipkg install http://nthill.free.fr/openwrt/ipkg/testing/20041204/snort-wireless_2.1.1-1_mipsel.ipk |
Some may not like that this package is over a year old. But there is nothing wrong with this, since all the necessary IDS functions are present here, and all later Snort rules can also be downloaded via ipkg (more details: OpenWRT tracker page). If you decide to set up an access point on a PC, you can download the Snort Wireless source code and compile it directly on your computer. Note that this should add the flag --enable-wireless, otherwise Wi-Fi pre-processors will not work.
Snort Wireless works like regular Snort, but is specifically designed for wireless access points, allowing you to effectively protect them from attacks. In particular, it contains a new rules protocol called wifi and allowing IDS to properly isolate wireless traffic typical of common WLAN attacks. For example, the same Netstumbler attacks or WEP cracking attempts. Using the wifi protocol in Snort Wireless is very similar to setting up normal rules for Snort, with one exception: instead of entering the IP addresses and ports of the first and second nodes, you should use their MAC addresses.
At this point, we have a working Snort Wireless. We proceed to configure it for use in the selected network. When you run ipkg, Snort is installed in the directory /etc/snort on the router. Like other Unix programs, Snort uses an editable configuration file where you can specify information about your network environment and various attack patterns to monitor. The file is named snort.conf (Rice. 5) and is located in the directory /etc/snort. You need to open it in any text editor (if your router does not have one, download it using ipkg).
Rice. 5. Configuration file snort.conf.
Now you can configure all the necessary network settings, including the name of the access point on which the IDS is running and the MAC addresses of the clients you want to monitor. There are a lot of settings you can adjust here, so be sure to review all of them carefully so you don't miss anything.
In particular, take a look at the Wi-Fi-specific pre-processors in Snort Wireless. They include pre-processors to detect passive network scanning by programs like NetStumbler and MAC address spoofing attempts. We decided to consider important preprocessors separately.

Rice. 6. The AntiStumbler preprocessor allows you to notify about a recon attack.
- AntiStumbler. Programs such as NetStumbler and MacStumbler ( Rice. 6) use null SSIDs to discover access points. These SSIDs work like broadcasts and cause other access points to send their SSIDs to the requesting host. This feature is useful when searching for available wireless networks. The AntiStumbler pre-processor recognizes the distribution of too many null SSIDs from one MAC address and may raise an alarm.
Note. This preprocessor does not allow you to define programs such as Kismet because they are just passively listening for 802.11 frames, not sending requests. - DeauthFlood. This attack has been detailed in our WEP cracking article. Used to disconnect hosts from access points and force a reconnect attempt, which provides additional packets for analysis during WEP cracking. In addition, the attack can be used to "denial of service" (Denial of Service, DoS) access point. The DeauthFlood preprocessor recognizes this type of attack by counting the number of deauthentication frames per unit of time and raises an alarm if necessary.
- AuthFlood. The attack is similar to the previous one, but the AuthFlood preprocessor determines too many authentication attempts, that is, attempts by clients to connect to the wireless network, which can be used as a DoS attack on the access point.
- MacSpoof. One of the most effective ways to restrict access to an access point is to create a list of allowed client MAC addresses. Unfortunately, an attacker can spoof their machine's MAC address and connect to an access point. The MacSpoof preprocessor checks the packet numbers and raises an alarm if it finds any inconsistencies that indicate possible MAC address spoofing.
- RogueAP. Alien ("enemy") access points are disguised as regular ones so that the user mistakenly connects to them and transfers any personal data. This preprocessor not implemented yet, however, in future releases, it will be able to report the proximity of foreign access points.
In addition, Snort Wireless includes many predefined rules for a wide range of situations. Depending on your network configuration, some of the rules can be very handy. For example, all web rules if a web server is running on your network. To activate a rule, simply remove the comment from the corresponding line in the Snort configuration file. Individual rule sets are stored in the directory by default /etc/snort/rules, and any of them can be viewed using a text editor. The rules in the sets are defined in exactly the same way as in Snort itself. By the way, following the examples, you can easily write the rule yourself.
Rice. 7. The Snort rule detected a port scanning machine.
In work
When the file snort.conf ready, you can run Snort. At startup, you can specify many parameters that determine everything from the output to the mode of operation. First, let's start Snort with the following options (in the Telnet prompt).
| snort -D -A full |
This command starts Snort as a background process, so you can continue to work with the shell in peace. When an alarm is triggered, full information will be logged.
Now that Snort is up and running, it's time to consider additional ways to secure your wireless network. Let's say you can refer to Kismet- a utility similar to Snort that can be deployed as an additional intrusion detection system. Snort works only at the third layer of the OSI model - the network layer responsible for IP and other traffic. And Kismet works at the second level - channel, responsible for Ethernet frames. Thus, deploying both systems in pairs will significantly increase the overall security.
Rice. 8. Kismet in action.
Snort can be configured to write logs to the database, making further analysis easier. Daniel Walther wrote management how to set up writing to MySQL and PostgreSQL databases. If you are using Gentoo Linux on a machine acting as a hotspot, you can go a step further by installing Apache and configuring the logs to be displayed via web. On the site Gentoo Wiki You can find a detailed description of such a setting.
Rice. 9. View Snort logs via MySQL, ACID and Apache.
Conclusion
We have touched only on the basic principles of Snort. In principle, according to the materials of the article, you can configure the system on an access point. However, Snort has many more features than what is described in the article. In particular, you can create rules on your own, which will help integrate Snort deeper into the network.
Finally, don't forget that both Snort and the rules need to be kept up to date in order to effectively secure your wireless network. Remember to visit regularly Snort Wireless, and ipkg package tracker(for OpenWRT installations) or Snort rules page(for others).
Like other security tools, Snort is not a panacea for network protection. This is just one of the bastions of your fortress. But in the complex of protection, it works very well.
Welcome back my hackers!
In the world of information security, the most common intrusion detection system (IDS) that you will encounter sooner or later is Snort. As you probably already know, IDS works in a similar way to antivirus software - it tries to identify malware on your network and alerts you to its presence.
Snort, created by Martin Roesch in 1999, became so popular that networking giant Cisco acquired it in 2014. Therefore, in the near future, you will most likely see it on almost all Cisco devices. And since Cisco is the maker of the most popular networking devices, you'll soon find Snort everywhere.
Even if your organization never uses Cisco (unlikely) or Snort, you should understand how this IDS works, as most other intrusion detection systems work in a similar way.
We recently published a few articles about Snort, but we thought it would be nice to do a whole series of articles on the subject. In this series, we'll walk you through how to use Snort from start to finish, including installation, configuration, managing output, writing rules, and monitoring alerts.
Let's start!
Method 1: Install Snort from the repositories
Installing Snort is easy if you have Snort in the repositories on your system. Unfortunately, it is no longer available in Kali, so our first step is to add a repository that has Snort. In this case, we will add some Ubuntu repositories.
Open the /etc/sources.list file. We can do this with any text editor (we'll use Leafpad here).
Kali>leafpad /etc/apt/sources.list
As seen in the screenshot above, we have added several Ubuntu repositories, which are also listed below. Since Ubuntu is a fork of Debian (the main Linux distribution on which Kali is built), most Ubuntu packages will work on Kali as well.
Deb http://ch.archive.ubuntu.com/ubuntu/ saucy main limited deb-src http://ch.archive.ubuntu.com/ubuntu/ saucy main limited deb http://httpredir.debian.org/debian jessie main deb-src http://httpredir.debian.org/debian jessie main
In order to update the list of our repositories, after saving the file, we need to update the list of packages themselves. We can do this by typing in the console:
Kali > apt-get update
Once our packages are up to date, we can install the Snort package from the repository with the command:
Kali> apt-get install snort
That's all there is to it. Snort installed and ready to go! To check this, just type in the console:
Kali > snort -V

In our case, Snort printed out its version number (in this case, 2.9.2).
Method 2: Installing Snort from sources
Installing Snort from source is more complicated and time consuming, but the advantage of doing this is that Snort will be compiled specifically for your particular hardware and software configuration.
This will give you the best overall performance. As with any IDS, performance is critical. Lower IDS performance will either slow down your overall networking ability or result in drop packets. In the first case, you will have dissatisfied customers or users, and in the second case, you will compromise the security of the network.
When using Snort in a secure production environment, installing from source is highly recommended. Also, installing from source ensures that you are installing the latest version of Snort. Many of the repositories contain older versions. The current version of Snort is 2.9.8 and in the repositories it is 2.9.2. A small difference, but when we are trying to protect the "treasure", then every detail will be useful.
Let's start by creating a directory in Kali where we will upload the source code.
Kali> mkdir snort_source
Then go to this directory
Kali > cd snort_source
Before you can download Snort, you need to install the Data Acquisition library or DAQ. DAQ has several dependencies that we need to install.
Kali> apt-get install -y bison flex
Now we can download and install DAQ from the Snort website.
Kali> wget https://www.snort.org/downloads/snort/daq-2.0.6.tar.gz kali> tar -xvzf daq-2.0.6.tar.gz
Then let's go to the daq directory.
Kali > cd daq-2.0.6
Finally, let's configure the DAQ and issue the make command.
Kali> ./configure kali> make kali> install kali> wget "https://snort.org/snort/snort-2.9.8.0.tar.gz"https://snort.org/snort/snort-2.9.8.0 .tar.gz

After it downloads, you will need to unpack it. (For more information about the tar command, see our Linux Basics article).
Kali> tar -xvzf snort-2.9.8.0.tar.gz
Let's go to the directory where the new Snort files are located.
Kali> cd /snort-2.9.8.0
You need to configure it.
Kali> ./configure --enable-sourcefire
After that, we need to use the make command, which determines which components of the source code should be recompiled, and then instructs to do so.
Kali > make
And finally, we do the installation (make install). This command takes the recompiled program components and places them in their respective directories.
Kali> make install
Since we installed new library files during the installation process, we need to update the shared libraries. To do this, enter the following command in the console:
Kali > ldconfig
To run Snort from any directory, you can make a symbolic link to the binary (executable) files in /usr/local/bin/snort and place it in the /usr/sbin directory, calling it snort. Since /usr/sbin is in our PATH, we can type Snort anywhere on the operating system to start using IDS.
Kali > ln -s /usr/local/bin/snort /usr/sbin/snort
Let's check if Snort installed normally. To do this, type in the console:
Kali > snort

As we can see, Snort has started and is successfully running in packet dump mode, or the so-called sniffer mode.
Now that we've successfully installed Snort, let's continue configuring it to detect malware. It will be in our next article in this series, so be sure to check back!
Denial of responsibility: This article is written for educational purposes only. The author or publisher did not publish this article for malicious purposes. If readers would like to use the information for personal gain, then the author and publisher are not responsible for any harm or damage caused.Publication date: September 21, 2009
Translation: S. Vladimirsky
Date of transfer: October 2, 2009
This guide describes how to install and configure an Intrusion Detection System (IDS) with Snort, ACIDBASE (the core security and analysis module), MySQL, and Apache2 on Ubuntu 9.04 using the Synaptic Ubuntu package manager. Snort will help you monitor your network and alert you to possible threats. Snort will generate the log files for the MySQL database, and ACIDBASE will display them in a graphical interface in a web browser.
1. System preparation and software installation.
1.1 Installation.
Download Desktop Ubuntu 9.04 32bit or 64bit from here: http://www.ubuntu.com/getubuntu/download
1.2 System and network settings
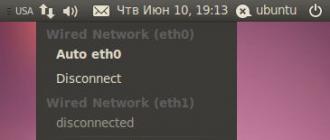
Connect your computer to the network. Although the system can operate with a wide variety of settings, the following configuration is preferred:
- Accommodation in the demilitarized zone (DMZ).
- Static IP address hidden by NAT behind a firewall.
- Connect to the monitoring port on the network switch (SWITCH).
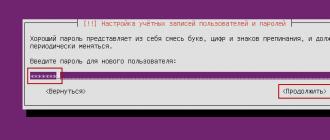
Create a new administrator named <ваше_имя> and password <ваш_пароль> .
1.3 Software installation.
The first thing to do after the installation is complete is to install any updates recommended by Ubuntu. To access updates, go to the menu: System> Administration> Update Manager (System> Administration> Update Manager). Enter your password and select Check. Select Install Updates .
From the desktop, go to System > Administration > Synaptic Package Manager (System > Administration > Synaptic Package Manager). Enter your password and select Search.
Find and install the following packages:
- Acidbase with all dependent packages
- Snort-MySQL with all dependent packages
- MySql-server-5.0 with all dependent packages
- libpcap0.8-dev
- libmysqlclient15-dev
- mysql-client-5.0
- Bison
- Apache2
- libapache2-mod-php5
- php5-gd
- php5 mysql
- libphp-adodb
- php-pear
2. Get superuser rights
From the desktop, go to the menu: Applications> Accessories> Terminal (Applications> Add-ons> Terminal) and enter the command:
$ sudo -i
$ enter password
3. Set up Snort
In order to set individual preferences, you need to modify the snort.conf configuration file.
Using a text editor (nano, vi, vim or other), open the /etc/snort/snort.conf file.
# vim /etc/snort/snort.conf
Change var HOME_NET any to var HOME_NET 192.168.1.0/24 (your home network address may be different than 192.168.1.0). If you are monitoring multiple networks, you must specify all of these networks as follows: var HOME_NET . Change var EXTERNAL_NET any to var EXTERNAL_NET !$HOME_NET (sets all variables except the external variable HOME_NET).
Change var RULE_PATH ../rules to var RULE_PATH /etc/snort/rules . Scroll down the list to where it says # output database: log, mysql, user= , remove the # sign from the beginning of the line.
Example: output database: log, mysql, user=
(see above for when a new user was created).
Write down the username, password, and database name (dbname). When installing the MySQL database, you will need this information. Save changes and exit.
4. Installing the Snort and Archive Databases in MySQL
4.1 Installing MySQL
Login to the MySQL server.
# mysql -u root -p
Sometimes it happens that the password is not set, so just press "Enter".
If the login fails, try typing the above command again and enter YOUR_PASSWORD.
If there is no password, you need to set a password for the superuser account.
Note: When you are on the MySQL server, the "#" character group is displayed at the prompt as "mysql>"
mysql> create user
mysql> SET PASSWORD FOR
mysql> SET PASSWORD FOR [email protected]=PASSWORD(
4.2 Creating the Snort Database
mysql> create database snort; mysql> grant INSERT,SELECT on root.* to [email protected]; mysql> grant CREATE,INSERT,SELECT,DELETE,UPDATE on snort.* to4.3 Creating an Archive database
mysql> create database archive; mysql> grant CREATE,INSERT,SELECT,DELETE,UPDATE on archive.* to4.4 Creating tables in the Snort and Archive databases
We will use the Snort schema to build the Snort and Archive databases.
# cd /usr/share/doc/snort-mysql # zcat create_mysql.gz | mysql -u
4.5 Confirmation of the creation of databases and newly created tables.
Login to the MySQL server and check the databases we just created and the tables hosted in those databases. If everything was successfully created, you will see four (4) databases (mysql, test, snort and archive) in the mysql databases and approximately 16 tables in each database.
# mysql -u root -p mysql> show databases; mysql> use snort; mysql>show tables; mysql> use archive; mysql>show tables; mysql> exit
4.6 Testing Snort
In terminal mode, type the command: # snort -c /etc/snort/snort.conf
If everything went well, you should see the answer in ascii codes.
Press ctrl + c to end the test
5. Setting up Apache2
The Apache2 package must already be installed on the computer.
Using your favorite text editor, create a file called test.php in the /var/www/ folder.
# vim /var/www/test.php
Write in it:
Save changes and close this file.
Edit /etc/php5/apache2/php.ini file
# vim /etc/php5/apache2/php.ini
Under the "Dynamic Extensions" line, add the following:
extension=mysql.so extension=gd.so
Reload Apache2.
# /etc/init.d/apache2 restart
Get the IP address of your work computer.
# ifconfig -a
Open a web browser and navigate to http://YOUR_IP_ADDRESS/test.php .
If everything went well, PHP information will be displayed.
6. Folder Configuration
Move ADOdb to the /var/www folder.
# mv /usr/share/php/adodb /var/www/
Create a folder called web in www and move ACIDBASE to it.
# mkdir /var/www/web # mv /usr/share/acidbase /var/www/web/
Temporarily write-enable the acidbase folder to install it.
# chmod 777 /var/www/web/acidbase
# cd /var/www/web/acidbase # mv base_conf.php base_conf.old
To work in ACIDBASE, run the command:
# pear install Image_Color
7. Installing ACIDBASE for Snort and Archive databases
7.1 Installing the Snort Database via Web Browser
Step 1 of 5:
Enter the path to ADODB. This is /var/www/adodb .
Step 2 of 5:
Main Database type = MySQL (Main database type),
Database name = snort (Database Snort),
Database Host = localhost (Local location of the Snort database),
Database username =<ваше_имя_пользователя>(Username by the Snort database),
Database Password =<ваш_пароль>(Password for Snort database)
Archive Database type = MySQL (Archive database type),
Database username =<ваше_имя_пользователя>
Database Password =<ваш_пароль>
Step 3 of 5:
If you want to use authentication, enter your username and password (user:<ваше_имя>,password:<ваш_пароль>).
Step 4 of 5:
Click on Create BASE AG.
Step 5 of 5:
When step 4 is done, at the bottom click: Now continue to step 5 (Now go to step 5) .
Bookmark this page.
7.2 Create a folder for the Archive database ACIDBASE
For the archive database to work correctly, an archive folder must be created in the ACIDBASE folder.
# mkdir /var/www/web/acidbase/archive # cd /var/www/web/acidbase # cp -R * /var/www/web/acidbase/archive # chmod 777 /var/www/web/acidbase/archive
Rename the existing base_conf.php file to base_conf.old .
# cd /var/www/web/acidbase/archive # mv base_conf.php base_conf.old
7.3 Installing the Archive database via a web browser.
Open a web browser and go to http://YOUR_IP_ADDRESS/web/acidbase/archive/setup .
On the first page, click Continue.
Step 1 of 5:
Enter the path to ADODB. This is /var/www/adodb. >
Step 2 of 5:
Archive Database type = MySQL (Database type),
Database name = archive (Archive Database),
Database Host = localhost (Local location of the Archive database),
Database username =<ваше_имя_пользователя>(Username of the Archive database),
Database Password =<ваш_пароль>(Password for Archive database)
Step 3 of 5:
If you want to use authentication, enter your username and password (user:<ваше_имя_пользователя>,password:<ваш_пароль>).
Step 4 of 5:
Click on Create BASE AG.
Step 5 of 5:
When step 4 is completed, click below: Now continue to step 5 (Now go to step 5).
8. Launch Snort and check the status of the services.
To start Snort, type in terminal mode:
# snort -c /etc/snort/snort.conf -i eth0 -D
This command starts snort using interface eth0 in demo mode.
You can verify that the service is running with the following command:
# ps aux | grep snort
If the service is running, you will see something similar to the following snort -c /etc/snort/snort.conf -i eth0 -D .
Verify that all required services are running by running the following commands:
# /etc/init.d/mysql status # /etc/init.d/apache2 status # /etc/init.d/snort status
If the services are running, you will see a response message
If needed, run the command
# /etc/init.d/
for each of the services that needs to be restarted.