Instructions
serviceability network cards
It is possible that the computer does not see the network card. There may be three reasons: incorrect installation cards, incorrect BIOS settings and not serviceability the most cards... In the first case, by disconnecting the computer from the network, you should check the correctness of the insertion cards into the slot. In the second, enter BIOS and check if the network card is enabled. The third option is the most difficult, check at home serviceability network cards you can only install it on another computer.
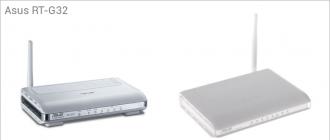
Network cards are separate and built-in. An integrated network card is located directly on the motherboard. A separate card is installed in a PCI slot. For the user, they work the same way, so when we talk about how to turn on the network card, we will not distinguish between them.
Instructions
Helpful advice
It is convenient to use specialized software such as SiSoft Sandra to view all the information about your computer.
Connecting to the network through a dedicated channel has its own characteristics. The process of connecting and configuring programs for working with the Internet takes place in several stages. First you need to decide on the provider. Prices for connection and traffic in home networks can differ significantly. It all depends on the type of connection provided by the providers. For residents of large cities, most likely, all types of connection will be available. As a rule, most "home networks" offer their customers various tariff plans that include a fixed amount of traffic.

Instructions
After the conclusion of the contract, you will receive a document from the company, which will detail all the parameters you need:
- your IP - digital address on the network;
- Subnet mask;
- main gateway - the address of the main one in your local network through which you go to;
- DNS- - domain name name that translates alphabetic characters into intelligible numeric characters.
- WINS — server — this numeric address is not always indicated;
- -server - the address of the "intermediary" server through which the flow of information received by you from the network will pass;
- the address of the provider's "home page", as well as the login and password to access your "local" section, to which you will monitor the status of yours.
After you have the necessary information at your fingertips, set the parameters for the network card. To do this, go to the Network folder of the operating system. From this folder, go to the Display Network Connections section. Now select your network device from the list of devices, right-click on it and select Properties.
Check the box next to the line When connected, display the icon in the notification area - after that, an icon in the form of two connected computers will appear in the lower right corner of your desktop.
Now go back to the General menu and click on the Internet Protocol (TCP / IP) line. The connection setup menu will open in front of you - and this is where you enter almost all the parameters we have listed. DNS and WINS names - specify in the special tabs that will open after clicking the Advanced button.
Related Videos
Helpful advice
Check all the addresses you entered very carefully - a mistake in any number will make your work with the network impossible!
A network card is a piece of equipment that a computer needs to connect to other computers and to connect to the Internet. You can see what network card you have installed in the "Device Manager". To do this, follow these steps.

Instructions
Open the Start menu in the lower left corner of the display.
Right-click on the "Computer" item and select the "Properties" item from the drop-down menu. The "Systems" window will expand on the screen.
Find the Network Adapters section and click the plus sign next to it. You will see a list of network cards installed on your computer.
A typical one with the name looks like this: "Realtek RTL8139 / 810x Fast Ethernet network".
In order to view the detailed information about it, right-click on the name and click on "Properties".
Related Videos
Helpful advice
To easily view information about all the hardware installed on your computer, install a specialized software such as SiSoft Sandra.
To download the correct driver for a network card, you need to find out which model you have installed. In the Windows operating system, you can do this in Device Manager by following these steps.

Instructions
Open the "Start" menu and click on "Control Panel".
Related Videos
Helpful advice
For a convenient view of all the information about the equipment connected to your computer, install the Everest or SiSoft Sandra software.
After a successful installation of the network card, it may happen that it suddenly stops working, the connection to the Internet is not established, there is no local network. Initially, you might think that the matter is in the modem or in the provider - temporary disconnections of the Internet are not uncommon today. To test the health of your network card, use the tips in this article.

You will need
- Checking the system settings of the network card.
Instructions
The easiest way to check the connection and the board is to pull it out of your system unit and insert it into another system unit, on which the local network was in order. In this case, do not forget that you will need the freshest devices for correct operation. When installing the card into another system unit, make sure that those that are not available in all models of network cards are in the correct position (select the Plug & Play mode).
Recently, the so-called "gigabit" cards are becoming more widespread. As the name implies, there are 1000 megabits of them. They cost several times more expensive than conventional cards, and their purchase is justified only when the data transfer in the network exceeds 100 megabits. If your ISP provides such speed, buy a gigabit network, otherwise a regular 10/100 card will suffice.
The manufacturer of the card doesn't really matter. As for the chips used in network cards, most people working with networks prefer Realtek products.
Related Videos
Sources:
- Network Card
The network card is a special board that is installed on the motherboard and is required to access the Internet. Often, as a result of reinstalling the operating system or the occurrence of network problems, the user is faced with the task of determining the model of the network card. There are several ways to determine the brand and manufacturer.

You will need
- Computer, network card, Everest utility, Internet access.
Instructions
Open the Computer Management window. To do this, click on "Administrative Tools" in the "Control Panel" applet. Go to Device Manager. Click on the plus sign next to the "Network Cards" line. A list of all installed network cards will open.
Determine the model of the network card by "Device ID" and "Vendor ID". This data is displayed when the BIOS boots, or you can use the Everest utility. Install the utility, open the program window and go to the "Devices" tab. Expand the "Unknown" tab in the upper right window, marked with a question mark. Click on this sign located at the line "Network". The “Hardware ID” appears in the lower window with the VEN and DEV values. VEN is the manufacturer identification code and DEV is the device. The program for these codes the device and displays information.
You can quickly get information about the model and manufacturer using Device ID and Vendor ID on the website www.Pcidatabase.com... To do this, enter the obtained values in the corresponding fields.
Related Videos
Almost every user of a personal computer (both a desktop computer and a laptop) can recall such moments when this very computer began to create continuous problems and do not bring any benefit. It is often not entirely clear how one PC differs from another other than screen width. And such questions as "what clock speed, how much RAM or what video card" may well be confusing, although it is important to know. And if you need to find out which network card is on, then you need to do the following.

You will need
- Computer, mouse, Windows operating system, network card.
Instructions
It is necessary to click on the "Start" button in the lower left corner of the desktop (a button in the form of a circle with a four-color flag) and find the "Computer" item in the menu that appears. If this item is not displayed in the Start menu, then click on it while holding down the right mouse button on any free space in the Start menu and select Properties (this is true for the Windows 7 operating system). Open a window with several tabs, from which you select the "Start" menu and press the "Configure" button. In the window that opens, we find the computer item and select the option "Display as a link" and click the "ok" button below. After that, in the "Properties of the taskbar" window and the "Start" menu, press the "ok" button. Now the "Computer" item has appeared in the "Start" menu. Clicking on it (while holding down the right mouse button), select "Properties".
In the window that opens, we find the item "Device Manager" and click on it. In this window, you can find out information about all the devices that are installed on the computer. In the list, you need to find the item "Network devices" (in Windows 7, this item is accompanied by a small image with two screens and a gray-green wire under them).
After clicking on the triangle next to the item "Network adapters" a list will open, which will indicate the one that is on yours. By hovering the mouse and clicking on "" (while holding down the right mouse button), you can select the "Properties" item and in the menu that opens, find out all the necessary information about the network card that is installed - manufacturer, location, drivers and a number of other properties.
note
You need to be careful when you go to the "Device Manager" menu, as changes in this section can lead to very serious consequences.
Helpful advice
In the window "properties of the network card" there is a tab "drivers". Thanks to this tab, you can update the drivers for this device. In the same tab, the user can turn off the network card, thereby disconnecting the connection to the Internet.
Sources:
- what is my network card
Any user who has wired access to the Internet today is familiar with a device such as a network card. This device has several names: network card, network adapter, and Ethernet adapter. It serves for direct conversion of the input signal and reverse conversion of the output signal.

You will need
- Network card, computer, driver disk.
Instructions
Despite the fact that many network cards do not require additional software or special drivers (most often they are embedded in the operating system distribution kit), sometimes they still have to be used. An operating system developer cannot physically package all drivers into one assembly, otherwise the distribution can grow significantly.
If you purchased a non-built-in motherboard fee, but separate, it must be mounted in one of the free PCI slots of the motherboard. Initially, you need to turn off the power of the system unit, then remove the side wall and install the device. Without closing the side wall, turn on the computer by connecting power to the system unit. There is no point in completely assembling the system unit right away, in case of an incorrect connection, you will have to open the side wall again.
If the card was identified and a notification about finding a new device appeared in the tray, then the card was installed correctly. Wait a few seconds, if the drivers for your device are in the system distribution, a message about successful installation will appear on the screen, otherwise you will have to install the native drivers, which most often come with the device. If there was no CD in the kit, you can get the necessary driver from the Internet using your friends' Internet connection or via a 3G modem.
As soon as the drivers for the card are installed, connect the cable to the network card, the flashing lights of two colors in the Ethernet connector indicate the correct connection. Sometimes it happens that the flashing lights are noticed, but there is no Internet connection. Most likely a local network connection. To enable it, click the "Start" menu, select "Network Connections". In the window that opens, right-click on the "Local Area Connection" icon and select "Enable".
A MAC address is a unique identifier assigned to network equipment by the manufacturer. If the computer is connected to a local network, the administrator can assign it an arbitrary MAC address that is not associated with the factory one.

You will need
- - a computer;
- - Network Card.
Instructions
To find out the MAC address, from the "Start" menu, select the "Run" option and enter cmd. Click OK to confirm. In the opened console, write the getmac command. The line "Physical address" displays the MAC address. You can call the control console in another way: from the "Start" menu, select the items "All programs", "Accessories" and "Command line".
If you want complete information about, enter the ipconfig / all command.
In addition to the physical address, you will see the rest of the data about the network card and network properties. If there is a network cable, the message “Network disconnected” will appear in the “Network status” line. If you have multiple network cards installed, several blocks of text with information about each of them will be displayed.
You can also find out the MAC address from the Control Panel. Double click on the "Network Connections" icon. To open the context menu, right-click on the "Local Area Connection" icon. Select the "Status" option and open the "Support" tab. Click the Details button. A new window displays information about the network and the MAC address of the network cards.
The command ipconfig / s comp_name, where comp_name is the name of any computer on the local network, displays its MAC address, provided that you have access rights. You can use the nbtstat [-a comp_name] or [-a IP] command for the same purpose.
You can change the MAC address of the network equipment using Windows tools. Call the context menu by right-clicking on the "My Computer" icon. Select the "Properties" option and the "Hardware" tab. Click on "Device Manager". Right click on the name of the network card and select the "Properties" option. In the "Advanced" tab in the properties window, check the "Network address" item. Enter the MAC address in the box on the right.
Related Videos
Sources:
- network number
There are two types of network cards - integrated (built into the motherboard) and separate. The fundamental difference in them is only that the integrated one is already included with the purchase of the motherboard, and you still have to buy a separate one in order to insert it into the PCI slot. The principle of their operation and settings is essentially the same, so the steps described below are suitable for both types.

Instructions
Visit the manufacturer's website to download additional software for the network card. Usually this operation is not required, since a network card is such an element that often does not need additional drivers. It uses standard Windows drivers. If the operation of the network card is unsatisfactory due to various kinds of failures, it may be precisely in the software.
Install network map into the connector if it is not integrated. After installing it in the appropriate slot, the operating system will automatically detect the new element. Look at the rear panel of the system unit, and in particular at the panel of the network card. The correct operation of the device is indicated by alternately blinking orange and green diodes. If they do not flash, pull out the power cord and plug it back in. If this action does not bring the expected results, check that the network card is correctly installed in the motherboard. To add a network map, the above steps should be enough, but there are situations when the board itself needs to be activated directly from the operating system.
Open the start menu. Go to "Network Connections". In the window that appears, right-click on the "Local Area Connection" icon. Then select the "Enable" command. If you activate the network map thus it is impossible due to the fact that the corresponding icon in the indicated place cannot be found, do otherwise. Go to "Control Panel", then to "Device Manager". Select networking controller from the list. Click on it with the right mouse button and select "Engage". After these actions, a window should appear with the inscription "Enable". At the end of the procedure, the network card will be turned on.
Related Videos
After reinstalling Windows, it is often necessary to install an additional driver on a separate device. Operating systems contain drivers for only a small fraction of computer hardware, and some devices require newer drivers than those originally installed. One of these devices is a network card. It is rather difficult to determine the model of the card - its board itself does not have clear indications of the model name.

You will need
- A computer with access to the Network.
Instructions
Enter the task manager. To do this, right-click on the My Computer icon, select the Task Manager item in the context menu, and left-click on it. A window will open in which a list of all devices installed on the PC will be listed, grouped by semantic categories.
If the model of the card is a computer, then it will be considered an unidentified device and have a yellow question mark icon. It is usually called an Ethernet controller and is located in a network device group.
Right click on the network card icon. In the context menu that appears, click on the Properties item to open a window with information about the device. It lists information about the device driver, its manufacturer, the resources it uses, and its physical connection to computer systems. The model of the network card will also be indicated here, if the system was able to determine it. Otherwise, continue with the steps below.
Click the Details tab at the top of the device properties window. Click the drop-down list at the top of the window to open it and select the item containing the device instance code. At the bottom of the window, a set of letters, numbers and special characters will appear that denote this particular network card.
Copy the code by pressing the shortcut keys Ctrl and C, and save it. It will be required to find a driver for a network card of the installed model. You should enter the received code into any search engine - in its output you will definitely find an indication of the driver for the network card.
Download the driver and install it. After installing and rebooting the system, go to the properties of the network card again in. If the driver was installed correctly, the model of the network card will be indicated there.
Helpful advice
If you need to determine the model of the card on a laptop, it makes sense to search by its model - such devices have the same hard-coded set of equipment.
A network card or card is an integrated peripheral or add-on device that allows a computer to create, connect, and interact with wired and wireless networks. To find out its manufacturer and model, use one of the suggested methods.

Instructions
If your network is already installed in the computer, you can look at the warranty card or check, of course, provided that you have kept the original box from the device. The warranty card always contains the full name of the manufacturer and model of the device.
If you are looking for your network card model or card to download drivers for a clean version of Microsoft Windows that does not contain built-in device drivers, go to the network card manufacturer's website. Find the page for downloading drivers and software. Usually, it is called Downloads, Drivers, etc. Most likely, the site will automatically detect your network card. If it doesn't, download all available drivers and try installing them via driver update in Device Manager. It is also possible that when connected to the Internet, the operating system will itself determine the model of the network card and load the necessary driver.
If the driver is already installed, and you need to find out the manufacturer and model number of the network card, go to the Windows control panel through the Start menu or the system folder "My Computer" and double-click on the "Device Manager" shortcut, having previously switched to the "Small icons "or" Large icons ". In the device manager window that appears, find the "Network adapters" section and expand it with a single click of the left mouse button. All network devices will be listed there, including Wi-Fi. Double-click a device name to view the details of the device and the driver installed on it.
You can also open the case by carefully removing the network card (if it is not integrated) from the lan slot and look at the labeling on the sticker in the corner of the network card.
Broken network port in laptop- far from uncommon. If the network connection does not work, then the network card may be out of order. There may be several reasons for this: starting from a spark of static electricity and ending with mechanical damage to the connector contact itself.

You will need
- - administrator rights.
Instructions
Check your network settings. Each network has its own rules for setting up a network connection. Usually they relate to parameters such as range, IP address, default gateway, and others. Make sure you are in the correct IP address range and there are no address conflicts on your network. If you can't set it up yourself, check the internet for special instructions. They similarly describe that and, there are also special screenshots taken by users in this procedure.
Restart your computer and enter BIOS. To do this, immediately after starting the laptop, press Del on the keyboard (it can also be F2, Esc or other buttons). Check that the network card has the Enable parameter - that is, it is enabled. Install the drivers for the network adapter by downloading them from the official website of your laptop manufacturer. When choosing drivers, pay attention to the laptop model and the version of the operating system. If you have an installation disc, then download all the software from it to your personal computer and restart it so that all changes are saved.
Delete the network connection and recreate it. In this way, you will get rid of incorrect settings that may be assigned to the old network connection. As a last resort, you can try reinstalling the system. If all these steps did not help you start the network map, then, alas, it is out of order. There are external USB network adapters on the market especially for laptops and netbooks. If it is not possible to use wireless technologies, use a similar device. However, it should be noted that such technologies have some speed limitations and are much more expensive.
Related Videos
Sources:
- what network card do i have
The computer is connected to the network, but when you try to open the page, the browser displays a message that it could not connect. A variety of reasons can lead to this, one of them is not serviceability network cards.

Instructions
Look in the system tray - does it have a connection icon in the form of two computers? If not, then it is quite possible that the network card on your computer is simply disabled. To enable it, open: "Start" - "Control Panel" - "Network Connections". In the window that opens, find the "Local Area Connection" item. The column "Status" will indicate its status. If the device is disabled, right-click it and select “Enable” from the context menu.
The situation becomes more complicated if the list of network connections is empty. In this case, you need to check serviceability network cards... Open the section "System" - "Hardware" - "Device Manager" in the Control Panel. Find the "Network Cards" section. You will most likely see a device marked with a yellow question mark or exclamation mark. This means that a driver is not installed for the device or it is not working correctly.
In order for the network card to work, you need to find a driver for it. But first you need to find out its exact name. If you know it, find the driver through Google or any other search engine. If not, you will need the Aida64 (Everest) program. Run it, on the right side, select the "Computer" - "Summary information" - "Network" section and look at the name of the network adapter.
After finding the driver you need on the network, open "Start" - "Control Panel" - "System" - "Hardware" - "Device Manager" - "Network Cards" again and double-click the network card marked with a yellow icon. In the window that opens, select "Driver" - "Update". Specify the driver saved on your computer as the source.
VPN connection check
Checking the VPN connection configuration
A necessary step in working with a VPN connection is to check the configuration to make sure that the system can correctly create channels on the network. Follow the steps below to test your VPN connection.
- On the client, right-click the Company ABC VPN Connection and select Connect from the context menu.
- Click the Connect button.
- Click the OK button to accept the credentials. After that, the connection will be created.
You can test the connectivity by pinging the domain controller.company.com. Since the system has passed the health checks, this connection is allowed full access to all "resources on the intranet. Follow the steps below to test the connection."
- After the Company ABC VPN Connection is established, select All Programs-Accessories-Command Prompt from the Start menu.
- Enter the ping company command. com and press the key
. - A response should appear from the IP address.
- Select Connect To from the Start menu to open the Connections window.
- Select the Company ABC VPN Connection and click the Disconnect button.
- Click the Close button.
NPS provides detailed connection information that was lacking in earlier versions of Windows. In Windows Server 2008. R2, finding the root cause of legacy VPN connectivity problems has become an easy task.
Managing Inoperative VPN Clients
In the example above, everything was smooth and there were no performance issues. But if the client did not pass such a check, then the inoperable elements must be restored. A previously configured health check checks if Windows Firewall is enabled. To test the recovery capabilities, turn off Windows Firewall and reconnect.
- On the VPN client, select Control Panel from the Start menu.
- Click on Security.
- Click on Windows Firewall.
- Click on Change Settings.
- Select the Off (Not Recommended) radio button and click the OK button.
It's pretty frustrating when someone gets unauthorized access to your computer. If you think your computer has been jailbroken, disconnect it from the internet. Then, find the vulnerabilities that the attacker exploited to break into the system and fix them. Then take steps to avoid similar intrusions in the future.
Steps
Part 1
Blocking unauthorized access- An attacker can gain remote access to the computer, but this is unlikely. But there are some steps you can take to prevent the invasion attempt itself.
-
Look for obvious signs of remote access. If the cursor moves, programs start and files are deleted without your participation, someone has gained access to the computer. If this happens, turn off your computer and disconnect the Ethernet cable.
- If you find unfamiliar programs or your internet connection speed has dropped, this does not mean that your computer has been jailbroken.
- Many programs that update automatically open pop-up windows during the update process.
-
Disconnect your computer from the internet. Do this if you think your computer has been jailbroken. Disconnect your computer not only from the Internet, but also from the local network to prevent unauthorized access to other computers.
- Turn off your wireless router and disconnect the Ethernet cable from your computer.
-
Start Task Manager or System Monitor. Using these utilities, you can identify active processes.
- On Windows, press Ctrl + ⇧ Shift + Esc.
- On Mac OS, open the Applications - Utilities folder and click System Monitor.
-
In the list of running programs, find programs for remote access. Also look for any unfamiliar or suspicious programs in this list. The following programs are popular remote access programs that are installed without the user's knowledge.
- VNC, RealVNC, TightVNC, UltraVNC, LogMeIn, GoToMyPC, and TeamViewer
- Also look for unfamiliar or suspicious programs. If you do not know the purpose of this or that active process, find information about it on the Internet.
-
Note the abnormally high CPU utilization. It appears in the Task Manager or System Monitor. High processor utilization is normal and does not indicate a compromised computer, but if it occurs when no one is using the computer, most likely a lot of processes are running in the background, which is very suspicious. Keep in mind that high CPU utilization occurs during background system updates or large file downloads (which you forgot about).
Scan the system with an antivirus program. Be sure to install antivirus or leave Windows Defender on. Open your antivirus software and run an operating system scan. A full scan will take about an hour.
- If your computer does not have antivirus, download it on another computer and copy it to your computer using a USB drive. Install antivirus and scan your system.
-
Delete the files found by the antivirus. If the antivirus detects malicious programs, remove them or send them to "quarantine" (this depends on the antivirus); in this case, the found programs will no longer harm your computer.
Download and install Malwarebytes Anti-Malware. This is a program that detects and neutralizes malicious programs not found by the antivirus. Malwarebytes Anti-Malware is a free download from malwarebytes.org.
- Since your computer is disconnected from the internet, download Malwarebytes Anti-Malware on another computer and copy it to your computer using a USB stick.
-
Scan the system with Anti-Malware. A full scan will take about 30 minutes. It is possible that Anti-Malware will detect a cracker that controls your computer.
Quarantine the detected malware. In this case, the found programs will no longer harm your computer.
Download and run Malwarebytes Anti-Rootkit Beta. This program can be downloaded free of charge from malwarebytes.org/antirootkit/. Anti-Rootkit Beta detects and removes rootkits, which are malicious programs that allow an attacker to gain a foothold in the system and hide traces of infiltration. A full system scan will take some time.
Monitor your computer's behavior after removing malware. Even if antivirus and / or Anti-Malware program has found and removed malware, monitor your computer's behavior to determine if there is any hidden malware.
Change all passwords. If your computer is compromised, it is most likely that the attacker obtained your passwords using a keylogger. In this case, change the passwords for different accounts. Do not use the same password for multiple accounts.
Sign out of all accounts. Do this after changing passwords. Sign out of accounts on all devices on which you use these accounts. In this case, the attacker will not be able to use the old passwords.
-
Reinstall your operating system if you are unable to block unauthorized access to your computer. This is the only reliable way to prevent intrusion and get rid of all malicious files. Please back up important data before reinstalling the system, as the process of reinstalling the system will delete all information.
- When backing up your data, scan each file, because there is a risk that old files will lead to infection of the reinstalled system.
- Read on for more information on how to reinstall Windows or Mac OS.
Part 2
Preventing unauthorized access-
Configure automatic updates for your antivirus software. Modern antivirus detects malware before it gets on your computer. Windows comes with Windows Defender, which is a pretty good antivirus that runs and updates in the background. You can also download an excellent and free antivirus such as BitDefender, Avast! or AVG. Remember that only one anti-virus program can be installed on a computer.
- Read on for more information on how to enable Windows Defender.
- Read the
Be aware that your computer may turn on automatically to install updates. Most of the latest versions of operating systems are automatically updated; as a rule, this happens at night when no one is using the computer. If the computer turns on without your knowledge (that is, when you are not using it), most likely it woke up from sleep mode to install updates.
Introduction
SSDs are usually faster than magnetic hard drives. Sure, some flash drives have mediocre write speeds, but overall, it is solid state drives that are setting the pace right now, overshadowing the evolution of traditional hard drives.
True, SSD drives are not only faster, but also much more expensive than conventional HDDs. Every gigabyte of SSD is expensive. And if there is an option to free up several gigabytes by disabling unnecessary Windows services and components, then this cannot be neglected.
It is also worth noting that there are many people on the forums of computer enthusiasts who claim that a few simple Windows optimizations will help to increase performance. But is it really so?
In this article, we decided to take a closer look at the most popular SSD tweaks and determine, using a test, how they affect system performance. Basically, we have to answer only two simple questions - is it possible, using certain system tweaks, to free up space on the system disk and increase the performance of the computer?
In addition, we plan to test two different solid state drives to see if the effect depends on the specific SSD model, or if these tweaks will work for any drive. It is possible that these tweaks are completely useless and there is no way to make an SSD run faster.

We'll be testing nine of the most popular SSD tweaks for the Windows 7 operating system:
- Disable System Restore.
- Disable data indexing.
- Disable paging file.
- Disable hibernation.
- Disable prefetching (read ahead).
- Disable flushing the Windows entries cache.
- Disable SuperFetch and Windows Search.
- Disable ClearPageFileAtShutdown and LargeSystemCache.
- Setting up a power plan.
AHCI Mode and TRIM Command
Before proceeding with subtle system tweaks, you need to make sure that the SATA controller is set to AHCI mode, and the TRIM command is supported by Windows 7. Both of these settings, strictly speaking, cannot be classified as optimizations for SSDs - rather, this is a requirement for the computer configuration that uses a solid state drive.
AHCI (Advanced Host Controller Interface) mode is a specific SATA controller mode that allows hot swapping of SATA drives and NCQ (Native Command Queuing) technology. Using NCQ provides higher performance of the disk subsystem.
This is especially true for flash drives where a multi-channel controller is used: an SSD drive is much better suited to simultaneously executing multiple commands. That is why solid-state drives provide maximum performance at high queue depths and the benefits from using NCQ can be quite noticeable.
Do not forget about one more important argument in favor of AHCI: only in this mode of controller operation, you can use the TRIM command support provided by the Windows 7 operating system. TRIM support is necessary for SSD drives, since it helps to maintain high drive performance in over a long period of time.
According to Wikipedia, TRIM- a command that allows the operating system to notify the solid-state drive about which data blocks are no longer used and can be cleared by the drive itself. TRIM allows the SSD to reduce the impact garbage collection(garbage collection), which would otherwise result in a decrease in the write speed to the affected sectors in the future. TRIM support provides more stable write speed and also reduces wear and tear on free memory cells.
How to check if a SATA controller is operating in AHCI mode
The AHCI mode of the SATA controller can be set in the BIOS or UEFI settings of your motherboard. In most modern motherboards, it is installed by default, but you should make sure that the BIOS is set correctly before installing Windows, and not after. If Windows is already installed, you need to check if AHCI mode is enabled:
- In the "Start" menu, select "Control Panel".
- On the "View" tab, select the "Small icons" display mode.
- Select "Device Manager".
- In the "Device Manager" we find the branch "IDE ATA / ATAPI controllers", expand it and look for AHCI controllers.
- If the AHCI controller is on the list, then the system operates in AHCI mode.
- If there are no AHCI controllers in the list, then the system is started without AHCI support.

- If Legacy IDE mode is used instead of AHCI, then it is recommended to switch to ACHI mode. However, with the OS installed, this will be a little more difficult. This is described in more detail in Support article on the Microsoft website .
How to check if the TRIM command is enabled
If TRIM support is enabled in Windows 7, the operating system sends appropriate commands to the SSD. Checking if TRIM is working is also pretty straightforward:
- In the "Start" menu in the search field, enter cmd.
- Right-click on the cmd.exe executable file and select "Run as administrator".
- In the command line, enter "fsutil behavior query DisableDeleteNotify" (without quotes).
- If the computer issues DisableDeleteNotify = 0, TRIM support is enabled.
- If DisableDeleteNotify = 1 is displayed, TRIM support is disabled.

Disabling System Restore
Let's move on to describing more subtle system optimizations. The first of these is to disable System Restore, the built-in Windows system rollback (recovery) system that uses the principle of "checkpoints".
Disabling System Restore serves two purposes. First, you reduce the number of writes to the SSD, which increases its longevity. Today there are different opinions as to whether or not to worry about unnecessary write operations on an SSD. The number of write cycles is the main parameter that tells us about the longevity of the memory cells, on the basis of which solid state drives are created. Some users believe that there is no need to worry: you are unlikely to see the day when the memory cells of your SSD drive stop storing data. Other users, on the other hand, do their best to minimize the number of rewrite cycles. There is no definite answer yet which of them is right. But if you do not rely on chance and consider yourself to be someone who does not want to risk it, then disabling System Restore is a good option to reduce the load on memory cells. We add that System Restore checkpoints are not available for the TRIM command and regular use of this Windows function can potentially lead to a decrease in drive performance over time.
The second reason to refuse system recovery is to save free space on the system disk. Checkpoints created by System Restore are stored on the system disk itself and "eat off" expensive disk space on the SSD. At the same time, they do not always provide a full rollback of the system. As a rule, it is safer to have a complete system image created using a specialized utility (Norton Ghost, Acronis True Image). You can "deploy" such an image to disk in a matter of minutes and you will be confident that you will be able to return to the working system. In addition, you do not need to store such an image on the system drive itself - for these purposes, you can use a regular hard drive or an external drive.
How to disable System Restore
- Right-click on the "Computer" icon in the "Start" menu and select "Properties".
- Select the "System Protection" tab.
- Click on the "Configure" button.
- Check the box next to the "Disable system protection" item.

|
|||
|
| |||
If you turn to the system administrator and ask the question, what is the weakest link in the computer? - you will get the answer that this is exactly the HDD, because it is practically the only mechanical element of the system that slows down the operation of the entire computer. In this regard, many manufacturers were looking for a way out, at least some opportunity to speed it up, also with SSDs. The way out became visible when using AHCI.

The AHCI disk mode includes several main differences (there are 3 of them), which make it a priority in using all disk drives, except for the outdated IDE. The main "chips" of the mode:
- Hot Plug - allows you to hot swap computer components (disks). Thus, there is no need to turn off and disconnect the PC, you can change the HDD, SSD directly in the operating mode. This is important for server stations, where disconnection is unacceptable and is simply convenient for everyone who uses multiple disks;
- NCQ - support for "deep" sequence of commands, that is, it is able to set up a more efficient trajectory of movement of the head in mechanical and significantly increases the output in SSD;

- TRIM is primarily applicable to SSDs, as it guarantees a significant increase in speed.
AHCI mode allows you to take advantage of all these benefits, and most likely you have the option to turn it on. If you are using an SSD, then you probably need to enable it to see the proper speed of its operation, applicable to both SATA II and SATA III, except for outdated IDE drives. Therefore, if you are in doubt about which ide or AHCI mode to choose, the latter is definitely an advantage.
How to check if AHCI mode is enabled?
First of all, you need to find out whether it is worth taking further switching, perhaps you already have it active. There are several places that show the information you need: Device Manager and BIOS.
- Click Start, where RMB on "Computer" and click on "Properties";
- Now select "Device Manager";

- Then expand the section "IDE ATA / ATAPI controllers";
- Check for a section titled AHCI.

In the absence of such an item, you can find out that it is inactive. Also consider another option via BIOS (UEFI):
- Go to BIOS by pressing Del or F2 (possibly other keys) when starting the computer;
- You should go to the section called SATA or Storage in different variants until you find SATA Mode / Configuration, where the mode will be shown.

At this stage, do not change the connection mode, as this is fraught with system errors. It is best to enable AHCI mode in BIOS and install on new Windows, which guarantees normal mode processing, but this is quite radical.
How to enable AHCI mode in Windows 7?
The most relevant and widespread system in which we will perform actions. It should also be noted that if you are installing a new disk, then you can freely switch the AHCI mode without any consequences. There are also several options for activating AHCI: through the registry and through the utility. A more correct option would be through the registry in order to prepare the system for further changes, the latter method will simply help to solve overdue errors in the computer.
- Press Win + R and enter regedit;
- Follow HKEY_LOCAL_MACHINE \ SYSTEM \ CurrentControlSet \ services \ msahci;
- Change the value of the Start option to 0;

- Find the lastorV section here;
- Also replace Start with 0.
Now you can enable AHCI mode in BIOS and Windows will correctly detect it by installing the necessary drivers. An alternative method involves changing the mode initially and then simply fixing the error. To do this, use the official Microsoft Fix it utility. After installation, run the check and the failures will be eliminated, you may need to run from safe mode.
How to enable Windows 10 AHCI mode?
In general, the actions are not significantly different, let's look at the differences in editing the registry.
- In the same section, as in Windows 7, you need to change the Start parameters in the iaStorV and storahci folders to 0;
- Expand each of the above sections and go to the StartOverride subsections, where parameter 0, set the value to 0.

We managed to enable AHCI Windows mode, but it is worth noting that it is better to run the first launch in safe mode in order to avoid unnecessary problems. During the initial start-up, the AHCI operating mode will install the necessary drivers automatically.
You should make a reservation about the distinctive features of how to enable AHCI mode in Windows XP and other legacy versions.
Despite the fact that XP does not support this mode at all, there are drivers that extend these capabilities, although this is not safe.
You should also think about whether it is worth it, because if the computer is very weak for more modern systems, then the speed increase will be negligible. Also, the AHCI controller mode in Vista is included in the same way as the "seven".
So, the AHCI sata mode is easy to turn on, and the system will reward you for your efforts with a speed boost. Usually, there are no problems with changing the controller, but if you encounter them, then just run the Microsoft Fix it utility. AHCI is mandatory when using an SSD drive, otherwise you will not be using its full speed.
If you still have questions on the topic "What is AHCI mode and how to set it up?", You can ask them in the comments
if (function_exists ("the_ratings")) (the_ratings ();)?>