Despite the rapid development of wireless communications, RJ-45 sockets are still indispensable elements of the structured cabling system of a modern building. We offer to consider their device, types, pinout options and installation methods. The apparent simplicity of the question can be misleading, since there are certain nuances that need to be paid attention to.
Design features
Despite the variety of types of twisted-pair sockets, their design is almost identical, with the exception of small details. Let's take a typical external single-port device as an example.
Rice. 1. Basic elements of an external RJ-45 socketDesignations:
- A is a plastic cover.
- B is the base.
- C is a functional board with a standard connector installed on it.
- D - convectors for twisted pair connection.
- E - tie for fixing the cable.
- F - socket for connector.
Outwardly, the socket resembles a telephone standard RJ-11, the main difference lies in the number of connector pins, there are eight of them, not four. Accordingly, a computer socket can be used as a telephone socket, but not vice versa.
Different types of devices may have minor characteristic features, but in general the design concept remains unchanged.
Types and characteristics
The main parameters of these switching devices are determined by the following criteria:
- Number of ports.
- Category.
- Execution.
Let's briefly talk about each of them.
More doesn't mean better.
One of the main parameters is the number of ports. As a rule, they can be from one to four. If you want to use more connections, then it is easier to install a patch panel, but such a need indicates ill-conceived network wiring. In addition, it should be borne in mind that a large number of patch cords connected nearby causes some inconvenience.
 Rice. 2. Krauler 4-port external socket
 In practice, when organizing an office or home LAN, one and two-unit modules are mainly used.
This parameter is directly related to the characteristics of the cable used to install the computer network. We are talking about the bandwidth, which determines both the speed of data transfer and the possibility of using special network technologies. Below is a table that shows the relationship of category to bandwidth.

Currently, when installing a LAN, cables with a category below 5e are practically not used.
Execution.
The method of mounting the switching device depends on this parameter. There are two versions:
- for external (external) installation (such sockets are shown in figures 1 and 2);
- for indoor installation.
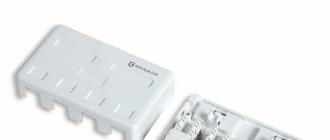
 Internal two-port RJ-45 socket disassembled and assembled
 As a rule, the choice of one or another version depends on how the LAN wiring is done. If it is external (for example, laid in boxes), external sockets are used. In cases where hidden wiring is done, internal devices look more aesthetically pleasing.
Separately, it is necessary to highlight the sockets that are installed directly on the box. Technically, such a design can be considered both internal and external.

The performance of the LAN is not affected by the execution.
Modular designs.
Speaking of performance, one cannot fail to mention modular designs. This solution allows you to assemble a socket in a standard case for a certain combination, for example, install it in RJ-45 and RJ-11 modules or with a different category.

RJ-45 pinout
This should not be a problem, since each contact group is color-coded in accordance with the T568A and T568B standards (it can be marked with the letters "A" and "B", as in the figure below).

It doesn't matter which standard is used, the main thing is that it be of the same type for the LAN, otherwise problems are guaranteed. It is believed that we have adopted a “swaging” of the T568B type, but this is a rather conditional statement.
If you do not know which standard your provider uses, then you can install it by pinouting the connector installed on the cable that enters the apartment.

Detailed connection instructions
Let's start with the tool that will be needed to terminate twisted-pair sockets. Ideally, it is desirable to purchase a universal extractor (shown in Figure 9). It allows you to crimp and cut the rest of the wire in one motion. Thanks to Chinese manufacturers, such a universal tool costs about 3-4 dollars. The price of branded products can be 2-3 times more expensive.
 Rice. 9. Universal extractor
 This tool has a special mechanism that allows you to press the wire between two contact knives and cut off its excess (3 in Fig. 9). In addition, it is equipped with a flat screwdriver (2) and a hook (1) that allows you to remove the wire in case of incorrect termination. The cost of a universal extractor is relatively low, and the benefits are quite tangible.
No less useful will be universal pliers for stripping insulation. They cost about the same as an extractor, they can cut a cable Ø3.5-9 mm such as UTP, STP, FTP. It is possible to adjust the depth of the cut.

It is undesirable to use a stripping knife, since in this case there is a high probability of damaging one of the cores of the twisted pair.
Having dealt with the necessary tool, let's move on to the algorithm for embedding a twisted pair into a switching device. We will proceed from the fact that the cable has already been laid, the seat for the socket has been prepared. The procedure is as follows:
- Using universal pliers, cut off the outer insulation layer from the end of the wire. It is enough to bare 4-5 centimeters. You need to act carefully so as not to damage the wires. If this happens, cut off the damaged area, adjust the depth of the cut and repeat the operation.
- After removing the insulation, level each of the pairs. Please note that there is no need to clean them. Each contact of the platform has special micro knives that cut the insulation and provide reliable contact and fixation of the wire.
- We disassemble the socket. To do this, remove the front panel. To do this, unscrew the fixing screw or unfasten the special latches (depending on the design). If a modular socket is used, the modules must be removed from the socket.
- We fix the cable on the module using a tie (E in Fig. 1) or in another way provided for by the design.
- We insert the wires into the clamps, while it is necessary to adhere to the color marking of the selected standard. Do not try to drown the cores deep, just fix them with a little effort (A Fig. 11).
- Using the extractor, we perform pressing (In Fig. 11).
 Rice. 11. A - cable with wires separated by clamps, B - pressing with an extractor
 At this stage, we will make a small digression regarding the use of available tools for pressing. Sometimes you can find tips in which, in the absence of the necessary tool for pressing, it is recommended to use a clerical knife or a thin slotted screwdriver. This approach can be used only as a last resort, when you urgently need access to the network, but there is no tool at hand. But in the future, such an outlet must be pinched. Otherwise, it is likely that the wire will lose contact with the latch after a while.
We also note that many branded manufacturers attach a simple plastic extractor to each outlet, which allows you to securely close the wire, after which it remains only to carefully cut off its excess.
- After pressing, the module is installed in place. If the socket is external, then its base is screwed to the prepared site, so that the cable is supplied from above, and the connector for the connector is from below. When installing an internal socket, its base is installed in the prepared glass and fixed in it.
- We fasten the front panel, after which we check the performance. You can do this with a special tester, but it's easier to connect a computer and check for a network connection. If problems arise, then first of all check the correctness of the pinout, as practice shows, in 90% of cases the reason lies precisely in this.
When using a shielded cable, you must install an appropriate socket that has a shield connection. Otherwise, it turns into a large antenna, which will not be slow to affect the bandwidth, and, consequently, the data transfer rate. For the same reason, you should not use an STP or FTP cable if ungrounded equipment is connected to it.
Twisted-pair LAN technology requires the use of complete lines. Twisting, adhesions are unacceptable, this leads to serious losses. If, nevertheless, it became necessary to extend a piece of cable, special connectors should be used for this purpose.
 Rice. 12. Twisted pair connectors
 These devices are a box in which a board is installed with two RJ-45 connectors (A in Fig. 12), or twisted-pair latches, like sockets (B in Fig. 12).
It is not recommended to use sockets with more than two ports in domestic conditions. A large number of patch cords in one place will cause them to become tangled. It is better to spread the sockets at some distance.
The principle of crimping a computer outlet does not differ from similar actions with twisted pair. However, there are nuances depending on the color of the insulation, so the circuit looks like this: 
Before crimping and installing the socket, it is necessary to designate the location of the housing. For an internal socket, the case is latched inside, which means that it should be placed in the most convenient place for equipment.
With an external outlet near the box, it is attached to several screws or double-sided tape. Next, the braid is removed from the twisted pair and the wiring is untwisted. Then you need to decompose them by color, and then press them until the characteristic click of the tool (extractor). As a result, you get a neatly fixed twisted-pair wire at the end of the groove.

Crimping occurs in the following sequence:
- Cutting the end of the cable with a cutter into a crimping tool
- Removing insulation from a wire that is placed in a crimp extractor
- Shortening the wires by 1.5 cm and aligning them to the same level
- Placing the conductor in the connector and verifying the correct entry and fixation of the wire in the connector
- The connector is inserted into the crimping device
- The pliers are clamped to the extent that the connector pins squeeze the cable conductors.
Crimping computer socket rj - 45

If it was not possible to purchase a crossover knife, it is quite possible to do without it, the main thing is that the length of the wire is sufficient.
In this case, the use of a patch cord is even inappropriate.
In large rooms, you can simply place a long wire with crimped RJ 45 connectors on the main wire, but without using a socket with a 5E patch code. 
Checking the connection crimp
You can find out how correctly you crimped the cable by placing it in the HUB switch. If it works, then everything is done as it should.

In addition, there are quite a lot of testers of different price categories on the computer market that can test a twisted pair cable for operability. Moreover, they work on the same principle, so there is no point in overpaying.

The photo shows a tester that is equipped with a transmitter and receiver connected via the two connectors listed above (RJ 45 and Cat 5e). This device shows which wires are twisted, exchanged in pairs, in addition, it also checks the integrity of the wiring. If the connection is correct, the receiver will alternately light up different LED colors.
How to connect an 8-wire socket
To connect the outlet you only need a flat screwdriver and a thin knife.

The cable sheath is removed no more than three centimeters, then the wires are unwound by 15 mm. According to the wiring diagram, they are placed in the comb with a screwdriver, and then with a knife until it stops. With a special desire, two twisted-pair wires are placed in one socket (but when they are combined).

Disadvantage of dual connection: low data transfer rate.
How to connect a socket to two sockets
An effective fixation of the conductor in the socket is provided by a tool for tamping the wire to a maximum depth for the socket. Such a tool can be an ordinary tweezers or a thin screwdriver. The wires for driving into the terminals do not need to be stripped, since the socket has special cuts that clean them from insulation.
Then you should pull the cable onto the socket module. At the same time, it is also cleared by 3 cm from the main insulation, and the wiring is untwisted by 1.5 cm.
Now you need to fix the cable with a cable tie on the fixture board. Get rid of the protruding screed with wire cutters.
Please note that each diagram has notes on which cable and where to connect. For this, a plate is provided, as in the following photo.

You can attach the box with the socket with screws or double-sided tape.
To remove the socket cover, just press both sides of the box with your fingers a little, and it will open.
You can see how compression occurs in practice in the video.
In conclusion, I would like to wish you success in the repair, and follow the safety precautions!
Thanks to Legrand, connecting a computer outlet is becoming easier. This leader in electrical installation and power equipment offers a wide range of sockets for network connections.
Thanks to this, you can organize a wired Internet access point in any place convenient for you, and the attractive appearance of such sockets will allow them to fit seamlessly into the design of any room.
Due to the huge range of products manufactured by Legrand, the computer socket and connection scheme may vary somewhat. Here, much depends on the type of outlet, some features of installation, connection and its fastening.
And if you add here a variety of design solutions in the design, a rich range of colors and types of materials used for the manufacture of sockets, then the range becomes truly comprehensive. Let's try to start to understand at least the basic criteria for choosing computer outlets.
So:
- First of all, you should pay attention to the category of information outlet. Legrand produces category 5e and 6 sockets. At the moment, the release of category 6a sockets has already been announced, but they are not yet represented on our market.
- Let's take a look at the differences between these categories. Category 5e sockets are designed for data transmission up to 100 MHz, and category 6 up to 250 MHz. If we talk about the data transfer rate, then category 5e sockets are capable of transmitting up to 1 Gb / s, and category 6 - up to 10 Gb / s. Given the speed of information technology development, it is advisable to use category 6 sockets, despite the fact that their price is slightly higher.

- The next rather important parameter is the type of cable for which the information socket is intended. In most cases, this is a UTP cable type, but the Legrand computer socket and connection diagram can also be designed for STP or FTP cables. This type of cable can only be used for category 6 outlets.
Note! Cable designation can be done according to ISO/IEC 11801. In this case, the cable will be designated U/UTP, F/UTP or S/UTP, respectively. In addition, various additional modifications of these cables can be used.
- The UTP cable is a normal twisted-pair cable with no shielding. If there is a shield in the form of a braid, the cable is designated STP, and if ordinary foil is used as a shield, then the cable is designated FTP. In addition, there are various modifications with braid and foil, both for the cable as a whole and for individual cores.
- Another factor that our instructions advise you to pay attention to is the method of fastening and mounting the connector itself. In addition to conventional connectors, an increasing number of models are supplied with quick-connect connectors. We will describe the features of connecting sockets of this type below, and you can choose a model that is more convenient for you.
Note! Now sockets with LCS 2 connectors are produced. They are only available in category 6 sockets and are designed for fiber optic networks. As planned, the same connectors will be installed on category 6a models.
- Another parameter that we advise you to pay attention to when choosing is the method of attaching the connector directly to the box. It can be clamp and screw fastening. With my own hands, of course, it is easier to mount models with clamping mounts, but I personally doubt their reliability and durability. Therefore, I advise you to use sockets with screw fastening.

- Well, the last parameter is the number of connectors installed in one mounting box. It can be products for 1 or 2 connectors. And here you can choose the model that best suits your needs.
Connecting information outlets Legrand
Now we come to the most important question. How is the connection of the Legrand computer socket and the connection of computer sockets in general carried out?
To do this, let's first analyze the general principles of connecting information cables, and then the peculiarity of their connection to connectors of various types.
General principles for connecting information outlets
Almost all modern local networks use the RJ-45 connector for connections. Although the official name of this connector is 8Р8С, which in deciphering the abbreviation means: 8 positions, 8 contacts.
To connect sockets and connectors of this type, a twisted pair cable is used, which has a strictly standardized color code for each core. Based on this color designation, the connection is made.

So:
- There are currently two generally accepted connection standards: TIA/EIA-568A and TIA/EIA-568B. The difference between them is the location of the wires.
- For the TIA / EIA-568A standard, a green-white wire is connected to the first pin of the connector, then in ascending order: green, orange-white, blue, blue-white, orange, brown-white and brown. This connection method is somewhat less common.
- For the TIA/EIA-568B standard, the wire sequence is as follows: orange-white, orange, green-white, blue, blue-white, orange, brown-white, brown. This type of connection is used much more often.
Connecting the Legrand socket connector
The wiring diagram for a Legrand computer outlet is no different from generally accepted standards. In this case, any outlet can be connected according to both standards. The corresponding color designation is available on the surface of the connector.

- First of all, we should get to the connector. In some models, it may be necessary to disassemble the socket, but in most, the connector can be reached without additional effort.
- We open the cover that covers the contact part. To do this, using a screwdriver, insert it into the cable slot and pry the cover up.
- Now we cut the cable and lay the cable cores according to the color marking on the connector cover.
- Firmly close the top cover. During this, the cable cores are crimped and reliable contact is ensured. After that, you can cut off the excess cable cores protruding beyond the cover.
- After that, it is necessary to install the information socket in the socket and fix it with screws. The socket is ready to go.
Connector connection: quick installation
Connecting a Legrand computer outlet with a connector - quick installation - is somewhat different. But this feature lies only in the installation method, and the connection diagram remains standard. At the same time, the connector is color-coded for both types of connection, which allows you to perform it without even having specific knowledge.

- On the back of the Legrand computer socket there are two white latches, by turning them counterclockwise, we can remove the connector.
- The connector is put on the cable. After that, the cable should be cut and the wires connected according to the color marking. The protruding parts of the cores can be cut off.
- Now we install the connector in place and turn it clockwise with a little effort. During this, the cable is crimped and securely fixed.
- Now we install the socket in the seat and fasten it with screws. Everything, the socket is ready for use.
Conclusion
Now you know how to make a choice and connect a computer outlet. As you can see, this is quite easy to do. And the video on our website will make this task even easier. After all, such a simple procedure will greatly facilitate the connection to a wired Internet network and will allow you to hide and unify the wiring throughout the house as much as possible.
An Internet socket, which is used in computer and other communication networks, has a significant difference from connecting and installing conventional electrical equipment. This is due to the presence of a cable for data transmission (twisted pair is used) and the presence of an RJ-45 plug that must be connected to power (8P8C type). These two differences have significantly changed the structure of the connector, because of this, the installation and connection of the Internet outlet has also changed significantly.
What is important to know?
As a rule, a socket with two twisted pairs with four wires is used (eight wires are obtained). Each core is divided by color and has a personal color marking. They are all necessary for fast data transmission.
The 8P8C type connector, which is used to connect to the socket, has the following form:

Manufacturing engineers have spent a lot of effort developing an Internet socket that the user can independently install and connect to the electrical network without having experience and special equipment. In addition, the user must make the connection in such a way that the reliability of the connections and the safety of the contacts remain at the highest level.
Preparatory work
The example uses a product from the Legrand Valena model. Since its mechanism is suitable for many series of Legrand wiring equipment, it has become popular among consumers.

Before proceeding with the installation of a computer outlet with your own hands, it is necessary to install a twisted pair cable. To do this, the end of the twisted pair is output to the socket.
First of all, you need to remove the back cover from the mechanism. To do this, the Internet socket must be turned with the back side facing you. This is done as follows: you need to turn clockwise (approximately ninety degrees) the white retainer. How this is done correctly is shown in the photo below:

After the latch has been turned, it stands perpendicular to the connector body and the back of the structure is easily detached from the device. Then you need to push the network cable (twisted pair) into the center of the back cover, which was previously removed. This is done from the side of the latch (outer side). After that, you need to expose the veins. To do this, carefully remove the protective sheath from the twisted pair.

Connection nuances
On the back cover of the Internet outlet, there are grooves and stickers that indicate in which scheme the device can be connected. There are two connection schemes - these are A and B. Which type to use depends on how the equipment is interconnected.
Today, almost all network structures independently recognize the scheme by which the connection was made and, if necessary, adjust to it. But the network outlet to which you need to connect the mechanism for accessing the Internet is best installed by connecting the wires of circuit B.

According to the scheme, it is required to place twisted-pair wires of a certain color in the grooves of the cover of the corresponding color.
Then we return the cover to its original place. As soon as the lid has taken its seat, close the white latch. To do this, it rotates counterclockwise. It should be noted that incorrect installation of the cover is completely excluded, since the device has special elements that are mirrored on the connector (protrusion and groove). Therefore, it is impossible to install the elements incorrectly.
But, the question arises: how is the Internet outlet connected to the cable, because the insulation was not removed from the wires? This is considered the main difference between the network socket and other wiring structures. The pads with contacts in a computer socket are two sharpened plates. They are located so that the distance between them is equal to the cross section of the copper double core.
Thus, the cover with all the wires inserted is placed in its original place, and these blades cut through the insulation of the twisted pair and come into contact with the cores that conduct current. This connection is secure. It guarantees uninterrupted stable operation of electronic structures. In this case, the work will be carried out without excessive losses.

Then you should make sure that the installation of the cores is carried out correctly and cut off the extra ends of the twisted pair that stick out. The main thing is not to allow accidental closure of any cables to each other.
It remains to install the Internet socket in the socket, fix the front panel. When the connection to the network is made, you can check what the result is. You can install and connect any network device yourself using this method. Even if the contact groups differ in them, the meaning will not change.
For example, there is such a socket mechanism, the connection of which is carried out manually. That is, each twisted pair cord is squeezed into a specific terminal according to the number and, as shown in the photo below. It is a little more complicated and longer than installing the Internet outlet of the Legrand series. But the technology of how to install and connect the device remains unchanged: the cores fall into the hole between the pointed plates and touch the core, which carries the current.

Important! Before connecting the cable, you should call your Internet provider and clarify which connection scheme is used in the apartment.
Now you know how to install and connect an Internet outlet with your own hands. We hope that the provided diagrams, video and photo examples were useful to you in self-wiring!
You probably don't know:
Few people know about such a useful thing as the Internet. socket and especially how it connects. But in fact, this device allows you to solve many problems. Firstly, it makes it possible to avoid loosening of contacts in the line coming from the provider and, as a result, the need to call its employees for periodic repairs; and secondly, it simplifies the connection of various gadgets and accessories which makes life much easier.
Design
To begin with, we will consider the typical versions of models presented on the market of Internet accessories. Conventionally, they can be divided into two main categories, which differ in the method of installation:
- embedded;
- overhead.
Both options are widely used, while the first is more preferable at home, since it solves the problem of ease of use and aesthetic taste, which is especially important in elegant.
It is from them that one can additionally distinguish:
- standard RJ-45;
- dual RJ-45 (for two parallel networks).
Otherwise, the structure is almost identical, although there are exceptions to the rule that have additional USB ports, etc. But in this case, it does not make sense to consider them, so let's go straight to the main point.
Preparation
At the time of installation, all conditions must be prepared. Firstly, it is necessary that the main cable has already been laid from the provider and a branch has been laid from it directly to the place of use. Otherwise, the whole procedure does not make any sense.
Advice! Ideally, the branch is laid inside the walls, but this is extremely rare, so this procedure has to be performed by the owner of the dwelling. It is hidden inside a corrugated polymer tube and installed in a special channel, hollowed out in brick or concrete masonry. Or they hide it behind, which can both complicate and simplify the installation process.
The problem can be the purchase of a special rosette cup for drywall and even special tools for cutting holes in gypsum boards. However, all this can be at hand with a thrifty owner.
Otherwise, in addition to the kit, packed in cellophane, the master will need:
- a screwdriver, preferably a four-sided (phillips);
- knife, wire cutters or stripper (optional).
Note! The stripper is a professional tool that allows people involved in networking, such as network administrators and technicians, to strip contacts and crimp as quickly as possible.
Step-by-step instruction (for embedded version)
Initially, you should unpack and disassemble the existing set of spare parts, so to speak, to separate the wheat from the chaff. Next, using a screwdriver, you should separate the outer part of the socket from the inner one, which is hidden inside in a special hole or in a glass.
The next step is to divide the inner part again in the same way with the same tool.
Advice! But you can do it just with your hands, slightly pressing down on the internal module with a built-in port. As a result, a small fragment should be in the hands.
Note! The structure of the product may differ and constitute the know-how of the manufacturer. For example, some developers add a special spare part to it, called a fixing ring. It is easily manually separated from the main part, which is a single whole of the outer and hidden components.
- In turn, a small cover should be removed from it. This can be done with a knife or the same screwdriver. Under it will be a miniature box with 8 slots and one hole for shrinking a 4-pair cord.
- The next step is stripping the cable. It should extend about 10 cm beyond the wall. The rest is unlikely to be needed, so it can be safely cut off, leaving a few centimeters for stripping.
Advice! If there is a stripper, then it can be immediately cleaned with the corresponding end, and if not, then using a knife, draw a circle along the outer common braid and then remove it with a slight movement, tearing it at the cut point.
Important! This should be done carefully, since there is a high probability of damaging the thin copper wires located inside.
- Next, you should disassemble the pairs of cores into separate threads for the convenience of further work.
- The next stage is the most critical, since an error in the process of its implementation can cost the quality of all work, and as a result, all operations will need to be performed from scratch. The bottom line is to put the threads in the appropriate grooves of the prepared fragment with the port in the necessary strands of the stripped cord.
- For the correct execution of the operation, prudent manufacturers supplement the legend in the form of a sticker. It shows what color braided wire should be installed in the numbered slot.
There are two installation scenarios, both of which are fixed on the sticker. The first scenario is applied with a direct scheme, which assumes the following sequence:
But it is used exclusively when connecting devices of the same type, therefore, in this case, a script encoded under the name T568B should be used, namely, having a cross sequence:
According to the standard, serial numbering is performed, and there will be 4 marked slots on each side. In each of them, you should enter the appropriate wiring and pull it up to a characteristic click. If necessary, the wires can be pushed all the way with the blunt side of the knife blade.
Advice! When all the wiring is properly installed, you can check the correct assembly by connecting a patch cord to the port connected to the target device, for example, or a personal computer. The appearance of a network signal will indicate the successful completion of the operation.
- Before assembly, you need to cut off the excess wires, leaving a millimeter for reliability. Now, in reverse order, put on the cover and fix the element in the inside of the case.
- Then, using mounting screws, it is mounted on the wall or in a rosette cup with maintaining the level.
- And at the last stage, the outer decorative part is fixed, which does not carry a functional load.
- conclusions
As you can see, the difficulties in performing this process are insignificant. It requires a minimum of tools and a little care. If you need to install an external type of construction, then there will be an order of magnitude less problems, since installation is much easier.