And so friends, in this article we will understand why the free space on the “C” drive in the Windows 7 operating system disappears, and where it disappears. Now, in order, we will analyze all these moments.
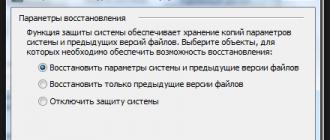
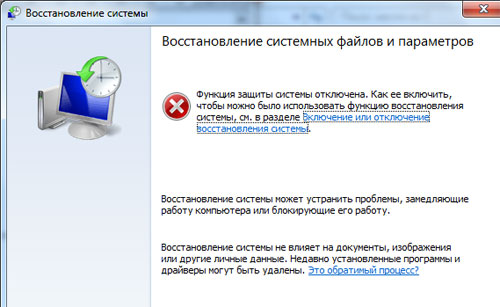
1. After installing the operating system, the System Recovery option will be enabled by default. It does not matter what your operating system is, it can be Windows 7 X32, or Windows 7 X64. In order to see how much space you have reserved for system recovery, right-click on “My Computer” and select “Property”, then “Advanced System Settings” and then select the tab “System Protection”. The figure shows that system protection is enabled.
Today in this thread we are going to share some simple and useful tips to get as much free disk space as possible. You can delete this folder to get a lot of free disk space. Be sure to check the contents of this folder before deleting it. If you find something useful, you can first make a backup of this file. Also create temporary Internet files of your web browser to get free space.
Disable sleep mode from “Power Settings” if you are not using this feature. Go to the System Restore tab and select the Disable System Restore on All Disks option and apply it. This service runs in the background and checks the status of system files.
You can configure the system recovery in Windows 7 yourself, or rather how much free space on the hard disk to back up for recovery. To do this, select the disk, in our case the “C” disk, then click on the “Configure” button. You will have such a window with settings as in the figure below, where you can independently allocate free space for restoring the operating system.
Now you can safely delete all files present in this folder. You will find many temporary files in the search results. Be sure to check all files before deleting. After searching you will get 100 files, just select them all and delete. All files in this folder are also used as wallpaper. When a hard disk partition is lost, do not create a new partition in the unallocated space and overwrite the new data in this partition. Otherwise, these operations will overwrite the lost partition and data.
The problem with the loss of the hard disk partition
Reinstalling the operating system, deleting accidentally deleted hard disk partitions, improper manipulation and viral infection can lead to the loss of a partition. Another important reason for losing partitions is damage to the partition table. is a kind of system file that contains important information about hard disk partitions, including the starting point and end point of a hard disk partition, file system, name, size, and other important hard disk partition information. If one of the hard disk partitions is lost, then how to recover the lost hard disk partition becomes relevant.
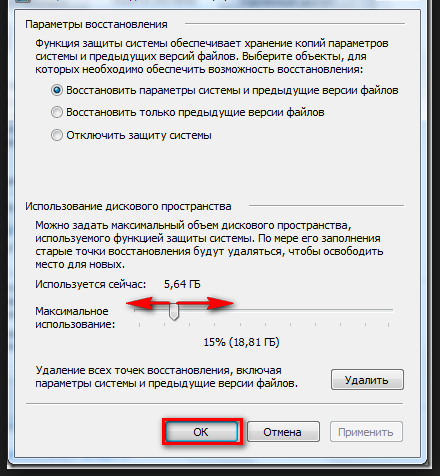
Depending on the size of your disk, select the necessary space to restore your operating system. Here you can turn off system recovery. Personally, I never use system restore, this option is always disabled for me. When can it come in handy? When for any reason your operating system “crashes”, when you start your computer by pressing F8, you can choose options for restoring your operating system, for example, “Last successful boot” or “System Restore”, and your OS will be restored. I will say right away, it can not always help all this and restore your OS.
This article describes step-by-step instructions for recovering data from lost or missing partitions using professional partition data recovery software. In fact, data still exists, and the partitions are not actually lost. But if it is badly damaged and it is very difficult to return the entire section. In this case, you will need data recovery software to find all the important data stored in the partitions.
How to recover a lost hard disk partition?
This software is designed to recover files from a lost or deleted partition. Below are step-by-step instructions on how to recover a lost partition on a hard disk with data.
Tips for deleting accidentally deleted partitions
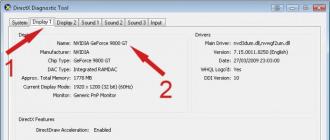
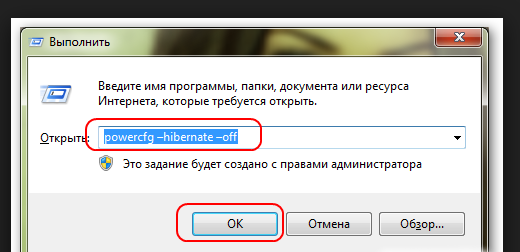
Recover lost and deleted or lost disk partition data on hard disk.2. A lot of free disk space “C” can be used under “Sleep mode”. This is the system file hiberfil.sys, as a rule it is located on the system disk, in my case it is the “C” disk. I do not use sleep mode, immediately after installing Windows, I disable it, because it does not always work correctly, and after the “Sleep” my computer was hanging. In order to disable hibernation in Windows 7 X32 or Windows 7 X64, you need to do the following. I’ll say right away that there are several ways to turn off the sleep mode, I’ll tell you about the easiest one. And so, to disable hibernation in Windows 7, just press the key combination Win + R, you will have the line "Run". In this line, enter powercfg –hibernate –off and click "OK". That's all, your sleep mode is disabled, as a result of this, you will have more free space on the "C" drive.
Step One will begin the quick scan. After it completes, a deep scan will automatically start to find more files. Recover lost partition data and create a new hard disk partition. After creating a new partition, you can reuse it to store data again.
Windows recovery system
Disappearance of disk space is a common scenario. Be that as it may, no matter how much we have, there is never enough disk space. When we collect photos and programs, more disk space is consumed, unless the files are deleted. Nowadays, so much happens on our computers, it is almost impossible to quickly and easily understand what exactly is taking place.
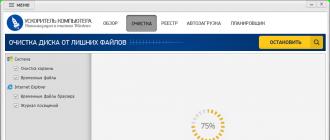
3. After installing the programs and operating system, you should always clean the Temp folder. Temporary files are stored in this folder, you can safely delete them. There are files that are not deleted, but do not pay attention to this, clean this folder. It should be cleaned periodically. It is located on the “C” drive in the Windows folder.
After the installation is complete, you are given the opportunity to run it or run it as an administrator. After the little blue progress bar disappears, the results will be completed. The most useful is that it is sorted by reducing disk space; the largest consumers of space are at the top. Memory is where your programs and data are located when they are used. Disk space is your hard disk where data is permanently stored or until you or the program explicitly erase it.
- When you turn off the computer, your memory will be deleted.
- To free up memory, you can run fewer programs at once.
- To free up disk space, you delete files.
Having done all these actions you will be able to free up free space on the “C” disk (System disk). Now you know where the space on the “C” disk in Windows 7 disappears and how to increase it. I will say straight away that these are not all options for cleaning the system disk, I told you about the simplest ones for a regular PC user.
You began to notice that recently the computer has begun to think and hang for a long time, and some programs do not want to run at all. The reason for this may be a simple lack of free space on the C: drive. After all, for the computer to work correctly, the system disk should have at least 2 GB of unused memory.
My laptop, for example, has eight gigabytes of memory, but 300 gigabytes of disk space. Disk space on the machine is almost always much larger than its memory. If you want to go deeper, you can simply expand the subfolder. In this case, this is actually a discovery for me, because this machine will never use sleep mode.
Hard disk partitioning is useful for creating virtual disks and creating disk volumes that can be used to store certain types of files. For example, if you do not want to store all of your media and documents on a disk, you can create a hard disk partition from which the new volume will be allocated. Many users are already familiar with partitioning hard disks, but the non-partitioning of a hard disk is another problem that some may not be familiar with. In other words, if you have partitions and you want to delete them and merge them to disk, how do you do it?
In this article we will look at ways that will help you free up space on the C: drive, and if you repeat at least a few of them regularly, then problems with free space should not arise in the future.
The first thing to do is move personal files from desktop to any other logical or physical disk. The fact is that all the desktop files are stored on the system disk, respectively, take up space. It can be music, movies, and various word, excel, power point, and other documents. Copy them, for example, on the D: drive or on any other.
In this guide, you will learn how to partition partitions on a hard disk, and then explain how to disable a partition when you need to free up space on the disk. There are several ways to open the disk management console. The easiest way is to go to the search window in the “Start” menu and enter “disk management”.
At the top of the resulting list, you should see that the “Control Panel” option is clearly indicated and highlighted. The disk management console will open. You will notice that all discs are displayed clearly. If you have never broken a section before, note that there are already three sections. The first is the recovery partition, which is required to restore the operating system if it becomes unavailable.
Second, look at the right side of the explorer in section "Libraries". Here you will see four categories: "Video", "Documents", "Images", "Music". Go to each of them and see what files are stored there. If they are standard, and you do not even know about them - feel free to delete. If your personal files are there, transfer them to another disk.
In fact, they include the operating system, with the exception of the third, which contains the main system files and free space. In fact, you will “cut down” a part of the disk, and it will become a separate partition. You can start doing this when the following window appears.
Improper removal of programs, cluttering your computer on your own
Specify the size for the new section. This is unallocated space and is not yet used. It needs to be formatted to create a healthy partition. This opens the wizard for creating simple volumes, which allows you to customize the formatting and the path to the disk using the assigned letter.
The third thing to do is clean the basket. The files deleted by the user from the computer are stored in it - that means you don’t need them, but they take up space on the C drive. Open the basket and click on the button. "Empty trash". An information window will appear, where you will be asked if you really want to delete these objects, click "Yes."
Here you can assign a drive letter and path. The default path will be a drive letter. If this is the first partition you create, the default drive letter will be used. In this window, you can select different file system types, specify a partition name, and enable file and folder compression.
You can do it for as many sections as you need. For example, when configuring dual boot, you may need to create up to three additional partitions for the second operating system to be installed. It is all up to you, and it is a completely different subject.

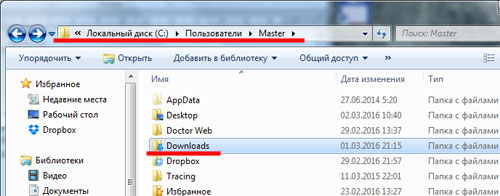
The fourth item is cleaning up the folder with the downloaded files. By default, this folder is stored on the C: drive, and if you download games, pictures, music, programs from the Internet, then each time it will take up more and more space. It is located: From: - "Users" - "Your computer name" - “Downloads”. Open it and delete all files from there.
After you have obtained the procedure for creating new partitions and you have used them, you can at some point find the deletion of partitions and the merging of disk space with the disk. To do this, you will need to open the disk management console again and select the partition that you want to delete. This will delete all data in the partition, but this is normal because you want to get free space again.
You will see that the section is now free. This will change it to unallocated space, which is the only way to merge this space back. This will delete the partition, and you will no longer see it, since the memory has been returned to disk.
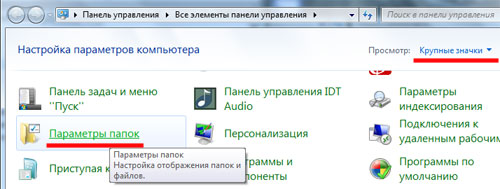
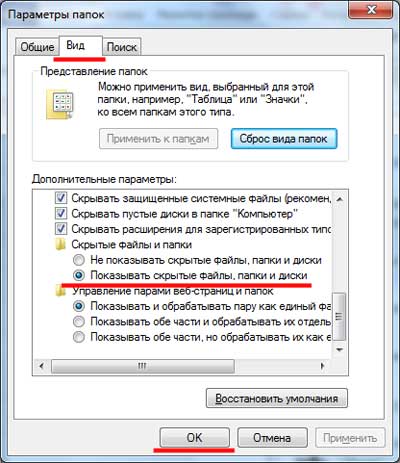
The fifth thing to do is clean folder with temporary files. If they fall into this folder, then they are of no value and can be safely removed. First you need to enable the visibility of hidden folders. To do this, go to "Start" - "Control Panel" - select view "Large Icons" - go to section "Folders settings".
Now you have successfully unmounted the disk and there is more disk space. If you have created several partitions and want to clear them all, continue to select “Delete Volumes” and then “Delete Partition” for each of them until you get one unallocated space and follow the instructions above to increase the volume for the disk.
The procedure is similar if you have several sections and you want to remove some of them. For example, if you have four sections, for example ,, ,,, and, you can remove only two. Follow the same steps as for the individual sections. They will come together as one unallocated space.
Here on the "View" tab, put a marker opposite the item "Show hidden files, folders and drives" and click "OK".
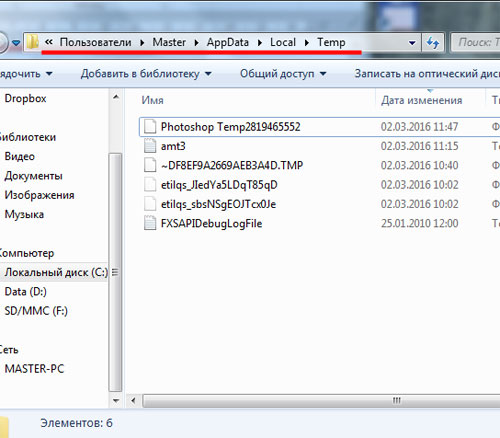
Close all windows and proceed in the following way: From: - "Users" - "Your computer name" - “AppData” - “Local” - “Temp”. Select all the files - Ctrl + A, and press Delete. If you want to delete files from the computer bypassing the recycle bin, press Shift + Delete.
When the wizard opens, select unallocated space from the list of available disks and add it to the delete list if it does not already exist. Regardless of how many sections you are going to do or how much you want to delete and divide, the procedures are the same as described above. Just be careful to avoid deleting the sections that contain the data you want to keep. Backup your system before deleting multiple partitions. This ensures that no data will be lost if you make a mistake when deleting the wrong partition.

As a result, in the Temp folder you will only have those files that are necessary for the operating system at the moment.
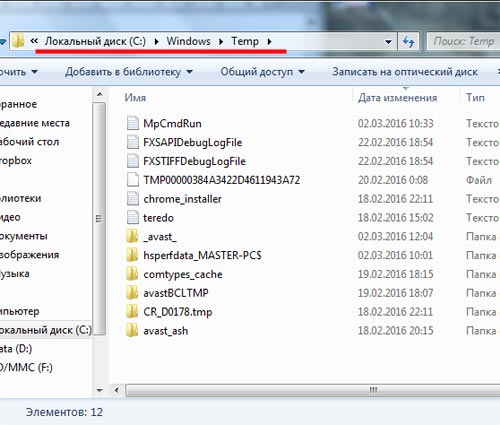
We are looking for another folder with temporary files on your computer: С: - “Windows” - “Temp”, and delete all files from it.
Deleting multiple partitions will be a problem only for users with larger hard drives or for users with smaller drives who have allocated too much space for partitions and not enough disk space. If you are working with multiple virtual machines and dual boot systems, this information can be very useful. This should give you the basic tools for managing your disk partition so that you can create any configuration you want.
Second, SSDs, slowly raising the tempo for storage, are mainly used as disks with a capacity of 512 GB or less. Last but not least, even if you have enough space on your computer, you can in any case free up disk space, since most of them are dead weight.
Related videos:
The sixth is remove system restore points. They are created either automatically, before installing some programs and drivers, or you created them manually. Go to "Start" - "All Programs" - "Standard" - "System Tools" - "System Restore".
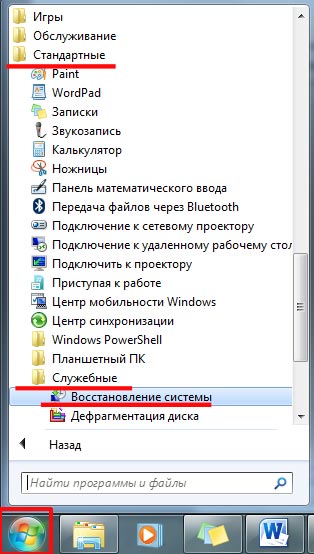
I have disabled this feature, so the window looks like this. You will see a list of recovery checkpoints which, if problems arise: an incorrectly installed program, drivers, etc., will help roll back the operating system to a working state. Leave one restore point, probably the last one, and delete the rest.
Related videos:
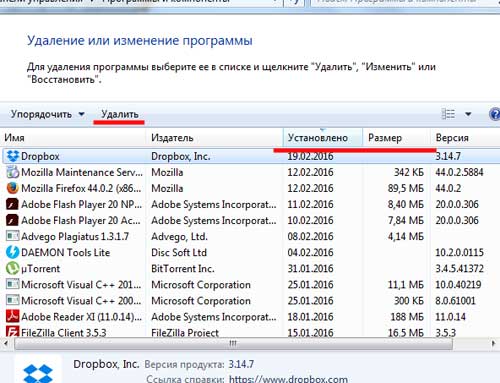
The seventh point, which will help us to clear the disk space C: - is remove unnecessary or unused programs. Go to "Start" - "Control Panel" – "Programs and Components".
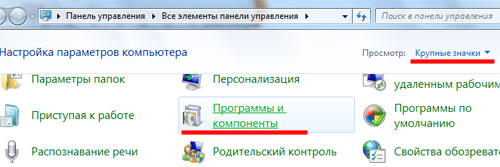
Here you can sort the programs by size, date, name. Review the list, and if you find programs that you have not used for a long time, feel free to delete them by clicking on the "Delete" button.
Related videos:
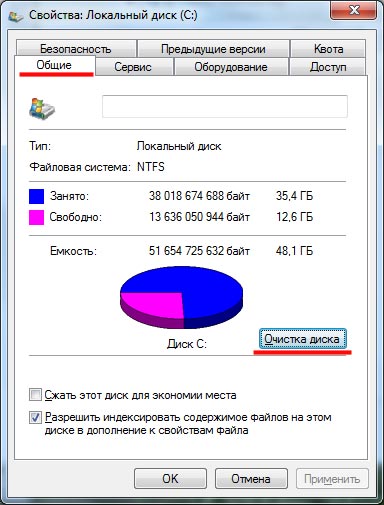
The eighth way to free up disk space C: is to clean the disk. To do this, use the standard program from Windows. We right-click on the C: drive and go to "Properties".
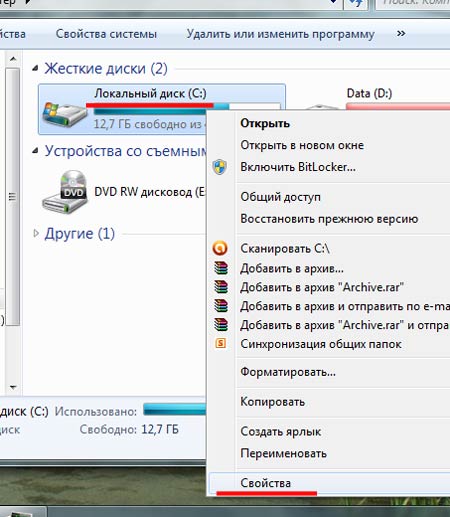
On the “General” tab, click on the “Disk Cleanup” button. Wait a couple of minutes for the program to perform the analysis.
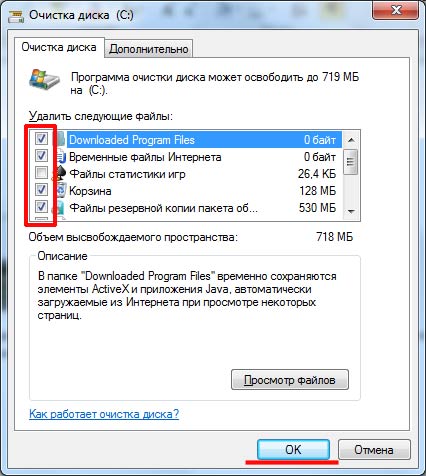
Check the checkboxes next to the items you want to delete and click OK.
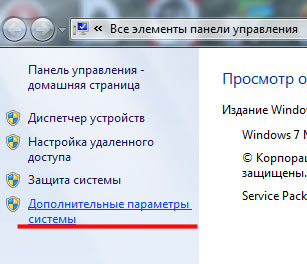
Ninth point - swap file transfer to another drive. The paging file is the virtual memory of the computer, when the program does not have enough RAM, it accesses it. By default, the paging file is stored on the C: drive.
To move it to another drive, right-click on the “My Computer” shortcut and go to “Properties”. Next, click on the link "Advanced system settings".
Tab "Additionally" in section "Speed" click on the "Parameters" button.

In the next window tab "Additionally" in section "Virtual Memory" Click "Edit."
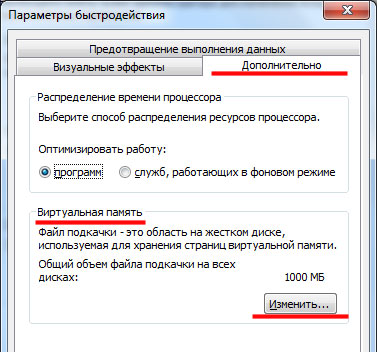
Now select the C: drive and mark the item with a marker. “Without paging file”, click "Set." Select any other disk, click on it with the mouse, mark with a marker “Specify Size” and set the initial and maximum size - initial, as the maximum amount of RAM, twice as much. Click "OK" and restart the computer.