Surely, every owner of a laptop or netbook faced such a problem as clogging the keyboard. Someone constantly eats over it, someone at all manages to spill coffee or tea on the keyboard. And it is good if, as a result of these barbarous actions, the technique remains alive and does not shorten anywhere. But in any case, sooner or later, the polluted keyboard will make itself felt: they will stop pressing any buttons, or, on the contrary, will spontaneously be pressed. What to do in this case? How to clean the laptop keyboard?
I have to say that there are two ways to clean a laptop keyboard. The first - a long and painstaking - to clean the keyboard itself. The second - fast and costly - contact service (or me). But not all service centers for repairing computers and office equipment will begin to tinker with your slapped clave, the minimum that they offer you is to turn it off as a device and offer you to use a plug-in external keyboard. The maximum of the proposed you service center there will be a replacement of the keyboard entirely, which is expensive considering the work and the waiting time, until the ordered keyboard is brought.
Disassemble to clean
So, the first thing to do is, of course, turn off the device and disconnect it from the network. Then you should disconnect the keyboard from the laptop (netbook). As a rule, manufacturers try to simplify the procedure for replacing keyboards on laptops, so it is mounted on top with a few snaps, which need to be pulled off with something flat. But sometimes there are also keyboards that are “soldered” into the top cover along with the touchpad and other buttons. In this case, you will have to poke around without disconnecting the keyboard from the device.
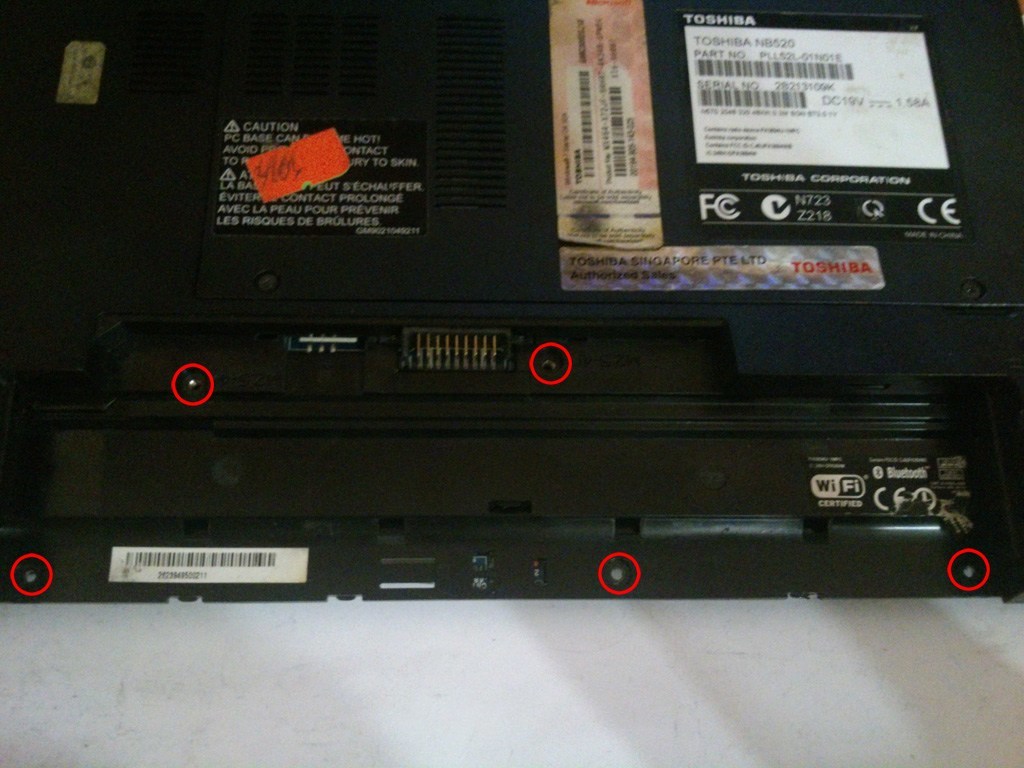
To remove the keyboard from a Toshiba NB520 netbook, you need to disconnect the battery from it. Under it are five cogs that need to be unscrewed.
Then you need to disconnect the small semicircular socket with the power button.
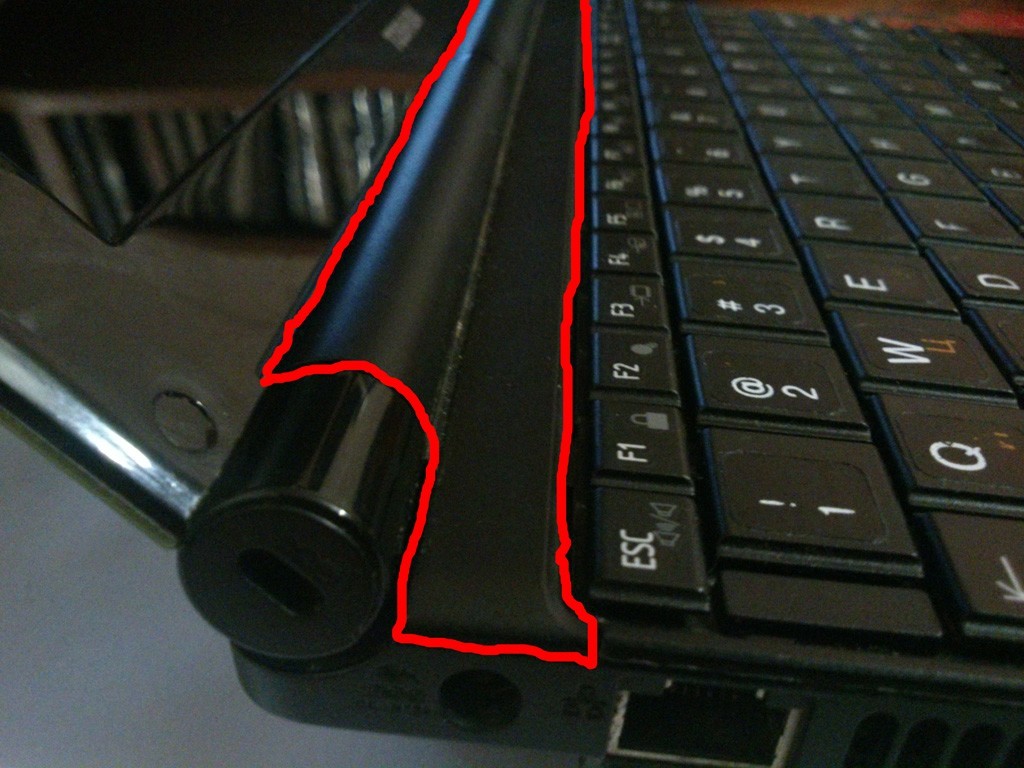
To do this, hook it with a flat thin screwdriver from the keyboard and snap it off. After removing the upper edge of the keyboard is available to us.

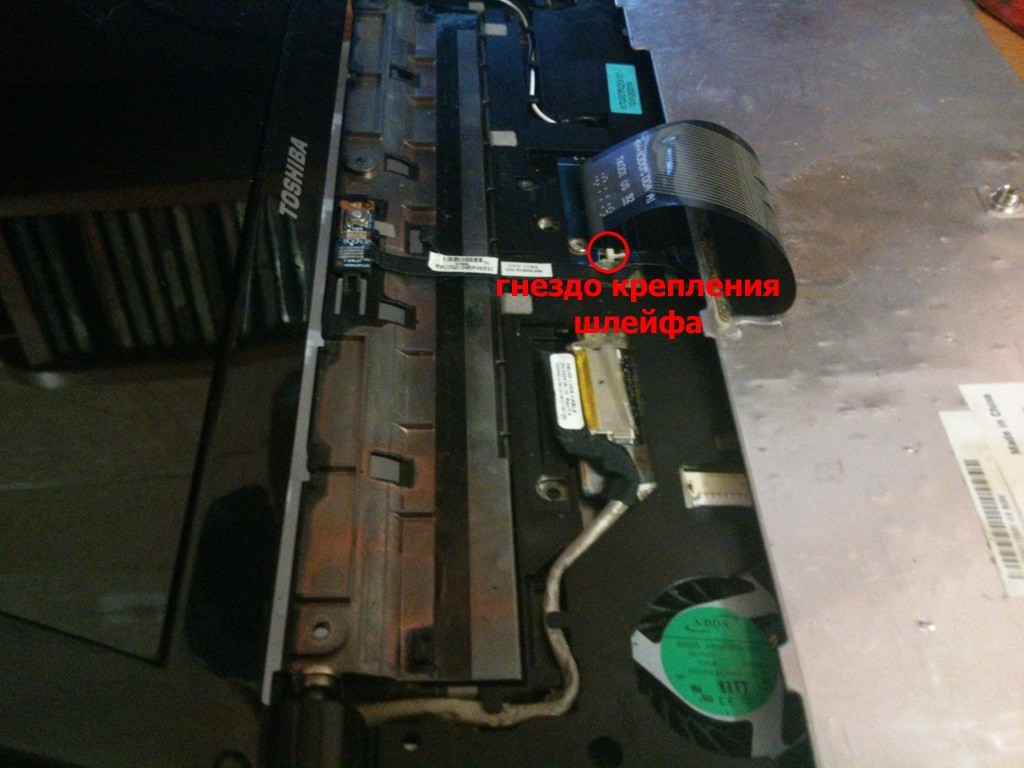
and it can now be removed from the case. Pull up the sides of the keyboard and release from the mount. Carefully turn over and pull the connecting cable out of its socket.
Everything, now the keyboard is available to us separately from the netbook. I got not too clean owner of this device:
Let's proceed to the analysis of the keyboard. This description will be relevant for owners of all keyboards with scissor mechanism. First you need to unfasten the keys from the keyboard case. They are mounted on the scissor mechanism itself, which, as a rule, has two types of fastening simultaneously for each key. The first is the antennae with the letter “G” entering the corresponding grooves on the key or in the keyboard case. The second - the slats, which are inserted into the slots of the keys or housing.
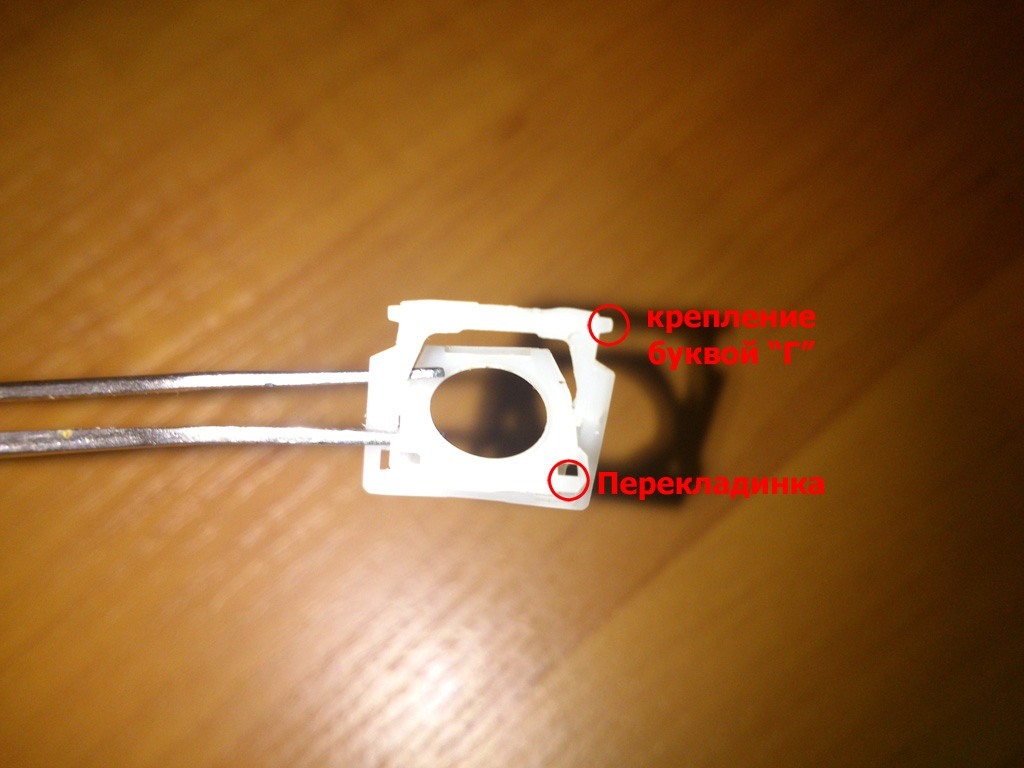
The antennae letter “G” is very, very fragile, so when you disconnect the keys should be extremely careful. The key must be disconnected from the side of the mounting-crossbar and in no case from the side of the antennae by the letter “G”! Therefore, first you need to slightly raise the key and look under it to find out the side that is fastened with crossbars.

Here it is, and it is necessary to delay the first. There will be two clicks - this crossbar will come out of their nests.
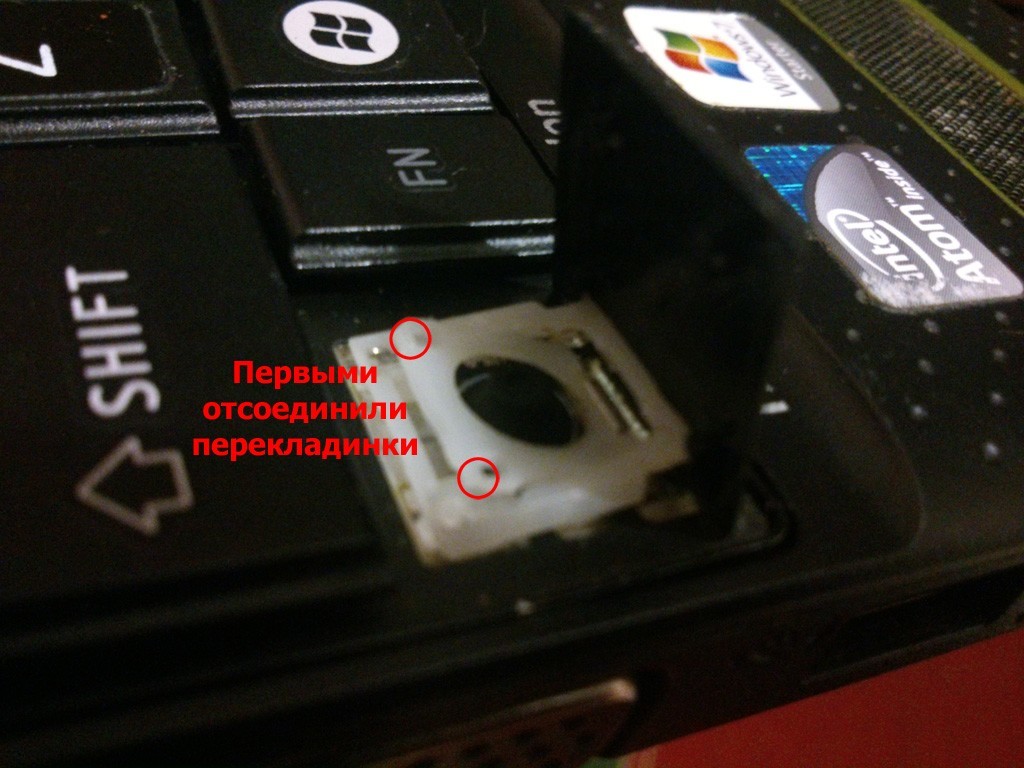
Now it remains only to disconnect the antennae. To do this in the direction of one of them pull the key, and it will be released.

The principle is mastered, now you can remove the remaining keys. For convenience, I laid them on the table in the same order in which they were on the keyboard. Before that, I, armed with wet wipes, showed an individual approach to each key and wiped it.
When all keys are unfastened, you can begin to remove the scissor mechanism itself. On different keyboards, it is attached to the body with a few differences, but the principle is the same - with its legs it clings to the small antennae of the case. We find the most mobile corner and we pull it, releasing from the antenna. Then we release another closest angle in the same way, the other two legs of the mechanism will not be difficult to remove from their seats. If the mechanism is contaminated, then it must also be wiped with a damp cloth.
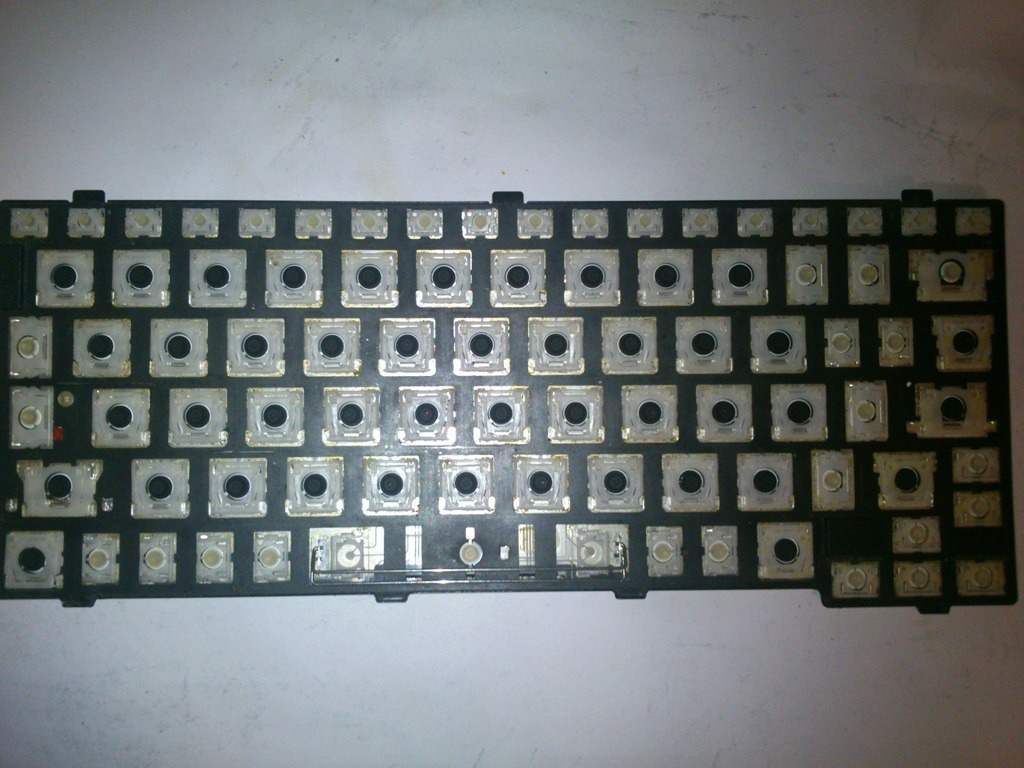
After all the manipulations, I got this picture:
![]()
And such a “smart” look of a dirty keyboard case:
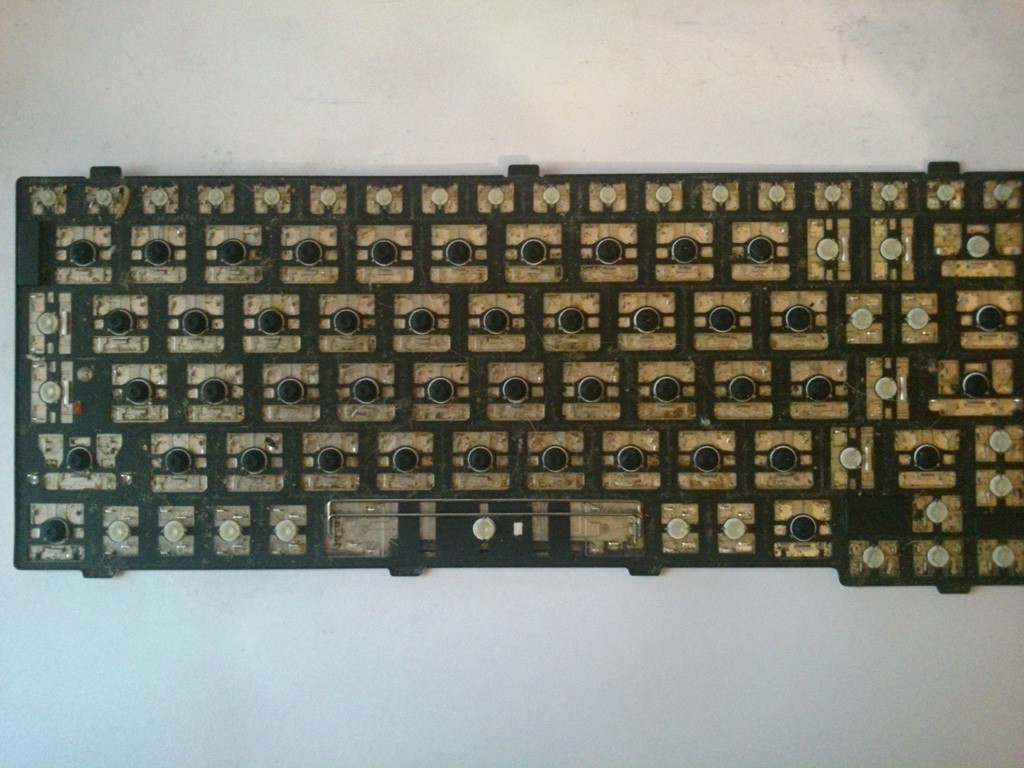
It should be said that under the keys in the center of the scissor mechanism are rubber caps, which carry out the closure of the contacts of the pressed key. I was lucky, on this keyboard, they were glued to the body, before there were removable. They should also be especially careful because they are very light and can "fly away" from the slightest exhalation.

You can start cleaning the keyboard itself. All the same wet wipes are primary rough cleaning of the surface. Then, armed with cotton swabs and alcohol-containing solution, cleaning is carried out more carefully. At the end of the "water procedures" you can assemble the keyboard in reverse order. At first we put scissor mechanisms into place.
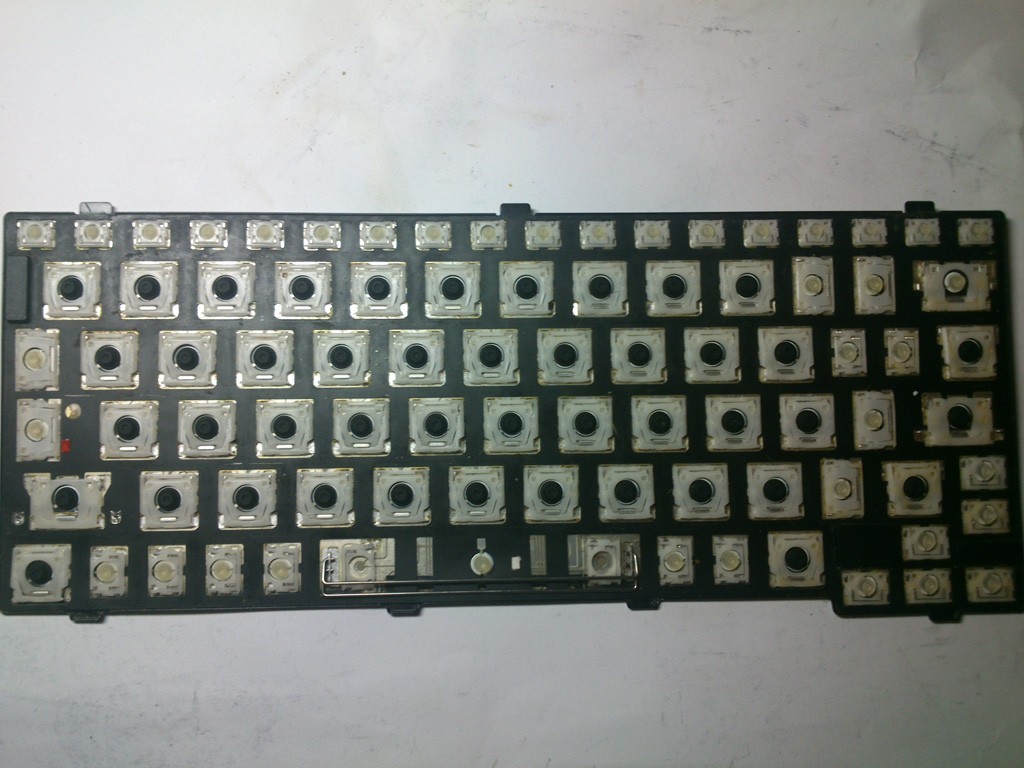
And then carefully latch the keys themselves. And that's what I got at the end:

Install the keyboard on a netbook in the reverse order.
I would like to note the fact that on some notebook keyboards, the back of the keyboard case, made in the form of a stretched foil film, acts as one of the contacts. Be very careful with her when cleaning the case, do not remember and do not tear it. Any deformation of this contact can lead to sticking of any of the keys during operation of the device.
I hope this article will help you deal with how to clean the keyboard netbook.