After creating an email account on Gmail, I recommend first of all to figure out how to set up gmail and make two important settings in your account. First, you need to control gmail Inbox, so as not to miss important correspondence that may fall into the spam folder. Secondly, pay attention to gmail securityto prevent attackers from taking over your sensitive information. Consider these two settings in order.
Gmail Setup # 1: Control Inbox in Gmail
The Gmail service has a built-in message filtering system, which, according to its rules, compiled by the developers of this system, automatically sorts letters and places them either in a folder Inboxor to the folder Spamming(Spam is the mass mailing of advertisements by e-mail without the consent of the recipient). A small problem is that sometimes this system may incorrectly recognize letters (after all, this is a “technique”) and place an important message for the user in the spam folder.
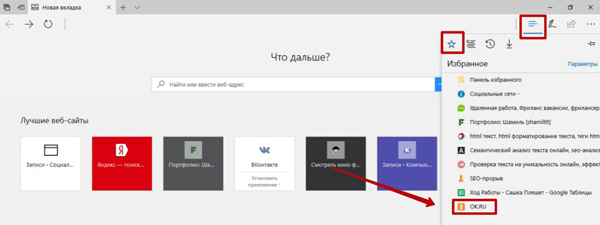
Therefore, in order not to miss important correspondence, I advise you to make a simple setup in your account. When you enter your mailbox, the initial system settings do not display the Spam folder. To check the spam folder, click on the additional link 6 more (currently) as shown in the picture. Additional folders will open, including the folder Spamming. To be sure that you have not missed an important letter, check this folder as well!
If you don’t want to constantly click on the link that opens additional folders, you can move the Spam folder to the main folders. To do this, you just need to left-click on the Spam folder and, holding down the left mouse button, move this folder to the area with the main folders and release the button. Everything! Now, if any message falls into the spam folder, you will see it. The same setting for displaying the Spam folder can be done in another way.

In the upper right corner of the account is a link to Settings. Going to and further to the tab Shortcutsfor any folder, you can specify: show or hide its display in the main folders.
 Now, when you receive letters either in the Inbox or in the Spam folder, you can decide for yourself: this is a normal message, or it is really spam and you can specify it. Consider a specific case. Let's say you subscribed to my newsletter. Checking the mail, you saw that the system automatically placed the received letters in the spam folder.
  To make it clear to the system that these letters have come to you because you yourself have expressed a desire to receive them, select these letters with checkmarks and click on the button: No spam. Next time, when the letters of my mailing will arrive, they will already be automatically placed in the folder Inbox. In exactly the same way, if in the future you notice in the folder Inboxletters that you did not ask to be sent to you, mark them as Spam, so that the system “understands” what to do with such letters in the future.
Gmail Setup # 2: Security in Gmail
Now let's move on to the second important setting. Let's pay attention to the security of logging in and out of Gmail. Regarding logging in to Gmail, the system’s Help itself says the following:
“If you use an insecure Internet connection to log into Gmail, such as a public wireless access point or a network without encryption, your Google account may be vulnerable to attack by cybercriminals. On insecure networks, it’s easier for an attacker to impersonate you and gain full access to your Google account, including the confidential data contained in it, such as bank statements or registration information. In this regard, the Always Use HTTPS option is used as the default setting. The HTTPS protocol (secure hypertext transfer protocol) is a protocol that provides secure data exchange with authorization and encryption. ”
This parameter "Use only https" Gmail developers made the default setting, as it is advisable to use it in most cases:

You can also check what type of connection you are currently using to Gmail by looking at the address bar of the browser that you use to browse sites (Mozilla Firefox, Opera, Internet Explorer, etc.). If a letter is added s, then the connection is secure. Everything is good! If not, then in the Gmail settings, in the section Are commonindicate: Use only httpsas shown in the picture above. And finally, I’ll mention a safe exit. When you finish working with your Gmail account and don’t want someone to be able to easily enter your mail after you, it’s necessary make the correct exit from Gmail.
For example, this happens in cases when you use a public computer that not only you work on. It can be at work, in an Internet cafe, or even just came to a friend and checked mail from his computer. So that after your departure no one can access your email account, ALWAYS click on the link Go outin the upper right corner of the page, as shown in the picture.
This must be done, because if you simply close the tab of the browser on which your Gmail or the browser itself is open without clicking on this link, when you open the tab or browser again, you can still access your account. And always keep your Gmail username and password in a safe place! But this is a separate topic for discussion.
So, in this article, we examined two main settings that I recommend paying attention to when using Gmail. Pay attention to the spam folder so as not to miss important emails, monitor the secure login using the https connection, and also use the secure login by clicking the Log out link.
Mail is the most important means of communication between work colleagues, long-distance acquaintances, relatives, friends, and other people with whom you would like to maintain a relationship. Some still prefer to write letters the old fashioned way, on paper, but this:
- uncomfortable;
- costly;
- prevents the preservation of the environment and ecology.
Using email on a mobile is no less simple than using a computer, and today we have prepared for you a detailed manual on how to implement setting up mail on Android in the Gmail email application.
There are 2 applications on Google’s mobile OS, with which you can simply and easily exchange electronic messages between users of the Gmail service, as well as available by default. The first is Email. It is simple, has an absolutely uncomplicated interface and allows you to connect the boxes of any services.
Perhaps soon we will prepare an overview of this pleasant and certainly deserving worthy place in the hearts of users of the application. But today we will talk about a proprietary utility from Google - a program Gmail. Unlike Email, it has much more advanced settings and allows you to fine-tune the synchronization parameters to suit your needs, has support for push notifications and contains a flexible system for sorting and filtering correspondence. For the Gmail application Android itself is perfectly suited, because it was here that the developers were able to fully reveal their potential and capabilities. About it and will be discussed later.
Just want to warn you that in the material presented we will talk about the version of Gmail for Android with the number 5.10.1128x. If you have a newer version, all the operations described below will probably be available to you.
The latest versions of Gmail for Android have much more voluminous functionality (for example, only in the updated package can you connect Outlook, yandex.ru and other mail-service mailboxes). Therefore, it is quite worth updating.
How do I find out the version of the Gmail application available on your smartphone before updating?
- run Gmail;
- click on the button to call the context menu on the smartphone, located on the left. A menu of additional options should appear. Select the item "Settings". This menu item contains all the basic aspects of setting up mail on Android;


- a mini form will appear showing the number of the active version of Gmail.

How do I know the version of Gmail after the upgrade?
In the new version of the program for working with e-mail, the interface has been completely redone, so the method for determining the version is different here:
- in the running utility, press the button with three horizontal lines in the upper left corner;

- select the last field “Help / review”;


Gmail application update procedure
We start the OS and wait until an icon appears in the notification panel with a notification about available new versions of programs. This requires a reliable network (Wi-Fi or fast mobile). Usually this happens a minute or two after loading Android (possibly earlier). Therefore, be patient.
Sometimes such an icon is not at all among notifications, but the update is still available.
How to check for updates if there is no push notification?
- go to the Play Store. Click on the button with three horizontal lines;

- select the item “My applications and games” in the menu that opens;

- here we see that there is an update. New versions of available applications in this menu are displayed above the list of already installed programs. If you know that there is a new version in the Play Store, but it still doesn’t appear on the list, you’ve probably upgraded Gmail to the maximum available version, or your operating system needs to be updated. Consider upgrading to the official firmware of the new version, if it is on the server, or you should install custom firmware for your smartphone model (CyanogenMod, MIUI, Paranoid Android).
So, the update is in the list, and you want to install it.
- click on the “Update” button, and again “Update” on the page of the update profile;


- confirm the relevant permissions and click "Accept";

- after downloading the package, the program is ready for use.
So, all the preliminary preparations are completed, and we can begin to work with the program itself.
The very first thing we would like to tell you about is the basic principles for setting up mail on Android, namely adding a mailbox. In Gmail, you can add not only mail boxes from Google, but also any other accounts that support POP3 / IMAP for receiving and SMTP protocols for sending letters.
How to add a service mailbox from Google (Gmail)?
To attach a Gmail email account, you need to follow a few simple steps:
- in the launched application in the main menu (again, called by pressing a button with three horizontal lines in the upper left corner) select the "Settings" field;


- on the new form, select the option “Google - Gmail or Google Apps” and click on “Next”;


- enter the name of the electronic box and the password to it;

- at the first entrance, we note whether you want to receive a newsletter about new programs and updates from the Play Market;

- if everything went well, a message appears about entering the account and a proposal to synchronize its various components. We mark the points we need with checkmarks and go to the account;

- a new mailbox appears in the list of connected email addresses, which confirms the success of our actions.

Setting up mail on Android - how to add a personal mailbox from another web service (everything except Google)?
Gmail is a fairly flexible program, and in addition to Google’s mailboxes (which, by the way, have the same domain name as the name of the presented mobile program, is Gmail. Let this not confuse you) you can add any other email accounts services. How to do it?
- in the "Settings" menu, select the "Add Account" field. We mark the option "Personal (IMAP / POP)";

- enter the email address (required with the domain name);

- select the type of account that will be used to receive messages.
Different web services use different accounts. To find out which one you need, use the search engine. For example, for the e-mail service yandex.ru settings will be as follows: link.
It also shows the addresses of the POP3 / IMAP and SMTP servers and the numbers of the ports used, so this information is vital for connecting such a box.

- enter the password for the mailbox;

- on the following form, enter the server name for receiving letters, port number and type of protection. If you also connect a box from Yandex, all of these parameters can be viewed at the link above;

IMAP configuration is painless for the operating environment and quick for the user, so don't be afraid of new terminology and notation.
- if the settings are entered correctly, we do the same for the SMTP server, namely for outgoing messages;

- finally, at the final phase we are offered to configure several parameters.
Sync frequency - this is the period through which the phone’s account will synchronize with the Google server, as a result of which all new letters will be sent to your smartphone.
Notify me of new emails - a function to configure the appearance of push notifications in the upper part of the working window on the receipt of new correspondence.
Sync mail from this account - whether mail for this account will be synchronized with the remote Google web server.
Download attachments with Wi-Fi connection - if a reliable and fast Wi-Fi connection is established, then when you establish a connection, attachments will be copied along with the letters on the phone.

- final phase - entering the optional abbreviated name of the accounting service and your name, which will be displayed in the sent letters.

Finally, everything is ready - the account is added and ready to go.
Summary
In the article presented to your attention, we described only the initial settings for the Gmail mobile application for Android. Next week, our editorial team will prepare for you a guide with more in-depth customization techniques for this flexible and incredibly functional software tool (the article "" has already been published), after which you will see that setting up mail on Android is a fascinating and interesting exercise.
Email Gmail in its functional characteristics is not inferior to stationary and in some cases even surpasses them in terms of convenience and some other technical capabilities.
After setting up Gmail, the mailbox will be accessible from absolutely any device that can access the Internet, so you can forget about such an unpleasant thing as synchronization. Even judging by the reviews of Web users, Gmail has been holding a leading position among all popular email clients for a long time.
Opportunities
Along with the convenience and functionality, the mailbox is distinguished by the presence of one of the most “smart” spam filters, which takes into account the results and conclusions of the search engine from Google. The Gmail inbox automatically sorts incoming correspondence according to the established settings, taking into account their importance, content and address of the sender.

The client can receive and send letters from all of your third-party mailboxes, and even in such a way that the recipient does not doubt at all that the letter came from exactly the mail where it was sent. Here you can add the most modern Internet protection: invisible protocols, IP alerts, flash access and much more.
How to create a mailbox in Gmail?
Mailbox registration takes place at gmail.com. It should be noted right away that the address gmail.ru has nothing to do with the client, and it doesn’t have any relation to Google, so you should not contact the last resource to avoid problems.
As such, getting a mailbox address is a kind of bonus when creating an account in Google, and if you click on the gmail.com link without having it, the settings wizard will immediately suggest correcting this misunderstanding.
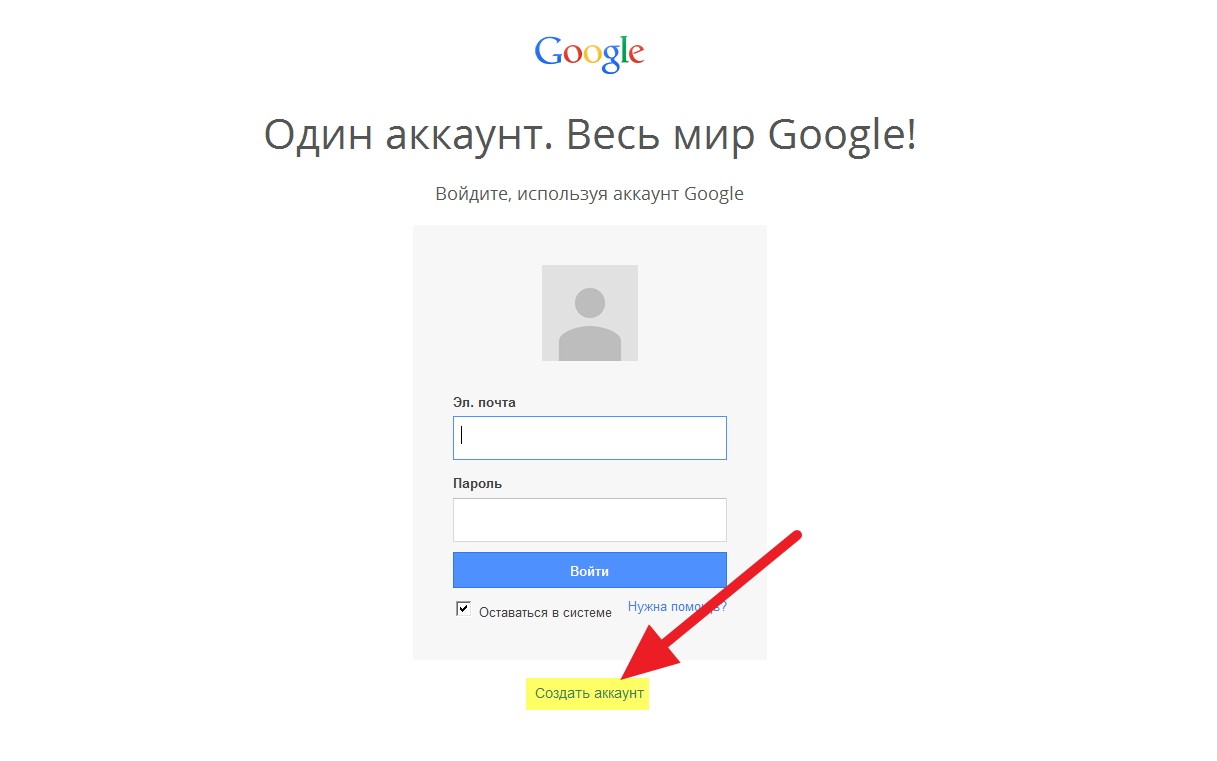
Account creation
By clicking on the "Create an account" button, you will find yourself on the "Gmail registration" page, where in the web form you will need to carefully fill in all the fields. The huge popularity of the client makes it almost impossible to register the desired address, but if you show a little imagination, you can get something more or less suitable for you or your business.

For example, you can insert dots in the name of the mailbox (Gmail login), which means that it is permissible to use domain names with a middle name, which are likely to be unoccupied. It should be noted that the reliability of the data must correspond to the tasks that this particular mailbox will perform.
Passwords and protection
The https protocol provides protection, but no one has yet canceled the human factor, so be careful when choosing a password for the mailbox. A simple combination in the form of a birthday or simple numbers (QWERTY, 123456, 12121990) can cause hacking and, in some cases, theft of funds, because most payment systems work through an email client.

At the next stage of registration, you will be asked to enter an alternative email address or phone number. It should be understood that non-existent data or a dummy number can play a trick on you if you lose access to your Gmail email client in the event of a hack or password change procedure.
Next, you need to fill out the remaining fields and agree to the terms of service from Google. Then send the data to the server, and you can safely open the Gmail mailbox. Logging in is via the username you created and password.
Security Settings
The first thing the client settings wizard recommends is to visit the security section. We click on the gear in the upper right corner and select the item "Configure Gmail mail client". On the very first tab in the "Connection Security" section, put a beacon in the "Use only https" field. After that, the web interface of the mailbox will go to an encrypted channel and a secure data exchange protocol, which in the face of an abundance of hacker attacks will be clearly out of place.

For example, if setting up Gmail and receiving emails was performed by a third-party stationary program (through which you collect all correspondence), then the columns “Type of access” should contain the names of the browser or your mobile phone. If you find a protocol for collecting POP type letters, there is a reason to be wary and turn to the special page responsible for protecting your correspondence - “Gmail Security Check”. There, step by step, you can control all incoming and outgoing letters along with collection protocols.
If your data is extremely important for you and your business, then you can configure your Gmail inbox through two-step authentication (password + mobile phone + alternative client). As the saying goes, there is never much security, so it’s better to take care of it before, and not after, your box has been hacked.
Labels and Filters
For a more thorough sorting of letters, you need to configure the Gmail mail client in the "Labels" and "Filters" sections. The latter can completely automatically distribute all letters in different folders (labels), taking into account the signs of incoming correspondence set by users.
The shortcut in its functionality is close to the already familiar concept of "folder", but has several additional properties. By default, the client already has predefined shortcuts and folders located on the left side of the screen, but the user is free to customize them to his desires and needs.
After you select the "Configure Gmail" menu item, you can go to the "Labels" section and use the simple "Yes" and "No" markers to customize the appearance of incoming mail.

The section has the ability to create new shortcuts, delete old ones, assign them a degree of importance and change their way of displaying in the client.
Generally speaking, a mailbox can be configured and organized into all available letters, as if this is information on your hard drive - the principle is the same: folders - files, shortcuts - folders. Correct setting of Gmail and filters will allow you to automatically scatter all incoming and outgoing correspondence according to the specified parameters, excluding the routine that competing email clients are not deprived of.
Import contacts and letters from third-party mailboxes
After the "move" to Gmail, you will surely have plenty of contacts and tons of letters in third-party clients. Transferring them to Gmail takes place automatically after making the necessary settings.
The client also allows you to receive at your address all letters that come to other mailboxes and send them without changing the old outgoing address.
Import Settings
All settings can be made on the “Accounts and Import” tab. In the "Import mail and contacts" section, click on the "Import mail and contacts" link, and then follow the instructions in the wizard. It will take the actual address of the old mail and the password to it, so that Gmail can receive correspondence to its client. While working with the settings wizard, you can choose what exactly you want to import by putting the necessary marker in the selection menu.
The rest of the mail client settings can be left unchanged and left as is, by default. They are responsible for the appearance of the box, language packs, page display mode, keyboard shortcuts, response templates, and more.
After creating your Gmail inbox, we recommend that you understand the settings. In order to prevent theft of confidential data by intruders, the user needs to check the security settings. In addition, setting up Gmail allows you to avoid situations where important correspondence falls into the spam folder.
Top of page
Here you can see the block for quick access to Google services. When you reply to a published comment, the user receives a notification. It is displayed as a number in the quick access box. When you click on the icon, the page with the last comment opens, where you can answer the person you are talking to.
The Google+ button is for adding notes to the “wall”. It should be noted that event reports are automatically published on the user’s page. In the right corner is an avatar. By clicking on it, you can change information about yourself or go to the main page of the Google+ service.
Verification of parameters
To configure Gmail, click on the hexagon icon. A pop-up menu will appear in which you must select the item with the appropriate name. A new page will open. Almost all Gmail inbox settings are clear by name. The user needs to focus only on those parameters that cause difficulties.
A chain of letters is a grouping of messages that the author receives in response and sends to the same point. To see the whole conversation, just make one click. The numbers indicate the number of letters in the conversation. Stars are the notes in the list opposite each message. If in this section the user puts not “1 icon”, but something else, then he will have access to several options for icons.
To mark an important message, click on the rectangle to the right of the star. After a second click, the letter becomes normal. If the user wants to change the color of the icon, then he can add the desired group of stars by dragging the icons with the mouse.

Desktop Alert
This is a short pop-up message. It is displayed only in the most popular browsers. The user can enable the option of receiving notifications by e-mail or in Google Talk chat.
In the section "Ad selection criteria", you should choose the advertisement that will be displayed on the pages of the service. If the user wants to leave a signature in each letter, then he must enable the corresponding option.
An answering machine is used to send a pre-prepared message. Most mail servers correctly display the UTF-8 encoding. This parameter must be changed if the message recipient sees strange characters instead of letters and numbers.

Section "Labels"
With it, you can configure virtual folders. Near the item “show in the list” is a list of folders (shortcuts). Near each object two parameters are displayed: “yes” and “no”. Having chosen this or that value, the user can adjust the visibility of each folder in the left menu.
The “Send letters as” function allows you to send messages to recipients from other Gmail mailboxes without leaving your account. This option is needed for those who use an account to log in to other useful Google services. Here you must specify the name that the recipient of the message will see. When setting up Gmail, the user will notice that the service can regularly pick up letters from other servers. To enable this option, you need to have at least a superficial understanding of the terms “port” and “network protocol”.
The user can provide access to the account to other people or to himself if he has several accounts in the Gmail service. The “Show in IMAP” setting allows you to enable the display of folders in external mail programs.
Inbox
The importance markers are the marks in the list of letters with which you can highlight important messages. If the user does not need this function, then he simply turns off the option.

Accounts and Import Tab
The account password is changed here. The user can import letters from the Yandex.Mail service. Setting up Gmail allows you to access messages from Hotmail, Mail.ru and other accounts. To import letters and contacts, just enter the password and address of the old mailbox.
Filters Tab
This tool is used to create various rules under which received messages fall into the folders selected by the user. Service can filter letters. Messages containing obscene speech will be sent to the Spam folder.
Forwarding and POP / IMAP
On this page you can configure the export of letters to other electronic mailboxes. Protocol access for receiving POP / IMAP messages is used by mail applications. When setting up Gmail.com, an account owner who does not work with similar programs may skip this tab. At the bottom of the page there is a link to detailed instructions for setting up email clients.

Chat Tab
Here are all the settings for Google Talk. The user can select a microphone and a video camera, check connected devices, activate chat.
Lab Tab
On this page there are additions to expand the functionality of the mailbox. Google does not guarantee the smooth operation of plugins. Extensions may disappear at any time. Therefore, the user installs plugins at his own risk.
Offline Tab
Here you can switch to offline mode. If the browser extension is not already installed, the service will prompt the user to download the plugin.
Themes Tab
This page will interest those who like to experiment with the appearance of the mailbox. The user can install any topic they like.
Configure Gmail in Outlook
To get started, you need to enable POP in an available Gmail account. Then click on the “Save Changes” button. Then you need to start the Outlook program, open the “Tools” section and switch to the “Accounts” tab. After clicking on the “Add” button, click on the “Next” link. In the line “Server type” you need to select POP3.

Gmail Mail Server Settings
Next, the user must specify the email address. In the two fields intended for entering information about the server, the phrases pop.gmail.com and smtp.gmail.com should be alternately typed. Then you need to specify the username and password for the account. After clicking on the “Other Settings” link, you need to open the “Outgoing Mail Server” page. Authentication is required here.
Next, check the box “Use the settings of the incoming server”. After that, you can switch to the “Advanced” tab. Next to the POP3 and SMTP parameters is located the item “Require encrypted connection (SSL)”. The user needs to enable this option. Next to the SMTP parameter, enter 465.
After that, you can click on the OK button. Next, go to the active link “Check account settings”. You’ll see a notification that Gmail’s mail setup in Outlook is complete. The user needs to close the window with the message, click on the “Next” link and click on the “Finish” button. To avoid serious errors when using the utility with Gmail, you can download the program update.
Sending electronic e-mail messages is one of the main operations that are constantly used in office work. The introduction of business correspondence, sending commercial offers, or just chatting with friends - all this became possible thanks to the use of e-mail, and knowledge of how to configure the outlook client to work with gmail mail.
Let's look at it from the technical side. To ensure the possibility of sending e-mail, we need a certain service that will take care of the technical support of the process, and a client program in which we can create new messages and view the received ones.
From this point of view, the Microsoft Outloock email client and the Gmail email service from Google are the most popular at the moment. And now we will show you how to set them up properly for collaboration.
Technical information
To get started, let's get acquainted with the technologies that are used in the process of creating and sending electronic messages. And then we'll see how the Gmail mail service will work in outlook.
Mail client
A program that provides the user with a graphical interface with which you can create, edit and send electronic messages. The mail client also stores incoming mail, providing the ability to view and read it.
Post service
A special software package that takes on the task of ensuring the transmission of e-mail messages between users - both their own and users of third-party services.
SMTP protocol
Modern protocol used for sending electronic messages
POP3 Protocol
A modern protocol that allows email clients to receive electronic messages by downloading from a remote mail service.
Configure Outlook mail client to work with the Gmail mail service
So, start Outlook - you should see the main program window in front of you:

Now you can go directly to configuring gmail for outlook.
Press the "Service" button in the menu bar, and in the window that opens, the "Create" button:

A window will open in which we need to check " Manual settings ...". Install it and click" Next. "

In the next window, set the " Internet Email"and click" Next ":

A window for entering parameters will open. Here you need to fill in the following fields:
- Enter a name - enter from the keyboard the name of the user who you want to assign to this account
- E-mail address - enter your email address registered in the Gmail service. The address should be in the form [email protected]
- Account type - select the POP3 protocol
- Incoming server - write pop.gmail.com
- Outgoing server - write smtp.gmail.com
- User - specify the address of your account, without @ gmail.com. To make it clear, if in our example the username example @ gmail.com is in the "User" field, we should type example
- Password - indicate your secret password that was assigned during registration in the Gmail service
- Put a tick " Remember password"
Test data entry is shown in the figure below:

Now we need to configure additional parameters. Press the button " Other settings". In the window that opens, we are interested in three tabs:
Outgoing server
Here we need to check the box next to " SMTP server requires authentication"and then select" Similar to incoming mail server". An example in the image below: 
Connection
Here should be selected the item " Through a local area network"as shown in the image below: 
Additionally
The most important point. What options should be selected here:
- POP3 server port - dial 995
- SSL encryption required"
- SMTP server port - 465
- Type of encrypted connection - select "SSL"
- Check the box next to " Leave copies of messages on the server". This is necessary so that you have a backup of your messages in the mail service itself.
An example of settings is shown in the figure below:

When done, click OK, and return to the account settings input window. Now all that’s left is to check the parameters are correct - for this, click the " Account Verification". If the test sending and receiving messages passed without errors, then you and I have correctly configured the Outlook client to work with Gmail mail. You can use it.
Conclusion
Google’s Gmail service is one of the most used free email services. It has almost all the necessary functionality for working with electronic messages. The user-friendly interface provides a pleasant work process, and the security settings are configured in such a way that you will be protected from spam, and your correspondence will not be available to attackers.
If you prefer to use local versions of email clients, then Microsoft Outlook is the best choice. He copes with the tasks assigned to him.
If you encounter problems when trying to download a file from exchangers, look for recommendations in the material -.
To connect the computer to the TV, use.
Why look for information on other sites if everything is collected from us?