Part 2: Work with Wi-Fi jammer, based on ESP8266
For the module requires power, it can be powered from USB computer port / power supply 5v or as in my case from UMB (PowerBank).
Spoiler: Photo example
Now from any device, we need to connect to an access point pwnet which our module created (Password deauther) .
Moving from browser to "any" device at To view the link Login or Register , here we are warned that this thing is legal to use only on your own network:
Spoiler: Admin panel


- APs- Search and select Wi-Fi hotspots
- Stations- After selecting an access point, you can scan it and view all connected devices. I don’t know why, but the device didn’t find raspberries. (Raspberry Pi3)... Perhaps this is somehow connected with the fact that the module has a very weak antenna, and simply does not reach it. (Lies 2 meters, in a box)
- Attacks- here we can choose the type of attack. (Description below)
- Settings- Setting up the device, for example, the name of the created network and its password, you can examine in more detail for yourself. You can also reboot the device in this tab.
Deauth - Actually herself function-jammer, directed to all access points selected in the first tab.
Beacon- Floods, creating a cloud (Up to 48) wi-fi networks. The networks themselves can be either named / created by you at the bottom of the tab, or created automatically - fortunately, there is such a function.
Probe-Request- DDos attack on the access point (I did not find a description of her, I say as far as I understood myself), extremely useless thing as for me. The result of enabling this function: The admin panel of the router is in perfect order, just like it is. You can also connect to the AP, the signal is stable.
My opinion. A fucking huge disadvantage is that this module has a very weak antenna. For its normal operation, buy another module. Unplug this one from the board, insert one, and then you will be able to connect the antenna. I haven’t found any other way out yet, maybe you know - write to me. For as I understand it, if we solder a regular antenna right here, then we will burn this module.
A Wi-Fi jammer, or a Wi-Fi jammer, is a gadget designed to disconnect wireless devices from a hotspot. Why is this needed? You can imagine both a friendly prank (a neighbor, of course, will be glad when you cut off his porn video or, for example, a football match at the most interesting place), and a criminal application: an attacker can disconnect security cameras or other important equipment from the network. In this article, we will analyze what inexpensive options for hardware deauthenticators are, how to use them, and how to defend against such attacks.
How does the "jammer" work?
Unlike real jammers, which interrupt the signal of the radio transmitter with their stronger signal, the deauthenticator works at the software level. It implements a denial of service attack by sending a deauthentication frame to the router on behalf of the devices connected to the network. Since this frame is not encrypted in any way, it is enough for the jammer to find out the MAC addresses of the devices by sniffing the traffic on the network.
Usually, deauthentication is part of a complex network attack. It is used to create an "evil twin" of the access point or to intercept a handshake, which then allows you to decrypt the password. However, a jammer can be useful on its own.
WARNING
All of these tips are highly recommended for educational purposes only. Blocking the transmission of data and the use of the considered means may be punishable by law. Penetration testing requires written confirmation from the customer. Remember that deauthorization data is saved in the router logs.
Recently, inexpensive and miniature boards with support for the NodeMCU software platform have become very popular. They are built on the ESP8266 module, which implements work with Wi-Fi using the 802.11b / g / n standard at 2.4 GHz. Now there are two variants of such boards: with the CP2102 chip of the American company Silicon Labs or with the Chinese CH340.

These boards are positioned as devices for prototyping: on their basis, craftsmen create automated systems controlled over Wi-Fi. The topic itself is quite exciting, but we are now interested in something else - the possibility of using NodeMCU to carry out attacks.
Due to technical limitations, the ESP8266 is unsuitable for full monitoring and packet injection, but it can be used as a deauthenticator - which led to the appearance of the corresponding firmware. Last year, a good man with the pseudonym Spacehuhn released the first of them, but since then there have been other versions with additional features. However, before moving on to the software, let's decide on the choice of hardware.
INFO
If you choose more serious wardriving equipment - with a monitoring mode and maybe even the ability to carry out MiTM attacks on the network - then check out our last year.
I will demonstrate the process using the example of a board from the Chinese manufacturer Dstike: it has an ESP8266 and has modes of operation as a client (P2P) and an access point (soft-AP). The board can be controlled from a smartphone or any other device with Wi-Fi.
Note that the performance of the software does not depend on the chip or the board - you can choose any option at your discretion. There are several variants of Dstike products in different designs and for use in different situations. All of them have one thing in common - the ability to jam networks.
Varieties of Dstike devices
Deauther wristband- bracelet with built-in display, battery and switch. Convenient device for quick access to the control panel.

Deauther Power Bank- with a modified charge controller; control is carried out through a special panel. The controller has a connector for connecting an external antenna. Batteries are not included. It is a discreet device that can be easily dropped off and used remotely.


Deauther OLED V3.5- in this version, you will additionally receive a connector for connecting an external antenna and a holder for a 18650 mAh battery. The device is controlled using buttons and a switch, and the output goes to the screen, which allows you to use this option without additional equipment.

The main advantage of these gadgets is the ability to select a specific network or all at once within the range of the device. Just in case, I would like to point out that you don't need a Wi-Fi password to carry out attacks! 🙂
Installing Deauther 2.0
Let's start with Deauther 2.0 - the very firmware that Spacehuhn developed. In its GitHub repository, you can select the version for a specific board.
Files with the bin extension are compiled sketches. They need to be installed on the board through a special bootloader. But if you want, then in the archives with the source code you will find libraries and sketches that can be delivered through the Arduino IDE.
Continuation is available only to participants
Option 1. Join the "site" community to read all the materials on the site
Membership in the community during the specified period will open you access to ALL Hacker materials, increase your personal cumulative discount and allow you to accumulate a professional Xakep Score!
How WiFi jammer works
Unlike real jammers, which interrupt the signal of the radio transmitter with their stronger signal, the deauthenticator works at the software level. It implements a denial of service attack by sending a deauthentication frame to the router on behalf of the devices connected to the network. Since this frame is not encrypted in any way, it is enough for the jammer to find out the MAC addresses of the devices by sniffing the traffic on the network.
Usually deauthentication is part of a comprehensive network attack. This attack is used to create an "evil double" access point or to intercept a handshake, which then allows you to decrypt the password. However, a WiFi jammer can be useful on its own.
All the tips discussed in this article are highly recommended for educational purposes only. The blocking of data transmission and the use of the considered means may be punishable by law. Penetration testing requires written confirmation from the customer. Remember that deauthorization data is stored in the router logs.
Recently, inexpensive and miniature boards with support for the NodeMCU software platform have become very popular. They are built on the ESP8266 module, which implements work with Wi-Fi using the 802.11 b / g / n standard at 2.4 GHz. Now there are two variants of such boards: with the CP2102 chip of the American company Silicon Labs or with the Chinese CH340.
 NodeMCU versions
 These boards are positioned as devices for prototyping: on their basis, techies create automated systems controlled by WiFi. The topic itself is very interesting, but at the moment we are interested in something else - the possibility of using NodeMCU to carry out attacks.
Due to technical limitations, ESP8266 is not suitable for full monitoring and packet injection, but it can be used as a deauthenticator - which led to the appearance of the corresponding firmware. A year ago, a good person with the pseudonym Spacehuhn posted the first of them, but since then other versions have appeared - with additional features. However, before moving on to the software part, let's decide on the choice of devices.
If you choose more serious equipment for wardriving - with a monitoring mode and maybe even the ability to carry out MiTM attacks on the network - then check out our previous article.
Within the framework of this article, I will demonstrate the process using the example of a board from the Chinese manufacturer Dstike: it has an ESP8266 and there are modes of operation as a client (P2P) and an access point (soft-AP). You can control the board from your phone or any other WiFi-enabled device.
Note that the performance of the software does not depend on the chip or the board - you can choose any option you like. There are several variants of Dstike products in different designs and for use in different situations. All of them have one thing in common - the ability to jam networks.
Varieties of Dstike devices
Deauther wristband- bracelet with built-in display, battery and switch. Convenient device for quick access to the control panel.
 Portable Jammer
 Deauther Power Bank- with a modified charge controller; control is carried out through a special panel. The controller has a connector for connecting an external antenna. Batteries are not included. It is a discreet device that can be easily dropped off and used remotely.
 Power bank
  Charge controller
 Deauther OLED V3.5- in this version, you will additionally receive a connector for connecting an external one and a holder for a 18650 mAh battery. The device is controlled using buttons and a switch, and the output goes to the screen, which allows you to use this option without additional equipment.
 Ready jammer with screen
 The main advantage of these gadgets is the ability to select a specific network or all at once within the range of the device. Just in case, you don't need a WiFi password to carry out attacks!
Installing Deauther 2.0
Let's start with Deauther 2.0 - the very firmware that Spacehuhn developed. In its repository on GitHub, you can select the version for a specific board.
Files with the bin extension are compiled sketches. They need to be installed on the board through a special bootloader. But if you want, then in the archives with the source code you will find libraries and sketches that can be installed through the Arduino IDE.
If you chose the option with loading the binary, then first run the NodeMCU Flasher program. You can download it from the NodeMCU repository.
Install drivers for CP2102 or CH340. After that, we connect the board to the computer, open the NodeMCU Flasher program, select the COM port in the device manager in the "Ports (COM and LPT)" section. Now go to the Config tab, click on the gear and select the downloaded .bin file.
 Program for firmware
 After adding a file, its path will appear in the line on the left. Go to the Operation tab and click on Flash - after that the firmware will be loaded into the board.
If it's more convenient for you to install through the Arduino IDE, then the process is slightly different. First of all, we download the drivers in the same way (CP2102, CH340). Then open the Arduino IDE and in the "File" menu, look for "Settings", click on "Add a link for the board manager" and insert two links:
We save everything.
 Adding links
 Open the "Tools" tab and select the "Board Manager" item from the "Board: ..." menu.
 Adding boards
 Select "Entered" and install arduino-esp-8266-deauther and esp8266.
 Installing packages
 Open the folder with the sketch and libraries, go to "Tools". The settings should be like mine in the screenshot.
In the line "Board" select ESP8266 Deauther Modules from the list.
 Download firmware
 In the Flash size line, select our module. Set the firmware and memory size as in the picture below.
 Module versions
 After switching on, the board will create an access point. Connect to it and go to 192.168.4.1 or deauth.me. You will be taken to the configurator and you will see a warning.
 A warning
 In the configuration section, in the LANG line, specify ru to enable the Russian language in the web interface. For the settings to take effect, you need to click on "Save" and restart the device. It is now ready to go.
Overview of features and settings
Let's quickly go through the application and see what our headscarf is now capable of.
 Settings
 If you connect a jammer via a serial port, then using commands you can control the jammer. This function can be disabled in the settings by unchecking the SERIAL checkbox.
Serial Commands
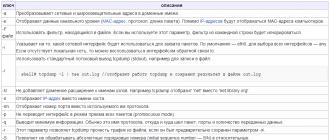
- scan [
] [-t - show [
] - select [
] [ ] - deselect [
] [ ] - add ssid
[-wpa2] [-cl ] - add ssid -ap
[-cl ] [-f] - add ssid -s [-f]
- add name
[-ap ] [-s] - add name
[-st ] [-s] - add name
[-m ] [-ch ] [-b ] [-s] - set name
- enable random
- disable random
- load [
] [ ] - save [
] [ ] - remove
- remove
- attack [-t
] - attack status [
] - stop
- sysinfo
- clear
- format
- print
[ - delete
[ ] [ - replace
- copy
- rename
- run
- write
- get
- set
- reset
- chicken
- reboot
- //
- send deauth
- send beacon
- send probe
- led
[ ] - led<#rrggbb> [
] - led
- screen
- screen mode
- delete
600 seconds after the start of the attacks, they will automatically stop. If you do not want this to happen, you can manually configure the timeout by setting a value in the ATTACKTIMEOUT menu: specify 0, and the attacks will stop automatically being disabled.
If you click in the scan section Scan APs, then the jammer finds all Wi-Fi hotspots. Choose one or several networks, and you can go to the attacks section. Mode Deauth disconnects all devices from the selected network. Mode Beacon allows you to create up to 60 access points at the same time.
 Scanning and types of attacks
 In chapter SSIDs access points are created for the Beacon attack.
 Creation of access points
 The firmware provides the ability to connect a display - for the version of the device with it. But if you wish, you can solder the screen and buttons to the board yourself, as well as provide autonomous power supply to turn it into an independent device.
Also, the developers of the firmware, in addition to the WiFi jammer itself, also sell a device that allows it to be detected.
 Detector
 Wi-PWN
Consider a similar Wi-PWN firmware developed by Sam Denty (samdenty99). He improved on Spacehuhn's creation and added deauthentication detector functionality and also created a companion app for Android. As a result, using Wi-PWN is more convenient than Deauther 2.0.
After downloading and unpacking the archive, you will need to flash the board and install the application on your phone. In the folder you will find the ESP8266Flasher program. Run it, select the COM port and in the Config section - the firmware (it is located along the path * \ Wi-PWN-master \ arduino \ Wi-PWN). Now click Flash in the Operation tab.
We connect to the board via Wi-Fi from the phone.
 Wi-Fi network
 We open the downloaded application, agree with the rules, indicate the name and password of the network. After setting up, we connect to the new WiFi.
 Configuring the access point and completing the installation
 The application has several tabs with self-explanatory names:
- Scan- section with search and selection of several access points;
- Users- the function of scanning a specific Wi-Fi for connections and creating your own "users";
- Attack- attacks are similar to the Spacehuhn version, but when cloning networks, the maximum number of users is 48 instead of 60 (this was the case in earlier versions of Deauther);
- Detector- a function that allows you to scan channels and identify jammers;
- Settings- setting up a WiFi server (network name, password). Here you can also enable the WiFi client and configure the scan and attack settings.
For stable operation of the device, I recommend attaching the radiator to the heating part of the device. Otherwise, the jammer may overheat and turn off.
Protection against WiFi jammers
NodeMCU is a cheap, versatile, powerful and compact deauthentication solution. You can repeat the entire project quickly and effortlessly. And since anyone can do it, it's a good idea to think about protection as well.
Most popular routers use IEEE 802.11b / g / n standards, which are prone to jamming. If you want to eliminate this possibility, then look for a router with support for the 802.11w standard, which completely protects users from WiFi jammers.
Some routers have anti-spam protection, but it only works with devices connected to the network, and the WiFi jammer does not connect to the network. If your router has spam protection that works with unconnected devices, then I advise you to activate it!
Today, a person's dependence on the Internet is gaining momentum, because now it is impossible to deny the constant connection an individual with a network through which he receives this or that information to meet general education and simply entertainment needs. In addition, a modern person spends a lot of time texting on social networks or surfing various web pages. This factor can be used as a so-called lever of pressure on a particular person.
Probably, each of us has ever faced the problem of noisy neighbors with whom it is impossible to build a constructive dialogue about the fact that you can behave a little less loudly. We recommend communicating in a legal way, but if all else fails, then you should act more radically, and most importantly, imperceptibly.
You can, for example, drown out wifi-signal of incomprehensible claims of housemates. We will consider this method in more detail in this article.
The principle of operation of the Wi-Fi jammer and its main manufacturers.
Jammerwifi, or, as it is also called, a Wi-Fi suppressor, is designed to block the working activities of various devices, including those that illegally obtain certain information. Typically, such devices operate on the basis of standards Wi-Fi and bluetooth.
The main principle of the signal suppressor is the special generation of noise interference in the specified frequency range. A device such as a jammer allows you to implement a smooth adjustment required to suppress the signal. router power in any of the ranges. This allows you to implement wireless blocking from the router within the protected area.
Jammer wifi from a router can prevent wireless data transmission between it and:
- smartphone;
- laptop;
- tablet;
- personal computer;
- other gadget that supports the wireless network function.
The range of such a device, designed to muffle a wifi signal, is directly dependent on the conditions under which its operation is implemented, as well as on the power of the installed signal of the main stations and neighboring terminals. The standard jamming radius for jamming devices is 30-40 meters, and the frequency range of the working activity is 2.4GHz.
The most popular manufacturers of jammers are:
- blockers "LGSh" (701, 716, 718, 702, 712, 704, 719, 705);
- suppressors "Sonnet" (3rd model, 4th model);
- multi-frequency signal suppressors operating in a large number of ranges (Whirlwind, Tsunami). They will help the user jam signals GSM, CDMA, 3G.

We make a jammer with our own hands.
If you do not want to spend money on purchasing a factory suppressor wifi signal, you can easily create the necessary device with your own hands. In order to start assembling the jammer on your own, you need to find a detailed diagram of the device on the Internet.
Further actions are to implement the layout of the main components of the apparatus. The following items should be purchased:
- generator, the purpose of which is to control voltage;
- antenna that determines the jamming radius;
- special RF amplification unit;
- a tuning circuit with a device installed in it that generates interference.
To suppress wi-fi frequencies, you should purchase a voltage generator that operates in a frequency range of 2.4 GHz up to 2.5 GHz.
You should also pay special attention to the form in which the jammer will be assembled: whether it will be a portable plan or a desktop plan. It should be taken into account the fact that the table-type blocker has a larger coverage area in contrast to the portable type device.
We jam the Wi-Fi signal with another network.
To carry out suppression signal one wi-fi network with another wireless network, you need to install a special set of software on your PC or laptop, with the help of which the detection of all networks available nearby (even hidden ones) is realized. This software includes "Aircrack-ng", which, moreover, is designed to implement the interception of traffic that is transmitted via wireless the network... This program works with any network adapter that works wirelessly. The main requirement related to the adapter is its support for monitoring mode.
The program can work on the basis of such operating systems as:
- Windows;
- Linux;
- Mac OS X;
- UNIX.
After the software is installed, you should determine the communication channel on which the router, the signal of which must be suppressed. After finding the specified access point, you must turn on your point on the same communication channel. Next, you should increase the signal strength of your network to the maximum parameters.
The consequence of such a simple fraud is a complete drop in the speed of the object to suppress the Internet signal.