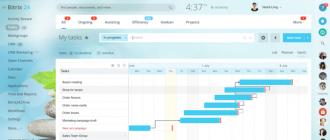
Let's go to the program settings window. Right-click on the main window and select the submenu Settings -\u003e Configuration ... As the picture shows:

Legulering brightness - blur - sharpness, etc.
We look at the screen below

Player settings menu
We will be presented with a settings window:

KMPlayer settings window
You need to do it as in the picture. Remembering the playback location is very convenient function... When you want to watch the film later. Just close the player and when you need to open it again and start the movie - it will continue from the last moment you watched. It is also worth remembering that it is better to disable this function for audio files.
Expand the General menu for advanced settings. Go to the submenu " Repeat / List
»Then on the right select the window« Playlist
". Uncheck the box "Clear standard list at closing ". So that your playlist does not reset when you close it (and you spent so much time creating it).
There is also an interesting sub-item “ Keys / Global
"And the window on the right" Global keyboard shortcuts
". Here you can configure global keyboard shortcuts for the most common operations when the player window is not active. For example, you are working in Word, typing text and suddenly want to switch to the next song, then in order not to make unnecessary movements, you can press a pre-selected keyboard shortcut. Click the "Add" button, a window with a choice of function will appear. Select "Play" then "Next". The entry will appear in the window. At the bottom, select a keyboard shortcut. To do this, left-click in the field next to which is written in red letters "Key" and press the key combination. For example, in my case it is Ctrl + Alt + PgDn.
Next, we are looking for the menu “ Decoders
"Right selection" Using built-in codecs
". The recommended value is "Use when system codecs fail." But you need to remember that in this case you need to download and install a set of decoders ( special programs allowing video decoding). Most best set K Lite Codec Pack. Take. Otherwise, use the "Always use" option. Why did I focus on this? Because with some video files there are problems when playing with built-in codecs. To avoid this, we use my advice.
It is also worth paying attention to the item “ Audio processing
". You can check the box next to “Built-in audio processor (Crossfader)” and next to “Use in audio mode only”. Also press the "Set" button next to it and in the appeared window set 2000 ms in both fields. What is it for? So that there is no silence when switching from one song to another. The first song will slowly fade out in volume, and the second, on the contrary, will increase. You will get beautiful continuous playback.
Also, on quiet video files, enabling the setting “ Automatic adjustment volume (normalization) "in the" Compressor / Normalizer "item. The program will itself increase the volume of the sound.
Menu « Video processing »I do not recommend touching it, because you can greatly lose in computer performance. There are a lot of settings and filters, and if you activate everything, the computer will start to slow down (even a powerful one).
Well, now we figured out the settings.
Some useful combinations keys (work with active window The KMPlayer, to make the window active, left-click on it):
- Left and Right Arrows - Rewind and Forward
- Up and Down Arrows - Volume Up and Down
- Enter - in video mode expand to full screen
- Alt + E - show / hide playlist
- Space - pause
- PgDn and PgUp - next and previous track / video in the playlist
- Ctrl + D - open DVD menu
At the request of the workers, I will describe another very useful function - display of items in the playlist. In KMPlayer, it can be configured in the most sophisticated way. Go to Settings - General - Repeat / List and select the tab Playlist :

Configuring KMPlayer Playlist Entries
You need to change the values \u200b\u200bin the Title field. By default it is empty (everything should display fine). By clicking on the Info button, you can view the list of macros to add to this field. Here are some examples:
$ filepart (% filename%) - file name will be displayed
% album% -% artist% -% title% - Album - Artist - Track title (you can put your own punctuation marks, the order is also important, the main thing is that the macros remain original)
$ if2 (% artist% -% title%, $ filepart (% filename%)) - if there are artist - track title values, then displays them, otherwise displays the file name
$ caps (your caption) - converts any value inside to a string with the first caps, the rest lowercase letters... Example SKRILLEX - FIRST OF THE YEAR - Skrillex - First Of The Year.Replace the words "your title" with the expression you want.
Also, sometimes there are problems with dVD playback when using the codecs installed in the system (my discs were played without sound). We open customization DVD - Decoder :

DVD settings
And check the boxes next to the Built-in decoder for watching DVD (as in the picture above).
An important function of the player is video buffering... This is necessary for watching movies over the network (and over wi-fi) and movies with a high bit rate, when other programs are accessing the hard disk. For the video to play smoothly, you need to increase the buffer. Go to Settings - Filters - Input filter ... Put a tick opposite Asynchronous file processing and one more Enable buffer for files on the hard drive. Buffer size to taste, the bigger the better):

Setting the video playback buffer.
Having problems watching videos on your computer or not satisfied with the standard Windows player? We read how to download and install KMPlayer. You have probably heard or read about this Korean media player on numerous occasions. This is one of best players to watch movies, clips and any other video on your computer. The player has a beautiful design, convenient menu, excellent functionality. KMPlayer uses its own codecs for video playback, with which it plays almost all existing video file formats.
Where to download KMPlayer
KMPlayer is free, so you can and even need to download it from the official site. Follow this link http://www.kmplayer.com and press the big yellow button labeled “Free KMPlayer. Download Now ”. In the window that opens, specify where to save the program installer to your computer, you can save it to your desktop.
The program is small, so it can be downloaded to your computer quickly even from a poor Internet connection.
How to install KMPlayer
The installer name consists of many numbers and depends on the version of KMPlayer at the time of download. Now the name of the installer looks like this: 3.9.1.130_20141103045254.exe 🙂 Run the program installer from the desktop (or from the folder where you saved it). A window appears with a choice of language. If there is Russian and you are satisfied with the Russian language, then press "Ok".

A window appears with the text "Welcome to the KMPlayer Installation Wizard". Click "Next".

In the next window, you are offered to familiarize yourself with license agreement... Click "Accept".

"Components of the installed program" can be left by default, just click "Next".

In the window with the choice of the installation folder, you can also not change anything, click "Install".

Wait while the program is installed. In the "Installation Options" window, click on the circle opposite the "Parameter Settings". We remove all 4 checkboxes, it should be like in the picture below. Click the "Next" button.
If for certain purposes, for example, to create a music video, you need to cut a fragment of audio or video from a movie, then The KMPlayer will help you solve this problem. – Korean-made professional, versatile and multifunctional video and audio player to view media data.
To perform these operations, The KMPlayer has a capture function, both video and audio. You can save a fragment, or you can re-record the entire scene, applying various effects or settings to improve the quality of the source material. From the cut out fragments in the future in any editor, you can compose a movie or music video, decorate with special effects.
So, in order to cut a fragment from a video, you need to stop viewing at the desired place during playback by pressing the "Pause" button. Right-click on the player window to bring up the context menu.


By default, the video clip file will be saved in the "Capture" folder, which will be created at C: \\ Program Files \\ The KMPlayer \\ Capture. In the "File name" line, you can change the path for the target file. By default, the player saves video in * AVI (VFW) format, but you can choose another format (some formats may not be supported).
In the audio settings, set the switch to the position "Encode audio stream" or "Encode. audio with processing ". Next, you need to click the "Start" button and enable playback. " When it will be necessary to finish recording a fragment, close the player with the "Close" button in the upper right corner of the player. If you press the "Pause" button, the recording will continue.
In the "Capture audio ..." settings, in principle, nothing needs to be changed, except for the final path for the cut fragment from a video file or an audio file if the "Capture" folder is not suitable.

If you are well versed in encoding files, you can set the switch to the position "Audio encoder 1". Additional settings will be available to you through the "Browse" button.
If you need to re-record video or audio, for example, by applying a surround sound effect to the audio track, then before starting recording, move the playback visual control slider to the left to the end, that is, to the very beginning of playback.
The KMPlayer saves the final audio file in WAV format (Windows PCM – high definition format). No other options are available. If you need a file with a different extension, for example, .mp3, then convert with any converter, for example, the program Format Factory (Format Factory).
Note.
On Windows XP / 7 The KMPlayer by default creates a "Capture" folder at C: \\ Program Files \\ The KMPlayer \\ Capture automatically. In operating rooms windows systems On 8 / 8.1 / 10, when trying to start capturing, the error "Failed to make the specified file" may be displayed.
But a "The KMPlayer" folder will be created at C: \\ Users \\ Admin \\ Documents \\ The KMPlayer (Computer / This PC\u003e Documents\u003e The KMPlayer). Right click on The KMPlayer window and select Preferences\u003e Configuration\u003e Associations / Capture\u003e Capture. Specify the path to the "The KMPlayer" folder or the path to any of your other folders.
Some distributions of The KMPlayer have high speed mode for video processing enabled by default. To capture video, you need to disable it. Right click on the window TheKMPlayer and select Settings\u003e Advanced Menu. You need to check the box if not. Then right-click on the player window again. Select "Video (Advanced)" and uncheck "Super Speed \u200b\u200bMode" and "High Speed \u200b\u200bMode".
Source files for video capture to work correctly must have the .avi extension. MP4, FLV, MKV, etc. technologies are not supported. The easiest way to see the file extension is to hover over and see the tooltip. To convert source files any media data converter can be used to AVI.
The capture folder can be opened from context menu player. To do this, right-click on the player window and select Capture -\u003e Open Capture Folder.
KMPlayer offers a huge number of settings so that each user can tailor the player to their individual needs. There are so many settings that beginners can get confused. It will take any user a couple of days to get used to and understand the huge variety of different buttons and parameters.
There are two main options to invoke KMPlayer settings. The first is by right-clicking on the center panel of the player. You will be presented with a pop-up window with many options. They mainly relate to what happens in your player when you play a file, and also affect appearance interface.
With these settings, you can, for example, control the sound, image quality, change subtitle display parameters, use various effects, change the interface language, capture recordings, get information about the file being played, change the video scale, change the player's cover, etc. It is simply impossible to mention all the possibilities within one article.
But these are not all the possibilities that the player offers you. In order to open the window with all the settings, you need to press the “F2" key, or click on the gear icon on the control panel, and in the window that opens, click on the gear icon again. cursor to the settings tab and click on the “Configuration” button.
In this window, you can configure KMPlayer by changing any parameter to suit your needs. Here you will find a huge number of settings, therefore, for convenience, they are sorted into sections. You can select the desired section by clicking on the left side of the window and also view the subsections. Using the KMPlayer configuration window, you can configure:
- General settings... They relate to the basic operating conditions of the player. With the help of them you can change the section of the window, select the option of actions when starting the player, configure the operation of hot keys, control playback parameters, change the player visually, change controls, etc.
- Filter settings. Here you can select the filters used for media files, manage splitters, set the buffer size, etc. Everything related to the work of filters is in this section.
- Decoders. Section dedicated to managing codecs. Here you can choose which codecs the player will use by default, set their priority, change external and built-in codecs, etc.
- Plugins. Everything related to add-ons and extensions for the player you can configure in this section. The subsections contain plugins responsible for their area, for example, audio plugins are located in the “Audio” subsection. Basically, all subsections are presented in a separate list, in which you can enable, disable, or completely remove plugins for KMPlayer.
- Video processing and audio processing. Here you can find all the parameters that are responsible for the quality of video and audio. Here you can set the video size, quality, sharpen, blur, change noise, change contrast, use video filters, enable post-processing, etc.
- Subtitle processing: this section is responsible for configuring subtitle parameters. You can change the color, size, use a different subtitle format, as well as set the subtitle language, select a folder for subtitles, align them, etc.
- Additional sections are also available, in which you can change the rendering parameters, set the screen indentation, change the color balance of the player, troubleshoot various problems, capture video, manage the player's configuration, create a file with settings and change them to suit your needs at any time. And also reset settings and configurations.
As you can see, the KMPlayer player has a huge number of settings, with the help of which each user can fully adapt the player's work to their own requests, which will appeal to experienced users, as well as those who work with media files, since the player has many built-in tools for solving these tasks.