Most of the articles in the X-Mobile rubric are devoted to hacks and tweaks that require root privileges, firmware modifications, or their replacement with custom ones. However, not every reader is ready to expose their smartphone to such operations, fearing that they can turn the device into a brick or lead to instability in work. Today I will debunk these myths and show that even in the most stalemate situation, bringing a smartphone back to life is not so difficult.
Destroying Myths
Let’s talk about what it is all about “turning a smartphone into a brick” and what other pitfalls a user can wait on the way to change the system and install custom firmware. What kind of glitches can I catch at the same time, and is it possible to kill a smartphone by reflashing it incorrectly? Will you lose the guarantee forever or can the smartphone be returned to its previous state? Can custom firmware really let the smartphone owner in the most inopportune moment and are they worth it?
Myth 1. Incorrect flashing can kill a smartphone
A smartphone can be killed by falling from the fifth floor, but not a flashing. The main problem that anyone who wants to reflash a smartphone faces is that a failure may occur during the installation of the firmware, which will lead to its inoperability, and the smartphone will actually turn into a brick.
All this is true, but only on paper. To understand why, it’s enough to understand how the process of flashing the smartphone works and what system components are used. In order to be able to install third-party firmware on your smartphone, you need to unlock the bootloader (not in all cases), get root and install a custom recovery console (ClockworkMod or TWRP) that can install firmware with any digital signature.
The recovery console is stored in a separate section of the internal NAND memory and is in no way associated with the installed operating system. After installing a modified version of the console, it will be possible to flash custom firmware or even another OS (Firefox OS, for example). If a failure occurs during the installation of the firmware, the smartphone will not be able to download it, however, the recovery console will remain in place, and all that will need to be done is to boot into recovery again and reinstall the firmware.
In addition, any custom recovery console contains a backup / restore function that allows you to backup the main firmware and restore it unchanged (with all applications, settings and data) in case something goes wrong. In fact, the smartphone can be returned to its original state.


You may ask: what will happen if a failure occurs during the installation of the recovery console itself? Nothing, in this case the opposite situation will turn out, when the operating system itself will remain in place, and the console will be lost. To deal with it, just re-flash recovery directly from Android.
Hypothetically, one can imagine a situation where both the firmware and the recovery console will be killed (although this is rather difficult to do), but even in this case, the primary bootloader will always remain in place, flashed into the permanent memory of the smartphone.
Conclusion: it is impossible to kill a smartphone by installing third-party firmware through a custom recovery console. Either recovery or the primary bootloader will always remain in place.
Myth 2. Custom firmware is unreliable
Firmware firmware is different. On the expanses of the World Wide Web, you can find a huge number of Android assemblies for every taste and color, and most of them are really slag, which can lead to instabilities in the smartphone and loss of functionality. Therefore, the first thing to remember is that you should only deal with serious custom firmware developed by large teams of experienced developers. First of all, these are CyanogenMod, Paranoid Android, AOKP, OmniROM and MIUI.
The second one. There are two types of firmware: officially supported and ported by third-party developers. The same CyanogenMod, for example, has the official version for the Nexus 4 smartphone, but does not have one for Motorola Defy. But for Defy there is an unofficial port of CyanogenMod 11 from the developer with the nickname Quarx. Their difference lies in the fact that the CyanogenMod team is responsible for the support and proper operation of the first, while the second is for Quarx personally. Official firmware versions are usually usually fully functional, but the correctness of the second depends on a third-party developer.
Well, the third. There are stable and developing firmware versions. Stable versions of CyanogenMod have an M index (CyanogenMod 11.0 M7, for example). This version of the firmware usually does not contain bugs. Developed versions (in the case of CyanogenMod it is daily nightly builds) may contain errors, and therefore are not recommended for everyday use.
Conclusion: if you install a stable official version of “normal” firmware on your smartphone, the risk of encountering bugs is minimal. Everything else is for experimenters.
Myth 3. Software that requires root privileges can turn a smartphone on.
In theory, an application with root privileges can do anything with the smartphone’s firmware, including erasing it completely. Therefore, with such software you must be extremely careful. The software that we talk about on the pages of the magazine is completely safe and tested on its own skin. In addition, for the entire time using smartphones on Android (and this is starting from version 1.5), I never I have not encountered a situation where root-based software would kill a smartphone.
The software distributed through Google Play, usually completely corresponds to the declared characteristics, and if it led to a brick or left a backdoor in the bowels of the smartphone, it would not last a week in the store. In any case, here you need to follow the rule “trust, but verify” and carefully read the instructions for using root-applications.
Myth 4. Root rights make a smartphone vulnerable to viruses
The smartphone is vulnerable to viruses not by root privileges, but by the bugs used to receive them. Rooting tools and viruses can use the same Android vulnerabilities to gain root privileges, so the fact of having root on the device does not change anything. A well-written virus will not request rights in the standard way, giving out its presence; instead, it will use the same vulnerability to get them secretly.
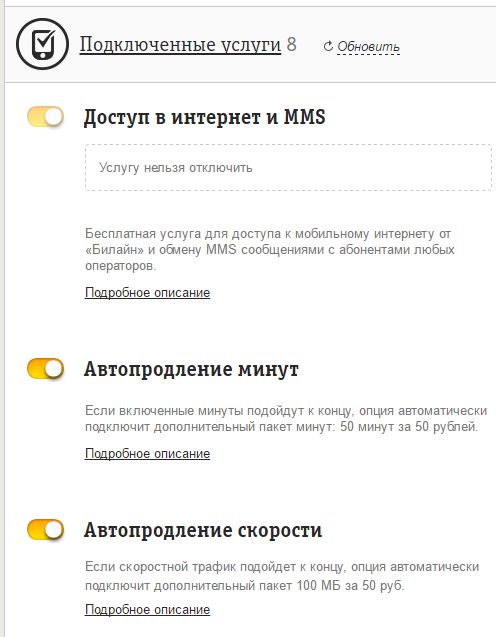
Moreover, having root, you get the opportunity to install the latest version of Android (in the form of custom firmware), in which these bugs are already fixed. Also, do not forget that most custom firmware allows you to disable root or create white lists of applications that can use these rights.
Myth 5. A rooted smartphone may fail
The software designed to get root does four simple things: it launches an exploit that allows you to get root privileges in the system, mounts the / system partition in write mode, copies the su binary required to obtain root privileges to the / system / xbin directory, and installs the SuperSU or SuperUser application, which will receive control whenever an application asks for root privileges using su.
None of these steps can lead to a crash or kill a smartphone. The only thing that can happen is that the exploit will cause a segmentation error and the smartphone will go into reboot, after which it will continue to work normally.

Myth 6. Having received root and installing custom firmware, I will lose the guarantee.
The warranty is lost not from the very fact of getting root, but because of its discovery by the service center. Most devices can be removed from root privileges using the Universal Unroot application or by reinstalling the stock firmware using the official application from the manufacturer.
There are, however, two exceptions to this rule. The first is the Knox system, pre-installed on new Samsung smartphones and tablets, such as the Galaxy S4, S5, Note 3 and Note 10.1. Knox provides enhanced Android security by responding to any firmware modifications and installing third-party kernels and firmware. In the event that the user performs these actions, the system sets a trigger that confirms the fact of modification. The trigger is implemented in hardware (eFuse chip), so resetting it to its original position will not work. On the other hand, it is not clear whether the service center will refuse to repair the device on this basis. Second: the eFuse chip is also installed on some other devices (for example, smartphones from LG), and it also allows you to accurately determine whether the smartphone was rutted or reflash.
If we talk about custom firmware, everything is more complicated. Usually, a flashing operation requires unlocking the bootloader, and this can be done either using special exploits or using the web service of the smartphone manufacturer. In any case, the unlocked bootloader will accurately indicate that the smartphone did not belong to the blonde.
On some smartphones, it is possible to lock the bootloader back, but you should learn about this separately, and also keep in mind that a newly locked bootloader will most likely receive the status of Re-locked, not Locked, as it was originally (this happens on HTC smartphones, eg). The exception is only smartphones and tablets of the Nexus line, the bootloader of which can be locked and unlocked in three clicks without dancing with a tambourine, and no one will find fault with anything.
INFO
On Linux, ADB and Fastboot can be installed separately from the Android SDK. On Ubuntu: sudo apt-get install android-tools-fastboot. In Fedora: sudo yum install android-tools.
To prevent Knox from interfering with root applications, it can be disabled using the following command from the terminal: su pm disable com.sec.knox.seandroid.
findings
Obtaining root and flashing the smartphone are absolutely safe operations that can not brick the smartphone for purely technical reasons. The only exception is an attempt to hack the bootloader in order to unlock it. In this case, the eFuse chip may work (if there is one in the smartphone) and block the ability to turn on the smartphone.
Fortunately, today, smartphone manufacturers either choose not to block the ability to turn on a smartphone with a hacked bootloader (by setting a trigger that indicates the fact of an action like Knox does), or they implement a special web service that allows you to painlessly unlock the bootloader with a loss of warranty on your smartphone, which eliminates the need for users to risk breaking the bootloader.
Problems that may occur during flashing
So, now let's talk about what problems can arise when getting root and flashing and how to deal with them.
Scenario one: after a failed flashing, the smartphone stopped loading
Unsuccessful flashing can be caused by several factors: the battery is dead, and the firmware is only half full, the firmware was unsuccessful or intended for another model of smartphone. In the end, the smartphone simply did not have enough space that could happen when trying to install the latest version of Android on a smartphone three to four years ago.
Outwardly, all these problems usually manifest themselves either in the endless reset of the smartphone to the initial logo of the manufacturer, or in the so-called boot-loop, when the loading animation spins on the screen for more than five to ten minutes. There may be problems with the screen (colorful ripples) and a broken touch screen, which also impede the use of the smartphone.
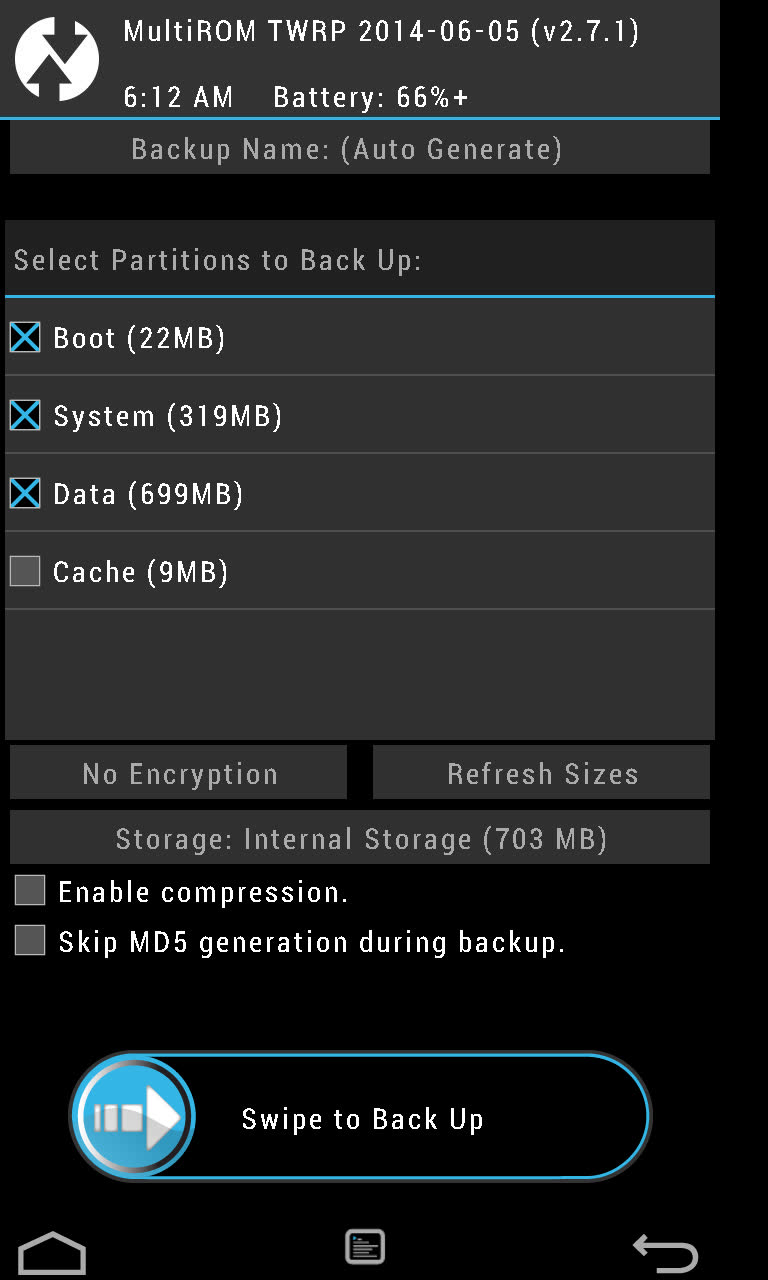
In all these cases, it’s enough to do one simple thing: turn off the smartphone by long pressing the power button, then turn it on with the volume down button pressed (some smartphones use a different combination), and after getting into recovery, reinstall the firmware (Install zip from sdcard - \u003e Chooze zip from sdcard) or restore a backup (Backup and restore -\u003e Restore). Everything is easy and simple.
Scenario two: firmware works, but recovery is not available
This can happen after an unsuccessful installation or upgrade of the recovery console. The problem is that after rebooting the smartphone and turning it on with the volume down button held down, a black screen appears, after which the smartphone either resets or hangs.
Solving this problem is not easy, but very simple. You can install the recovery console on the vast majority of smartphones using the TWRP Manager, ROM Manager or ROM Installer applications. They themselves determine the model of the smartphone, download and flash the desired recovery, without requiring a reboot. If, with their help, it is not possible to restore the console, it is enough to find on the Web instructions for installing recovery on your device.
Scenario three: neither firmware nor recovery is available
Honestly, it’s hard for me to imagine such a scenario, but, as practice confirms, it is quite real. There are two ways to get out of this situation: use fastboot to upload recovery to your smartphone or use the tool from the manufacturer to install the stock firmware. We will consider the second method in more detail in the next section, but I will talk about fastboot here.
Fastboot is a tool that works directly with the primary bootloader of the device and allows you to upload firmware, recovery, and unlock the bootloader to your smartphone (in devices of the Nexus line). Fastboot support is available in many smartphones and tablets, but some manufacturers block the possibility of its use. So you have to consult about its availability with the Internet.
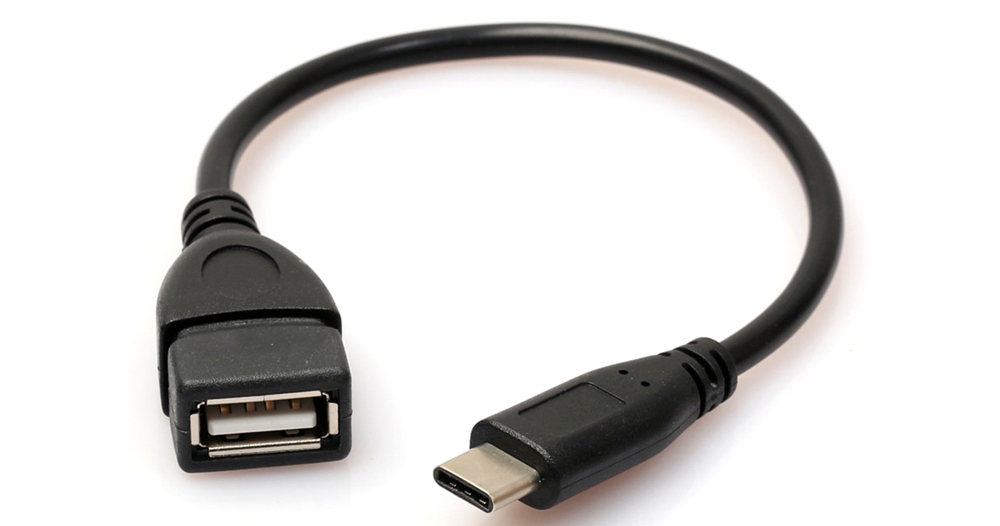
To access fastboot, you will need drivers and an Android SDK. When they are installed, open the command line, go to the SDK installation directory, then to the platform-tools directory, turn off the smartphone, turn it on with the volume buttons (both pressed), and connect it using the USB cable to the PC. Next, you need to find the recovery image in .img format for your device and run the command:
$ fastboot flash recovery image.img
Or even make the smartphone boot recovery without actually installing it:
$ fastboot boot image.img
In the same way, you can flash official firmware update:
$ fastboot update update file.zip
You can find a recovery suitable for your device either on the TWRP website or in the XDA-Developers and w3bsit3-dns.com forums.
Returning the smartphone to its original state
In this section, I will talk about ways to return a smartphone to a clean drain, no matter what condition it is in. These instructions can be used both for scraping the smartphone, and to remove traces of rooting and flashing. Unfortunately, I can’t talk about all the possible models, so I will focus on the four most popular flagships: Nexus 5 (this instance I call the control), Galaxy S5, LG G2 and Sony Xperia Z2.
Nexus 5 and other google phones
Returning Nexus devices to their original state is easier than any other smartphone or tablet. In fact, it is so simple that there’s nothing to talk about. In fact, all that needs to be done is to install the ADB / fastboot drivers (even they are not needed on Linux), download the archive with the firmware and run the script. Step by step the whole operation looks like this:
- from here.
- Download and install the Android SDK.
- Download the archive with firmware for the desired device from the Google site.
- Turn off the device, turn it on with the volume buttons held down (both) and connect using a USB cable.
- Unpack the archive with firmware and run the flash-all.bat (Windows) or flash-all.sh (Linux) script and wait for the operation to complete.
- We launch the command line, go to the directory with the Android SDK, then platfrom-tools and execute the fastboot oem lock command to lock the bootloader.
For those who are interested in what the script does, here is a list of commands:
Fastboot flash bootloader bootloader-NAME-DEVICE-VERSION.img fastboot reboot-bootloader fastboot flash radio radio-NAME-DEVICE-VERSION.img fastboot reboot-bootloader fastboot flash system system.img fastboot reboot-bootloader fastboot flash userdata userdata recovery recovery.img fastboot flash boot boot.img fastboot erase cache fastboot flash cache cache.img
Galaxy S5
With the Galaxy S5 smartphone, everything is somewhat more complicated, but overall quite simple. This time, you will need the Samsung application Odin, with which the smartphone will be flashed. Sequencing:
- Download and install the latest Samsung USB drivers from here.
- Download and install the latest version of Odin from here.
- We go to samfirmware.com, enter the search model SM-G900F, find the firmware marked Russia, download and unpack.
- Turn off the smartphone and turn on with the volume down and Home buttons held down, wait five seconds until a warning message appears.
- Press the volume up button to put the smartphone in Odin mode.
- We connect the smartphone using a USB cable.
- Launch Odin, press the PDA button and select the file with the extension tar.md5 inside the directory with the unpacked firmware.
- Press the Start button in Odin and wait until the firmware process is completed.
As I already said, this operation will return the smartphone to its original state, but will not reset the trigger installed by the Knox system (if it was in the standard firmware). Therefore, the service center may refuse to repair.
LG G2
Restoring the LG G2 to its factory state will also not cause any special problems. The number of steps in this process is somewhat larger, but by themselves they do not require special training and knowledge. So what to do to return the factory firmware to G2:
- Download and install the ADB Driver Installer from here.
- Download the official firmware (Europe Open 32G or Europe Open) from here.
- Download and install LG Mobile Support Tool, as well as FlashTool (goo.gl/NE26IQ).
- Turn off the smartphone, hold down the volume up button and insert the USB cable.
- We expand the FlashTool archive and run the UpTestEX.exe file.
- In the window that opens, select Select Type -\u003e 3GQCT, Phone Mode -\u003e DIAG, in the Select KDZ file option, select the firmware downloaded in the second step.
- Click the CSE Flash button at the bottom of the screen.
- In the window that opens, click Start.
- In the next window, select the country and language and click Ok.
- We are waiting for the firmware to finish, and then turn the smartphone off and on.
It's all. But keep in mind that, as in the case of Samsung, the smartphone will still have the status of Rooted, and this can not be fixed.
Sony Xperia Z2
Now about how to return to factory state smartphone Sony Xperia Z2. As in the previous two cases, this will require stock firmware and the official firmware utility. You run the utility on the PC, connect the smartphone with a USB cable and start the update process. Step by step it all looks like this:
- Download and install the ADB Driver Installer from here.
- We reset the smartphone to the factory settings.
- Download and install the Flash Tool from the official Sony website and the latest firmware from here.
- Copy the firmware file to the C: / Flashtool / Firmwares directory.
- Turn off the smartphone and turn on the volume down and Home keys with the keys held down.
- We connect the smartphone to the PC using the USB cable and run the Flash Tool.
- Press the button with the lightning icon in the Flash Tool. In the window that opens, select Flashmode, double-click on the firmware in the list that opens.
WARNING
In many smartphones, an unlocked bootloader will not allow an update by air.
In 90% of cases, unlocking the bootloader will entail the deletion of all data from the smartphone, including the memory card.
findings
Smartphone firmware, and even more so getting root access, are not at all as scary and dangerous operations as they might seem at first glance. If you do everything right and do not resort to tools that unlock the smartphone bootloader bypassing the manufacturer’s tools, you won’t be able to brick the smartphone. Yes, in some cases it will be necessary to tinker to get everything back in place, but what is better - to use a locked smartphone, which does not allow to do half of the things that it is capable of, or get full control over the device? After all, reinstalling Windows on a PC doesn't scare anyone.
The loss of Android functionality on a smartphone or tablet, or the so-called bricking, occurs for a variety of reasons. Most often, this is facilitated by incorrect firmware, which can turn an advanced phone into a brick that no one needs. The question of whether you can restore the gadget yourself is of interest to many users.
How to eliminate the consequences of unsuccessful firmware
Data-lazy-type \u003d "image" data-src \u003d "http://androidkak.ru/wp-content/uploads/2016/09/kirpich.png" alt \u003d "(! LANG: kirpich" width="200" height="119" srcset="" data-srcset="http://androidkak.ru/wp-content/uploads/2016/09/kirpich..png 300w" sizes="(max-width: 200px) 100vw, 200px">
!}
 If after the logo appears when you turn on the system does not start for several minutes or the download is constantly reset, then this is not a “brick” and not all is lost. To get the launch, you need to go from the smartphone to the Recovery menu and do a new flashing.
To do this, follow these steps:
If the gadget is turned on, you must turn it off. Hold down the key with which the volume decreases and the power key. The Recovery menu opens, which offers 2 ways:
- restore backup (this is the main requirement for firmware, if the phone was flashed, then the backup was also restored). The backup starts to run in the Backupand Restore ”section when you select the previous system position.
- flashing - carried out by selecting the “Install zip fromsdcard” section, in which you need to specify the necessary component of the operating system. This option deals with the correction of incomplete recovery errors that may occur, for example, due to the phone being disconnected at the time of the file recording process.
Another situation may arise: when starting the firmware, I cannot access Recovery. This is eliminated simply: returning the console to fix the system is carried out by special applications TWRP Manager, ROM Manager or Installer. These applications are designed to determine the gadget model and to independently download all the necessary components to launch a suitable Recovery.
If none of the above programs corrected the error, you can find instructions on downloading the recovery console for a particular brand of smartphone or tablet.
Read also: How to upgrade Windows Phone on Android
How to restore the real “brick” of Android
We examined what can be done in case of incomplete loss of smartphone functionality. Now it's time to talk about how to restore a completely “dead” Android when nothing starts. It is not necessary to go to the workshop right away, you can try to start the system at home with the help of simple actions.
What to do, consider step by step:
- Install the latest Samsung USB drivers for your computer.
- Download and install the latest version of the Odin app.
- Download licensed firmware that is suitable for a specific model and country.
- Turn off the “brick”, then press the key that reduces the sound and the “Home” key. After a few seconds, a warning appears on the screen.
- By pressing the button on the phone, which increases the sound, put it into Odin mode.
- Connect the gadget to the computer.
- Make Odin start, click PDA, in it designate the tar.md5 file in the directory with the firmware.
- Press the “Start” key, start recovery, wait for the end of the operation.
- Hooray, the "brick" has earned!
How to reflash a smartphone with Flashtool
One hundred percent this option applies to Sony phones, however, devices of other brands can be restored in the same way.
What do you need:
- “Brick” Android;
- licensed firmware in FTF format;
- flashtool program installed on the computer, firmware drivers for it;
- disabled antivirus, firewall, which can respond to Flashtool as a viral component;
- charge the phone well enough so that it does not turn off at the time of recovery.
Step-by-step recovery instruction via Flashtool
data-lazy-type \u003d "image" data-src \u003d "http://androidkak.ru/wp-content/uploads/2016/09/Flashtool.png" alt \u003d "(! LANG: flashtool" width="200" height="205" srcset="" data-srcset="http://androidkak.ru/wp-content/uploads/2016/09/Flashtool..png 293w" sizes="(max-width: 200px) 100vw, 200px"> !}Many newcomer experimenters, or just users of smartphones based on the Android operating system, who are far from the topic, are faced with such a problem as “bricking” the device. Let's take a closer look at what an android brick is.
So, okirpichivanie is a complete (less often partial) loss of a device’s performance, as a result of any actions with software, or interference with a “factory” operating system.
The most common signs that your smartphone has become a "brick" is the lack of reaction to buttons, both on-screen and physical; inability to turn on the device; a permanent error stating a problem with RAM or internal memory; error popping up when you turn on your smartphone about the impossibility of loading the Android operating system.
For ordinary users, in such cases, there is nothing left but to carry your device to the service center, where they can tear off the undemocratic amount of money for “banal” actions that help return the smartphone to its original working condition. We will try to give some recommendations that will help you avoid such errors in the future and warn those who have not yet encountered this problem.
Common causes of the “bricking” of smartphones
The first and most common reason is a flashing of the operating system. An inexperienced user who, for some reason, is tired of his OS, after reading information from various unverified sources, downloads all kinds of supposedly the latest and most modern firmware, and proceeds to the software “upgrade” of his smartphone. In some cases, it costs a small loss - broken applications, blocking of some settings, but, as a rule, after installing suspicious Androids, the smartphone flatly refuses to work, causing panic in the wizard.
The first and simple rule: never reinstall the operating system unnecessarily. If you still really need, or really want, then download Android from trusted sources and carefully read the installation instructions!
No less rare causes of “bricking” are the other way around, a rollback to the factory software after installing the so-called custom firmware. Yes, and this happens, and very often. Therefore, to avoid this, see the recommendations above. And yet, for those who want to take a chance, you can read the material with recommendations for installing the OS and how to restore the brick by.
In more rare cases, the system crashes after installing heterogeneous "improvers", i.e. programs that are designed to improve performance, increase the speed of data transfer via Wi-fi and the like software. Even such a seemingly simple installation of a new theme for Android can make your smartphone a "lifeless brick."
If you suspect that after your actions with the software, this unpleasant event occurred, then the first thing you need is not to panic. You already have nothing to lose, therefore: we are looking for the official firmware for your smartphone; carefully study the instructions for installing the OS specifically for your model; make reinstallation. In many cases, after installing the official version of Android, your device will come to life, and you will get invaluable experience of what you can do and what you can not do, also others, in which case, help.
Those who are afraid or not sure will have to bring the device to the service of specialists, and so that you are not greatly deceived, look for information about different services, since there are a lot of it on the network.
The reasons for not turning on or constantly rebooting in a cycle can be completely different.
In this case, I describe the situation when you "pranked" with the firmware of various custom ROMs / boot scripts and now sit biting your elbows or tearing your hair [ underline whatever applicable] above a brick-like device that used to be called a phone.
I will try to give some useful tips aimed at solving your problem.
METHOD 0
For starters, a few trivialities from the captain0] Charge the phone fully or use a fresh battery
1] Turn off the phone completely
2] Remove the battery, SD card and SIM card
3] Wait 5-10 minutes
4] Put all the parts back in place
5] Try turning on the phone
The chance of inclusion is not great, but still.
METHOD 1
If there is a suspicion that the phone on / off contact is jabbing
And the phone still needs to be turned on. Try to hold down the power button of the phone with the battery removed, and then insert it fully, without releasing the finger from the power button.
Did not work out? Then another option - with the battery inserted and the power button held down, connect the phone to the charger.
If the start problem has not been resolved by the above methods, then we turn to unobvious tips.
METHOD 2
Attempt to call recovery script TWRP / ClockWorkMod
[in case you have any of them installed]
1] Make sure the phone is off
2] Holding the buttons down + press and hold the button . In Russian: [Volume Up + Center Button + Power On]
3] Hold until one of the following pictures appears. Pictures may vary depending on the software version.


If nothing appears, then most likely you have not installed such programs or the recovery section has been damaged. In case of success, go to.
METHOD 3
Boot Area Recovery
To restore your phone is necessary put it in Download mode and flash recovery script. Actually what we will do.
1] Downloadand install the driver
2] Download flashing utility
11] At startup, the program will tell which port the device is connected to. ID: COMand the word Added appears in the log list. Thus Odin saw your phone.
Self-flashing your mobile phone on Android is a simple task, which rarely leads to bad consequences if you are not mistaken in selecting files. But if something went wrong - the device may refuse to boot.
Today we will learn how to restore the phone after unsuccessful firmware. This does not require much time, just downloading the necessary software and a few additional steps.
Restoring with official support
If you tried to update Android using the official firmware, then utilities from the manufacturer will help in the recovery.
- look at the company's website, download drivers and other software there
- connect the computer to the phone
- restore the device to its original state
In the software of each company, a certain section is responsible for this, but it is usually not difficult to find it.
Enable Recovery
If you tried to install third-party firmware on the device, then at best it will be possible to restore the system by resetting the settings. It can be started by simultaneously pressing the volume and power buttons. Combinations may vary on different devices. Select the line “wipe data”, then start zeroing the contents of the device. You can try to reinstall the operating system, for this, select "choose zip from sdcard". We find the archive with the firmware, start the installation process on a new one. It is better to use a different version, as the old version can lead to the same problems.

Using the Flash Tool
This program will help you in all those cases when you need to return the mobile device to its original state. The method is applicable on almost all smartphones. First download and install the ADB Driver Installer. Copy the firmware file to the Firmwares folder located in the Flashtool directory. We take the device and connect to the PC using the USB cable. Now press the button with the lightning icon in the Flash Tool, and then select the device firmware in the program.
Note that in cases where root is installed on your smartphone, installing the official firmware will be problematic, usually such actions will lead to crashes.

In addition, a video with detailed instructions for “rolling back” the firmware.