Good day. Today I want to talk about the operating experience of Cyanogenmod 10.1 on my SGS3.
For starters, how did I get to Cyanogenmod?
The first time I met with the firmware of this team in 2011, with the version of CyanogenMod 7.1 on the Samsung Galaxy Ace. After that I tried a lot of firmware, both on SGA and SGS3, but opted for Cyanogenmod.
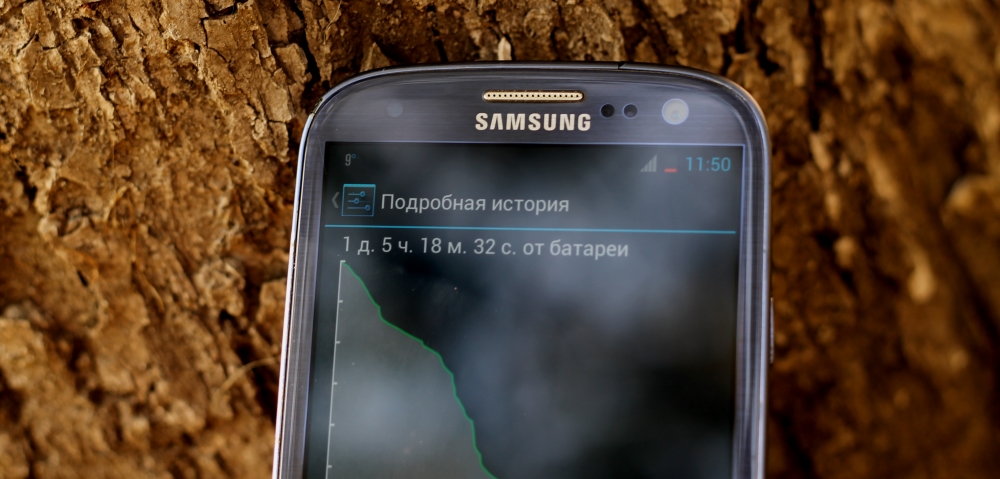
When the firmware exited Beta status, I installed it, fearing only that the problem with excessive energy consumption was not fixed, but my fears were not justified. After a month of using the firmware, I can say that the phone lives with fairly active use for 20-24 hours, and with an average load of 40-48 hours.

Performance:
One of the reasons for switching from the SGS3 stock firmware was brakes and a rather slow robot. But with Cyanogenmod 10.1, I did not notice problems with brakes, crashes, reboots a month later, and I can say that the robots are about the same as in the LG Nexus 4.
I also forgot to say that after updating from 4.0.3 to 4.1.2 the phone constantly lost its network and at the most inopportune moment the network disappeared, it was treated by a reboot. I read a lot of information about this issue. but did not find a solution. With the transition to Cyanogenmod 10.1 for the entire time of use, I no longer ran into this problem.
If we talk about the performance in benchmarks, then AnTuTu Benchmark showed 18598 parrots, which is pretty good for the flagship of early 2012.
Dialer:

One of my smartphone requirements is a good and fast dialer. In the stock firmware, the phone book is one of the best I've seen on android, but it VERY VERY VERY slow The standard android dialer does not have such a problem. This is another proof that all add-ons on android make it not only more beautiful and functional, but also slower and more buggy.
Multimedia:

So, what about music and video in Cyanogenmod 10.1?
I will answer briefly: pretty bad compared to the Samsung stock firmware. But there is always a way out: the standard Cyanogenmod audio player is Apollo, but the video player, as such, is not in principle: it is combined with the Gallery. After spending 10 minutes on Google Play, I found a way out. My new audio player was the Android “Play Music” stock player, and DicePlayer was the video player.
If you compare the sound quality in the original headphones, I can note that the quality has become a little worse, but the maximum volume has increased.
Camera:

One of the factors that prevented me from switching to the Cyanogenmod 10.1 firmware used to be the camera. In Beta firmware versions, the camera gave a blue or green tint, and the pictures were of rather poor quality. But in the final version, this bug was fixed.
The camera application itself is pretty good, and most importantly - fast and makes it possible to take a picture exactly when I want it. But the range of settings is slightly inferior to the Samsung camera.
Sample Image (photo only cropped) :

Conclusion:
Cyanogenmod is one of the best custom firmware. For my Galaxy, this is a second wind. I am very pleased with my choice and can recommend Cyanogenmod 10.1 RC2 to all SGS3 owners.
P.S: Do not judge strictly, this is my first article. If you have comments or suggestions, write in the comments.
If you find an error, please select a piece of text and press Ctrl + Enter.
Hi, let’s show you how to flash today Samsung GT-I9300 Galaxy S3 standard firmware and root (or root?). Since the amount of information on this unit is quite large, I decided that I will tell you about service codes, custom firmware and backup of this model next time. Everyone already knows what kind of animal it is - there are a lot of reviews and reviews on the Internet.
Initially, the device was delivered with androyd version 4.0.4 “Ice Cream Sandwich”, they still bring them with this old software, but you can already upgrade it to version 4.1.2 “Jelly Bean”, they also promise updates at the end of the year up to version 4.3 - while we wait. Initially, on the first versions the device was wildly buggy, crashed, turned off, applications stopped working (processes were terminated urgently), lost the network and stupidly died - turned off for no good reason and didn’t turn on anymore - in the servers they stupidly changed the warranty boards (who were lucky) and They explained that this was a factory marriage, but about a year later the situation leveled off and there were fewer such jambs that Samsung engineers could have fixed.
The most important drawback of this device today is its fragility - it slightly pressed or squeezed and God forbid it was dropped - a crack on the sensor has been provided, and this is already replacing the entire display module (up to 8,000 thousand rubles can be repaired in some sharams). So be careful. And let's get started with the firmware.
ATTENTION!!! Before starting software updates, rutting, resetting and other manipulations with your own or God forbid someone else's device HIGHLY RECOMMEND read this one. In short, you have been warned and don’t say later that you hear this for the first time.
Samsung GT-I9300 Galaxy S3 - software update and ROOT-rights.
Before proceeding with the firmware, let's first prepare everything we need:
- Fully charge the battery;
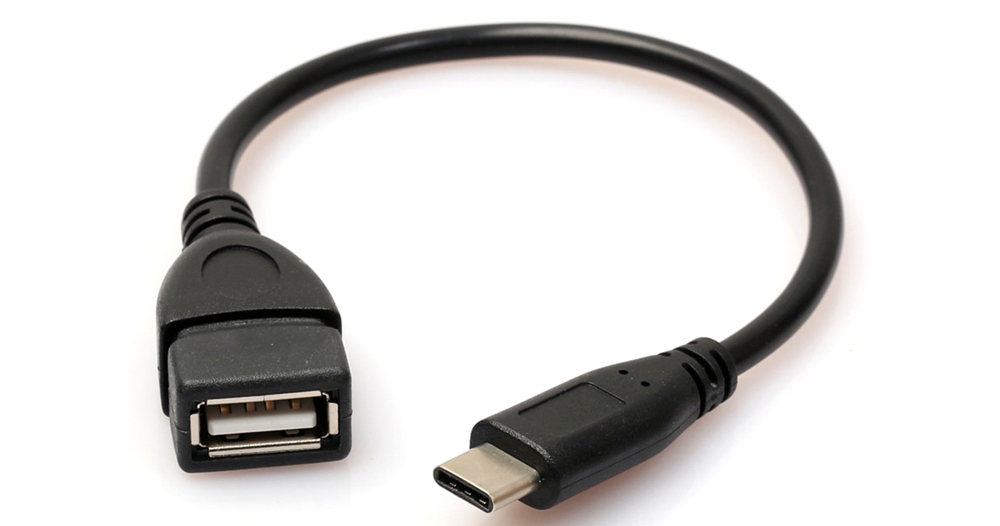
- MicroUSB any cable is suitable, but it is better to take from the kit;
- Firmware, latest version - I9300XXUGOE1 ;
- Program flasher - Odin3 v3.04 ;
- Drivers - Install kies (when updating the software, do not run this application, but rather go to the task manager and kill all processes called kies). But it’s better to install the drivers there and a post on how to install them correctly;
- A personal computer or laptop of medium configuration with the operating system WIN7 SP1 should be enough;
- CF-Auto-Root-m0-m0xx-gti9300.tar - firmware file for rooting.
First back up all the data or use the KIES program to save all the necessary files to your computer. Soon there will be an article on how to backup firmware - I'm already writing. You can download all the files at the end of the article.
Samsung GT-I9300 Galaxy S3 - factory firmware.

1 step: If you have not charged the battery yet, then it's time to do it, insert the battery into the phone and enter the device in the DOWNLOADING mode - first press the HOME (central) button, then the volume down key and then the device’s power button.

2 step: Information will appear warning us about possible problems with the phone when using modified firmware. And it offers either to continue or restart the smartphone. Continue by pressing the volume key up. A green android robot should appear. We are on the right track.

3 step: Download the archive with firmware and flasher and run the application Odin3_v3.04.exe.

4 step: Before us appeared the main window of the flasher program Odin3 v3.04.

5 step: And so, the smartphone is put into boot mode, the battery is charged, important information is saved, the drivers are installed (do not forget to “kill” all kies processes if you installed it). We connect the cable to the phone — the com port should be determined and a line appears with the word Added — this is a good sign, which means that the device has detected a PC.

6 step: Now it’s the ONE configuration line - the choice of firmware files:
Pit - mx.pit
Bootloader - BOOTLOADER
PDA - CODE_I9300XXEMG4_1314436_REV00_user_low_ship.tar.md5
PHONE - MODEM_I9300XXEMG4_REV02_REV04_CL1360150.tar.md5
Csc - Csc_OXE_I9300OXEEMH1_CL1359224_REV00_user_low_ship.tar.md5
BE CAREFUL - CHECK SEVERAL TIMES !!!
If everything is ok, press the START button.


8 step: "PASS" - after about five minutes, the device will be sewn. Everything, Samsung GT-I9300 Galaxy S3 ready to use. You have the latest firmware version.

9 step: Reboot and check the software version by typing the following code on the telephone keypad *#1234# .
Getting ROOT Rights.
If you still decide to rut your Samsung GT-I9300 Galaxy S3,then you realize that you are doing and taking all responsibility on yourself. And so let's get started:
1 step: Download CF-Auto-Root-m0-m0xx-gti9300.tar -this is a rootkit, so it will be necessary to disable ANTI-VIRUS, unzip this archive. The final file must be with the extension .tar or .tar.md5.
2 step: We transfer the device to DOWNLOADING mode - see the instructions above.
3 step: We launch attachment Odin3 v3.04.exe.
4 step: Select the rootkit file and put it in the field PDA. If you have version androida 4.1.x, then we must uncheck Auto-reboot.
5 step: We connect the phone with a cable to the computer and press the Start button. After a minute, the device will flash, and since we unchecked Auto reboot - turn off the device with the handles and enter it into recovery mode, holding down the volume button in turn, then the HOME button and the power button. Root rights are automatically reinstalled.

Instructions for installing the official single-file firmware on the Samsung Galaxy S3 (GT-I930x).
Drivers and Programs
Attention!
To install the official stock firmware on the Galaxy S3 and return the phone status (“Settings”\u003e “About device”\u003e “Properties”\u003e “Device status”) to “Official” after switching from custom firmware and thereby returning the ability to receive updates by air is enough Follow the instructions provided.
Installation Instructions
Unzip the downloaded archive into a folder with Odin PC for convenience. The file in the “.tar” or “.tar.md5” format must be left, and “SS_DL.dll” can be deleted.
Reset device data.
To do this, go to the settings on the tab " Accounts"To the section" Archiving and Reset", Select" Reset device"And press the button" Delete everything". The phone will reboot.
Launch Odin PC as administrator.
Put the device in boot mode ( Download mode).
To do this, simultaneously hold down the Volume Down key, the Home button and the Power button. Then wait until the phone reboots and accept the warning by pressing the Volume Up key.
In this state, connect the smartphone to the computer. The Odin should light up the inscription " COM».
Press the button “ AP»And select the tar archive of the firmware.
Items " Auto reboot"And" F.Reset Time" must be activated, but " Re-partition"If active - need to disable.
Press the button “ Start". The firmware installation process will begin.
At the end of the operation, if everything went well, the message “All threads completed.” Should appear in the Odin PC log. (succeed 1 / failed 0). " The phone must be manually restarted by holding down the power button until the screen turns off. Initial loading of the device may take up to 5 minutes.
ATTENTION!
If the device does not boot for a long time or a data reset has not been made, it must be performed from the recovery.
To do this, simultaneously hold down the Volume Up key, the Home button and the Power button. After downloading, select " Wipe data / Factory reset", and then - " Reboot system now". If after these actions the device also freezes at boot, it is necessary to reflash it again.
Among dozens of smartphone models produced annually by one of the market leaders, Samsung, the manufacturer’s flagship devices attract particular attention. As for the software part of the Samsung flagships, here we can talk about the broadest possibilities for its variability. Consider in this aspect the model Samsung GT-I9300 Galaxy S III - the methods for flashing the device will be discussed in the material proposed below.
A high level of performance and a large margin of productivity, thanks to the use of the most advanced industry achievements, make it possible to easily use Samsung's flagship solutions for many years without a critical drop in productivity. Some attention is required only by the software part of the device. However, to interact with system software, up to its complete replacement, there are convenient tools and proven methods.
All manipulations according to the instructions below are made by the user at your own risk. The author of the article and the Administration of the site do not guarantee the achievement of positive and desired results by the owner of the device, nor are they liable for possible damage to the smartphone as a result of incorrect actions!
For the fastest and most effective process of reinstalling system software in the Samsung GT-I9300 Galaxy S3, several preparatory procedures are necessary. Due attention should be paid to this issue, because only after proper preparation can you count on a positive firmware result and quick elimination of errors that may occur during the installation of Android in the device.

Drivers
Almost all procedures involving serious interference with the system software of an Android smartphone require the use of PCs and specialized utilities as tools that allow manipulations. Therefore, the first thing to take care of when there is a need to flash Samsung GT-I9300 is the correct pairing of the device and the computer, that is, the installation of drivers.


USB Debugging Mode
In order for Windows applications to interact with the software components of the smartphone, a special mode must be activated on the device - USB debugging. This option will need to be used for almost any manipulation involving access to data in the phone’s memory. To enable the mode, do the following:

Root Rights and BusyBox
Without obtaining Superuser rights, serious interference with the Samsung GT-I9300 Galaxy S III software is impossible. At the preparatory stage, root-rights will make it possible to create a full-fledged backup, and in the future they will allow practically any manipulation with the system software, up to its complete replacement. 
To obtain privileges on the model in question, one of the software tools is used: or - these are the fastest and easiest means by which it is easy to root the device. The choice of a specific application is up to the user, in general, they work equally efficiently and are easy to use.


In addition to root rights, many operations with the Galaxy S3 GT-I9300 model require the device to be installed
BusyBox - a set of console utilities that allow manipulations that require the connection of additional kernel modules of the OS. An installer that allows you to get BusyBox available at.


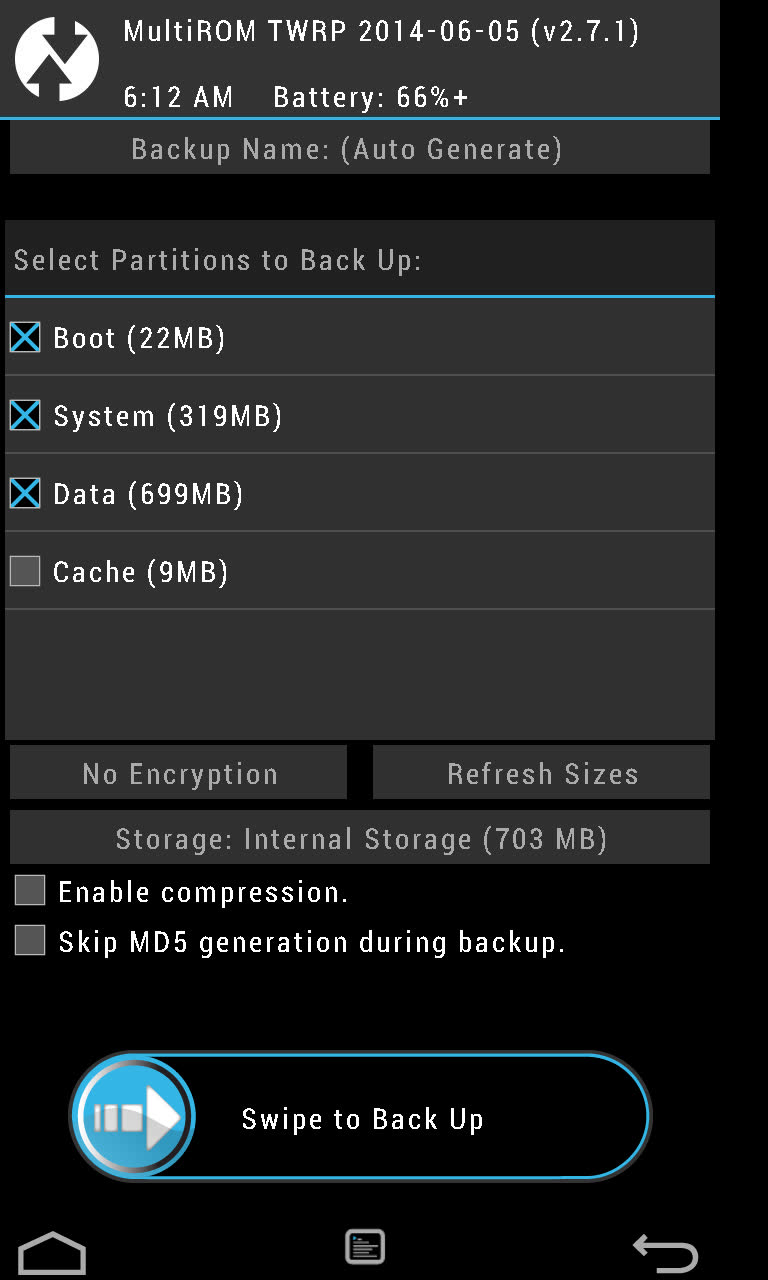
Backup
Theoretically, after installing the drivers to perform manipulations with the Samsung GT-I9300 Galaxy S III through programs for interacting with memory sections, there are practically no obstacles, you can proceed with the installation of Android, but, as you know, this process may not always work without error and can lead to damage to individual software components of the device, not to mention the fact that all user data as a result of the procedure will be deleted and you will need to restore everything you need - contacts, photos, applications, etc. In a word, starting a reinstallation of Android without a preliminary backup is highly discouraged.

User data
To save the information stored in the phone’s memory during operation, the easiest way is to use Samsung’s proprietary Smart Switch tool, which was mentioned above when describing the driver installation process. We perform only three simple steps and all information will be archived in a backup copy:


It should be noted that recovery from a backup created using Samsung proprietary software will be possible only on a smartphone operating under the official firmware. If you plan to switch to custom or have a desire to additionally be safe from data loss, you can use one of the instructions for creating backups offered in the material at the link below:
EFS Section
An extremely important system area of \u200b\u200bsmartphone memory is EFS. This section contains the serial number of the device, IMEI, GPS ID, MAC address of Wi-Fi, and Bluetooth modules. Damage or removal EFS in the process of manipulating system partitions for various reasons, it will lead to inoperability of network interfaces, and in some cases to the inability to turn on the phone.

For the considered model, backup creation EFS Before reinstalling the system software is not just a recommendation, but a requirement to fulfill! Ignoring the operation to create a dump greatly increases the risk level of getting an inoperative smartphone!
In order to always have the opportunity to quickly restore the partition EFS in Samsung Galaxy S3, create a dump area using a specialized software tool - EFS Professional.


Recovery EFS used tab "Restore" at EFS Professional. After connecting the smartphone in the same order as when creating the backup, and switching to the program recovery section in the list "Select a backup archive to restore" you need to select a backup file, check the presence of marks in the checkboxes of the field Archive Backup Contens and by clicking "Restore", wait for the completion of the procedure.

Firmware
One of the notable features of Samsung's flagship devices is the availability for them of just a huge number of modified unofficial firmware. Using such solutions makes it possible to completely transform the software shell and get new versions of Android. But before proceeding with the installation of custom, you should study the methods of installing the official versions of the system. In case of problems, this skill will allow you to restore the model software to its original state.

Method 1: Smart Switch
The Samsung manufacturer has a rather strict policy regarding interference in the operation of the software of its own brand devices. The only thing that it allows you to do officially regarding the Galaxy S3 firmware is updating the system version through the Smart Switch proprietary software, which we already used above when installing drivers and creating a backup copy of information from a smartphone.

- Install and launch Smart Switch. We connect the smartphone launched in Android to the USB port of the computer.
- After the model is determined in the application, an automatic verification of the version of the system installed on the phone with the edition available on the Samsung servers is carried out, and if an update is possible, a corresponding notification is displayed. Push "Update".
- We confirm the need to start updating the phone system version - button "Continue" in the appeared request window with the revision numbers of the installed and available for installation system software.
- After reviewing the conditions under which the update is successful, click "Everything is Confirmed".
- Further, Smart Switch will carry out the necessary manipulations automatically, reporting what is happening in special windows with progress indicators:


- After receiving confirmation of the successful completion of the OS update in the Smart Switch window

Samsung GT-I9300 Galaxy S3 can be disconnected from the USB port - all system software components are already optimized.


Method 2: ODIN
Using a universal tool for replacing system software and restoring Android in Samsung devices is the most effective method of manipulation. The application allows you to install official firmware of two types - service and single-file, and installing the first version of the package is one of the few ways to "revive" Galaxy S III, which are not working in the software plan.

Before using ONE to overwrite Samsung GT-I9300 memory sections, we recommend that you familiarize yourself with the instructions for reinstalling system software using the application in the general case from the material available at the link:
Service package
A special type of package with system software used in service centers and designed for installation in Android devices Samsung through ONE is called "Multi-file firmware" due to the fact that it includes several system component files. You can download the archive containing the service solution for the model in question here:
- Put S3 in Odin mode. For this:

- Launch ONE and connect the phone to the USB port. We make sure that the device is defined in the program in the form of a blue-filled field with the number of the COM port through which the connection is made.
- We add the multi-file firmware components to the program from the folder obtained by unpacking the archive downloaded from the link above.

To do this, we press the buttons one by one and specify the files in the Explorer window in accordance with the table:

After loading all the software components into the program, the ONE window should look like this:

- If you plan to re-mark the device’s memory, specify the path to the PIT file on the tab "Pit".

It is advisable to carry out re-marking only in critical situations and when errors occur during the operation of ONE without a PIT file! Initially, you should try to carry out the process of reinstalling Android, omitting this step!
Push button "PIT" on the same tab in ODIN and add the file "Mx.pit"present in the catalog with the proposed package.

When using a PIT file during the reinstallation of Android on the Samsung GT-I9300 on the tab "Options" ODIN must be checked "Re-Partition".
- After making sure that all files are added to the appropriate fields and the parameters are set correctly, click "Start" to start transferring files to the device’s memory.
- We wait until ONE rewrites the memory areas of the smartphone. The interruption of the process is unacceptable, it remains only to observe the progress indicators in the flasher window and, at the same time,

on the screen S3.
- After the ODIN displays "PASS",

the device will reboot and the OS components will be initialized.
- Android installation is complete, and in the end we get the device cleared of the remnants of the previous operating system,

which shows the same level of performance as when you first turned on after the purchase.


Single-file firmware
If you need to simply reinstall Android, update or roll back the version of the official Samsung GT-I9300 OS, a single-file package is usually used. To download the latest version of the official OS for Russia, to install it through ONE, please follow the link:

Installing such a solution is much easier than service. It is enough to follow the same steps as in the instructions for working with a multi-file package, but instead of points 3 and 4, you need to use the button "AP" adding a single file * .tarcontained in the directory obtained by unpacking the archive with single-file firmware.

Method 3: Mobile ODIN
Many users of Android devices are interested in the possibility of reinstalling the OS on the device without using a PC. For Samsung GT-I9300, this action is possible using the Mobile ODIN tool, an Android application that allows you to seamlessly install official single-file firmware.

You can get the tool in the device by downloading from the Google Play Market.

Successful execution of Mobile One functions is possible only if root-rights are received on the device!
The software package used in the example below can be downloaded here:
- Install Mobile One and put the package that will be installed in the internal memory of the Galaxy S3 or on a memory card installed in the device.
- We launch the application and provide Mobile ODIN root-rights.
- We download additional MobileOdin components that provide the ability to install packages with system software. A request for an update will appear the first time you run the tool. We confirm the need to download add-ons by clicking on the button "Download" and expect the installation of the modules to complete.
- Before installation, the firmware file must be downloaded to Mobile ODIN. Scrolling through the list of options on the main screen of the application, we find and click "Open file ...". Select the storage where the firmware is copied to, then specify the file intended for installation.
- If the system version is rolled back, you must first clear the device memory sections. To do this, check the checkboxes "Wipe data and cache", and "Wipe Dalvik cache".

In the case of an update, data cleaning can be omitted, but the procedure is recommended, as it allows you to remove the “software junk” from the system, and also prevents the appearance of many errors during the installation of Android and its further operation!
- Push Flash and confirm the appearing application requests.
- Mobile Odin carries out further manipulations without user intervention. The latter can only observe:

- After the welcome screen appears, we carry out the initial configuration of the OS settings.
- Everything is ready to use the Samsung GT-I9300 Galaxy S III running the reinstalled official Android.


Method 4: Custom Firmware
The above methods of installing the official Android versions in Samsung S3 allow you to bring the device to the factory state and solve a lot of problems that arise for various reasons in the process of using the smartphone. If the purpose of the firmware of the device is to completely convert the software part, introduce new functions into the device and turn the phone into a really modern device, in any case with regard to the OS version, you should pay attention to the possibility of installing one of the custom firmware.

Since the level of popularity of this model is extremely high, a large number of different unofficial system software solutions based on the Android versions of KitKat, Lollipop, Marshmallow and Nougat have been created for it. Below are the most popular modified shells for S3, and their installation can be divided into two stages - equipping the smartphone with a modified recovery, and then the direct installation of an unofficial Android.
Installing, starting, configuring TWRP
In order to make it possible to install a modified unofficial OS on the model in question, the device must be equipped with a special recovery environment - custom recovery. Several solutions are available for the device in question, including its updated version of Philz Touch, but it is considered the most functional and convenient product to date, it should be installed to obtain results, as in the examples below.

For all flagship Samsung solutions, the TeamWin team officially developed and released recovery packages, which are installed using several methods. Two of them have already been described in articles on our website.
- You can use the ODIN program or the MobileOdin Android application to transfer TWRP to the device’s memory. The process is similar to installing a single-file firmware.
- The official method of installing TWRP using an Android application is the most preferable solution described in the material at the link below. In addition to the process of installing the environment, the article describes the basic methods for installing firmware using the tool:
- TWRP is launched after the medium is brought into the device using one of the methods described above, by pressing the keys on the turned off device “Volume +”, "Home" and "Turning on".

You need to hold the buttons until the boot recovery logo is displayed on the device screen.

- After loading into the modified recovery environment, you can select the Russian language of the interface, and then slide the switch Allow Changes to the right.

This completes the recovery setup, TWRP is ready to use.

The package with TWRP used for installation can be downloaded at the link below or at.

Form * .img, as a result of which writing to the corresponding memory section through Official TWRP App S3 will be equipped with a custom recovery environment, it is downloaded from the official website of the developer. And you can also use the link:

In an effort to get the latest versions of Android on the Samsung GT-I9300, many owners of the device ignore the possibility of using one of the most beautiful and functional shells for the device in question - MIUI. Meanwhile, this particular product is considered one of the best solutions, despite the fact that it is based on the losing relevance of Android 4.4.

MIUI packages intended for installation in the model under consideration are posted, including on the sites of well-known development teams miui.su and xiaomi.eu.
For the current generation of people, a smartphone has become an indispensable assistant and an extremely useful device that combines hundreds of different functions. Take a photo, count the number of ingredients, set reminders, find out the weather, read the news, chat with friends - this is not a complete list of everything that modern smartphones are capable of. Sometimes we simply forget that they are not eternal and are subject to gradual wear and tear.
Smartphones running the Android operating system have long captivated the whole world with their diversity. Their program code is open and ready for editing or improvement. In the process of using such devices, there are times when the software component crashes and the smartphone stops working properly. To solve the problem of a simple factory reset, it may not be enough - you need to flash the Samsung Galaxy S3 GT-I9300.
Fortunately, manufacturers of mobile equipment and just enthusiasts have found dozens of ways to change the firmware for all Android devices without exception. The process will take several minutes and the smartphone will come to life, starting its daily work with renewed vigor. The AndroGoo website has prepared detailed instructions on how to flash the Samsung Galaxy S3 GT-I9300.
What do we need?
- At least 50% charged device (if possible).
- Original USB cable.
- version 3.0.7.
- Latest firmware:
If a new version of the OS was released for the smartphone or you do not need it in the instructions, let us know in the comments under the post.
The process of firmware Samsung Galaxy S3 GT-I9300
- If Kies was installed on the computer, delete it.
- Download and install for Samsung smartphones and tablets.
- Download and install version 3.0.9.
- Reboot the computer.
- Unpack Odin to the desktop. In the same folder we extract the firmware files from the previously downloaded archive.

- On the smartphone, go to " Settings«, « For developers"(If there is no such item, go to" About phone"And click many times on" Build number"), Turn on" USB debugging"And “Unlock, foreseeable. production. ".


- We transfer the smartphone to Download mode. To do this, turn it off completely, hold down the buttons simultaneously Home + Turn On + Volume Down.
- After the screen appears with the inscription Warning, confirm the selection by pressing the button Volume up.

- The phone went into boot mode.

- We launch Odin on behalf of the administrator.
- In this state, we connect the device to the computer using a USB cable (exclusively USB 2.0), so that flash Samsung Galaxy S3 GT-I9300. If in the ODIN window, the field ID: COM it turned blue, as in the screenshot below, everything is fine - you can continue. If not, reinstall the drivers and restart the computer.

Files that can be found in the archive with firmware
The picture shows the names of files that can be in the archive with the firmware and indicates where to install them in the Odin window.

If the file is only one and takes up a lot of space - insert it into the field PDA. This is the firmware.
- In the appropriate fields on the right, select the firmware files, based on the example above. IMPORTANT! Only flags should be checked Auto reboot and F. Reset Time.

- This is how the window of the program ready for firmware looks like:

- Click on START and wait for the end of the firmware process. At the same time, it is strictly forbidden to disconnect the smartphone from the computer and touch the USB cable. The whole procedure will take several minutes - the specific time depends on the power of the PC.

- After the end, the device will reboot itself. We disconnect it from the PC and begin to use a fresh firmware.