Hello dear friends!
Today, we will tell you how to install Russian firmware on a Xiaomi Redmi Note 3 smartphone.
As far as we all know, this smartphone comes to its customers from the "Celestial Empire", at the start of sales, with a preinstalled official firmware from the manufacturer, which includes only English and Chinese. Now we will try to limit our readers from this discomfort, telling you step by step what needs to be done in order for Russian and Ukrainian languages to appear on your smartphone.
Installing Russian firmware on Xiaomi Redmi Note 3 according to the points:
1. First you need to install the latest Chinese official firmware (link)
a) Make sure that the charge of your smartphone is at least 50%
b) Install the drivers ()
c) Go to the Flash Tool and click on "Download Agent" and select the file "DA_SWSEC.bin"
d) Select the scatter file, which is stored in the "singed_bin" folder
e) In the top navigation menu, select the "Options" item -> click on "Download" and check for an activated checkbox
2. After that we need to install the Russian firmware (link). To do this, you must:
a) Go to the "Redmi Note 3" folder and run the Flash Tool
b) Click on "Download Agent" and select the file "DA_SWSEC.bin" (if it has not been selected earlier)
c) Select the scatter file, which is stored in the "images" folder
e) In the top navigation menu, select the "Options" item -> click on "Download" and check for activated checkboxes
f) Return to the main menu of the Flash Tool and click on "Download"
g) Connect the switched off smartphone while holding down the volume button "-" and hold it until the download starts (yellow bar)
g) After installation, you can close the program and connect your smartphone
The first start-up may take up to 5 minutes.
Voila! Russian firmware is installed. We wish you pleasant use!
All actions you do at your own peril and risk. We advise you to carefully follow all the points.
Video of installing Russian firmware on Xiaomi Redmi Note 3
From SW. Andrey Kovtun
"This manual is recommended for use by experienced and knowledgeable users or specialists. This manual will describe the process of flashing a smartphone, it is important to understand that during the flashing all data on your smartphone will be deleted, and we are not responsible for any possible harm that you may cause. your smartphone, all actions you do at your own peril and risk. "
DOWNLOADING SPECIAL SOFTWARE FOR SMARTPHONE FIRMWARE
1. Follow the link to download the program for flashing the smartphone MiFlash
2. From the link download "ADB" Android adb-USB UnifL Driver - this is a driver for the correct connection of the smartphone to the computer
3. Follow the link to download fastboot edl, you will need it to switch the phone to EDL mode
4. Follow the link to find the Redmi Note 3 Qualcomm Latest Global Stable Version Fastboot from the list and download the firmware for the Xiaomi Redmi Note 3 Pro smartphone
Download all these files and unzip them. Unzip the firmware to drive C on your computer, or to another place convenient for you, it is important that the path to the folder with the firmware does not contain Russian letters.
PREPARING THE COMPUTER
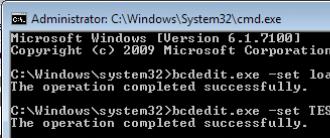
Disable driver digital signature verification
1. Open "Start", and there is already "Parameters" 
2. Go to the "Update and Security" settings section 
3. Go to the "Recovery" menu 
4. After restarting the computer, we get to the menu in which we select "Diagnostics" in other versions of "Troubleshooting" 
5. After restarting the computer, we get to the menu in which we select "Diagnostics" in other versions of "Troubleshooting" 
6. Select "Additional parameters" 
7. Select the item "Download Options" 
8. And click the "Restart" button 
9. In the window that appears, select item 7, to select it, press the F7 key on the keyboard 
Then the computer will restart and you will be taken to your "desktop".
Installing the software
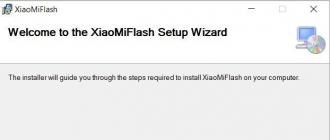
1. Installing MiFlash
Open the unpacked folder from the archive, and run the MiPhones.exe file 
Next, we indicate the folder where we want to install the program and click "next" 
During installation, warning windows may appear, but we ignore them and click "Install this driver anyway" 
At the end of the installation, click "finish" (end). We have installed the MiFlash program
1. Installing the ADB driver
Open the folder with the downloaded driver and find there two files with the extension .exe 
Setup.exe - for 64-bit operating systems
Setup_x86.exe - for 32-bit operating systems
We launch one of the files corresponding to the bitness of the operating system and the installation menu will open.
To start installation, click "Next" 
The program will start the installation and ask if you want to install software for this device.
We mark the item "Always trust the software" with a "birdie" and click "Install" 
At the end of the installation, click "Finish" in the window that appears.
The drivers are installed.
PREPARING YOUR PHONE
1. For the firmware, you need to put the phone into the "Fastboot" mode, for this we turn off the phone. On the switched off phone, we simultaneously hold down 2 keys ("volume down" and the "lock" button). The phone vibrates and a picture should appear on the screen, as below. 
After switching to the "Fastboot" mode, we connect the phone using a cable to the USB port of the computer (it is recommended to use the USB ports on the back of the case) or laptop.
2. Open the "Fastboot_edl" folder and run the edl.cmd file, the phone should turn off and go into EDL mode, "search and install the device driver" may also start, wait for this window to close.
TELEPHONE FIRMWARE
1. Run the MiFlash program (from the folder where you previously installed it)
2. Then click on the "Refresh" button 
3. Our device COM 10 should appear (the number may be different) 
4. Click "Browse ..." and specify the path to the folder where the firmware is located. Then we set the marker in front of "Flash all" 
5. After that, press the "Flash" button and the device will start flashing 
6. At the end of the firmware, we will see the following:  The device has been updated!
EXIT EDL MODE AND TURN ON THE SMARTPHONE
1. Disconnect the phone from the USB cable
2. Press the lock button for 5 seconds, then release it, and press it again until the phone vibrates and the start-up process begins
3. After updating the firmware, the first launch of the phone will take about 10 minutes
4. When the phone turns on, you will have to go through the "First turn on" procedure
Self-flashing smartphones is most often needed in 2 cases: if the manufacturer has stopped issuing automatic updates for this model, and when a problem arose in the operation of the device that cannot be solved by other methods
In the case of Xiaomi Redmi Note 3 Pro, the firmware is required for those users who want to install the latest software shell, because over-the-air updates for this phone model have not come since 2016.
Downloading MiFlash
To flash Note 3 Pro, you need a computer running Windows 7, 8 or 10 (under XP, the required program does not always work correctly). To automatically install all the necessary drivers, the first thing to do is download and install the Mi PC Suite program on your PC.
Then we download the main tool for the firmware process - the Mi Flash Pro program. It is a universal software management tool for the Xiaomi phone line. If during the installation there are questions about the signature of the drivers, we agree to the continuation of the installation. Drivers that have not been installed can be manually fixed through the "Device Manager", specifying the path to the folder where MiFlash is installed.
When looking for a firmware file for updating to MIUI global, you need to pay special attention to the specification of the smartphone model: for the Redmi Note 3 Pro on the Qualcomm Snapdragon 650 processor, there will be its own version, which will not work for the Redmi Note 3 Pro on the Mediatek chip and for the Note 3 PRO SE. These models will have their own firmware. The rest of the process will be the same.
Installing the firmware for developers
Installing firmware for developers on Xiaomi instead of the global stable one is needed in the case when an error occurs when trying to unlock the bootloader after the official permission from the manufacturer. To do this, follow these steps:
- Enable USB debugging mode on the phone (located in the "For Developers" menu, which is activated by repeatedly clicking on the "MIUI Version" item in the "About phone" settings section).
- Download the firmware file for developers and place it in the internal memory of the phone (preferably in the root folder).
- Download and install the Mi Unlock Tool on your PC.
- Launch the "System Update" application on the phone, select the path to the copied firmware file in its menu and click "Update".
- Wait until the end of the installation process and reboot the device.
- After that, restart the phone in boot mode (volume down button + power button), connect it to the computer and launch Mi Unlock Tool.
- The application will display a message that after 72 hours you can try to unlock the bootloader again. According to users' experience, after these steps, the unlocking takes place without problems.
We put custom recovery
After successfully unlocking the bootloader, a custom recovery (TWRP) is installed for further actions, which gives the phone owner ample opportunities:
- backing up data and the current state of the phone;
- access to all functions and actions that require root rights;
- resetting the device to its original settings;
- recovery from backups;
- installation of custom firmware versions, as well as patches with additions and fixes to them;
- flashing the radio module, kernel, etc.;
- clearing the system cache;
- the ability to manage the memory card (split into sections, allow the installation and transfer of applications).
To install, the recovery image (file in * .img format) is downloaded to the C drive in the TWRP folder, then you need to download the Install-TWRP.zip archive and unpack it into the same folder. After that, replace the original recovery.img file with TWRP ++ 3.0.2-2.img, deleting the first one and giving its name to the second one.
Now you need to load the phone into boot mode again: turn it off and turn it on with the volume down button pressed. Go to the TWPR folder on the C drive and run the Flash.bat file. If the installation of the recovery went smoothly, the phone will reboot with the entrance to TWRP, where the user will be able to manage its software, including installing any custom firmware.
The firmware file in zip format must be downloaded to the phone's memory and moved to the root folder, then loaded into TWRP. For error-free software installation, it is recommended to make a "wipe", i.e. clearing operating system data.
The next step is to select the Install item in the recovery menu, specify the path to the saved firmware file, select it and confirm the installation. If the process is successfully completed, you can reboot the phone into normal mode and use the updated system.
Possible problems and solutions
The process of flashing Xiaomi Redmi Note 3 Pro does not cause difficulties for experienced users, but it must be remembered that for any consequences of independent intervention in the device software, responsibility remains only with the user himself. Among the most common problems that arise during manual system updates, the following are noted:
- Problems with unlocking the bootloader. Officially, an unlock request is made through an appeal to the manufacturer on the Xiaomi website, but the answer may be negative or not at all. It is difficult to trace the pattern, but some users receive permission after 3 days, while others may not receive it even after a month. Experienced users can try third-party programs that can "crack" the bootloader, but the consequences of such a decision are difficult to predict.
- MiFlash does not see the phone. After connecting the phone via USB, MiFlash may not see it in the list of available resources. Most often, the Refresh button helps in this case, which refreshes the list. If after clicking on it nothing has changed, the problem may lie in the incorrect recognition of the phone by the computer: if the phone is connected as just a USB drive, the program will not be able to recognize it. You can check this in the phone settings.
Sometimes, after flashing, users are unpleasantly surprised by the loss of personal data. Firmware is the installation of an operating system from scratch, so full memory cleaning is an integral part of this process. It is necessary to take care of the safety of the data in advance by rewriting them for storage in the computer memory or on another medium. Also, backing up the original system will help get your phone back to working condition if something goes wrong after flashing.
Sources of purchase of Chinese smartphones today are countless. And not everyone manages to get a gadget with high-quality firmware that works properly. Therefore, you often have to look for ways to reflash your smartphone. This is especially true for those who buy a phone from China over the Internet. Mobile devices presented in official Xiaomi stores in Russia are already equipped with custom firmware with full-fledged russification, therefore, if you do not want extra hassle, you can just buy a gadget there. But keep in mind that they are significantly more expensive. Therefore, it is quite possible that it will be more profitable to buy a phone on the Internet and understand a little about the features of its self-flashing.
Also, a smartphone software change may be required if it has ceased to be updated “over the air” for any reason. The availability of the current firmware version is extremely important for the correct operation of the device and the ability to use the latest applications on it.
Therefore, we propose to figure out how to reflash Xiaomi Redmi Note 3 Pro. An example of this gadget can be used on other similar models of this manufacturer. We will offer several methods, and you will only have to choose the most suitable one. But in any case, remember: an independent firmware change is performed by the user at his own peril and risk. And to end well, be sure to follow the instructions in the order below.
Downloading MiFlash
 The easiest way to change the firmware is through the MiFlash program. It is installed on a computer, but it does not always automatically pull up all the necessary drivers for a specific Xiaomi model. Therefore, it is better to download them yourself.
When launching MiFlash, do not be alarmed by the appearance of a sign asking whether to use unverified drivers. Confirm the installation anyway. This program is good in that it allows you to directly and as quickly as possible install any firmware you choose.
Give gifts
We connect the phone to the computer
 Using a USB cable, we connect the gadget to the computer. You need to go to the developer settings and enable USB debugging mode. Also, it will be useful to activate the factory unlock, because most modern Xiaomi models come with an initially locked bootloader. Unlock rights can be obtained by making an official request on the Xiaomi website. However, be prepared for the fact that in this case you will lose the warranty rights to the device.
In MiFlash, we indicate the path to the previously downloaded software and reflash the phone. You can download the latest firmware version on the official website: http://en.miui.com/download-301.html. The procedure will complete within a few minutes. After that, you can disconnect the smartphone from the computer, turn it on and start setting up the new firmware.
Possible problems and solutions
When self-flashing Xiaomi devices on Android, you may encounter some common problems. But the good thing is that someone has already solved the same issues before, and therefore a solution has been found for them. Let's go through the main such situations. 
- MiFlash does not see the phone. It's not about the program itself, but how the computer sees your smartphone. If he takes it for a regular file drive, then, of course, he will not give the command to install software for mobile devices on it. Therefore, if you connected the phone via USB, and it still does not appear in the MiFlash working window (even after clicking the Refresh button), then you should manually check the settings for recognizing the connection made.
- Xiaomi does not give permission to unlock. After an official request on the Xiaomi website with a request to unlock the gadget, it is far from always possible to get a positive answer. This is logical, because, otherwise, the manufacturer would not have had to install a locked bootloader. It is difficult to find an exact answer to the question of what criterion is used to select those who can and cannot change the firmware. If you were refused to unlock the bootloader, then there are not so many options. It remains only to use special software that allows you to literally hack the limiter, but the consequence, as you understand, will be entirely under your responsibility.
- Data disappeared after flashing. It should be understood that changing the firmware is similar to the procedure for reinstalling the operating system on a computer. That is, all data will be deleted. Therefore, before starting the procedure, be sure to take care of saving the files you need to another medium. When the new OS is installed, you can easily return the data to the gadget.
Xiaomi Redmi Note 3 Pro is still too early to be discounted, although there is. The model turned out to be very successful, which won the love of not only mi-fans, but also other users. In this article, we will tell you in detail about all the obstacles that you will have to face in the process of installing custom firmware on your smartphone.
1. INSTALLING THE DRIVER ON THE COMPUTER
The first step is to install the driver on your computer. The easiest way is to install the Mi PC Suite program, which will automatically download and install all the necessary drivers. If, for some reason, you were unable to install the drivers using this program, then you will have to do it manually:
upload archive with drivers and unzip its contents to the "C: \ drivers" folder
connect your phone to your computer using a USB cable; open "Device Manager" on your computer
right-click on the "Unknown device" that appears and select "Update driver"
select the item "Search for drivers on this computer", find the folder with previously downloaded drivers and select it
confirm the installation, you're done 🙂
If you are still experiencing problems with the installation, then perhaps disabling the digital signature verification of the installed drivers will help you.
2. UNLOCKING THE LOADER
Now you need to unlock the bootloader on your phone. To officially unlock the bootloader on a Xiaomi smartphone,.
3. INSTALLATION OF CUSTOM RECOVERY
Now you have to install custom recovery on your device.
To do this, strictly follow our instructions:
upload a custom recovery image in .img format, TWRP version 3.1.1-1 will do;
put your device into Fastboot mode by simultaneously holding down the power and volume down buttons until the fastboot logo appears;
connect the device to a PC;
open the folder with MiFlash and move the downloaded .img image into it. Then hold down Shift on the keyboard and right-click on the folder space to open the context menu, in which select “Open command window”;
in the window that opens, type the command: “ fastboot flash recovery file.img”, Where file.img is the name of the downloaded custom recovery image. Execute the entered command by pressing the Enter button;
maybe the phone will reboot several times, after which a custom recovery will be installed on it, and the device itself will be completely ready for custom firmware.
If suddenly you decide to flash the official version of MIUI on the device using custom recovery, then you will have to patch the bootloader: in the TWRP menu (custom recovery), click “Advanced” -> “Disable verify”, then install the patch itself along the path / sbin / cofface .zip. If you are going to install custom firmware, then this step should be skipped.
4. INSTALLING CUSTOM FIRMWARE
Are you still here? We praise your patience and dedication! And only now you can install custom firmware.
Follow our instructions further:
pre-download the firmware you like and GAPPS to it (a set of Google applications, its services and Google Play, including) and copy them to the internal memory of the phone;
reboot the smartphone into Recovery TWRP mode by holding down the power and volume up buttons until the “Mi” logo appears;
follow the path: "Wipe" -> "Advanced Wipe", check the items "Dalvik / ART Cache", "System", "Data" and "Cache" and then confirm the cleaning, either by clicking on the confirmation button, or by swiping on the slider below ;
now select the "Install" item in the menu, in the phone memory select the .zip firmware archive and, if necessary, the GAPPS archive;
use the slider or button to confirm the installation, then select the “System” item in the “Reboot” menu, which is responsible for rebooting into the system;
after rebooting, you configure the device as when you first turned it on and are happy with the new firmware.