Virtualization technology allows you to create several virtual ones with their own operating systems on one physical computer. The guest operating systems will use the resources of the real PC allocated to them within the established limits. In this case, there is no need to partition the disk into sections and there is no danger of damaging the bootloader. The user's personal data is not affected and is safe. If you are interested in these opportunities, stay with us. Today we will tell you how to enable virtualization in Windows 10.
A hypervisor developed by Microsoft called Hyper-V is included as an optional component in the system. It can only be used in x64 bit OS Windows 10 Enterprise or Pro. In a corporate environment, Microsoft even recommends specific HP and Lenovo laptops. Users of the Home edition and all x32 bit systems do not have this option.
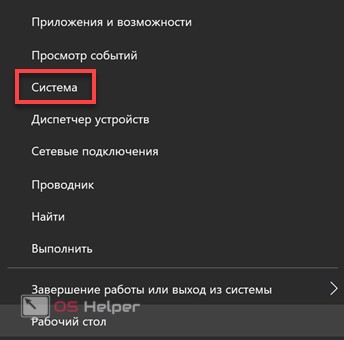
- You can quickly find out the parameters of installed Windows using the keyboard shortcut Win + X. In the drop-down menu, select the item marked with a frame.
- The window that opens contains two blocks of information. In the first, we look at the amount of installed memory and bit depth. Hyper V requires at least 4 Gb of RAM. In the second block, we pay attention to the release of the OS.

- Based on the system settings, the computer is suitable for installing and running the Microsoft VM. Additionally, Hyper-V requires the processor to support SLAT nested paging. Intel has implemented it in the Core i3/5/7 line, and AMD has implemented it since the first 64-bit Opterons. The processor model is indicated in the characteristics of the device, so there is no need to check it in BIOS or UEFI. We can verify the support of Hyper technologies using the command line. We enter the command "systeminfo" and look for the data block indicated in the screenshot.

As you can see, all the necessary requirements are met and we performed the check without entering the BIOS. After making sure that the hardware configuration is suitable for using the virtual machine, we can proceed to the installation.
Installation
Hyper-V is a component of the operating system. It cannot be downloaded and installed separately. You can only enable use in a Windows environment. Consider several options for connecting Microsoft Virtual Machine.
Graphics Mode
Let's start by using the graphics mode, as the most familiar to users.
- Press the Win + R key combination to open the Run dialog box and enter the command "control" in the text field as shown in the screenshot.

- The result of our actions will be the appearance of the classic Windows control panel. We are looking for the specified item and open it.

- In this window, we will use the navigation menu responsible for working with the components of the operating system.

- Turn on Hyper-V. We expand the "Hyper" branch and make sure that the checkboxes are checked in front of all its components. We complete this section by clicking the "OK" button.

- Windows searches and installs the ordered components internally.

- When you have finished making changes to the software configuration, the system will prompt you to reboot.

This completes the installation and the PC is ready to use the built-in virtualization tools.
Command line
You can also install hypervisor components using command line options.
- Open the Power User menu and run PowerShell or the CMD shell as an administrator.

- Enter the following line in the window that opens:

- Windows processes the received command to install additional components.

- Finally, we will be asked to confirm the changes made and reboot. Enter the English letter "Y" in any case.

The computer will immediately exit graphics mode and display the standard update window. The system will start with Hyper-V enabled.
The last method involves using the Windows Deployment and Image Management tool.
- We start the command line with administrative rights. Enter the following line:

- After completing the installation of the components, DISM asks for confirmation.

Entering the letter "Y" causes the PC to immediately reboot, during which the initial configuration of Hyper-V is performed.
Usage
After completing the installation, you can start creating a new virtual machine.
- The new component is located in the "Administrative Tools" section of the Start menu.

- Hyper-V Manager is the standard Windows management console. Operations are enabled and configured in the Action area. Select the checked item to start the wizard.

- A three-point selection menu will open. Select the one marked with a frame.

- The first window is informational. By checking the box in the specified place, you will no longer see it on subsequent launches. To create a machine with its own configuration, select the button marked with a frame.

- Here we give a name to the created machine and we can change the location where its files are stored.

- The generation should be selected based on the bit depth of the OS intended for installation. For 32-bit versions, we leave the first, while modern distributions refer to the second.

- The amount of allocated memory depends on the physical capabilities of the PC. The simplest solution would be to allocate 2 GB (2048 MB). This is the minimum amount required to run 64-bit Windows. Enough of it and to install any version of Linux.

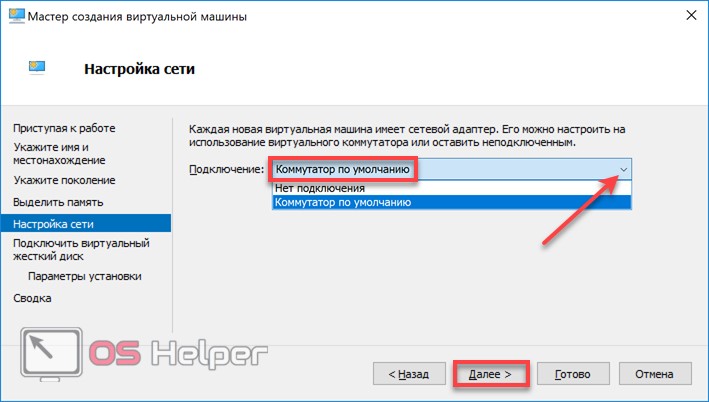
- In the network settings, open the drop-down menu and select the specified option. VM Manager will automatically set up a connection for the virtual machine using the current Internet connection.
- The disk size that will be used for installation can be limited to 32 GB. This is enough to run the guest OS with a set of programs.

- We agree with the proposal to install the guest system later. You can do this using DVD media or an ISO image.

The virtual machine is ready. To disable Hyper-V and remove the guest systems, you need to disable the use of this Windows feature in the Control Panel.
Alternative
Windows Home owners who don't have access to Hyper-V can use Oracle's free alternative solution. Unlike the Microsoft product, the VirtualBox application runs on 32-bit systems, has more features and is less demanding on resources. It does not require a special set of processor instructions.

Almost all existing operating systems will run in VirtualBox, which cannot be said about Hyper-V. In it, the choice is limited to several versions of Windows, and more recently, also Linux.

Finally
For comfortable use of virtual machines, do not forget that they consume the physical resources of the computer. Ideally, the PC should have 8 GB of memory to ensure that the current and guest OS work simultaneously with running applications.
Video
To help users who want to better understand the Windows 10 virtualization settings, below are the video links.
Hyper-V is an operating system component that is disabled by default. To enable a component Hyper-V 64-bit production processor required Intel or AMD with support for NX and SSE2 instructions. The processor must support virtualization technologies ( Intel VT-x or AMD-V), as well as Second Level Address Translation (SLAT) technology. You can check the processor for the presence of the necessary technologies using the Coreinfo utility from Sysinternals, the verification procedure is described in detail
Also, before enabling Hyper-V, you need to check if these technologies are enabled in the BIOS / UEFI.
GUI
To enable the Hyper-V feature in the GUI, press the key combination + R and in the window that opens, enter OptionalFeatures and press the key Enter↵
In the opened window Windows Components find the point Hyper-V. In addition to the Hyper-V platform itself, this includes tools for managing it - graphical snap-in Hyper-V Manager and module Hyper-V for PowerShell. Expand it, mark all components and press the button OK
To disable Hyper-V, uncheck the box next to Hyper-V

You must restart your computer to complete the installation and make the requested changes.
Enable or disable Hyper-V using
Windows PowerShell
The Hyper-V component can be enabled using the Windows PowerShell console
As administrator and run the following command:
Enable-WindowsOptionalFeature -Online -FeatureName Microsoft-Hyper-V –All

Y
To disable the Hyper-V component using Windows PowerShell, run the command:
Disable-WindowsOptionalFeature -Online -FeatureName Microsoft-Hyper-V-All

To complete the operation, restart Windows by pressing the key Y
Enable or disable Hyper-V using DISM
To enable the Hyper-V component using DISM, run a command prompt as an administrator and run the command:
dism.exe /Online /Enable-Feature:Microsoft-Hyper-V /All

To complete the operation, restart Windows by pressing the key Y
To disable the Hyper-V component using >DISM, launch a command prompt as an administrator and run the command:
dism.exe /Online /Disable-Feature:Microsoft-Hyper-V-All

To complete the operation, restart Windows by pressing the key Y
Good afternoon. Thanks to my site, I constantly tinker with the operating system and, of course, over time I began to look for a way so that I could write instructions, but at the same time make fewer changes to the operating system of my work computer ... The solution came elementary - a virtual machine. This is an emulation of a fully (or almost fully) working operating system that runs on your operating system. I tried VirtualBox, VMware Workstation and Hyper-V… VirtualBox is free and not as user-friendly as the other two. VMware Workstation - excellent in all respects, but paid. Hyper-V is a well-balanced virtual machine that migrated from server operating systems to Windows 8 and just needs to be turned on for access. Therefore, the choice fell on the latter: simple, free and tasteful. By the way, I have Windows 10 Professional licensed, but I got it for free thanks to the Windows Insider program (six months of suffering with bugs and a license in my pocket)).
I will probably immediately warn you that when you enable Hyper-V components, you will not be able to use other virtual machines. So, let's begin:
Right-click on the "Start" corner and select "Programs and Features".
In the left pane, select "Turn Windows features on or off"
Now open the Start menu → All Programs → look for the “Administrative Tools” directory and find “Hyper-V Manager” in it.
Running it, we will see the virtual machine management console, I already have one created machine, which hosts the music bot for my TeamSpeak server. But now we are creating another machine to show how this is done. But first, let's immediately create a "Virtual Network" so that our VM has the Internet. To do this, click on the computer name in the left column, and in the right column select "Virtual Switch Manager".
I add this paragraph two months after writing the article. This is because, below, I described an easier way to connect a virtual machine to the Internet, but I myself use a slightly different one. The difference between them is that in the method described here, the VM gets the main access, and the computer works after it, and this is not correct, but it is easier to configure. If you use the computer not only for running virtual machines, select "Internal" → "Create a virtual switch" and check the box "Allow identification". Internet access is configured using .
On the left, select "Create a virtual network switch", on the right "External" and click "Create a virtual switch".
Enter a name for the network, in the "External network" section, select your network adapter and click OK.
Now let's create a virtual machine. Click "Create" - "Virtual Machine".
Opens " Virtual Machine Creation Wizard“, on the first window, just click “Next”.
Specify a name for the future virtual machine. If desired, you can also change the storage location of the virtual machine, I have changed the location in the settings so as not to clog the SSD and all virtual machines are stored on one of the hard drives. Click "Next".
Everything is simple here, we read what is written, if you have a motherboard without UEFI support or you are going to install a 32-bit system, then select the first item, if the conditions for using the second generation match your capabilities, select the second generation. I want to install 32bit Ubuntu, for one of the following articles, so I choose the first generation of Hyper-V. Click next.
The amount of virtual memory. In the case of Windows, 2-3GB is desirable for 32-bit systems and 3-4 GB for 64-bit systems. More does not make sense for a virtual machine, and less can affect the operation of the system. You can also use "Dynamic Memory", in this case, the VM will be allocated as much memory as it needs.
Hyper-V Manager provides tools and information that you can use to manage your virtualization server. Virtualization technology allows you to create several virtual machines on one physical computer and work with them in parallel. Some applications, in addition to the Hyper-V component itself, can also use virtualization technology.
This article will tell you how to turn off Hyper-V virtualization in Windows 10. Since this functionality is not necessary for everyone, it is present. Although by default on the original assembly of the Windows 10 operating system, the Hyper-V component is disabled. Therefore, we have already considered .
We recommend that you use the Hyper-V Virtual Machine Manager to manage virtual machines. Hyper-V Manager allows you to create and configure virtual machines. Therefore, before disabling Hyper-V in Windows 10, you must first stop the previously created virtual machines.
First of all, we go to Hyper-V Manager and in the virtual machines section, right-click on the running new virtual machine and select the item in the context menu Switch off…

Programs and Features

Windows PowerShell
Using the Windows PowerShell shell, you can not only enable and disable system components, but also .

Command line
- Launch command line by pressing Win+X and choosing the item Command Prompt (Admin).
- Next, we execute the command: dism /online /disable-feature /featurename:microsoft-hyper-v-all.
- After the shutdown process is completed, we confirm the restart of the computer by clicking the button Y.
Conclusion
It is possible to turn off Hyper-V virtualization in Windows 10, because by default the Hyper-V component is disabled and virtualization is not used. And also the ability to simultaneously use several virtual machines is not needed by many users. Therefore, we looked at how to disable the virtual machine management service, then the Hyper-V component itself.
Virtualization may be needed for those users who work with various emulators and / or virtual machines. Both of them can work well without this option enabled, but if you need high performance while using the emulator, then you will have to enable it.
Important warning
Initially, it is advisable to make sure that your computer has support for virtualization. If it is not there, then you risk simply wasting your time trying to activate through the BIOS. Many popular emulators and virtual machines warn the user that his computer supports virtualization, and if you enable this option, the system will run much faster.
If you did not get such a message when you first started some emulator / virtual machine, then this may mean the following:
- Virtualization is already enabled by default (this is rare);
- The computer does not support this setting;
- The emulator is not able to analyze and notify the user about the possibility of connecting virtualization.
Enabling virtualization on an Intel processor
Using this step-by-step instruction, you can activate virtualization (relevant only for computers running on an Intel processor):

Enabling virtualization on an AMD processor
The step-by-step instruction looks like this in this case:

It is not difficult to enable virtualization on a computer, for this you just need to follow the step-by-step instructions. However, if the BIOS does not have the ability to enable this feature, then you should not try to do this using third-party programs, as this will not give any result, but it may worsen the computer's performance.
We are glad we were able to help you resolve the issue.
Poll: Did this article help you?
Not reallylumpics.ru
Virtual Secure Mode (VSM) in Windows 10 Enterprise
Windows 10 Enterprise (and this edition only) has a new Hyper-V feature called Virtual Secure Mode (VSM). VSM is a secure container (virtual machine) running on a hypervisor and separated from the host Windows 10 and its kernel. Security-critical system components run inside this secure virtual container. No third-party code can run inside VSM, and code integrity is constantly checked for modification. This architecture allows you to protect data in the VSM, even if the kernel of the host Windows 10 is compromised, because even the kernel does not have direct access to the VSM.
The VSM container cannot be connected to the network and no one can gain administrative privileges on it. Inside the Virtual Secure Mode container, encryption keys, user authorization data, and other information that is critical in terms of compromise can be stored. Thus, an attacker will no longer be able to penetrate the corporate infrastructure using locally cached domain user account data.
 The following system components can run inside VSM:
- LSASS (Local Security Subsystem Service) is a component responsible for authorization and isolation of local users (thus the system is protected from “pass the hash” attacks and utilities like mimikatz). This means that passwords (and / or hashes) of users registered in the system cannot be obtained even by a user with local administrator rights.
- Virtual TPM (vTPM) is a synthetic TPM device for guest machines that is required to encrypt the contents of disks
- OS code integrity control system - protection of the system code from modification
To be able to use the VSM mode, the following hardware requirements are imposed on the environment:
- UEFI, Secure Boot and Trusted Platform Module (TPM) support for secure key storage
- Support for hardware virtualization (at least VT-x or AMD-V)
How to enable Virtual Secure Mode (VSM) in Windows 10
Let's look at how to enable Virtual Secure Mode in Windows 10 (in our example, this is Build 10130).

Checking the operation of VSM
You can make sure that the VSM mode is active by the presence of the Secure System process in the task manager.
 Or by the event “Credential Guard (Lsalso.exe) was started and will protect LSA credential” in the system log.

VSM security testing
So, on machines with VSM enabled, we register under a domain account and run the following mimikatz command from under the local administrator:
mimikatz.exe privilege::debug sekurlsa::logonpasswords exit
We see that the LSA is running in an isolated environment and the user's password hashes cannot be retrieved.
 If the same operation is performed on a machine with VSM disabled, we get an NTLM hash of the user's password, which can be used for "pass-the-hash" attacks.