Hi all!
The other day I was wondering how to remove Windows 10 login password. Initially, I didn’t have it, but at the same time, the loading of the dozens itself was not complete, but up to the welcome screen... Where you had to press the “log in” button from your account, and this was the first problem that bothered me a little. It’s as if, after clicking on the “login” button, the computer thought some more... Although, it’s not clear what to think!
It would start right away, and that’s all...)) We’ll do everything. Read to the end.
In general, okay. I initially came to terms with this problem! Click login and Windows starts without a password.
But, one day the other day... Once again, while working on the blog, I noticed some strange feature, or a glitch with the mouse.
The mouse cursor kept hovering on the screen, and at the same time the buttons reacted. And after a while, the cursor worked again as if nothing had happened. To understand the situation, this is a radio mouse, without a wire. Which, at the same time, turned itself off if you did not approach it for a long time. And then, when clicked, it starts again - it works... and the mouse indicator blinks, as it should. The problem with the mouse was repeated more and more often, until I bought 3 types of different batteries - it didn’t help. I bought another mouse - it didn’t help! But the problem turned out to be not in the mouse at all...
And in search of a solution, I accidentally came across a video from YouTube, where one gamer talked about a similar glitch in the top ten. And to fix it, you had to create an account in xbox microsoft (if you don’t already have one), and there in the settings disable one function related to mouse settings... (this problem is more relevant for gamers whose mouse slows down during the game or freezes)


Hmm... Just think about it! What does this have to do with the Windows 10 password and account?
The fact of the matter is that earlier, before logging into xbox, I did not have a password when starting windows itself. And when I created the account, it contacted my local computer, and now required a password upon boot:

It turns out that you can have 2 types of user. One local user, no password. And the other is from a microsoft account. You could have activated it in another way. For example, it worked for me via xbox.
Naturally, this whole thing was not satisfactory. It was enough that Windows loaded until the welcome screen appeared:

After that, you need to press the mouse button or spacebar. For the Windows 10 login screen to appear. And only after that, you had to enter your password and press login.
This, of course, is an unrealistically unnecessary action.
Some kind of headache when loading the computer. From whom, what to hide? Why encrypt like that? And the same thing happened when exiting sleep mode.
So! It was decided to deal with this situation and launch Windows directly to the desktop, bypassing the welcome screen and entering a password.
How to remove the password when logging into Windows 10 from sleep mode and when starting a computer or laptop?
After reading a little online about this, I found several solutions. And today I will share with you...
First of all, it was necessary to leave one account - one user under which we log into Windows 10. That is, local. And you can simply delete your Microsoft account so that it doesn’t interfere. Or switch from Microsoft to local. And why did I even need it?
or, here's another option...
Shown how to disable (remove) the password request when logging into Windows 10 on a laptop?
The video shows it specifically on a laptop, and about exiting sleep mode without a password.
Sequencing:
1. Type netplwiz in the search and run the command

2. User accounts will open
Here I left only one user (local, only myself). And I deleted all the others! At the same time, the group for the main user is - administrator. The point is to be one person in the Windows 10 system, as an administrator.
Click Apply and a window will pop up asking you to enter your old password. We just enter it and then check again to make sure the box is not checked. Click “apply” and “ok” again.
There is an opinion that at this point there is a small glitch in the top ten itself. And the checkmark may appear again after saving. So check it again!

By the way, about the glitch with a tick. He is really present. And if you log into user accounts again, the check mark will appear again. But it won’t take effect until we click OK. :

This helped me, but in addition I deleted my Microsoft account (see video below) and disabled the password request when resuming from sleep mode (read below).
At the stage when I left one user with Windows, which should already start without a password... When logging out of the system, or when exiting sleep mode, the password was shown.
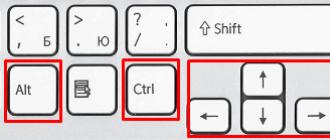
You can easily check this by logging out of the system using the key combination win+L:
How to log out of the system, as if from sleep mode. Check if there is a password?
Press the key combination WIN+L:

And we log out of the system. We will immediately notice whether a password will be required or not.
If not, then congratulations! Everything is resolved, and when you exit the sleeper, the password is no longer required.
Windows 10. What to do and how to remove the password if it requires a password when exiting sleep mode?
In the video above, these points were discussed. Let's take a closer look, step by step.
1. In the search, enter “password”, then open “Login Options”

2. In the login options, select "NEVER".
This is the entry parameter, namely the exit from sleep mode. Windows explains it to us like this:
If you are away, how long should Windows require you to sign in again?

That's all!
Although you probably won't have such a function after you disable the user's password. As shown above. After all, if there is no password, then what to ask for)) . In any case, write below if you have any difficulties. We will try to help you!
To check, you can restart your computer. Or log out of the system using the key combination WIN+L, and it will no longer require a password. Just press the button and log in. And when the system boots when you turn on the computer, the password and welcome screen will not be requested at all, but the desktop will immediately load. Fast and convenient!
And lastly, this is a video about Microsoft Local Recording. Since there is not much information on this topic, I found a solution...
Microsoft account - how to disable it in Windows 10?
The topic was divided into 2 stages:
- First, the account is deleted from the computer itself.
- Deleted from the site itself (Microsoft server)
The first stage is shown in the first part of the video.
But the second stage, in more detail...
Instructions:
1. Go to the website https://account.microsoft.com


3. Then, on the SECURITY tab, you need to find the item ADDITIONAL SECURITY SETTINGS

4. And in the next steps, request a special code to verify the account that it belongs to you. Click - SEND CODE. The code arrives quickly, and we enter it in a special field, as shown below...

5. The fifth step, at the very bottom, after going to the next page (you may need to click the CONTINUE button), and then the item - “Closing your account”, which is at the very bottom of the screen. And select the link - “Close account”.

6. You will be warned again and told that the account will be permanently closed after 60 days. expectations. But that's not the point! Read the information in detail and click NEXT. As shown below...

That's all the stages. In fact, I wouldn’t have needed the last step if I hadn’t created a Microsoft account through xbox. So I had to deactivate it.
The most interesting thing is that the problem with the mouse was not entirely related to the xbox settings. Because this is more of a setting for gamers.
Well, oh well))… One event with a mouse forced me to look into another problem and write about it on the blog pages.
I found new ways for myself that speed up the operation of Windows 10, as well as how to quickly find suitable drivers for all computer devices so that they are free of system errors and conflicts. After all, problems associated with the top ten are periodically noticed. Especially when the processes in the system are heavily loaded.
I want to tell you everything. Write below how relevant is this for you to know?…
As for Windows being loaded with various processes and programs that can slow down its operation, this is not necessarily a problem with RAM. It is likely that the glitches are software related to . The same hard drive may produce errors that you are not aware of. Everything needs to be checked and corrected periodically.
In the next issues, there is something to talk about.
By the way, speaking about programs such as Photoshop or dreamweaver - they are also not bad at loading your system. Especially when you surf the Internet at the same time, and have 30 tabs open, and 3 more browsers are additionally launched to check client sites.
So it turns out that the system can be very heavily loaded with tasks, and Windows will cope, but somewhere the first problems will begin. And it’s especially bad when the computer freezes completely and you turn it off emergencyly. And then, after another failure, it may turn out that Windows will not start. Or something will break in the system again and you will need to re-enter your password.
In general, write below what is wrong with Windows 10. We will figure it out together.
If you found today's episode useful, please click like.
During the installation of Windows 10 on a computer, you are voluntarily/forced to come up with a PIN code to log into your account. You won't be able to skip or ignore this setup step, but luckily, you can remove that annoying pin code later. Although I would not recommend leaving your computer unprotected if you have any important data stored there. But this is a completely separate topic, and today we will find out how to remove PIN and password in Windows 10.
How to remove PIN code in Windows 10
You can, of course, remove the PIN code in Windows 10 in different ways (although this is not a fact, I just don’t rule it out). But I'll show you how I did it. You should like this method because it is simple and straightforward.
However, it is worth reminding you once again that by removing the PIN code from your computer, you leave it practically defenseless. On the other hand, if you are sure that no one else except you will have access to it, then why not? But you can save a little time by not entering your PIN code every time you turn it on.
Step-by-step instructions on how to remove a PIN code inWindows 10:
We figured out the PIN code, but there is one more small nuance. Now Windows 10 will ask you for your account password at startup. And a password, by the way, is even less pleasant and time-consuming to enter than a PIN code. Therefore, next we will show you how to disable the password when logging in in Windows 10.
How to disable password in Windows 10
Before you disable your password in Windows 10, make sure you have it written down somewhere or remember it well. Because if you rarely use a password, you can easily forget it. And then, when you need it to confirm some settings changes in your Microsoft account, you will not be able to remember the password. Of course, it can be restored, but this is an extra hassle that no one likes.
Disable passwordWindows 10 when logging in:
- To get started, press Windows + R. In this case, Windows is the key on your keyboard with the Windows logo on it.
- In the window that appears, enter the phrase netplwiz to bring up the account settings item we need.
- Directly in the “User Accounts” settings window, uncheck the “Require username and password” checkbox.

Next, click OK and restart your computer to make sure everything is applied. Oh yes, I almost forgot, to apply these settings, you will need to enter your password two more times to confirm that you are the one currently controlling the computer.
Personally, everything worked out for me. I'm almost sure you do too. Now Windows 10 will not ask you to enter your password or PIN when you turn on your computer. If something went wrong for you, write in the comments below, we’ll try to figure it out. If you managed to mess up very badly, then use it to return your operating system to its previous state.
Did you read to the very end?
Was this article helpful?
Not really
What exactly did you not like? Was the article incomplete or false?
Write in comments and we promise to improve!
In Windows 10, as in previous versions of this OS, you can use special modes to shut down work and quickly restore the session. For example, hibernation mode, which allows you to save everything you did in a given session and switch the computer to lower energy consumption. At the same time, even if it is not possible to recharge the laptop or connect the PC to the network, the hibernation mode will save everything on the hard drive until turned on. But after turning it on, you are asked to enter your account password every time, which is very annoying if you are the only one using the computer. We suggest considering ways to remove the login password in Windows 10.
How to remove the login password in Windows 10. Method 1
The simplest method that is suitable for all users, including beginners who recently switched to “ten”.
This completes the steps of method No. 1. Now we know how to disable the login password in Windows 10. Let's move on to the second method of disconnection.
How to remove the login password in Windows 10. Method 2
This option to cancel a password login is a little more difficult for inexperienced users, but not as complicated as it might seem. Let's use the keyboard and enter the combination Win + R. In the Run utility window, enter “Netplwiz”: 

In fact, there are a lot of ways to disable the login password in Windows 10. You can even use the option through the registry, but so that you don’t accidentally mess things up in this segment of the system, we didn’t consider it. The methods presented above are the most optimal and everyone can choose the one that suits them.
By default, the Windows 10 operating system is configured in such a way that every time you turn on, reboot, or log in, the user must enter a password or PIN code. Many people are annoyed not so much by the need to do this, but by the slowdown in loading the computer until the password is entered. I would like to remove this option, disable it, remove it - call it whatever you want - just so that after pressing the power button, the PC immediately starts on its own to a working state with the desktop on the screen.
Disable password on power on and reboot
First, let's look at how to remove the password requested by Windows 10 after turning on or rebooting the system. Obsessively fearing that unsophisticated users could put themselves in serious danger by turning off password entry, Microsoft hid this setting so far away that the average person would never find it without help. Below we will describe in detail, with pictures and simple language step by step algorithm of actions for disable password entry. So that it is understandable even to a completely inexperienced user.
- In the search bar (it opens by clicking on the magnifying glass icon at the bottom left of the screen) type the command netplwiz.
- We launch the found utility with the signature “Run command”.
- In the “User Accounts” window that opens, uncheck the box next to “Require username and password.”
- Click OK.
- In the newly opened window, to confirm the action, enter your account password twice.
- Then again click on OK.
Remove password entry when logging into Windows 10
In addition to the power-on and reboot operations, the Windows 10 operating system prompts you to enter a password by default. upon login. This occurs when exiting sleep mode, and this parameter must be changed separately. You can disable entering a password when logging into Windows 10 through the standard Settings application.
- Launch Settings (by clicking on the gear icon in the Start menu or in the Action Center).
- Click on the Accounts item.
- Select Login Options.
- Under the heading “Login required”, instead of “Time when the computer wakes from sleep mode”, select “Never”. There is no need to save anything - it happens automatically.

Now Windows 10 will never ask you for a password when you turn on, restart, or sign in. However, you should not forget it. The password will have to be entered again after installing the next major update package or to confirm critical changes to the system.
For many users, entering a password on a computer during its startup is a procedure that is, as they say, a burden. Some people ignore recommendations for using Windows safely due to bouts of laziness. Other comrades simply do not need to protect their PC with a password and type a character key every time they turn it on. Because only they use the computer, and others do not have access to it.
This article will tell you how you can remove a password from your computer in various ways.
Method number 1: setting up an account
1. Press the key combination - “Win” and “R” (simultaneously).
2. In the “Run” line, type the command - control userpasswords2
3. Click OK.
4. To remove the password when logging in, in the “Accounts...” window, click on your profile in the “Username” column.
Note. You will not see panels for entering credentials; the system will perform authorization automatically.

6. Click the "Apply" button.

7. In the new window, enter your account login and password twice. Click “OK” again.
Remember! By removing your password, you give others unhindered access to your personal data.
Method number 2: changing registry settings
Only an experienced user can disable entering a password manually through the registry options. Therefore, before you begin to implement this method, think carefully about whether you can perform it correctly. Setting incorrect characteristics and entries in the registry can disrupt the operation of the entire operating system and render it unusable.
Note. You can also create a backup copy of "branches" before editing. In case of an error, you can use it to return the state of the registry settings to their original position.
1. As in method No. 1, open the “Run” panel.
2. Type the directive - regedit. Press "Enter".
3. Go to the section:
HKEY_LOCAL_MACHINE → Software → Microsoft → Windows NT → CurrentVersion → Winlogon

4. In the Winlogon folder, open the AutoAdminLogon parameter (double-click) and change its parameter to 1.
5. In the DefaultDomainName parameter, enter the name of your account.
Attention! If this setting is not in the directory, create it: right-click → New → String parameter.
6. Create a string parameter entry called DefaultPassword. And then set a password for logging into the system (in the setting value field).
7. Close the editor, restart your PC.
Windows will start without prompting for credentials.
Method number 3: disable on the command line
1. Open the Start panel (click the first button on the taskbar).
2. In the search line, enter - CMD.
3. Right-click on the icon of the same name that appears at the top of the panel.

4. In the context menu, launch the “Run as administrator” option.
5. Type in the line - net user, press “Enter”.

6. Find your account (name) in the list.
7. Run the same command in the format:


If the message “Command completed successfully” appears, you can log into the operating system without logging in.
Method No. 4: changing the login settings using the Autologon utility

2. Unzip the downloaded archive (right-click → Unzip...).
3. Run the utility executable file.
4. In the installer panel, click "Agree".

5. In the setup window, enter your account login and password.

6. Click the “Enable” button.
How to remove authorization after resuming from sleep mode on Windows 10?
To partially relieve yourself of the need to enter a login and password by activating the machine after sleep mode:
1. Go to the section: All settings → Accounts.
2. Click the “Login Options” subsection.

3. In the “Login required” option, set the value to “Never”.
Good luck and quick setup of Windows OS!