The main thing is to specify a picture on your computer or phone, and then click the OK button at the bottom of this page. By default, the plain background of the picture is replaced with a transparent one. The background color of the original image is determined automatically, you just need to specify in the settings what color to replace it with. The main parameter affecting the quality of replacement is "Intensity of replacement" and for each picture it can be different.
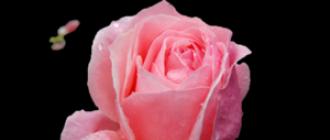
An example of a photo of a pink rose without changes and after replacing the plain background with transparent, white and green:
![]()


First example with a rose flower on a transparent background made with the following settings:
1) The intensity of replacement - 38;
2) Anti-aliasing along the edges - 5;
3) Replace the plain background with transparent;
4) Cropping (<0) или Добавление (>0) around the edges - "-70";
5) Invert - disabled (no checkbox).
For creating second example, with a white background, the same settings were used as in the first example, except for the parameter: "Replace plain background with" - white. V third example, with a green background, the settings are also used, as in the first example, except for the parameter: "color in hex" - # 245a2d.
The original image does not change in any way. You will be provided with another processed picture with a transparent or specified background.
Many inexperienced webmasters or fans of edited photos in Photoshop often make mistakes when changing the background texture. And all because of ignorance or inexperience in using a graphics program. That is why I would like to describe in more detail what tools for cutting objects exist and how to replace a plain background with a more creative one and vice versa.
Photoshop tools for clipping an object from the background
There are several basic elements that can be used to cut an object from the background. Some tools are used to cut out more complex objects, such as hair, grass, or animal fur, while others are used to select simpler objects, such as an apple, a vase, and other elements of still lifes or ordinary photographs, on a new layer.
It is not difficult to put a beautiful monochromatic background, but first it is necessary to accurately and efficiently cut our foreground object on a new layer. To do this, consider the most popular tools used by even the most professional Photoshop users.
- One of the simplest tools for selecting an object or background is the magic wand. To use it, it is necessary that the object that you would like to highlight should be monochromatic. This tool is able to select an object by hue. This is a very quick way to separate the subject from the background, and the outline of the selection is much smoother than using tools such as the lasso or the pen. But there are also disadvantages to this method. So, for example, if you highlight a light beige object against a white background, there is a good chance that the whole picture will stand out, and not the part of it that you need. And all because these colors are too similar and there is no clear border separating them. By the way, there is a possibility of inversion of the selected object. Let's say there is a solid color object in the picture that is easy enough to highlight, but you need to change the background. Therefore, having selected a part of the image with a magic wand, you need to right-click on it and select the item "Inversion of the selected area" in the menu that opens. So you will be able to choose exactly that part of the picture in which you need to make a solid background.

- Magnetic lasso. This tool seems to be magnetized to the edges of the object, automatically setting the points between which the selection line is drawn. After tracing the entire contour of the subject, the line turns into hatching, highlighting the entire area. Transfer the selected object to a new layer and we can make any background: plain, light, dark, with a picture. Now you can put whatever you want and not worry that it will hook on our object.
- Selection with a rectangular or oval zone. This selection method is not suitable for all objects in the image. If you have a round or square object, by holding down the Shift key and performing the same selection operations, you can accurately select them with the same radius or equal sides. After transferring the object to a new layer, you can edit the background.
- There is also a selection of an object using a mask. This tool allows you to select the most complex objects, such as mane, grass, fur, hair.
- The pen is similar to a selection using a magnetic lasso, only the selection points are not set automatically, but manually.
These tools will allow you to qualitatively create a new background for "Photoshop": monochromatic, patterned, gradient and others - without interfering with the foreground object.
A little about layers
Having selected an object in a photo or some part of an image, you need to transfer it to a new layer so that you can carry out subsequent processing with the possibility of undoing the actions. In addition, working with layers makes it possible to fix them or make them invisible for the purpose of inviolability of the object. To cut a part of the image onto a new layer, after selecting it with one of the above tools, press the Ctrl + J key combination.

Such actions will lead to copying the selected part of the image to a new layer. There is also the possibility of cutting out a part of the picture on a new layer. In this case, right-click on the selected object on the optical manipulator. In the window that appears, select the "Cut to a new layer" item. Thanks to such actions, it is possible, without catching important objects, to correctly, accurately and accurately change the background. For "Photoshop" a one-color, gradient background is not a problem, everything can be changed, edited or put on something new, more creative.
Change the background to a solid color
Having considered the necessary tools for selecting objects in a photograph, you can proceed to the item replacing the background.
The simplest way is to replace it with a plain background. How it's done? Select the object, by pressing the right button of the optical manipulator, we call the additional menu, in which we select the item of inversion of the selected area, press the keyboard button Delete.
These actions will cause the window to fill the background with color. In it, select any color from the palette, set the opacity of the color to 100% and save it by clicking on the Ok button. Now we can see that the background has changed to a solid color.

Create a solid color photo background
Another very simple way is to overlay the background with another layer. To do this, you need to put the layer with the selected object in the foreground, then go to editing the background layer and select the tool for drawing a rectangular area. Having chosen the required color of the future rectangle, you can draw a plain background for the desktop.
Creating a background using ready-made textures
On the global Internet, you can find a lot of ready-made textures of wood, plain fabric, natural stone or patterned background. But they are usually created in a very small format. To make a beautiful plain background for any image, you need to open the finished texture downloaded from the Internet in a separate Photoshop window, load the image that you want to edit.
These two pictures should be open in different tabs. Next, you need to select the texture by pressing the keyboard shortcut Ctrl + A. Select the "move" tool or press the hot key V and drag our texture to the tab with the image. There should already be a separate object layer from the background layer. After dragging, the texture will come to the fore. It needs to be moved under the object layer, above the background. All this is done by dragging them with the mouse in the layers window. Of course, our image will be larger than the texture on the canvas.

To put a solid color background of the image from the finished texture, you need to copy and paste it side by side, prematurely flipping it mirrored so that the joint between the two parts is not visible. How to do it? Select the entire texture layer so that it is outlined with a dotted line. Further, as in all programs, press Ctrl + C, then Ctrl + V. Transform the pasted copied texture layer by pressing the key combination Ctrl + T, and flip it in a mirror image by pulling the points that appear. To combine two layers into one, select 2 or more layers, press the keyboard shortcut Ctrl + J. This action will lead to their merging into one image.
- You need to learn how to work with layers. This makes it much easier to change any part of the image without spoiling the foreground objects.
- If the background image fails the first time, you can always undo the action by pressing the Ctrl + Z or Ctrl + Alt + Z keyboard shortcut.
Wallpapers belonging to the category "Texture" are gaining more and more popularity. Unobtrusive, pastel colors and a soothing texture help to increase efficiency and reduce nervous tension while working at the computer.
On our resource, everyone can download textured wallpapers for their desktop absolutely free. Mobile device owners can also install their favorite textured backgrounds on their devices. To do this, you need to select the required resolution of the screensaver on the site before proceeding with the installation of the background.
Widest choice
In the section you will find the following assortment of pictures:
- Abstraction;
- Creativity;
- Stripes;
- Texture;
- Leather, etc.
The assortment of the heading is rich in various colors, textures and image styles. Existing images can be easily supplemented with your own images. Texture screensavers are always relevant and will never go out of style.
For users who first came to the site, there are some recommendations for downloading texture backgrounds. With the help of a convenient system of filters on the site, you can quickly find the desired picture. This saves a lot of search time, reducing it to just a few clicks. There is a special mobile version, thanks to which there is a convenient opportunity to download images to mobile devices.
Creative people will love our free photo editing software to create unique, eye-catching and colorful textured wallpapers that will delight the eye and lift your spirits. Real masterpieces can be created in a few minutes.