How is the Android development process going? Let's highlight a few basics:
- In Java files, you describe the logic of the program — what you want your application to do.
- In XML files, you design layouts - appearance.
- Once the application is written, you need to use a build tool to compile all the files and package them together into an .apk file that can be run on Android devices and / or published on Google Play.
- All utilities and files that are used to create an Android application are combined into an integrated development environment (IDE). An IDE is a program that you open to edit your code files and compile and run.
- Eclipse was previously the standard IDE for Android development, but it has now been replaced by the more functional Android Studio, a product of Google.
You will, of course, find deeper processes going on behind the scenes of the above steps. For example, advanced users will want to know the role of the Dalvik virtual machine. At the end of the article, I will list links to useful resources that every Android developer should be familiar with. The first is the official documentation from Google.
- Download and install Android Studio.
- We will learn about launching and testing applications on Android devices and emulators.
- Let's create a simple Android application that displays the "Hello World" text on the screen of a mobile device.
At the end of the article, you can find useful recommendations for novice developers from the company.
Installing Android Studio Development Environment
It's really tempting to start reading the documentation and writing code to find out what the platform is capable of. And we will do it soon! However, to get started with the Android platform, you need to set up a development environment.
It is especially important for beginners in programming for Android to take their time and methodically follow each step. Even if you follow the steps correctly, you may need to troubleshoot a small environment setup issue depending on your system configuration or product version. To do this, use search services. The StackOverflow resource is especially worth highlighting.
It is important not to let any pitfalls interfere with your ultimate goal of learning Android programming. It is known that even professionals sometimes have certain problems with setting up a working environment. In such cases, knowledge of the command line is important. If you'd like to become more familiar with this tool, there is a link to a good introduction below.
Along with practicing the syntax, it is important to educate yourself in a successful programmer mindset that will not accept the file X not found error message as a final verdict. This kind of thinking is easily trained by you in cases when you do not give up and are looking for a solution to the problem that has arisen.
Go to Android Studio developer.android.com/studio/index.html and find a button to download the latest version for your platform.
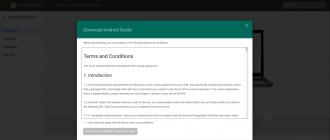
Click on the download button and you will be asked to read the terms and conditions of use of the software product. After reading carefully (as you always do) and accepting, the download begins. It will probably take a few minutes. After that, you can install Android Studio just like any other program. The download start page provides installation instructions for Mac and Windows.

Now that you've installed Android Studio, let's get it started! Start Android Studio. The program will ask if you want to import your settings. Since you are starting from scratch, just select the second item and continue.

You should see a nice Material Design loading screen.

When the download is complete, you will be taken to the welcome screen.

Even if you just downloaded Android Studio, you may not have the latest version. To avoid problems with versions in the future, click the "Check for updates now" button and, if necessary, follow all instructions to get the latest version. Sometimes Studio will automatically inform you that there is an update using a screen like this:

In this case, always select Update and Restart. Fine! We've successfully completed the development environment setup.
Creating your first Android project
It's time to create your first project. Let's start simple. It is customary for programmers to call the first program "Hello World". Let's follow this tradition and then make a few small changes so that the application uses your name for the greeting. In the end, you can download it to your device and show it to your friends. Android Studio has a little step-by-step tool to help you create your project. Click "New Project" on the start screen:


Fill it in like this. Feel free to replace "example" in the package name with something else to remove the warning at the bottom of the screen. You can also set the project location by specifying any folder on your hard drive
For dropdown SDK versions, see the Description section at the bottom of the dialog box. It explains what each setting is for.
Install the minimum required SDK as shown in the screenshot. This sets the minimum Android version required to run the application. Choosing this value for your own projects is a matter of balancing the SDK capabilities you want and the devices that will be supported.
For more information on API versions and their usage, there is a dedicated Dashboards page on the Android developer site https://developer.android.com/about/dashboards/index.html.

After selecting the version, the screen for selecting the starting template opens. You can create an app that already interacts with the google maps api and displays the map. In our test case, select Empty Activity and click the Next button.

And now you are at the last step of the application creation process. Before clicking Finish, there are a few things to note. This is where you first come across references to the main architectural components of any application.
- - this is the first, but not the last mention of the word Activity. In the context of Android, an Activity is usually seen as a "screen" in your application. This item is very flexible. When Android Studio creates the MainActivity class, it inherits from the Activity class from the Android SDK. Those familiar with object-oriented programming understand this concept, but for beginners, this basically means that your MainActivity will be a custom version of an Activity.

- Layout Name- the layout of what will be shown to the user is defined in a special Android XML form. You will soon learn how to read and edit these files.
Click Finish. It will take some time to create and load the project. After a while, Android Studio will complete the build of your project. Of course, the project is still empty, but it has everything you need to run on an Android device or emulator.

After loading the project, you view the XML layout file. Before moving on to Android programming, let's talk about how we can get this application running. It's time to say "Hello world!"

Launching the application on the emulator
Now it's time to say a few words about the emulator. Android Studio comes with software capable of emulating an Android device for running applications, browsing websites, debugging, and more.
This feature is provided by Android Virtual Device (AVD) Manager. Optionally, you can configure multiple emulators, set the screen size and platform version for each new emulator. This functionality is very useful as it eliminates the need for developers to buy multiple devices to test programs.
Click on the Run button in the form of a green arrow.

You will have to wait a while for the emulator to load and as soon as it is ready you will see something like this:

My congratulations! You've made your first Android app!
And so ... Why and how did it work?
Getting started with making changes and adding cool features requires a working knowledge of what's going on behind the scenes. Take a look at the files and folders section of the Android Studio project on the left side of the screen. You may need to click the small tab on the edge (see below) if the project explorer is not currently displayed.

Review the folder structure for a few minutes and double-click on the files to see their contents in the main window. If this all looks cryptic, don't worry!
Android project structure: Team
Every good team is made up of people who fulfill their assigned roles. Do you want to get the job done right? You need the right team. There are several key elements in Android projects, and each of them must play a specific role:
Java: Professional
This is the part of your code that is responsible for the logic of your application. Your code will be in the src \ main \ java directory in the main project folder. For learning Java, consider Bruce Eckel's book Philosophy of Java;
Resources: Artist
It's not enough just to make an Android app, it also needs to be stylish. Your app will never stand out if it doesn't have clear icons and images, well-thought-out layouts, and maybe even fluid animations.
During initialization, the folder contains the following folders:
- drawable, which stores icons. Now there is only a standard application icon.
- layout with XML files that represent screen designs.
- menu with XML files of lists of elements that will be displayed in the action panel.
- values with XML files containing sizes, colors, string constants, and styles.
AndroidManifest.xml: Boss
This XML file informs your system about the hardware and software requirements of the application and contains its version name and icon. The manifest also contains information about all Activities in the application. Do you need work done by your application? Talk to your boss first.
Alteration
Go to res / values / strings.xml and double click on the file. When you open the file, you will see two string resources in XML.
These resources are used in different places, but it is very convenient to have all the text used in your application in one file. If you need to translate it, or if your marketing colleague asks you to remove any redundant links, it's easy to make all the changes here.
Change the hello_world line that the application displays on the screen. Change its content to something more personal, such as using your own name. You will end up with something like:
Click Run. The application should restart and you will see a personal message:

We congratulate you - you completed your first project and learned how to edit source code. The first step in Android programming has been made. We wish you good luck on this challenging but incredibly interesting journey! If you need professional development of an Android application, contact Infoshell specialists.
Programming is one of those areas where everyone can feel like a creator. Usually, it is understood as the development of applications for personal computers, units of production equipment, or simply for electronic homemade products. But with the proliferation of touch-sensitive mobile devices, programming for Android, iOS or another system shell of this type is becoming more and more popular. Well, I must admit, this is a promising occupation. Therefore, within the framework of the article, it will be considered, for Android from scratch. What features are there? What language is used?
Program creation
Before writing programs on your own, you need to study all the components necessary for this:
- Language.
- Choose a development environment. We will dwell on the language in detail, as well as on software products, where applications will be created. But first, let's talk a little about development environments. They can be conditionally divided into three components:
- graphic;
- ordinary;
- online.
As for the creation of programs, it should be noted that now it is difficult to put forward an idea that would not have been previously worked out. Therefore, if a problem arises or simply in the absence of knowledge, it is necessary to correctly formulate the misunderstanding that has arisen and turn to more experienced programmers. They will be able to help in the creation of programs with constructive advice.
What language are programs written in?

Java is used for these purposes. It should be noted that this is a rather complex programming language. But to create your own applications, it is not at all necessary to know him completely. Basic knowledge and skills of working with reference information will be enough to get answers to your questions. In addition, there are certain templates, using which you can take some steps to create an application without significant problems. Then programming for Android becomes a pleasure.
Choosing a regular development environment
Eclipse and the Android SDK are considered the most serious players. They are both free. In general, it should be noted that these development environments are serious competitors, and each of them has a number of strengths and weaknesses. It is worth studying each of them. Separately, let us just dwell a little on one aspect of the Android SDK - the emulator. He is a program that pretends to be a phone or tablet that runs on the basis of "Android". The emulator works quietly on a regular computer and looks like a standard mobile device on the desktop. There is only one peculiarity - it is controlled with the mouse and keyboard, and not with your finger. In the emulator, it will be possible to check the functionality of the application for various screen extensions, as well as on different versions of the Android mobile operating system. Therefore, as strange as it sounds to you, it is not at all necessary to have a phone when developing applications aimed at Android.
What do you need to develop your application?

Graphical development environments
This option is suitable for those who have no idea about programming at all, but want to get their application here and now. First, you should familiarize yourself with the description and capabilities of graphical development environments. So, some can only place the simplest elements and attach minimal functionality to them. It is better not to use such resources, because with their help it will be difficult to understand the logic of work and create a developed final product. It is advisable to make a selection according to the following parameters:
- The presence of an intuitive interface.
- Use of clear logic of work.
- Ability to create elements in graphic and code modes.
- Availability of documentation on working with the development environment and a support forum.
Online development environment

They can provide a fairly wide range of functionality in a simple access point - the Internet. "Online development environment" - that probably says it all. Although it should be clarified that under Android it is still not easy. So, the most difficult will be to implement shooters and applications of similar complexity. But programs with text design and data transfer are easy.
Conclusion
We hope that there are no more questions about the first steps in preparing to create your own programs. If you decide to seriously engage in programming, then you can use the special literature. For example, the book "Programming for Android" by Hardy Brian. Of course, this is not the only good work, but you have to start somewhere. Here is a familiarization with this manual and you can start the path to success.
This tutorial will teach you the basics of how to write an Android application using the Android Studio development environment. Android devices are becoming more and more common, the demand for new applications is only increasing all the time. Android Studio is a free, easy-to-use development environment.
For this tutorial, it is best if you have at least a superficial knowledge of the Java language as it is the language used by Android. There will not be too much code in the lesson, since I assume that you are a little familiar with Java or are ready to find something that you do not know yet. The creation of the application will take 30-60 minutes, depending on how quickly you download and install all the necessary programs. After reading this tutorial on creating your first Android application, you may find yourself a new fun hobby or even start a career as a promising mobile application developer.
Stage 1: Install Android Studio


- JDK must be installed ( Java Development Kit) and JRE (Java Runtime Environment). You can download this link. Choose the version for your OS there, accept the license agreement, download and install.
- Now go here http://developer.android.com/sdk/index.html and download (be careful, you have to download about 3 gigabytes).
- We start the installation and follow the instructions.
Stage 2: Create a new project


- Open Android Studio.
- On the menu " Quick Start", Select" Start a new Android Studio project».
- In the window " Create New Project"(The window that opened), name your project" HelloWorld».
- Company name optional. *
- Click " Next».
- Make sure to check only the “ Phone and Tablet».
- If you are planning to test your first application on your phone, then make sure that the correct version of Android is selected (no older than the one on the phone).
- Click " Next».
- Select " Blank Activity».
- Click " Next».
- Leave all other fields as they are.
- Click " Finish».
* Typical company names for android projects "example.name.here.com".
Stage 3: Editing the greeting


- Go to the tab activity_main.xml it is most likely already active.
- Make sure the tab is active at the bottom of the screen Design(most likely it is).
- Drag the phrase “ Hello, World! »From the upper left corner of the phone to the center of the screen.
- There is a folder tree on the left side of the screen. Open a folder called " values».
- In this folder, double-click on the file " strings.xml».
- In this file find the line containing the text “ Hello world!"And add to this text" Welcometomyapp! ».
- Return to the " activity_main.xml».
- Make sure your text is centered on your phone screen and contains the text “ Helloworld! Welcometomyapp! ».
Stage 4: Add a Button

- On the tab “ activity_main.xml"Select the tab below" Design».
- In the column to the left of the phone window, look for a folder called “ Widgets". There are various buttons.
- Take the button " Button»And drag it to the phone screen. It should be centered on the screen, right below your text.
- Make sure the button is still selected (blue frame around it).
- In the lower right corner there is a window with the properties of the selected object. Scroll down and find the line titled “ text».
- Change the text " New Button" on " Next Page».
Stage 5: Create Second Activity

- At the top of the project filesystem tree, right-click on the folder named “ app».
- Please select New> Activity> Blank Activity.
- In the window that appears, in the top line, enter “ SecondActivity».
- Click " Finish».
- Go to the " activity_second.xml"And make sure the" Design».
- Move the text from the top left corner of the phone to the center of the screen as we did in the previous steps.
- Make sure the text box is still selected (blue frame) and in the lower right corner of the object properties look for the line “ id"And enter there" text2 ».
- In the upper left corner (in the project tree), double-click " strings.xml».
- Under the line
Hello world! Welcome to my app! add the following line
Welcome to the second page! - Return to the " activity_second.xml».
- Select the text box again.
- In the lower right corner in the properties of the object, find the line " text"And enter there «@ string/ second_page».
- Make sure the text box now says “ Welcometothesecondpage! ”And the blog is centered on the screen.
Stage 6: Registering an action for the button


Stage 7: Testing the Application

- In the toolbar at the top of the Android Studio window, click on the green play symbol.
- In the window " ChooseDevice"Select the item" Launchemulator»And select the device.
- Click on the " OK».
- When the emulator starts (this may take a long time), the application will automatically open on the virtual device.
- Make sure all text is displayed correctly and clicking on the button takes you to the next page.
Attention: If you receive the message “ HAX kernel module is not installed!", Then there are two possible options. The fact is that only modern Intel processors support this virtualization and you only need to enable it in the BIOS. If you have a processor that does not support this function, you will have to test the application on a real phone or use a third-party emulator instead of the built-in one.
How to get .apk file in Android Studio
Congratulations! You've just finished writing your first Android app with some basic functionality. The finished application should have a user welcome page and a button that takes the user to the second page.
You got a glimpse of the development of applications for android and perhaps aroused in yourself the desire to learn everything that is necessary in order to further develop in this direction.
Unfortunately, the complexity of Java makes it difficult for everyone to program in it. As an object-oriented programming language, it has a lot of features in the form of class constructors, exceptions that lead to applications crashing during operation, and other points that must always be taken into account when developing. However, Java code is easy to read and structured, especially if you follow the accepted standards for its design.
When developing in Java for Android, not only Java classes containing the code are used, but also manifest files in XML language, which provide the system with basic information about the program, and the automatic build systems Gradle, Maven or Ant, commands in which are written in Groovy, POM and XML, respectively; By default, projects use Gradle, and at the initial stages of learning how to develop in Java, you will hardly have to edit files written in Groovy. For the layout of the UI part, XML is also usually used.
Android Studio, recognized by Google as the official development environment for Android in December 2014, has been improving year after year, making life easier for Android developers. Its features such as a visual UI editor and code completion help make the development process more comfortable.
For those who are ready to fully immerse themselves in Android development, Java is the first choice. However, if you feel challenged by the specifics of the language, then start with something simpler and come back when you feel confident.

The language was officially unveiled to the Android community in May 2017 at Google I / O. Already in 2019, Google recognized it as preferred for Android development, relegating Java to the background. This also means that the creation of new standard tools (libraries, Android Studio functions) will be primarily aimed at Kotlin.
Since 2019, Android developers on Live Typing have been writing exclusively in Kotlin. Projects such as Superbro and are written in this language, and are gradually being translated into it.
Kotlin has incorporated the best of modern programming languages such as Java, Scala, TypeScript. Among the main advantages are automatic detection of data types, support for the functional paradigm, and extension functions. At the same time, the language received protection against a number of large-scale problems, for example, “errors in the billion,” or NullPointerException. All this explains its popularity - according to a 2019 StackOverflow survey, Kotlin was included in the top five most beloved languages by the community.
Kotlin is based on Java, so the transition is easier for seasoned developers. If you are unfamiliar with Java, we recommend that you work with it first. Large projects with a lot of legacy code are most likely written in Java. That is, in commercial development, tasks may arise where knowledge of Java will be required.
C / C ++

Lower level languages that are also supported by Android Studio using the Java NDK. This allows you to write native applications, which can be useful for creating games or other resource-intensive programs. Android Studio offers C / C ++ support through the Android NDK (Native Development Kit). This means that the code will be run not through the Java Virtual Machine, but directly through the device, which will give you more control over such system elements as memory, sensors, gestures, etc., as well as the ability to squeeze the maximum resources out of Android devices. ... This also means that you have to use libraries written in C or C ++.
In turn, it is difficult to configure and not very convenient, so it is recommended to use it to write only those program modules where you need to quickly perform complex operations: processing and rendering of graphics, video and complex 3D models.

The fact that Android doesn't support using Python to build native apps doesn't mean it's impossible. Fans of this language have developed many tools that allow them to compile Python code to the required state, and the presence of various libraries will allow you to build even native interfaces in compliance with Material Design guidelines. The most popular framework is Kivy, which allows you to create a Play Market application in pure Python.
BASIC

Due to its simplicity and friendliness, BASIC is the optimal entry point for novice programmers.
Bad news: it is not supported by Android Studio and is not suitable for Unity and Xamarin. The good news: BASIC has a dedicated B4A IDE in which you can create Android apps. The B4A embodies RAD's concept of visual prototyping, which is designed to be fast and easy to program. There are many handy small design solutions here, and the responsive community will help with any issue.
Its disadvantage is the fact that resource-intensive games on BASIC cannot be created and you should not count on support from Google due to the unofficial status of the software. This means that the applications will not conform to Material Design, and you, with knowledge of BASIC alone, cannot be regarded as a professional developer. And among the entire list of languages and environments in this article, this one is the only paid one.
Lua (using Corona SDK)

Balancing the ease of learning Android development with a sense of developer control. The Corona cross-platform graphics engine is based on the Lua language. LUA is much simpler than Java, and the Corona SDK will make working with this language easy and enjoyable. It supports all native libraries, thus allowing you to write for multiple platforms.
To write code, you need Notepad ++, and to run it without compiling it first, you need an emulator. If the APK is built and the program is ready to be deployed, then the application can be launched through the online tool. With basic programming skills, you can easily master Android development with Corona.
There were some restrictions, and such restrictions that make it impossible to develop serious things and establish themselves in the status of a professional. If you need functionality like in-app purchases in your application, you will have to pay for the ability to develop it, as well as for using the native Android API.

If you already know something about web programming in general and HTML, CSS and JavaScript in particular, then this knowledge will be useful to you for creating elementary cross-platform applications using the PhoneGap framework. This is the last, but not the least, way to conquer Android development on our list.
The main reasons for using PhoneGap for app development at Live Typing were:
- reducing the time and cost of developing an application for several platforms at once (an application for obtaining a subscription to sports establishments of the city);
- the ability to use the client's existing website and its fragments (application for paying for services and online purchases).
Conclusion
In general, applications for Android can be created in almost any popular language - there are frameworks and utilities for everything. However, if you want to become a professional Android developer, use all the features of the operating system and have access to the latest Android features, then Java or Kotlin will become your faithful companions. Even if these languages are unfamiliar to you and seem complicated, they are worth learning in order to write diverse, beautiful and functional applications for the Android operating system.
And you need to start getting acquainted with the theoretical side of Android development from our article, in which we have collected.
And if you decide to create a mobile application, but do not know which platform to start with, then start with Android. Android app downloads are 65% higher than iOS, and Android app design and development is cheaper. Looking for a reliable mobile development studio? and we will contact you.
Many programmers want to start developing applications for Android. But few know what steps should be taken here. This collection is designed to help beginners get started with Android development.
Beginning of work
For beginners in programming ours will help.
For new to android Google has made a good introduction to Android on their website. There's also a great Android crowdsourcing guide. Also, there is a course from Google on Udacity.
If you have problems with android, it is highly recommended to check StackOverflow first. It is designed to answer technical questions and even is.
You can always find it on our website.
FAQ
I want to start developing for Android. Where do I begin?
The first and most important step in Android development is learning Java and XML. Once you are more or less familiar with both, study the official Android Documentation and go through a few tutorials until you feel confident enough to create your own projects. Good luck!
Do I need an Android device for development?
You can write applications without any Android device using the included emulator (or enhanced Genymotion). However, to account for the hardware requirements, nothing replaces testing on a real device.
Which IDE should I use?
- Android Studio is an officially supported IDE for Android development. It is she who is used in modern guides and videos, including those from Google.
- Eclipse has been the main IDE for Android development for many years, so most of the legacy tutorials, resources, videos, and screenshots were taken with it.
- IntelliJ IDEA was an alternative to Eclipse, but nowadays it makes more sense to start with Android Studio. Android Studio is an offshoot of IntelliJ IDEA, so you get all of its benefits plus Android bonuses.
Maybe I should forget about Java and start learning Kotlin?
Google now officially supports Kotlin as a development language for Android, but this does not mean that Java support can be forgotten. In the near foreseeable future, documentation, tools, new platform features will support both Kotlin and Java. Although Kotlin is a younger language with some nice features, you can still create great Java applications. The choice depends only on you, but if you don't care about it or you are a beginner, then it might be better to opt for Kotlin.
Resources
Here are the essential resources for teaching Android development in English. This list is far from complete, but sufficient to get you started.
Android official resources
Design
- Beauties for Android is an inspiration for creating graphical interfaces for Android.
Newsletters
- Android Weekly is a great newsletter to keep you updated on the latest Android developments.
Library collections
Instruments
- Genymotion is an extremely useful and functional emulator.
- Android Asset Studio is a great collection of tools for creating / editing icons, images, etc.
- Codota Plug-in for Android Studio - great code examples right in Android Studio.
Examples of open source applications
Application Ideas
So you have an idea for an app ... People write about it every day. But before asking for help in the implementation of the project, you need to answer the following key questions:
What's my budget?
If you are serious and want to release your product, you need to think about your budget. Even in the case of a simple application, you need to think about several thousand dollars. At least.
What's my marketing strategy?
Are you going to use word of mouth or are you willing to pay for fame?
What is the list of tasks for this project?
Also, what are the restrictions? How many developers do I need?
Where will the data come from / where will it be stored?
Also, how will they be used? Do I have an appropriate privacy policy?
Is there a goal to make money?
If so, how are you going to achieve it? Through ads, IAP, subscriptions, paid apps? All of the above?
How will you pay your developers?
Do you have capital or are you going to pay them after the application starts generating income? Frequently, freelance contractors demand a portion of the full cost up front. Most developers are not interested in sharing revenue unless they are investing in the application themselves.
What will be the testing method?
What type of device are you going to install it on? How many iterations do you need? What kind of people do you want to involve?
How soon do you want to publish the app in the store?
This will definitely affect the final income.
Will you require or suggest registration / integration with social media?
Consider implementing this functionality.
What is your target audience?
Is it a niche app or could it be ubiquitous?
Has my idea already been implemented?
If so, how can I improve it or what's missing?
What to do with application ideas if you're not a developer?
You may be looking for developers on your team to implement the application. If you have the money and can pay a developer or firm, then everything is simple and straightforward. Next, we'll talk about what to do if you don't have enough money to pay someone.
Realize that your idea may not be unique and that development requires a lot of effort.
- Draw the design your application (look and feel). It can be rough and drawn on paper. But it should be specific enough, not vague.
- List your skills, related to the idea.
- Make a list of what you put in into your idea.
Understand that development requires significant effort. Imagine a developer working full time (8 hours) for 2 months to build your application. And you also work full time. What are you doing at this time? If your work, according to your ideas, ends earlier, then you need to reconsider the idea. In this scenario, the developer does most of the work and you are honestly useless. What you can give after the application is finished doesn't really matter and will not motivate the developer to finish the product.
Redefining your idea
If the developer is doing more work than you are, you need to rethink the idea to distribute the work more equitably. This will benefit from collaboration. Take a look at your list of skills and think about how you can apply them. It is okay if the application differs from the original idea. Revise it until the amount of your work and that of a developer is at least equal.
- Distribute work as fairly as possible.
- Focus on your skills first.
- Your download should be approximately equal to 2 months of full-time work. For simple applications, the load can, of course, be less. You can ask the community (e.g.