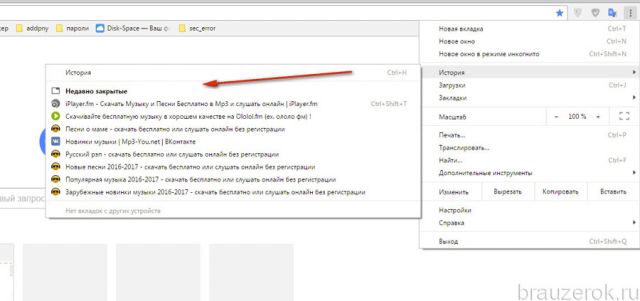
A "short" purchase story.
For a long time I thought about replacing my HP Pavilion dv6 6130sr with a lightweight laptop with a diagonal of 15 inches for a set of lectures at the university and use as the main computer. HP is a rather heavy laptop for daily driving to the university (the situation is aggravated by a huge charger weighing almost a kilogram), it also barely survives until the end of the third pair, and constantly leaving ultrabooks, albeit with 13-inch screens, constantly fueled interest in replacing it.
In addition, I had an unsuccessful attempt to replace the laptop with an Asus TF700 transformer tablet with a docking station, but, unfortunately, Asus made a very uncomfortable keyboard (compressed on the right, short key travel), put a slow internal memory chip, which caused the tablet to constantly slow down and a fairly modest battery, and offices on Android are very poor in functionality, so its only advantage over a laptop was its size and weight. After using this tablet, I believe that only routers can do in Asus (RT-N56U works great).
Brief characteristics of the HP Pavilion dv6 6130sr: 15.6 ”, AMD QuadCore A6 3410MX (1.6 GHz), Radeon HD6750M + HD6520G (CrossFireX), 8Gb RAM, battery 62 Wh, dimensions: 3.52x37.8x24.68 cm, weight 2.91 kg.
Brief characteristics of the Apple MacBook Pro Retina (ME293): 15.4 ”, Intel Core i7 4750HQ (2GHz), Intel Iris Pro (5200), 8 Gb RAM, 95 Wh battery, dimensions: 1.8x35.89x24.71 cm, weight 2 , 02 kg.
Initially, the main conditions were: weight about 2 kg., 13-15 ”high-quality screen, discrete graphics card (for games), small charge, autonomy for about 6 hours, which automatically means Haswell, and price / quality. But, unfortunately, I was faced with the fact that there were practically no offers on the market that interested me: HP, whose laptops I had used before, still do not want to make lightweight laptops with high-quality screens; Asus did not want to buy after a “successful” experience using the TF700 tablet, although the UX302LG ultrabook looked like a very good purchase relative to the MacBook air: a discrete graphics card (it turned out to have a slit bus, but still better than nothing), an IPS screen, a glass cover; Sony was not considered due to the sale of the Vaio brand, I was also not happy with the filling for the money our stores ask for; Lenovo, let brand lovers forgive me, I do not belong to high-quality brands, and I did not consider the rest due to the lack of stores (I am conservative in terms of purchases: first you need to look live, and then buy in a store or order on the Internet). Also, I initially did not want to buy a MacBook, because I got used to Windows (putting it instead of MacOS is akin to blasphemy and bullying), I thought sometimes to play games, although I realized that it would be difficult for me to find something more autonomous and compact. Therefore, I put this topic in a distant box.
Some time passed and I got hooked on the video of passing on YouTube, respectively, there was no need for a discrete video card, I also realized that I need a diagonal of at least 15 ”, the MWC, IFA, Computex exhibitions ended and I fell out of reality while preparing and passing exams in university. After passing all the exams (I accept congratulations on receiving a red diploma), not seeing anything suitable, I seriously thought about switching to poppy.
I compiled a modest list of programs that I use and the selection of analogues with the help of Google and sites offering alternatives for specific programs began, 90% of them were either available on MacOS or had analogues. After that, I finally made the decision to switch to the dark side for the cookies.
Problems encountered and their solution:
1. The layout of the Ukrainian keyboard.
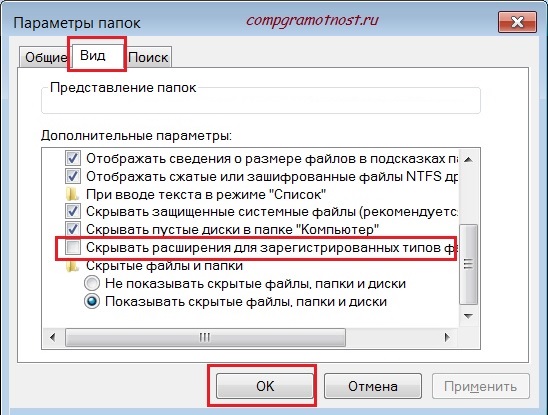
If the Russian user does not feel any inconvenience during the transition, since the PC layout is out of the box, the Ukrainian Windows user receives a clumsy Ukrainian layout (and a nervous tick of the right eye), and if the letters “and” and “i” are rearranged it’s possible to reconcile, I’m obviously not ready to come to terms with a dot and a comma “via the shift key”. The solution to the problem was found on Habr (http://habrahabr.ru/post/130471/) and has been operating since 2011, all you need is to put two files in the “Keyboard layouts” folder in the libraries, reboot and in the settings select the “Ukrainian” layout. The only thing that will remind you of the terrible Ukrainian layout is the engraving on the keys of the piano.
2. Finder.
After explorer in Windows, you start to feel sorry for the macrocode. I don’t understand how you can normally use the finder out of the box: the lack of automatic arrangement of files on a grid (why do I need two columns of files in an extended window?); “Free” location of files in a folder when copying / moving and layering them (I don’t think it’s normal to go into the submenu for file arrangement every time); folders mixed up with files, not folders then files, etc. I solved this problem with the XtraFinder app (http://www.trankynam.com/xtrafinder/). Now Finder is in no way inferior to Explorer + no need to set QTTabBar to get tabs. Unfortunately, the program sometimes crashes.
3. Work with archives.
Initially, when buying a poppy, we get an archiver that, by double-clicking, automatically unpacks the archive in the same folder. At first it seemed to me very cool and convenient, but later it turned out that you can’t look at the contents of the archive without unpacking, you can’t add files to the archive either. Using this after 7-zip on Windows is difficult and inconvenient, and I started looking for a solution. First of all, I drew attention to the free Keka archiver (http://www.kekaosx.com/ru/), but it differs from the standard only in support of more formats and an interesting icon, as for the archiver. This did not suit me very much, so I decided to look for a free opportunity to look at the contents of the archive in advance and found The BetterZip Quick Look Generator 1.2 (http://macitbetter.com/BetterZip-Quick-Look-Generator/), this program allows you to quick look (select the file and press the spacebar) to see what is in the archive, but does not solve the problem of adding files. I stopped at BetterZip (http://macitbetter.com/, the solution is paid, but there are distributions on trackers), this archiver is the same as 7-zip on Windows.
4. The music player.
On Windows, I used iTunes (I haven’t sold iPhone from iPod yet) and then AIMP3, but it wasn’t for the Mac, and Google aggressively offers VOX (http://coppertino.com/) as an alternative. First of all, we are met by a site where there is only one thought - when they will already let me download this player. After installation - who did this terrible design, and after some time of use this player just flew into the basket, this is definitely not AIMP: terrible design (a dark spot at the edge of the screen), inconvenient playlist management, the inability to delete several songs from the playlist at once, inability switching compositions with the multimedia buttons of a laptop, etc. The solution was still the same iTunes, but at the same time I had to convert my library to ALAC (thanks to XLD it took less than two hours - just a miracle program), he also solved my next problem.
5. Editing music tags in Flac.
It would seem that it could be easier than editing tags in music? But when switching to Mac, a big surprise awaited me. I like to add covers and prescribe all tags, including the lyrics, and it was this moment that made me ditch 2 hours to find the right program. On Windows, I used the tag editor supplied with AIMP where there was a separate window for adding song lyrics, when I started installing pre-selected analogues, I was surprised at the absence of such a window or at least a field. TriTag (http://old.feedface.com/software/tritag.html), Musorg (http://download.cnet.com/Musorg/3000-2141_4-127314.html), MusicBrainzPicard (https: // musicbrainz. org / doc / MusicBrainz_Picard) do not suspect the lyrics at all, and a program that suspects costs $ 6 (Music Tag Editor, available in the AppStore). The ability to add song lyrics is also in the Kid3 () editor, but it is implemented in a strange way: not only does the Lyrics field need to be turned on in the settings, it is a thin strip in one row. The solution was iTunes with normal tag editing (anyway, music is back in Alac). I also want to draw attention to the point that not all tag editor for poppy can add cover art.
6. View photos and images in a folder.
As a Windows user, I’m used to opening one image in a folder, and then scrolling through them in a row with the mouse buttons, but the standard View when you simply open it does not give such an opportunity. In order to be able to scroll through images, you must first select all the images in the folder (cmd ⌘ + A) and only then open them. This state of affairs didn’t suit me at all, and the search began for a replacement for the standard View, it turned out to be JustLooking (http://chipmunkninja.com/JustLooking). Unfortunately, there are several shortcomings in it: adaptation to retina is completely absent, the touchpad does not work zoom, the transition animation is slow, which must be turned off immediately in the settings. The first is partially solved by choosing the small size of the toolbar in the settings. Also, the Xee 3 program is considered to be a replacement for the View with the function of viewing all images in a folder, but it has become paid.
Shortcomings that I encountered, but related more to the laptop and not very annoying:
1. Adaptation to retina.After purchasing a MacBook Pro retina, users will be constantly accompanied by slightly blurry previews of images on websites (e.g. deviantart.com, mycolorscreen.com, forum w3bsit3-dns.com), non-adapted / partially adapted program interfaces (e.g. Word, Photoshop script editor, JustLooking, Photoshop up to version 13.0. 3). This is not very annoying, but hard not to notice.
As an illustrationscreenshot of the Word window with open settings (unadapted preview of styles and icons in the settings). Perhaps only visible on Retina-like screens:
2. Lack of speaker location.On the MacBook Pro retina 15 ”there are“ grids ”of speakers on the sides of the keyboard, so due to the fact that I don’t own blind typing, my grandmother blindly prints and sometimes I raise my hands to see where the letter I need is constantly music is muffled / distorted briefly.
3. Icons for the blind.Each time opening from nothing to do Launchpad, I see the iPad. Of course, I understand that getting into the giant icon is easier, but there are reasonable limits to everything. I would like to see in the settings the ability to adjust the size of the icons, but since the Programs folder in the dock is much more convenient (the icons are also huge, but at least it’s clear why), I’m not going to do something about it.
4. A gesture to show the desktop.I don’t quite understand the gesture for showing the desktop. Before that, I only dealt with MacOS on my mother’s white plastic MacBook (a1342) where Snow Leopard was installed (on newer versions it slowed down due to the small amount of RAM), I had to drag four fingers down, which seems more convenient to me, although and is a matter of habit.
I would also like to mention a very successful analogue of the CueTools program on Windows - X Lossless Decoder (http://tmkk.undo.jp/xld/index_e.html). Thanks to him, it took me less than 2 hours to convert music to Alac, because it: does not change / erase tags and covers in files; Conversion begins after dragging and dropping the selected files into the Finder onto the XLD icon in the dock; Converts immediately to the original folder. All I had to do after converting was to drag the already selected Flac files to the trash. In general, I recommend it to everyone.
Successful things that I would like to see on Windows “out of the box”:
1. Quick view(select the file and press the spacebar). A quick look here is simply omnivorous and opens up not only images, but also PDF, Doc documents. Thus, you can safely view the contents of the document without opening it.
2. Switch keyboard layout. On MacOS, the layout is switched by cmd ⌘ + space, which is the most convenient way to switch layouts. ISwitcher could be installed on Windows, but it didn’t work in some programs, sometimes it stopped responding or Alt just worked.
3. Mission Control. A very convenient way to switch between open windows, as well as watch what is happening in them. On Windows, you could put the Switcher program, but it does not reach the original. The only thing I don’t really like in Mission Control is that it does not display minimized windows.
To summarize, I want to say that in my case the transition was a success: there were no serious or unsolvable problems, almost all programs are available, and if not, there are analogues. In addition, I got a lightweight, quiet and powerful enough laptop with a long battery life, smart screen and touchpad. Perhaps if I used some unique software, the picture would not have been so rosy, but in such cases BootCamp can be downloaded at hand or you can download Wineskin, even though you can’t call it “crutches”.
If you find an error, please select a piece of text and press Ctrl + Enter.
Updated: 04.03.2017 Oleg Lazhechnikov
32
Most recently, I voiced my own and now, as promised, I publish a mini-faq on the transition from windows to mac. If someone remembers, then sometime at the very beginning I asked a few questions about the use of poppies. Then I asked if there was a manual for beginners in the network. I was advised a lot of things in the comments, but no one gave links to the consolidated post, apparently everyone figured it out themselves without any problems. In principle, it really is, it’s not difficult to figure it out, it’s much easier than it seems. Nevertheless, I still wrote this article, which will be what I needed then. This may be useful to someone during the transition.
On the touchpad there are tapes and clicks (pretty hard pressed), as well as various gestures. Therefore, first of all, you need to go to Programs / System Settings / Trackpad and see everything that is there, some of the questions will end there. The touchpad is excellent here, and I still don’t use the mouse, I hope to get used to without it, since traveling with it is not always convenient because of the need for an additional surface.
I will list the most basic actions on the touchpad.
Double click:double tap or single click.
Click middle button: cmd + tap.
Text selection: click on the touchpad and, without releasing, select the text. And through a double tap, as you can’t do on Windows.
Transfer windows or tabs in the browser: click on the touchpad and, without releasing, drag where necessary. But it’s easier to do with two fingers, one click in the lower left corner (the cursor should be on the window title), and the second drag. The second method allows you to drag to any distance, while the first is limited by the size of the touchpad.
Scroll down or up: simultaneously with two fingers to lead up or down (very convenient).
Gesture three fingers up: we get into mission control, or if, in Russian, then all windows are reduced and we see all running applications on the desktop at once. By clicking on the reduced window it is now very easy to go to the application you need.
Gesture three fingers left / right: we pass between desktops.
The last two gestures, it's just mega-convenient! I can’t imagine how to work without them.
Multiple desktops

Desktops can be created while in Mission Control mode. In any desktop, you can run the required number of applications or transfer already running applications there. Someone, for example, distributes by subject: work, communication, entertainment. Also, any application switched to full-screen mode (usually shift + cmd + F) creates a new desktop by itself. True, in this case, only one can be found on this desktop. Thus, we have the required number of desktops, each of which contains, or one full-screen
application, or several applications with windows.
Hot buttons on mac
What is convenient is that the main combinations are valid for any program, such as “open settings”. It will work everywhere. Equally convenient, you can create hot keys for yourself for almost any action in any program. This is done in System Preferences / Keyboard / Keyboard Shortcuts.

At the end of the page: cmd + down arrow
To the top of the page: cmd + up arrow
At the end of the phrase: cmd + right arrow
To the beginning of the phrase: cmd + left arrow
Close the hung application: option + cmd + escape. Or open the System Monitoring (located in the programs), this is an analogue of the task manager, and there we select the process to close.
Hide Dock Panel: option + cmd + D. Frees up space on the screen, and appears only when you hover over.
Copy: cmd + C
Paste: cmd + V
Cut to Finder: first just copy and then paste through option + cmd + V
Normal cut: cmd + X. Works in all programs, and in particular in Pathfinder.
Delete: cmd + delete
Layout Switching: cmd + space
To cancel punto switcher layout switching: option
Launch spotlight window: control + space. Spotlight is a global poppy search.
Exit the application: cmd + Q. Not quite an analogue of the red cross, because some applications, when clicking on the cross, remain hanging in the background. And here is the full exit.
Close the application window: cmd + W. It is convenient to close tabs in the browser or the Finder window (it always opens as if by a window).
Maximize window to full screen: control + command + F (less commonly shift + cmd + F)
Point: cmd + 7
Comma: cmd + 6
Open program settings: cmd +,
External hard drive on mac
I discovered the unpleasant news that Windows and Mac have different file systems, which means that the external hard drive can be used by default with either a macbook or a Windows laptop. That is, my hard drive, formatted in NTFS, is seen on the poppy, but you can only copy files to the laptop from it, but you can’t write it back. In fairness, I can say that if hard reformatted to HFS + (poppy file system), then Windows will not see such a disk at all, neither for copying, nor for recording.
More or less exits from this situation are:
- Format hard in FAT32. But there will be a 4 GB file size limit.
- Leave hard in NTFS and install NTFS Tools, NTFS-3G, Paragon NTFS, Tuxera NTFS and the like drivers on the Mac. The solution is bad because you can lose all the data on the external drive when it is used frequently with a poppy. Also, not all Mac programs can work with the disk directly (I read about it, but did not check it).
- Format the drive in HFS + and install Mac Browser on Windows. The same thing, you can lose data with frequent use on Windows.
- Formatting in exFAT is seen by both operating systems, but the file system itself is not very suitable for storing important files, because it is not very reliable.
I did otherwise. Since hard files are very important to me, they are sometimes in my only copy, and this disk is working and I work with it every day, the choice is obvious to me - HFS +! This is the most stable and safe solution, and also do not need to put anything extra anywhere. But since sometimes I have to transfer files with a Windows laptop, I also created a 50 GB exFAT partition on the disk, this is quite enough to transfer files to Windows or work with this disk on it. As an option, configure the network between the laptops, and use network drives.
Applications and analogues
You can find all the programs with tablets on all sorts of trackers. You can buy or download free ones on the App Store or official sites. In fact, there are a lot of free programs.
Lightroom - remained the same, there is a version for the poppy with a tablet or for money. Instead, they still advise a cheaper, but not worse at the same time analogue - Aperture, but so far I have not set it as unnecessary. And the analogue of Photoshop is the Pixelmator, although photoshop can be put.
Built-in image viewers (there are two of them) by default do not allow you to scroll through photos from one folder, for this you need to select a group of files and press enter or space, depending on which viewer you prefer. One could get used to this additional action, but they scroll through Raw on Retina with a delay, besides, and small pictures are small, the resolution is high.
And I put myself a free XnviewMP viewer. He flips through everything quickly, and scales the photo to retina (multiplies the resolution of the photo by two), and in it you can change the image format, crop the photo, etc. The only bad thing is that it’s a little buggy for me, it’s not in remembering some settings. I also put the Xee and Sequential viewers, but they, too, very slowly flipping through RAW. Xee still stands and is used to scroll through jpeg, maybe I’ll leave it alone, because Raw started to look only in Lightroom. There is also a Viewer from the App Store for 169 rubles, simple and leafing through everything from the folder, but also flipping RAW on with a delay.
Clipboard History - Clipmenu, free.
Punto switcher has a poppy version, it's a pity only there is no diary in it, for free.
Microsoft Office - eat for a poppy with a tablet or for money.
Life hack 2 - how to find a hotel 20% cheaper
Thanks for reading
4,00
out of 5 (ratings: 1)
Comments (32)
- Slows down;
- Suddenly shutting down;
- The default settings in Libre Office Calc are just creepy;
- To run macros you need to conduct a whole shamanistic ritual.
- A full-fledged emulator, that is, you have a separate window with Windows in it.
- "Windowed mode." Each program has its own separate window, in fact, you can work on OS X, and if you wish, switch to the window with the desired program. This is ideal for those who are happy with everything in OS X, but lack a couple of programs from Windows.
- Video Card: NVIDIA GeForce 640M
- Internal storage: Fusion Drive (128 GB solid state drive + 1 TB hard drive)
- RAM: 8 GB
- Processor: Intel Core i5 Quad-Core Ivy Bridge
Oleg Lazhechnikov
Oleg
Semen
Artyom
Vladimir Lapshin
Today we are starting a series of articles dedicated to people who decided to leave the traditional Windows-system and try their hand at the "apple" OS X Yosemite.
Most people first encounter Apple technology with friends, fellow students, colleagues, or just a stranger. A specific apple design involuntarily attracts the eye and lingers in consciousness for a long time.
Then, passing Apple technology in chain stores, most potential buyers unwillingly glance at the luxurious displays and mysterious Mac OC desktops. Still would! The Windows screensaver for most Russians has already become something mundane and boring, we do not even pay attention to it, choosing the next components for the PC. And here is a real mysterious country: iMac widescreen flat-panel monitors, weightless aluminum Macbook Airs and fundamental MacBook Pros.
At the last stage, an internal struggle arises: is it worth risking finances and a familiar interface for the sake of unknown beauty? In order to answer these difficult questions, we suggest you read the article on the benefits of Mac OC.
Today we’ll talk about the difficulties that you will encounter when moving from one operating system to another. The topic of moving from one system to another will be interesting not only to those who plan to do this, but also to those who have already crossed over to the other side of the barricades.
APPEARANCE AND BEGINNING
Apple computers and laptops have a single design established by the company - this is what distinguishes them from the gray mass of PCs and laptops that use the Windows platform. The buyer can only decide on the necessary power and technical specifications.
When choosing a “box” for Windows, the user has to study tons of information beforehand - in the literal sense, it is necessary to select each component separately: video-audio cards, a processor, memory chips, and much, much more. Computer for windows - designer abruptly Lego. Of course, many now will argue with me, they say in stores full of ready-made configurations. But if you devote a little more time to the issue, you understand that manufacturers greatly save on components, sacrificing one or two parameters in favor of an attractive price. And the result is most often very sad: the set production capacity is not even half used. Therefore, the user literally in the first year of using the equipment is faced with the need to upgrade: the video card ceases to “pull” the graphics, a cheap cooler starts to make a menacing noise or from the first days there is an acute lack of memory. We have to admit that buying a Windows PC is a task for enthusiastic people who are ready to devote themselves to a series of updates and modifications.
PRICE POLICY
Reading the subtitle, Windows fans rub their hands gloatingly: there it is! Yabloko, they say, crazy with their dear gadgets. We will conduct a small marketing research and find out how much you will have to overpay for becoming a member of the apple club.
Monoblock
Monoblock - an all-in-one computer: all the necessary stuffing of the computer is enclosed in the back of the monitor. The main advantage of the monoblock is its compactness and the ability to work on a high-resolution display. The disadvantages of the gadget include possible problems with the upgrade of components.
We will compare by basic parameters: display size (21 inches) and processor power (for example, Intel core i5). In this segment, the Windows platform is represented by Lenovo and MSI. The price for the first ranges from 40.500 rubles and reaches 53.990 rubles, depending on the narrow specifications and internal policies of online stores. For the MSI monoblock, you will have to pay about 60,000 rubles. Prices for the Apple iMac start at 78,000 rubles. The total difference is from 18,000 and reaches 37,000 rubles.
A laptop
A laptop - a portable personal computer, which, unlike a monoblock, combines not only a monitor and system components, but also a keyboard with a mouse (trackpad). Laptops are among the compact devices that people who prefer the activity of constant mobility prefer to purchase. These same characteristics become their advantages: light weight, size and versatility. The disadvantages of this type of technology include a short battery life and fast heating of the device.
In this case, you will have to reduce the selection and select models that are as close as possible to the characteristics of the MacBook Air 13. For comparison, again we take the display diagonal (13), processor (intel core i5), weight (up to 1.5 kg) and battery life (up to 12 hours ) Laptops of Lenovo (from 39.990 - 44.990 rubles), HP (38.290 rubles), Panasonic (from 103.000 rubles), Fujitsu (from 37.590 - 125.100 wheels) can boast a similar set. Against the backdrop of such a huge price analysis, the cost of the Apple MacBook Air (from 57,000 rubles) fades and we understand that pricing is not something to reproach Cupertino with.
WORK IN OC
So, with the costs and external characteristics figured out, we move on to the issues that most scare potential buyers of Apple computers - work in the Mac operating system.
Desktop
Microsoft has experimented with the Windows desktop in the past two years. The most unpredictable - and as experience proved unsuccessful - was the decision to remove the "start" button in win 8. Then there were unknown locks with the name of the operating system and Windows 10 appeared (release date October 1, 2014). We will compare it with Mac OS Yosemite, which also came out in the fall of 2014.
An interesting design feature has appeared in Windows 10 - the color of the start menu adjusts to the desktop background. Apple uses translucent textures and blurry backgrounds that create a single atmosphere.
Windows users have little choice when deciding how to work. You can use the start screen as the main control or return to the classic form of using the desktop. This choice defines the overall design concept for the latest version of Windows. The start screen is a set of colorful tiles, which creates a festive atmosphere on the desktop. It is difficult to judge how much such a color scheme contributes to work and concentration, how much your eyes get tired of the bright color set - only owners of the latest Windows OS can answer this question.
The most striking detail of Mac OS are the icons in the DOCK-panel, which hides from the desktop while working with the system. It’s worth noting that Apple relied on minimalism - along with OS X Yosemite came flat screen elements based on three colors: blue, white and gray.
Another feature of Windows 10 are virtual desktops. It is understood that the user will be able to customize each of the tables to their needs and, if necessary, simultaneously interact with several zones. The idea is not bad, but so far it looks damp in terms of ease of use of controls.
Fortunately, OS X has long been using a similar system for parallel program management - Spaces, which intuitively responds to user needs and ensures efficient work on multiple desktops.

For quick access to system folders, as well as to quickly obtain information about the status and operation of the system, the apple menu , is usually used, which is located in the upper left corner of the screen.
The program menu displays the operation of the current program and provides quick access to its functionality. It is constantly located in the top bar, while Microsoft chose to leave this element in the windows, periodically hiding it from the user's view (Windows example seven).

The status menu contains information about the current date and time, as well as the selected language, sound settings, wireless Internet connection (wi-fi) and status icons of some programs. The difference between Windows 10 and Yosemite in the location of this element. In addition, the OS X line contains two additional links that actually prove extremely useful: the user menu and Spotlight search. The first allows you to quickly move between users' desktops, the second is responsible for finding information on all files, folders, programs and other elements of the Apple computer system.

I would also like to talk about fine-tuning the desktop in Apple computers. As mentioned above, each OS X item has a program menu. The desktop is represented by the Finder program. By selecting the "show view settings" option, the user can configure the visual viewing of folders and shortcuts, not only the size of the icons, grids and labels, but also the display of the object's properties and sorting options.

Typically, a Windows desktop turns into a set of icons and shortcuts. At the same time, “Start” was and remains the main control element. But it’s worth paying tribute to Microsoft for several years that they left the folder-letter style and introduced visual visualization (the so-called “live tiles”) in the form of recently opened programs (central column) and windows with universal applications.
On Mac OS, the desktop field usually remains empty: shortcuts and folders appear there randomly and for a short time. Although, of course, this is a matter of taste, but the Mac OS environment provides convenient navigation through programs, files and documents. At the bottom of the desktop, there is a Dock Quick Access Toolbar, which is configured according to user preferences.

Let's talk more about Dock panels in fact, this is the main element that a beginner will have to work with immediately after switching from windows to mac os. This is where the most commonly used software shortcuts are located.

The user can customize its content and size at its discretion, but the first step is to figure out the capabilities and basic elements of the OS. Over time, each poppy grower forms it to suit their working and creative needs. By default, the Dock panel contains Finder, Dashboard, Launchpad, Safari, iMovie, iPhoto, Mail, Calendar, Contacts, iMessage, Facetime, iTunes, MacStore, Trash, and Settings.
In the following articles we will consider these elements in detail.
This text was not enough for me on the day of purchase of the first macbook.
I decided to buy the first MacBook Air when I came to work at the editorial office of Hacker magazine, where many colleagues had poppies and I did not want to be different from others. At first, the new MacBook seemed like a terribly inconvenient thing that you can’t work with and you can only look at it.
But, watching colleagues who work for the Mac 100% of the time and at the same time get sincere pleasure from comfortable and productive work, I decided - I also need to completely switch to OS X.
After many months of inconvenience (and the early days of the Mac were just hell), I finally stopped using Windows computers. My eyes ceased to be tired, 100% of the time spent in front of the monitor was effective (I don’t spend 10-15 minutes every day turning on the computer and watching freezes), fewer reasons for negative emotions, work with code / text is several times faster.
And now I only need one computer that is always with me. Before buying a Mac and getting used to it, I used a powerful home PC, a Windows laptop, which was in the office, and on iPad 2 I had a whole gentleman's kit for web development in case of urgent changes. Now all this mountain of brilliance replaces the MacBook Air.
But before the happy time came to enjoy working with the Mac, there was a long period of painful adaptation. Over the years, I want to turn to my past and give some advice that would reduce the time of this period. But this is impossible, so just share them with readers.
1. Complicate the process of turning on a Windows computer

In the early days of working with a Mac, many people experience great discomfort along with the wildest delight: it is not clear how to type characters on the keyboard, keyboard shortcuts do not work, the Start button is missing, etc. Everything is very beautiful, works fast, but wildly uncomfortable. But this is only out of habit. When after a few months of working on a Mac you sit down at a Windows computer, you again feel discomfort and think: “Wow, you ept, e-mine, why the hell at all ...”.
The more you work on a Mac, the easier it becomes. At first, work tasks are solved more slowly than on a Windows computer, but OS X is faster and an experienced user achieves maximum productivity on it.
In my opinion, you should strive to gain that critical mass of working time as soon as possible, after which you feel at ease with the Mac and no longer spend your life contemplating an hourglass and endless computer reboots.
In the first weeks when I worked at home for the MacBook Air, it seemed to me that the Windows computer was looking at me and mentally saying: “Traitor! Throw now this little freak! I’m twice as powerful and three times more comfortable! You’ll never learn how to work for him! ” And sometimes I threw it and sat down at the Windows computer, because behind it everything turned out much faster. With such actions, I simply harmed myself by delaying the happy moment of the full transition to the Mac.
I advise you to take the power cord / battery from the laptop and put it in that place, the process of extraction from where will take at least five minutes. And put it there every time you turn off the computer. So, gradually, you will learn how to solve all your computer problems exclusively with the Mac.
2. Transfer your data using iCloud for Windows

It is worth making sure that the files, mail, calendar events, bookmarks are immediately on the new computer. Otherwise, you can sit down for a moment on Windows, get carried away and lose an invaluable day of getting used to OS X.
8. Learn to use Spotlight

Spotlight is a global search across the entire Mac, that is, files, contacts, notes, mail, etc. It can be launched from any program by pressing Command + space or Alt + space (if it didn’t work, look in the settings for how it turns on). For starters, just knowing what it is is enough. Then you can master the operators and search filters, currency converter and calculator.
9. Take your time buying Microsoft Office

A full-fledged desktop Microsoft Office for Mac costs almost 15 thousand rubles. But it’s better to subscribe to Microsoft Office 365 for 400 rubles per month. As a gift 1Tb on One Drive and 60 minutes of Skype calls. One license can be used on 5 computers (Windows and Mac) and 5 mobile devices.
I myself do without Microsoft Office and use Google services. People who have been working on Macs since childhood can do great on Pages, Numbers, and Keynote. You can also try the open-source office suite Libre Office (the successor to Open Office). I have it installed (for the needs of IT journalism), but there is no desire to use it:
But this package has more features than Google Docs and iWork. And some like him. Therefore, I advise you to try it and make a choice based on personal impressions.
10. Discover the world of automation for OS X

Every time you do something that an automation script could do for you, you are wasting invaluable life time. If you need to fool around to create automation on Windows: write code / or install paid left-handed software, then in OS X everything is simple: you open Automator, select the necessary actions with the mouse and you get ready automation at the output.
Pitfalls when moving from Windows to OS X. Impressions of using iMac after long work on computers with Windows on board.
Introduction and purchase history
I thought about changing the computer for a long time. The first thoughts began to appear after testing the budget nettop 3Q Sign. I immediately noticed that the room became suspiciously quiet. It turned out that my old “sistemnik” was very noisy, just the cooler noise was so familiar that I stopped paying attention to it. However, you quickly get used to the good, and after the return of the nettop, the difference in noise level was heard by the “naked ear”. Then thoughts of “upgrade” began to appear. My “system engineer” is about four years old, at one time he was bought as a gaming PC, but since then a lot of water has flowed, and now I hardly play on a computer.
After testing the nettop, it became clear: small, quiet boxes that do not take up much space and are productive enough for everyday business are what I need.
As luck would have it, on Twitter or on the site various information about OS X appeared, at about the same time Alexander Zubkov published his huge “Mac Mini Operating Experience”. I trust Sasha’s opinion, in many ways our use cases from this article were similar to him, so I turned my attention to Apple technology.
It was clear that if you take the Mac Mini, it is mandatory with an SSD, so as not to worry about the speed of work. But on no site I saw the availability of such models (now, by the way, they appeared). It became clear that most likely you would have to install the disk yourself. I adequately evaluated my technical knowledge and decided that although I can install the SSD myself, it’s better to turn to specialists.
Among my acquaintances there was only one person working in this field - Alexei, known to some of you on Twitter as @androidioswp. Lesha and I had a lengthy conversation about customizing the Mac Mini: initially I planned to take the cheapest version and just install a 128GB SSD + 1 or 2 TB hard drive in it. But it turned out that such an “upgrade” would have come out very expensive, and it would have been more profitable to take an older version of the Mac Mini (with a Core i5 Quad-Core + 1 TB HDD) and simply install an SSD in it. Thus, the price tag on the Mac Mini has gradually grown to 35 thousand for the configuration I need.
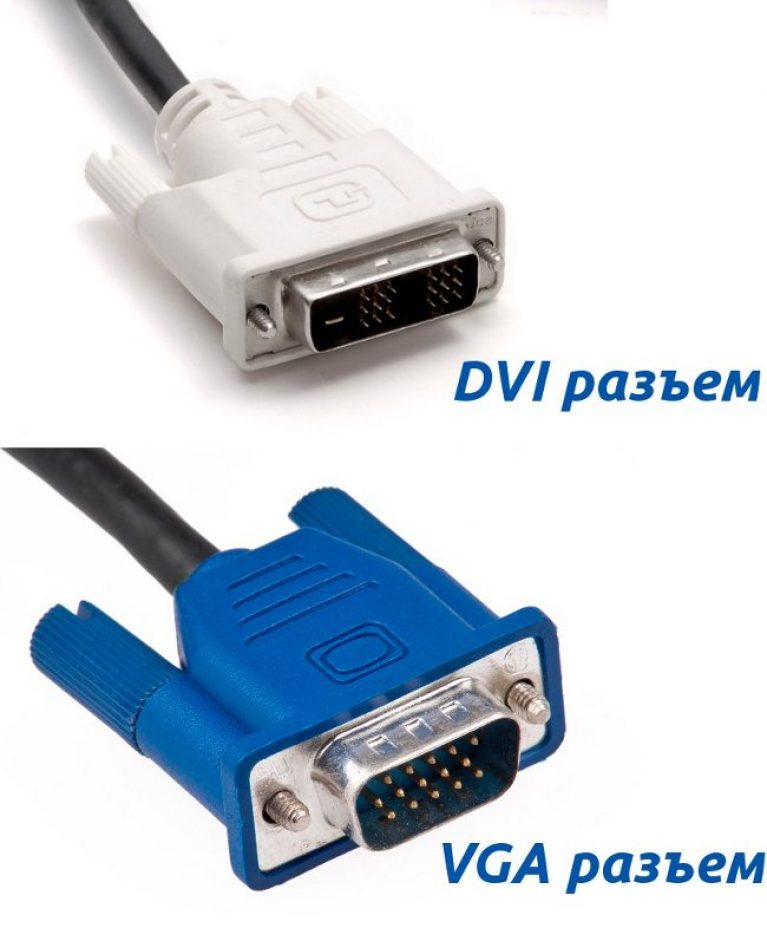
In addition to the nettop, I wanted to replace the monitor. Artem Lutfullin rightly remarked that this is the main tool for work, so there is no need to save money on your own eyes. He even recommended that I pay attention to the same monitor as his, we are talking about the Samsung SyncMaster S27A850D model. Its main features are the PLS matrix with soft colors and high resolution (2560x1440 pixels), as well as support for MiniDisplayPort (and a compatible Thunderbolt connector is just in the Mac Mini).
Thus, the total cost of the computer was approaching 60 thousand rubles. Continuing the discussion, Alexey mentioned that people often come to iMac from talking about custom Mac Minis. And then it dawned on me: iMac is really the best option, but I did not consider it, assuming that it is insanely expensive. However, it turned out that the configuration I needed would be no more expensive than a bundle of Mac Mini + monitor from Samsung.
In addition, iMac has a number of significant advantages over this combination. Firstly, this is the only cable for connecting a computer and a monitor. Secondly, the built-in speakers, which again positively affects the number of wires. And thirdly, of course, a cool look and materials. The only problem was the hard drive, there were no versions with SSDs.
Alexey said that they can pre-order a version with Fusion Drive, and as soon as she arrives at the warehouse, they will immediately notify me. It’s important to note that almost no one is engaged in custom deliveries of iMac (I wasn’t doing it at the time of writing, now the Apple online store has already appeared): for example, I went to MVideo and White Wind, and they didn’t even hear about them there . I did not contact Re: store because of the high prices. In general, Lesha consulted me in some detail, so I bought iMac at www.max-up.ru.
It is important to note here that I pre-ordered in mid-February, and the iMac came to me only at the end of April. This is due to delayed deliveries from an authorized dealer. As far as I know, custom iMacs now ship much faster. In addition, with the opening of the official Apple online store, ordering custom configurations has become even easier.
I apologize to the reader for such a long introduction, I wanted to describe my purchase history and note that I came to the iMac through much thought, that is, it was not an impulsive purchase.
Appearance, materials
The candy bar comes in a large "trapezoidal" package. It is interesting that in the new deliveries Apple uses a double box: cheap cardboard on top and quality packaging under it. I will not describe the unpacking in detail, since nothing special can be said about it.
Taking the computer out of the package, you immediately notice how lightweight the iMac is, especially if it was dealing with other all-in-ones (its weight is just over five kilograms, while the weight of the analogs starts from 8-9 kg).
Looking at a freshly bought computer, you cannot help but notice that after all, Apple designers are not in vain eating their bread. iMac looks very beautiful: stylish appearance, aluminum case, strict black frame around the screen. You can immediately see that this is a computer that was made to make it, among other things, just pleasant to watch. I had experience working with other all-in-ones, Apple has left them far behind in design and materials. After buying an iMac, you understand what “overpayment for design and materials” is and why it is justified.
In the iMac 2012 review, Sergey Kuzmin noted that reducing the thickness of the candy bar does not carry any functional advantages, however, from the point of view of appearance, this solution looks very impressive.

Due to the light weight for monoblocks and the successful coating of the support leg, the iMac is very convenient to turn left / right, and you will have to do this, because all the connectors are located on the back of the device.
If you need to move the iMac completely to turn left / right, then to tilt it up, just tilt the monitor slightly. I note that initially the screen tilted very easily, however, as the device was overgrown with various cables, raising / lowering it became a little harder.
The design of the iMac is something amazing, even after six months of use, it is still happy, it’s just nice to watch the all-in-one. Of the functional features, I liked the back leg, on which you can put some commonly used item, such as a notebook or phone.

Screen
Before describing the screen, I would like to note that before that I used an old ViewSonic with a resolution of 1280x1024 pixels as the main monitor. Its characteristics seemed to me sufficient for comfortable work, and thanks to the convenient aspect ratio, I could manage my workplace as productively as possible (first of all, we are talking about Word and web surfing).
I had experience using a pair of all-in-ones on Windows, so I assumed that I knew what high-quality monitors were. As it turned out, I was deeply mistaken.
When you turn on the iMac, you immediately notice how big the difference in the quality of the picture is between it and everything that you had to test before. The image seems to float out of the screen, the picture is strikingly bright and clear. I have not in vain mentioned computers and monitors that I used and tested before, an experienced reader will notice that among them there is neither MBP Pro Retina 13/15, nor iPad 3/4. In fairness, I note that I dealt with both devices, however, a very short time. And the fleeting memory of “what amazing screens they have” quickly disappeared from my head.
What is all this long introduction for? The fact is that to me as a person who has not used Apple's Retina technology before, the iMac screen looks wonderful: bright, clear, with rich colors, however, for example, it doesn’t seem good enough to Sergei Kuzmin, using iPad 4 and MBP Pro Retina 15 significantly affects the experience.


As you remember, the previous generation had two significant problems with the screen: dust clogged under it and it was very glare. This, by the way, was one of the reasons why I did not consider the iMac initially: my workplace is located near a window, and the sun often hits the screen. In iMac 2012, we significantly worked on the display, the absence of an air gap eliminates the problem of dust under the glass, and a special anti-reflective coating negates almost all glare and reflection. Even in strong sunlight, you can comfortably work at the computer (of course, the barely noticeable outlines of your face will be visible on the screen, but this is not at all what was in the same Acer monoblock, where the monitor turned into a mirror in sunny weather).
The screen brightness is conveniently adjusted using the F1 / F2 keyboard buttons. Interestingly, this combination does not work on third-party keyboards, but more on that below. In everyday work, I used about 30% of the brightness, in sunny weather I increased it to 60-70%. Honestly, I have never had a situation where it would have taken all 100% of the screen brightness, it is redundant.
I really liked the screen in the iMac, I would love to buy a separate monitor from Apple with the same characteristics. Before, I never understood why to buy expensive monitors for 30-40 thousand, and even more so for 90 and above. However, after using iMac, I see the validity of such solutions even for the average user.
Operating System and Firmware
In absentia, I was very loyal to OS X: a lot of positive reviews on the network, some of which were from very authoritative people. Morally, I was ready for change, another OS logic, as I assumed that it would be connected with some functions that improve the usability of the computer. It is important to note here that I never considered myself a conservative user: the new is always interesting, especially if this new one will be more convenient in the end.
Before proceeding to describe the impressions of OS X, I would like to briefly talk about my computer usage scenarios:
First of all, this is a tool for work - a typewriter and a simple photo editor (quickly rename files, fix something, nothing more). Of course, all this is combined with web surfing, twitter, checking mail and other routine chores. In addition, I use the computer as a video player with a TV connected to it.
It would seem that OS X should cope with such simple actions without unnecessary problems, but there it was. Working for the “poppy” for the first couple of weeks, I directly felt how he did not want to fit into my usual environment. It all started with the fact that I did not want to get used to switching the language through Command + Space, on Twitter they prompted a solution in the form of the KeyRemapforMacBook program, but as luck would have it, the Alt + Shift combination could not be properly configured there. The same thing happened with Alt + Tab. It's amazing how hard it is to relearn for other combinations: imagine that for ten years your right hand raised your mental command to raise your right hand, and now with the same command your left hand rises. Here are some of these impressions I felt from the change in the usual "hotkeys". But my misadventures did not end there. In addition to changing the language, I’m used to the fact that Enter opens a folder, Backspace brings you back to the section, and F2 is responsible for renaming the file. On OS X, Enter is responsible for renaming, Cmd + opens the folder down, Cmd + up takes you up to the section above, while Backspace does not have any specified actions at all. And yes, I could do everything through KeyRemap4Macbook just like on Windows, but I just liked the quick actions assigned to the default “efics” so much that I didn’t do that. In addition, some users on Twitter logically noted that you need to try to adapt to the system, and not try to "make it a second Windows."
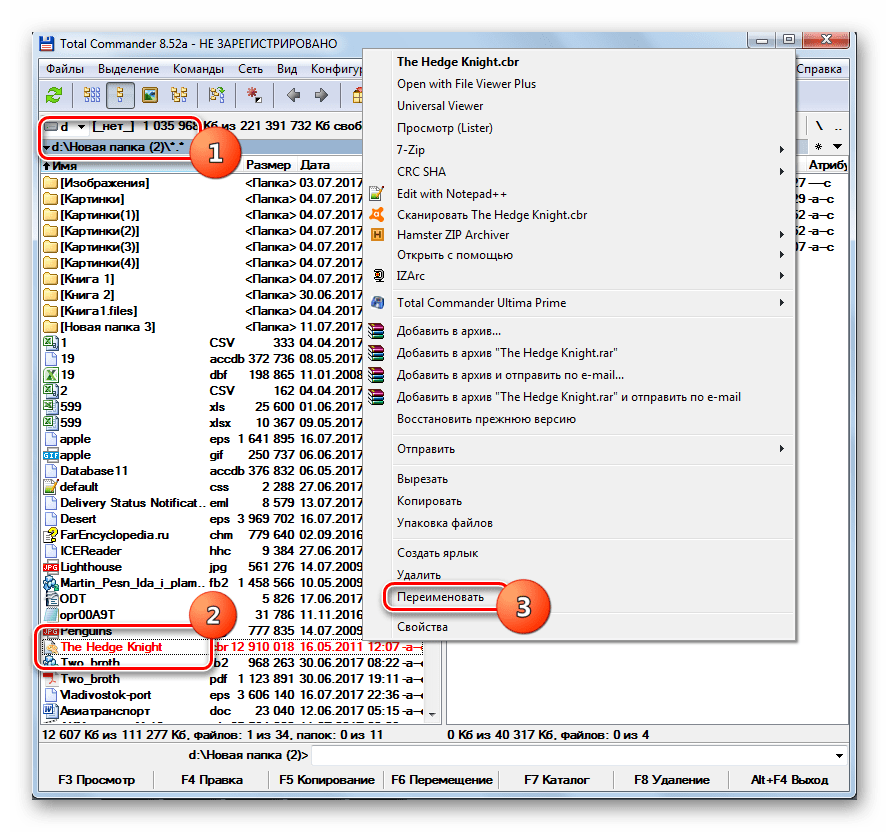
But most of all, the built-in photo viewer and iPhoto caused me the most problems. I need very little from such programs: open the picture, rename it (in the same window), go to the next. However, when you open a photo in this viewer, you can neither quickly rename it, nor go to the next. The same thing with iPhoto: you can rename a photo only if you click on its name. In general, there are a lot of unnecessary actions, and I could not find the key combinations that cause a quick rename (similar to F2 in Windows).

I will say in advance that I successfully solved both problems, but the first two weeks of the iMac were just a nightmare. I seriously thought about either handing it back, or selling it, or putting Windows as the main OS.
The main message of such a long introduction is that you need to get used to OS X, and even if you are mentally prepared for changes, it is far from the fact that in your individual case, switching to Apple technology will be easy and painless (although there are many such cases) .
I already said about the shortcomings of OS X, now it's time to move on to the advantages.
Work tables
In OS X, you can create multiple desktops. In addition, on each of them you can place certain programs. That is, let's say I need Finder, Pages and CyberDuck for work, and for entertainment I need a browser and a video player. I can configure the desktops so that when you open Pages, the second table will open immediately. Thumbnails of all tables are called up by pressing F3 or by swiping with four fingers up (if you use the touchpad).

In addition, there is a separate desktop with widgets. To get to it, you need to drag four fingers on the touchpad from left to right. I use this table to place sticker notes, and sometimes to view the weather.

Screenshots
I really liked how this function is implemented in OS X. You can take a screenshot of the screen (Command + Shift + 3), a screenshot of a part of the screen (Command + Shift + 4) and a screenshot of the active window (Command + Shift + 4 and then a space). By default, all pictures are on the desktop.

Active angles
A favorite feature of many OS X users. Its essence boils down to the fact that when you hover over a corner, some action is performed (for example, windows are minimized). Personally, I could not begin to use it, because with any random movement of the cursor towards the corner, an unnecessary action is performed.


Add or Remove Applications
OS X has three methods for installing third-party programs. The first is the simplest. You install the application from the App Store. After downloading, it automatically appears in the list of programs. A long press of the left button on the icon makes it easy to delete it (similar to iOS).


The second is installation using a pkg file. This method is somewhat reminiscent of the installation using the "executables" in Windows.

The third method is to copy the app-file of the program directly to the application folder. As a rule, such files are packaged in a dmg archive, and you just need to transfer the file icon to a folder. If you copy the file to another folder, then the settings and permissions for the application may not be registered.

Finder
Already at the file manager level, you begin to understand that in OS X the logic is completely different. There is no hard disk familiar to you; files are sorted into categories. I really like this approach, I sorted them on Windows the same way (separate folders for videos, music, photos).

Finder (as with all OS X) has a convenient preview option. You click on the file you need and press the spacebar, after that you will see a preview of the selected image, text (if we are talking about a text file), or the video starts playing. Using the navigation arrows, you can quickly go to the next / previous files, the preview will also be updated in real time. For me it was just a salvation. It was possible to easily view images using previews and immediately rename them by pressing Enter. However, there was one more problem: when renaming the file I needed, it “went” to the top of the list, and I had to scroll through the whole list from the beginning. I tried in the settings to sort by date of creation, however, this sorting applied only to a specific folder, and you had to set it manually each time. I suspect this problem has a simple solution, however I could not find it.
iTunes
It is amazing how much the impressions of the same program can vary on different operating systems. For example, using Windows on iTunes is not very convenient: the program either slows down, then freezes, then crashes, in general, there is not much pleasant.

But on OS X, none of these problems exist. The application “flies”, fits perfectly into the OS interface and does not cause any complaints. I enjoy using iTunes as my primary music media player. However, it is important to note that iTunes has a different logic, and you most likely will not be able to use your usual sorting by folders. Here they are replaced by playlists. Of course, it’s inconvenient to re-create playlists from your favorite tracks, but having done them once, then you can easily synchronize them with another “poppy” and with your iPod / iPhone.

Special attention deserves the purchase of audio and video content. I fully support the purchase of licensed music, another thing is that most of the tracks I need are most likely sold only in the Japanese section of iTunes (where you can’t figure it out without knowing the language). However, if we talk about Western or Russian artists, then the range is quite extensive. I liked the simplicity with which you can buy tracks in iTunes. In my opinion, this should be a good music store: ease of purchase and ease of listening.

In addition to music, films can also be purchased. I was glad that among the available resolutions there are HD / FullHD, as well as subtitles and audio tracks in several languages.

I was almost ready to call the movie purchase service ideal, if not for the “but” series. Firstly, all films have DRM protection, and you can’t just take and copy the film to your Android smartphone. Secondly, when viewing through iTunes, you cannot select the subtitle size, for me this drawback was decisive, since I like to watch movies with the original track and Russian subtitles. Thirdly, these same films can not be played by a third-party player (MPlayerX could not), in which I could adjust the size of the subtitles. Fourthly, I would very much like for the premieres of films to go to iTunes simultaneously with movie theaters or with a two-week delay. I think that many, like me, would prefer to watch a movie at home for the same money instead of going to the cinema.
Update: In Mavericks, you can now adjust the size of the subtitles.
Pages
On Pages, I immediately liked the synchronization with iCloud. Every time I create a document in Pages and make any changes to it, a copy of it is automatically saved in the cloud. It is very convenient. For example, I can turn off the computer, and the system itself will save the latest changes to the copy. Or here's another example for you: somehow I was adding another review, and our lights suddenly turned off. To say that I was upset means to say nothing. Five minutes later, the lights turned on again, I launched the iMac without much hope ... And what do you think? My entire document was in place, iMac even kindly opened the programs that were used before shutting down. What would happen on Windows? Most likely, he would restore the last saved copy, and 2-3 hours could go down the drain.

But the spell check in Pages I did not like. It does not correct even the simplest errors, and this, of course, is frustrating. With grief, I installed MS Office for Mac 2011. However, I could not use it, because I had noticeable delays when entering text. That is, I enter "verification", and the word appears only after a couple of seconds.
And one more thing: the cost of Pages is 600 rubles. You pay for the program once and receive all subsequent updates for free. The $ 20 price tag compares Pages from MS Office, which is constantly updated and asks for some wild sums (5 thousand rubles) for its license.
By the way, I left MS Office anyway, since it works much better with tablets than Numbers from Apple.
Safari
Before installing Google Chrome, I decided to give a chance to the built-in browser from Apple. At first glance, everything was great - perfectly drawn fonts, nice interface, convenient reading mode, and much more. I adjusted the scaling for myself and started using Safari. After some time, it became clear that the browser does not save the zoom settings, that is, each time you need to manually scale the site. A partial solution could be to set the font size in the settings, but in this situation formatting was lost, that is, you saw large letters with tiny pictures. Frustrated, I went to download Google Chrome.


Some time later, I still forced myself to switch to Safari, and all because the rendering of fonts in it is much better than in the same Chrome.
iPhoto
At the beginning of the section, I noted that iPhoto did not fit my tasks, but, nevertheless, I can not help but talk about the capabilities of this program. If you are a complete “teapot” in the photo, but want to slightly correct this or that image, then iPhoto is perfect for you. Using a simple interface and clear settings, you can easily change the brightness or other parameters of the photo.


Notification center
Like iOS, in OS X all notifications come through the notification center. In the settings you can change their appearance, I liked the notifications in the form of pop-ups most of all. Unfortunately, for me the font used in these "clouds" is very small, so I could not fully enjoy the twitter client, which Apple users praise without exception.

Mail & sparrow
Two great mail clients for OS X, one built-in, the other third-party. I will not describe their functionality in detail, I just note that the “mailer” should be just that: beautiful, convenient, functional. Personally, I settled on Sparrow, because in Mail in the "Inbox" column you can not adjust the font size.


iMessage
Own messenger for devices from Apple. Very simple, but no less convenient. You can also connect the same Google Talk to it. For me, its main advantage is the ability to immediately attach pictures to the chat. It is very convenient
Original accessories
Apple Wireless Keyboard. One of the most beautiful wireless keyboards and one of the few working with Bluetooth. Before that, I worked on a simple Genius SlimStar i220 White keyboard and was very used to it. Initially, I assumed that switching to a solution from Apple would not cause any problems, the keyboard seemed beautiful and comfortable. But it was not there. Fingers literally “ached” on how unusually the keys on the Apple Wireless Keyboard were located after the decision from Genius. I got used to this keyboard for almost three weeks, and the only argument in her favor was: “Well, well, she is so beautiful and so fits the look of the iMac.” Now I’m only lacking a full-fledged navigation arrow and a separate digital panel. And of course, it’s very disappointing that the keyboard, which has both arrows and a separate panel ... wired!

Apple magic mouse. I was prejudiced against the Apple mouse even before I met it. I fully supported people who criticized her flat appearance, it was immediately clear that holding and using such a mouse would be inconvenient.

However, at first glance, everything was in order. Yes, the mouse is flatter, but it did not cause any particular inconvenience. However, after half an hour I realized that this is not so. Due to the fact that the index and middle fingers are on the weight, and do not rest on the mouse, after some time they appear fatigue, which was not when using a conventional mouse.
However, the Magic Mouse has indisputable advantages. For example, horizontal gestures, with their help it is convenient to leaf through the same photos or scroll through some large picture in the browser. In addition, the mouse supports gestures with two fingers, horizontal “swipe” allows you to switch between desktops.
Magic trackpad. At one of the presentations, I complained to my colleague about the uncomfortable Magic Mouse, as well as the lack of convenient mice suitable for iMac in design. He suggested that I pay attention to the Magic Trackpad and spoke very flatteringly about it. In addition to this recommendation, I had my own interest in getting acquainted with this accessory. Honestly, I have not used Apple laptops for a long time and have long wanted to understand what their touchpads are praised for.

Its main advantage is, of course, multi-touch gestures.
Swipe up and down with two fingers allows you to scroll through a web page or any other page.
Swipe with three fingers emulates the selection of an area on the screen.
Four-finger swipe allows you to switch between desktops.


And yet, despite the convenience and functionality amazing for touchpads, one should not forget that these devices act as a replacement for the mouse, so even the simplest mouse can be more convenient than the most sophisticated touchpad. Personally, it’s easier for me to scroll through articles in the browser using the touchpad, but it’s more convenient for me to select objects with the mouse. As a result, my Magic Mouse and Magic Trackpad lie next to me.
Time capsule. One of my friends once told me that any of the OS X devices can also act as a router. I was curious, and I decided to check this function, after making measurements of speed on my previous router. The difference between the performance of my router and the performance of iMac as an access point just struck me. It turned out that the router cut the speed almost twice, while the iMac reduced it by no more than 10%.
After such sad (for my router) tests, it was decided to replace it with an AirPort Time Capsule. An ordinary Apple router costs about 5-6 thousand rubles, but the “capsule” is only five thousand more expensive, but it also has a built-in 2 TB hard drive (there are also modifications with 3 TB). An extra charge of five thousand seemed appropriate to me, and I took the recently announced updated Time Capsule model.

According to many Apple users, the whole process of setting up the capsule was reduced to connecting an ethernet cable to it and two to three clicks “Next” in the settings menu. In the worst case, you will have to drive the IP address and DNS servers manually. Of course, I was “lucky" the most. Neither automatic tuning nor manual helped. Perhaps this was the only call of the master to the house for all the time working with my provider. Incidentally, he was able to easily adjust the capsule, however, he clarified something and asked to change from the adjusters from the office.
After connecting and configuring the capsule, a separate icon appears in Finder, and you can copy and open files stored on it without any problems. They only open with a certain delay, apparently related to the fact that the capsule works wirelessly. As a result, I store almost nothing on the Time Capsule, except for backups.
Windows installation
You have two ways to use Windows on your iMac. The first is with the help of Bootcamp, this utility allows you to install Windows on a separate part of the hard drive and run it as a full-fledged OS on the computer. However, there are two nuances. First, when using Windows, it will be installed on your hard drive, and you will lose the benefits of Fusion Drive. Secondly, the integrated Intel HD 4000 graphics will not work on Windows, that is, the all-in-one will make more noise.


The second use case for Windows is through Parallels. Parallels allows you to run Windows in two modes:


Important note: if you plan to use Parallels frequently, it is better to take an iMac with 16 GB of RAM.

Interestingly, when installing Parallels, the program automatically downloads a clean image of the system itself, which is very convenient. Parallels can also pick up your installed through BootCamp Windows.
Performance
I intentionally ordered the simplest configuration available. I don’t need a powerful graphics card, so I didn’t see the point of paying extra for it, but I knew for sure that Fusion Drive is something worth paying for. So my iMac has the following configuration:
The first thing I immediately liked: the iMac turned on very quickly, as if I turned on the TV, not the computer. A little later, I noticed that Apple uses a tricky trick: as soon as you turn on the device, a gray apple appears on a white background with the sound "Ta Dam", and you subconsciously think that the computer is already turned on. However, this apple hangs for about three to four seconds, during which the system is still loading, but the user is sure that it has already booted.
Second: Apple computers do not need to be turned off, they are not loaded with garbage and do not start working more slowly without long reboots. In the case of the iMac, this, of course, is not so impressive, but I’m sure that all MacBook owners love this feature very much.
Third: the almost complete absence of noise, if you switch to iMac from a regular desktop computer, it will be immediately noticeable.
Now I propose to talk about the features of Fusion Drive. Ideally, it is assumed that iMac automatically transfers frequently used files to SSDs, and those that are used less often - to HDD. In fact, all new files are first written to the SSD by default, and then, when they reach the threshold of 4 GB for one-time transfer, they are transferred to the HDD. Honestly, I don’t really like this approach, I prefer the HDD and SSD to be two separate disks, and I would be able to independently set the folders that will definitely be on the SSD.
As for performance, there are no complaints about my everyday tasks (video, browser, twitter, mail, viewing and minimal photo processing). The only thing is that when quickly scrolling through the thumbnails of photos, iMac may think for a second or two. As other Mac’s owners told me, if the photos were on an SSD, there wouldn’t be such a problem.
I’m not afraid that the “stuffing” of my iMac will become obsolete, considering that the new versions of OS X work stably even on devices with the last year-old generation of processors and Intel HD 3000 graphics cards.
Webcam, microphone, speakers
As I said at the beginning of the article, the undeniable advantage of monoblocks is the minimum number of cables. So, you do not need to specifically connect the same webcam or external microphone. However, the convenience and quality of embedded components do not always meet the requirements of the user.
In my opinion, the iMac has excellent stereo speakers, they can perfectly replace the speakers for a couple of thousand rubles. The sound in them is clear and without wheezing, even at maximum volume.
The built-in microphone pleased me very much, it has excellent sensitivity, you are perfectly heard, even if you are sitting at a distance of two meters from the candy bar.
The quality of the webcam is also beyond praise, I would separately note the fact that it works better in FaceTime than in Skype.
Conclusion
I paid 67 thousand rubles for the iMac configuration I need. Now it costs 62 thousand. Perhaps the key question I wanted to answer is: “How convenient are iMac and OS X for a simple user?”. If we talk about the iMac itself, then there are no complaints: the stunning design, high-quality display, nice body materials and fast work. But about OS X I can’t say so clearly. Each user’s impressions from her will be individual, it all depends on how she suits your needs. It took me a month to get used to, and I can’t say that the transition was “smooth and painless”. Now I am happy to use OS X, because all the necessary programs are found, and I'm used to all the features of the OS. Undoubtedly, OS X has many strengths: it includes excellent synchronization of your documents with iCloud, fast speed, a nice interface, and easy backup of the system. But some functions seem simply illogical, for example, why you need to use a combination of two keys to open folders, although this is a frequently used operation, why it was impossible to make a separate “hotkey” for cutting, etc. Apple's “we know the best, do as we said” approach, of course, I really dislike. On the other hand, they use a tricky trick: they make 80% of the actions in their OS very convenient, and the user is forced to put up with the remaining 20%, because in general, almost everything suits him.
OS X seemed to me much more convenient than Windows, but at the same time, I understand that both operating systems have their pros and cons. Another question is that the direction in which Windows is developing now (we are talking about the “tiled eight”) I do not like at all, but in OS X everything seems to be stable so far (and I really hope that the colorful trends from iOS7 will not affect "Poppies").
Now I would like to talk about the possible configurations of Apple home computers and which one I think is the best.
In my opinion, it makes sense to take an iMac 2013 Late with a 256 GB SSD, and then buy an additional external hard drive of the required size for it. Now there are many models (starting from LaCie and ending with 3Q) that look perfect for Apple technology. A model with SSD will work faster than Fusion Drive, and all rarely used data can be stored on an external drive.
Also an interesting option is the combination of the Mac Mini and any external monitor. The ideal option is the Apple Thunderbolt Display, it just makes sense to wait for an update built on the basis of the current iMac line.
A little more about the price: Apple computers are expensive, on average 30% more expensive than their counterparts on Windows. Yes, in some respects (appearance, materials) they win, but for everyday work you will have enough notebook / monoblock capabilities on Windows. And the last tip I would like to give to the supposed “switchers”: don't jump right into the quarry, if you decide to switch to OS X, you don’t need to start with the expensive iMac or MacBook Pro Retina, choose something simpler, the same Mac Mini or Air of the previous generation. No one can say in advance whether you like this operating system or not.
Evgeny Vildyaev (