You will now receive practical advice and a complete “alignment”: How to take a screenshot of the screen on the computer. We will tell and show everything. And even step by step with us you will make your first screen.
To begin with, what kind of word is this - a “screenshot”? It happens like this - you urgently needed to send a friend through a computer the location of the object on the map. A photo is not at hand, and not in the search for Yandex and Google from the pictures.
Or if you are engaged in an online business, and any technical support requires a screen of what is happening from you. Then, like it or not, the need arose: how to take a screenshot of a screen on a computer.
And computer gamers consult with each other and show how they managed to triumphantly overcome the traps in the game.
In general, it will be useful for many to learn how to take a screenshot.
Now we will show you an overview of the most popular screenshot programs. With the help of these necessary things, you can independently and free scan your computer screen in the form of a picture (image).
- Using standard Windows tools and the “print screen” button
- Special programs to take a screenshot
- Using the browser you use
How to take a screenshot on a windows 7 computer and where to find it
This is the easiest way, but not the easiest. Its advantage is that it is always at hand, no need to download or access special programs. And minus - besides the fact that you need to press a button on the keyboard, you will need a series of actions to get a screenshot of the screen and find it.
Now to the point. If you need to take a screenshot of the screen on a windows 7 computer (windows 7), you will first need one action, or rather, a button - the “PrtSc” (Print Screen) or “Psc” or “PrtnScn” key, whichever is on your keyboard.

If you haven’t found out, if there is no “print screen” button, you don’t despair, use the electronic keyboard. This is not a problem - press "Win" + "U" at the same time. A standard Windows window pops up, select “keyboard” and turn on “electronic keyboard”.
Where can I find a screenshot, where is it saved?
By default, after you take a screenshot of the screen on the computer, Windows saves it in the clipboard. Do not try to find the screen yourself and do not find out where it is stored - just know that your “snapshot” is already in the memory of the “computer”.
Instructions on how to take a screenshot on your computer using the standard Windows program
- Press the “print screen” button when you find the desired picture. It is usually located in the upper right corner of the "F12".
- Open the standard graphics program “Paint”. How? Click "Start", then either enter "Paint" in the search box, or select "All Programs", then "Standard" and "Paint".
- The graphic editor will open. In the left corner, click "Paste" or the keyboard shortcut "Ctrl + V". And from the “clipboard” your picture will appear.
- If you don’t need to do anything with the screenshot taken, then save it. How? In the upper left corner there is a “blue square” (“File”) - click it and select “Save As”. I advise you to save in “PNG” format.
- After you have selected the "image format" a window will pop up in which indicate to the computer where you want to save the "screen". Everything.
If you want to edit the resulting image: crop or make changes (for example, text), then in "Paint" it is easy to do.
Be aware that with the combination of the “PrtSc” (Print Screen) and “Alt” buttons, the system saves only the active window to the clipboard, not the entire monitor snapshot, but part of it. These are the usual dialog boxes or windows that resemble Windows: such as the “are you sure you are going to delete all images?” Warnings when you empty the Trash folder.
How to take a screenshot on a Windows 7 computer using the standard Scissors program
In "Windows 7" there are "scissors" with which you can cut out the area of \u200b\u200bthe screen on the computer.
- Again, “Start”, then “All programs”, “Standard”, and “Scissors”.
- The picture on the display will turn white and a window will appear where you need to click on “Create”.
- Using the "mouse", move the cursor - indicate, as it were, the area that you need for the screenshot.
- A new window will appear, where in the upper left corner click “File” and “Save As”.
- Choose a place to fit the screen, and give it a name. Everything.

We did not find something characteristically different from how to take a screenshot on Windows 10 or on another Windows. In both cases, the screen is easy and simple to prepare using standard utility programs that are in every set of the operating system.
Moreover, you can do without any programs at all.
As already mentioned above, in order to take a screenshot of the screen on a computer on windows 10, you need to pay attention to the keyboard and find on it special keys Win + Print Sc SysRq (Win + PrtScr). And then, using a combination, click on them - the image on the monitor will darken a little and Windows will instantly take a screenshot and place your screen in a folder.
Where to find her? - you ask. And here everything is easy and simple. It is located in the “Screenshots” folder in the “Image” operating folder. Open and see the screenshots you created.
Useful advice, who uses exactly “Windows 10”: the screen can be made using the keyboard shortcuts Windows (with the flag) and “H” (English). In this method, the program will take and save a screenshot in the "cloud". And it will give you a list of applications with which you can send the picture electronically or edit it in the online service.
What to do if there is no such “magic” button “print screen” on the keyboard?
How to take a screenshot if there is no “print screen" button? Or a screenshot program
There is a solution for this method.
The most elementary is to select the “electronic keyboard” and repeat the necessary steps. And there is another option using specialized programs.
Honestly, there are many such utilities. And even we have not all tried them. But we definitely know that taking a screenshot of the screen with their help does not represent much effort. Everything is pretty simple: you need to download the program to your computer, run it and take a “screen capture” - a snapshot.
Screenshot Software
- Lightshot (https://app.prntscr.com/en/index.html)
- Screenshot (https: //screenshot.rf/)
- FastStone Capture (http://www.faststone.org/download.htm)
- Fraps (http://www.fraps.com/download.php) - makes screenshots in games
- PicPick (http://ngwin.com/picpick)
- Clip2Net (http://clip2net.com/en/)
- Screenshot Joxi (http://joxi.ru/lander/)
- Paparazzi (https://derailer.org/paparazzi/) - Mac only
Online services for saving screenshots
- PasteNow (https://pastenow.ru/)
- Makescreen (https://makescreen.ru/chrome)
- Snapito (https://snapito.com/) - you can send pictures to Pinterest
- Web Capture (https://web-capture.net/en/)
- IMGonline (https://www.imgonline.com.ua/website-screenshot.php) - Ukrainian service
- S-shot (https://www.s-shot.ru/)
- ScreenPage (http://screenpage.ru/)
Download as you know, nothing is needed. Just select and copy the link where you want to take a picture, paste it into a special field of the online tool and edit as you like - save to your computer.
Take a screenshot using a browser
The browsers themselves will help you how to take a screenshot of the screen on your computer. Applications and extensions are available for all search engines: Yandex, Opera, Google, Mozilla Firefox and others.
Today, Yandex, Opera, Google, Mozilla Firefox, the leaders in our country, already have a page capture function built into the settings.
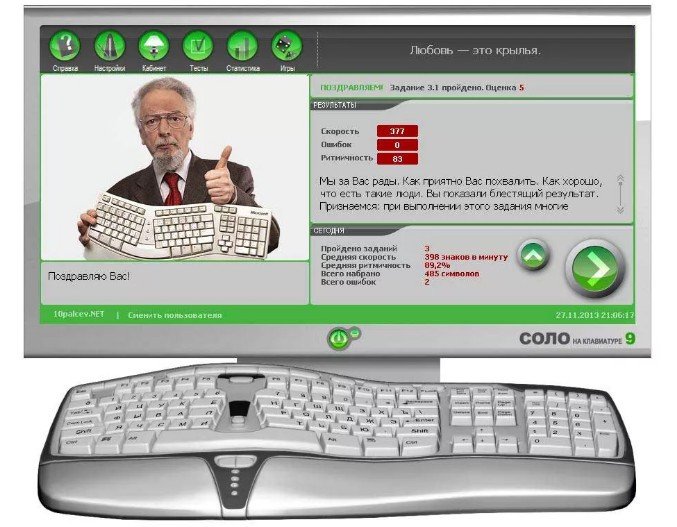
How to make a screen using the program "Lightshot"?

Let's look at the example of "Lightshot", we use it very often. By the way, I made this picture above using "Lightshot".
- Download the program from the official website for free. (No viruses, do not worry - everything is clean)
- Install (the program always starts with the computer, along with Windows).
- An icon appears in the upper right corner - an image of a purple-violet “feather”.
- When you need to take a screenshot, click on this "pen".
- The display will fade and you will be prompted to select an area for the picture.
- Right-click and drag the frame to the desired size.
- At the bottom and side of this frame, additional useful functions are located, including for saving a screenshot. (Dealing with the add-ons will not be any problem. Pupils do everything with a half kick).
Video - how to take a screenshot step by step, a screenshot on a laptop or computer:
If you have something to add - welcome in the comments. So introduce your friends (share on social networks - it’s useful for them, I’m very pleased, and it’s not difficult for you to click on the icon of your favorite social network) with 20 or more ways “How to take a screenshot of the screen on your computer yourself.”
When preparing articles, essays, reports, etc. Many users faced the task of “taking a picture” (taking a screenshot) of what is visible on the screen, and then inserting this picture or part of it into their document. The procedure for photographing the screen is called Print screen (print Screen). Sometimes the process of copying the contents of a monitor screen is also called "take a screenshot." Often, for these purposes, special programs are used that have wide capabilities, but in most cases you can get by with the built-in Windows tools. Actually, making a printscreen is very simple.
How to copy the contents of a computer screen
For this, there is a special key on the keyboard - Print screen (on keyboard Prtscn), most often located in the upper right corner of the keyboard. On the keyboard, the screen capture button is located here:


It can be used in two versions:

After clicking on this button, apparently nothing happens; no new windows open. By pressing the button Print screen the view of the monitor screen is copied to RAM and in order to save a screenshot to disk, you need to paste the contents of the clipboard into any program that can process graphics. Quite fit Photoshop, Paint or even Word, although there are many special programs for creating screenshots (SnagIt, WinSnap, HyperSnap, etc.).
How to save a screenshot in Paint
A simple (but sufficient) image editor is built into Windows. It is definitely on any computer running Windows and is called Paint.
To make a printscreen with Paint you need:

How to make a printscreen in Photoshop / Photoshop
- Press the key on the keyboard Print screen (or Alt + Print Screen - if you want to screen only the active window, and not the entire screen), when the necessary information is displayed on the monitor screen.
- Open program Adobe Photoshop, open a new document in it ( File-\u003e New ...) In this case, the size of the picture Photoshop determines itself, according to the contents of the clipboard.
- Paste the screen from the clipboard into a new program file Photoshop. To do this, select Photoshop in the main menu Edit-\u003e Paste.
- Save the screenshot to disk ( File-\u003e Save for Web & Devices) in the graphic format you need.
How to insert a screenshot in Word
If the screenshot doesn’t need editing, you need an exact copy of the entire screen or just one active window, you can insert the screenshot directly into the program Microsoft Word. To do this, just press the button on the keyboard Print screen (combination Alt + Print Screenif you need a screen of only the active window) and immediately insert the screenshot just taken at the cursor location in Word ( Ctrl + V - A universal insertion combination works, of course, in Word).
If you need to edit the screenshot before pasting it into a Word document, you must first paste it into one of the graphics processing programs ( Photoshop, Paint etc.), there, edit and save the screenshot to disk. Then the saved image can be dragged with the mouse to the desired location in the document Word or traditionally copy and paste using combinations Ctrl + C and Ctrl + V respectively.
The nuances of creating screenshots on a laptop and netbook
In order to take a screenshot on a laptop / netbook, you need to find the button Print screen (PrtSc) and make sure its color is the same as the rest of the alphanumeric keys. If the color is different, matching the color of the button Fn, then the “screen capture” button will work only when you hold the power button on the extended keyboard on the laptop. Those. need to press the PrtScn key while holding the Fn key (Fn + prtscn) The rest of the steps for inserting the received printscreen into Word or Photoshop are described above, there are no differences.
Basically, a screenshot is sometimes needed to communicate with a technical support service or to help someone yourself by showing how it looks like a program window or for a wide variety of other applications.
Screenshot by means of Windows without programs
In the simplest case, we have enough means of the Windows 7/10 operating system. To take a screenshot, press the “Print Screen” key. It is located in the upper right part of the keyboard.

Please note that on some laptops the PrtScr key is combined with some other button. In this case, press the “Fn + PrtScr” combination. But by itself, pressing this button does not save the screenshot, but simply copies the image from the screen to the clipboard, just like you copy any text using the “Ctrl + C” buttons and paste it later with the “Ctrl + V” buttons.
To save a screenshot to a file, we need a standard Paint image editor. It can be run from "Start -\u003e All Programs -\u003e Accessories -\u003e Paint" or simply write the word “paint” in the search bar of the Start button and select a program from the drop-down list.

I do just that, because it turns out faster than looking for the program in the rubble of the Start menu Now in the Paint program, click "Paste" or the "Ctrl + V" button to paste the contents of the clipboard.

All that remains is to save the image to a file. To do this, click on the "floppy disk" and select where to save the file. The file format I recommend choosing “JPEG”, because it takes up the least space, but you can not touch anything and leave “PNG” as the default.
You can take a screenshot of the window of the active program. To do this, press the key combination "Alt + Print Screen". And you can paste a picture from the clipboard not only into Paint, but also, for example, directly into a Word document or into an Outlook email.
So, the simplest action algorithm is as follows:
- Press “Print Screen” or “Alt + Print Screen”
- Run the Paint program
- Paste the contents of the clipboard
- Save file
You can also easily screen the screen using the standard Windows 7/8/10 Scissors utility. With its help, you can copy an arbitrary part of the screen. It is located in the menu "Start -\u003e All Programs -\u003e Standard -\u003e Scissors".

Click on the arrow on the "Create" button and select what we want to copy: any shape, rectangle, window or the entire screen. When we select the area, the window for editing and saving the finished screenshot will appear:

There are simple pen and marker tools. You can erase your creativity using the eraser. The Scissors utility cannot create transparent PNG files, therefore it is better to save it in JPEG. What are transparent pictures, I will show a little lower.
Send a screenshot to the cloud with one click
If screenshots are needed more often than once a week, it is better to install any program. In addition, programs can immediately upload a screenshot to the cloud and issue a ready-made link to the picture.
The program is from a domestic developer, therefore it is completely in Russian and, of course, free. In addition, I checked it for viruses - everything is clean. During installation, you can disable the loading of Yandex elements:

Immediately after installation, the window with the program settings opens, click "Save", I will talk about them a little later.
To send a link to a screenshot to a friend, simply press the Ctrl + PrtScr buttons. A characteristic click and a second darkening of the screen will mean that your clipboard already has a link to the screen! Check by inserting it into the address bar of the browser:

It's that simple! And if you want to take a picture of a certain part of the screen, then just click the PrtScr button and select the area. When you release the mouse - the link to the picture will be in your clipboard!
The Screenshot also has a couple of trump cards in its pocket, which other competitors do not have. If you reach far from the keyboard or laziness, you can click on the program icon in the system tray, which is equivalent to pressing the PrtScr button:

And for someone it will be more convenient to right-click on any empty place on the desktop and select the appropriate action in the context menu:

And everything is so simple, because programmers began to make the program purely for themselves, in order to get the functionality that is on the “macs” - quick screenshots. And, I want to say, it turned out perfectly.
A little bit about the settings
Each time the program starts, a window appears with the settings:

By default, hot buttons are as follows: for the whole screen Ctrl + PrtScr, for an arbitrary area: PrtScr. In the settings you can specify your own buttons, if, for example, these are already used for other software. Next, we can determine where to save the screenshots.
By default, images are saved to the hard drive and uploaded to the Screensaver’s own server (so that you can receive and send the link). It can be limited only to a hard disk (locally) or only to a server. Note that there are no restrictions on the number of files sent to the server. The folder in which the files will be saved on the computer can be specified just below. By the way, a shortcut to it is already on your desktop.
And the last few settings:
In general, that's all, in fact, even the kettle will figure it out, everything is simplified to the point of absurdity. After installation, the program gets into autorun and starts every time you turn on your computer or laptop. If you do not need it, then see the article. By the way, we could include this option in the settings, as most developers do.
How to make a transparent screenshot
Another interesting program “PrtScr”, which can take transparent screenshots, though it is in English, but I'll show you everything now.
What are transparent pictures? Let me show you an example. I took two screenshots in different formats and put them on another image in any image editor:

Right opaque JPEG format. As you can see, I selected an arbitrary area, but it is framed by a rectangle (which is usually just white, but this program adds a slightly visible background there). And on the left is a fragment that was saved in a transparent PNG file. It is superimposed in the form in which I circled it, without a rectangular frame. Such files are very convenient and beautiful to overlay on other images, and so that it will be imperceptible.
The PrtScr program "hangs" at the bottom in the form of an icon, by clicking on which with the right button you need to select "Capture screen now".

after which the screen will change color, and the following prompt will appear on the right:

This means that: the left mouse button selects a specific place on the screen (Alt + Print Screen hot buttons), when you press Ctrl, a rectangle is highlighted, and with the right button you can simply draw on the screen and then select the desired area. If you simply click anywhere, you’ll be able to take a picture of the entire screen. Hot buttons “Ctrl + Print Screen” include a magnifying glass with a very large magnification, where you can use Ctrl to select a screen area with pixel precision.
When we select the area, a window for saving results appears:

Here is what is interesting here:
- Save as ... - save to file. If you used arbitrary selection, you need to save the image in PNG format, not JPEG, to make the picture transparent. At the same time, the “Transparent PNG” checkbox should be on the “Settings” tab (by default it is there). Otherwise, use JPEG.
- Email ... - send by mail using the default email program
- Edit ... - edit in the Paint program
- Print ... - print to the printer
- To clipboard - copy to clipboard
- Discard - remove screenshot
LightShot - on-the-fly editing
Sometimes you need to finish drawing something on a screenshot right away, write text or wipe part of the image. For such cases, I recommend LightShot.
LightShot is as light as other programs, but after selecting the area, a simple editor appears in which you can draw with a pencil, marker, draw lines, arrows, rectangles or write text.

Conclusion
As you can see, everything is very simple. There are both standard Windows features and various applications with their own advantages. Which way to use is up to you. I also think it will be very interesting to read to you. If you liked the article, then share it with your friends on social networks!
And now the video with a visual "debriefing"
Screenshot (English screen - screen, shot - snapshot) - this is a screenshot of the monitor. Using the functions and programs of the operating system, as well as additional tools, the user has the opportunity to take a picture of the entire monitor screen or a separate part of it. Screenshots are placed as illustrations in the instructions for installing the software and are attached to the manual, placed in textbooks and manuals.
PC users use screenshots:
The ability to transfer a picture quickly from an online computer helps both in business correspondence and in friendly communication. It is useful for a novice PC user to learn how to take a screenshot of the screen and where it is saved. Your attention is invited to the instruction illustrated by the same screenshots received from the monitor.
Screenshot without programs in Windows
Taking a monitor snapshot is a feature of the computer’s operating system. No additional software is required. Just press the PrintScreen key. On different keyboard models, the key may be called PrtSc, PrtScr, PrnScr, or PrtSc / SysRq. When pressed, instant copying of what is displayed on the monitor takes place.


Photo: Classic PrintScreen Button Layout 
Photo: PrtSc Button Options
Like all copied material, the image is stored on the clipboard. To save it on a computer as a file, you can use any graphics editor.
The easiest way to save photos is through Paint, one of the standard Office utilities. To do this, follow these steps:

By default, the file is saved on drive C, in the Images folder on Windows 7 or My Pictures in Windows XP.
The screenshot can also be sent immediately by e-mail, printed. It can also be inserted into Word.
To do this, you must do:

In this case, the screenshot is saved with the Word file. The resulting image can immediately illustrate the text. You can work with it, as with any picture inserted into Word: change the quality, size, position, compress, crop, copy ...
Screen full screen
Software utilities provide an opportunity to get a screenshot of the entire screen. Using the “Scissors”, you can select the entire field and, save the picture or select the fragment of interest. To get an image from a laptop, just click keyboard shortcut Fn + PrtScn. The image immediately opens in Paint - it remains to save it or select another task: print, send by e-mail. Most of the above image editors allow you to get a screenshot of the entire screen immediately after starting them and pressing the PrintScreen key.
Video: Screen shots in Windows 7
Image from a separate part of the monitor
Scissors program and Fn + Alt + PrtScn key combination on any laptop to save the image of the active window - this is the fastest way to get a snapshot of the desired fragment. A screenshot of the active program is also performed by a key combination Alt + Print Screen.
Scissors is a very simple graphic editor.
To open it, you need to follow these steps:
- press the start button;
- select "All programs";
- find and open "Standard";
- open the "Scissors".
The image you are interested in should be on the monitor before the opening of the “Scissors”: when they are in operation, it will not work to perform actions outside the program. Saving a file is better in JPEG - editing pictures of this format, you get more options.
Consider the work of the image editor. Program Picpick not the most difficult, but has enough functions for working with images, including the function of creating screenshots. If you open PicPick and click PrintScreen, the image of what is currently on the monitor immediately appears in the working field.

By default, in the same way as in Paint, the image is saved in the Documents folder. If you previously worked in Paint, then understand how to take a screenshot of a separate part of the screen in Picpick, not difficult.
You must perform the following steps:

Working in PicPick, you get the opportunity not only to save the resulting screenshot in the selected format, but also immediately insert it into the desired program: Excel, Word, Power Point.
Custom area
You can select an arbitrary area of \u200b\u200bthe screen by selecting "Arbitrary area" from the task list. The cursor moves like a pencil, highlighting the outline of the area you need. The shape of the selected area depends solely on your vision of the future screen and your confident possession of the mouse.

Selecting an arbitrary area of \u200b\u200bthe PC screen, copy the desired fragment. But when using a screenshot like a picture in Word or Power Point, you get it, after all, in the form of a rectangle. A white background is formed around the image highlighted by your cursor.
Screenshot program
An example of working with Paint can be recognized as a classic way to get a screenshot. However, in Windows 7 in the section "Accessories" there is still a very simple program "Scissors", with which you can select and "cut" any portion of what we see on a working monitor. The figure shows how the “Scissors” screen was completed through Paint.

The compact “Scissors” window does not interfere with the view. The cursor captures the entire screen or selects the desired part. Minimum editing tools. To save, you can choose the format PNG, GIF, JPEG. If you need only a fragment of a picture of a working monitor in your work, you can resort to processing the image obtained in Paint, that is, cropping it. It is bulky and archaic. The task is simplified by the aforementioned “Scissors”.
There are many additional programs with more features: graphical viewers, converters, image editors. Depending on your goals, choose the most suitable: simple - for quick information, or voluminous - for editing, converting photos like Photoshop. A simple editor has the necessary functions to get a screen of the entire screen or a separate part, to create labels, draw, add labels.

More complex programs have the functions of correction, deformation, transformation, image conversion, creating videos, presentations:

You can use an online editor like Pixtick. It has the necessary set of functions for obtaining screenshots, their processing. Some programs for digital cameras, photo and video converters also have a capture function. In addition to this, they have dozens of other functions, which makes the work longer if the user has not yet acquired the necessary skills.
We do without printscreen
The PrintScreen key may not function due to a defective or clogged keyboard. If the printscreen does not work, this will limit your possibilities little.
To get a screen without the PrintScreen key, you can use one of the following methods:
- apply “Scissors” - this is possible if you have Windows 7 or the latest version of the OS;
- use an additional image editor: PicPick, EasyCapture, DuckCapture, Clip2Net or others;
- perform a screen using additional equipment - a digital camera, which is the least convenient, therefore acceptable only in extreme cases.
It’s better to install one of the above image editors on your computer, as standard operating system utilities can fail and do not always have a sufficient set of tools and functions.
>Need to take a screenshot on a computer?
I'll help you:
I will show 2 proven ways to take a screenshot on a computer or laptop, as well as how to save and send it.
I was encouraged to write an article by people who in 2019 still use phones and cameras to capture what is happening on the screen.
Firstly, it turns out an ugly blurry image. Secondly, it takes a long time and takes a lot of effort.
Proceed:
In any version of Windows there are standard programs installed by default, with which you can take a screenshot.
I will talk about the most popular tools:
Key “print screen” + program “Paint”
First, find the Print screen key (the following versions are possible: PrtScr, PrtSc or Print Scrn). Most often, it is in the vicinity of the F12 key.
The next step is to open the window you want to take a picture of: the page of the site, VK correspondence, check on the transfer of money, ... In general, what you need to fix at the moment.
I will show how to take a screenshot using the desktop example:
Press the “Print Screen” key if you want to take a photo of the entire screen. “Alt + Print Screen”, if you need a screenshot of only the active window, the program in which you are currently working. - It makes sense to apply if it is not open to full screen.
The screen will be saved to the clipboard. At the same time, you will not hear sound effects or animations, so do not rush to be afraid that this function does not work for you.
After the screenshot is in the buffer, you cannot copy any information before you save it. Otherwise, a loss will occur.
To see the resulting screen, you need to insert it into a program that can display graphics. For example, Paint, Photoshop - you can not only display, but also make changes. Word, PowerPoint - view only.
I will use the easy-to-use Paint editor. Simply put, an image editing program.
I paste the screenshot into the editor using the key combination “Ctrl + V” or the “Paste” button in the upper left corner.
The combination of keys, their simultaneous pressing "Ctrl + V", works absolutely in any program. If you can’t succeed, use the familiar insertion using a computer mouse.
If you need only a certain specific part of the image, then use the tools - “Select”, and then “Crop” - the red rectangles in the picture above.
Do not forget to click the "Save" button with the left mouse button.
Scissors Program
The easiest way to find the scissors program is to use the Windows search:
- Click on the magnifier icon next to the start button
- Enter the word "scissors"
- Right-click or press Enter / Enter to launch the application
Alternative way: go to "Start" → folder "Accessories - Windows":
Click “Create” and select the area whose snapshot we want to take. The default mode is “Rectangular”.
Functions of the modes:
- Free form - the outline of the screenshot is drawn by hand with the mouse
- Rectangle - Selects a rectangular area.
- Window - takes a picture by clicking on the desired window. It is convenient when several programs are open at once not on the full screen. With a mouse click, you can choose to capture only one of them.
- Full screen - takes a photo of everything that you see in the monitor in front of you
Suppose that you need to make a screen of correspondence VK:
- Go into the dialogue and find the necessary messages
- In the Scissors program, click Create
- Select the area you want to take a picture of
Then you will succeed:
By the way, with the help of the Pen and Marker tools, you can make inscriptions and markings on the screenshot. And the mistakes made are erased by the “Eraser".
F1 - opening help. It is useful for those who want to get acquainted with the work in Scissors in more detail.
- Click “File” in the scissors program, in the upper left corner
- "Save as…"
- Choose a place to save the file
- Change name if necessary
The first and second paragraph can be replaced by the key combination "CTRL + S".
In my case: Place - desktop, File name - Untitled.jpg, which ideally needs to be changed to a more understandable one. Otherwise, after a while you won’t be able to find the picture you want: the screenshots will have almost the same name, except for the number at the end.
If you try to close the Scissors program without saving the image, a dialog box pops up asking you to do it.
This can also be regarded as another conservation option.
How to take a screenshot without programs?
In order to get a screenshot without using programs, you must simultaneously press the keys "Win + Print Screen".
After which the screenshot, without sound and visual effects, will automatically be saved in PNG format at the address: “This computer” → “Images” → “Screenshots”.
You can go to this folder in order to edit, copy or send a picture.
Do not forget to come up with a unique name for each photo, otherwise it will turn out such a disgrace:
How to send a screenshot in a message?
There are two ways to send a screenshot:
Second, press the “Print screen” button or select the desired area for the picture using the “Scissors” program. Then, in the message sending field, use the key combination “CTRL + V” or the right mouse button, and then “Paste”.
Conclusion
Each of the 3 methods described in this article has its pros and cons:
"Print Screen" + Paint - works in 100% of cases, but the longest and most labor-intensive.
"Scissors" - are very convenient to use. Indispensable when it does not work, the PrtSc button is broken or not at all. But they do not always work, for example, when you need a screen window that closes on a click.
“Win + Print Screen” is a quick way to take many screenshots of the entire screen without changing the names and editing.
Choose a method for creating a snapshot based on specific tasks. Remember, there is no better, there is the most convenient in the current situation.
If you have any problems or questions - feel free to ask them in the comments!