In order to proceed to configuring the D-Link DIR-300 router, open the box, boldly tear off the orange sticker from the router. You can forget about the sticker.
We connect the router to the computer with a wire (blue patch cord), which is supplied.
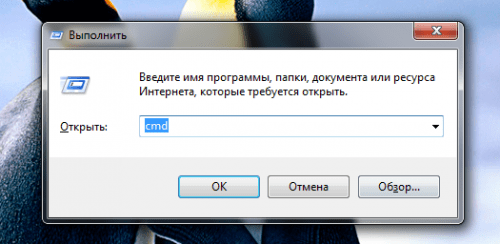
First, open a browser (Internet Explorer, Firefox) and type in the address bar 192.168.0.1.
Connecting wirelessly to a router may not always be successful, since in addition to your router, others may be available, there is the ability to connect and configure someone else's router D-Link DIR-300.
Login: admin
Password: (leave the field empty, although out of habit I want to enter admin)
On the "Setup" tab, select the "Install Internet" tab, and then the "Manually Configure Internet Connection" button.
Looking ahead, I’ll say that the address in the provider's local network can be issued dynamically or be static, usually at the request of the user. Providers usually ask for an additional monthly fee for a static address. There are two options. d-Link DIR-300 router settings, depending on what type of receiving addresses in your case, I personally use a static address, it’s more convenient.
Configuring the D-Link DIR-300 router with dynamic IP address assignment.
Option d-Link DIR-300 router settings No. 1, if the address is obtained via DHCP, i.e. dynamically.
In the "Internet Connection Type" field, select "PPTP Dual Access" (it’s dual access, I don’t know the fundamental difference, but I need to do just that).
1. Select a connection with dynamic address assignment by the Dynamic IP Address provider.
2. MAC address - if the provider’s network has a binding to the MAC address, click Cloning the MAC address, and d-Link DIR-300 router will copy the MAC address from the network adapter of your computer, relevant in cases where the router was not purchased at the time of connection to the provider.
3. IP address / server name– IP / Server name of the provider.
4. PPTP account - username for authorization in the provider's network.
6. Re-entering the PPTP password - repeat the password for authorization in the provider's network.
7. Select a connection mode - connection setup mode. "Always-on" is selected for permanent connection. "Connect-on-Demand" - establish a connection if necessary - that is, when traffic directed to the Internet appears, the router establishes a connection, and if there is no activity for more than the time specified in "Maximum Idle Time" - disconnects. If "Manual" is selected, the connection is established and terminated manually.
8. Save changes to 
Configuring the D-Link DIR-300 Router with Static IP Address Assignment.
1. Select a connection with a static value of the address "Static IP address".
2. IP-address - the address given to you by the provider.
3. The subnet mask.
4. Gateway provider.
5. DNS - DNS Server provider.
6. MAC-address - if the provider’s network has a binding to the MAC address, click Cloning the MAC-address, while the router will copy the poppy from the network adapter of your computer, it is relevant in cases where the router was not purchased at the time of connection to the provider.
7. IP address / server name– IP / Server name of the provider.
8. PPTP account - username for authorization in the provider's network.
10. Re-entering the PPTP password - repeat the password for authorization in the provider's network.
11. Select a connection mode - connection setup mode. "Always-on" is selected for permanent connection. "Connect-on-Demand" - establish a connection if necessary - that is, when traffic directed to the Internet appears, the router establishes a connection, and if there is no activity for more than the time specified in "Maximum Idle Time" - disconnects. If "Manual" is selected, the connection is established and terminated manually.
12. Save changes to d-Link DIR-300 router settings by clicking the "Save Settings" button. 
After correctly configured the connection d-Link DIR-300 Router with the Internet should be installed, which will indicate the indicator "Internet Online" on the left side of the browser screen.
D-link DIR-300
Wifi wireless router.
Connection
For successful work with settings and management via a web browser, JavaScript support must be active in it (this instruction does not have this information, refer to the manual of your browser).
- Turn off the computer.
- Connect the Ethernet cable to the LAN ports on the back of the D-link DIR-300 router, and to the computer’s Ethernet adapter.
Router Sockets
- Connect the PSU (power supply) to the power socket on the back of the router, and then to the outlet.
Turn on your computer.
Login to interface
Having adjusted the combination of the computer with the D-link DIR-300 router, you can go to the web-interface where the settings and management of the router are located. To do this, launch the browser and enter 192.168.0.1 in the address bar. Next press Enter.
NOTE: If the browser displays a “Cannot display page” error, make sure the router is connected correctly.
The web-based interface of the D-link DIR-300 router is implemented in several languages. To select Russian language, point to the inscription English at the top of the page and in the drop-down menu, click Russian.
Language selection
- Go to the System / Administrator Password page
- Enter your secret word in the Password and Confirmation fields.
You can install any word except admin. It is allowed to write Latin letters of both registers, numbers and symbols, which can be written on the keyboard. At the end, click Apply.
change Password
NOTE: Write down the new secret word or combination of numbers. If you lose your password, you can return to the factory settings by holding the RESET button for 20 seconds. Remember, this procedure will overwrite all the settings you specified.
After the password has been changed, the web-interface login page will open again. Enter admin and your secret word, then Log in.
Router setup
- To provide an Internet connection, go to the Start menu - Click’n’Connect.
Start setting up the router
- Connect the Internet access cable to the WAN port on the D-link DIR-300 router.
INTERNET jack
- To check the connection, take a look at the INTERNET indicator, it should be on. To continue, click Next.
- On the connection types page, select the one that your provider applies.
Different types of connection
WAN Wired Connection
PPPoE
PPPoE Connection Type
- In the Connection name field, enter its name.
- In the Username, Password and Password confirmation fields, enter the data provided by your Internet provider accordingly.
If you need to additionally configure the router, switch to the expert settings mode by clicking the Details toggle switch at the bottom of the page.
Static IP
Connection Type Static IP
- In the Connection Name field, specify its name.
- Fill in the values \u200b\u200bfor the IP address and Netmask.
- In the IP address of the gateway column, enter the address of this connection.
- In the Primary DNS server cell, enter the appropriate data.
As a rule, these parameters are enough.
Dynamic IP
Connection Type Dynamic IP
- In the Connection Name field, enter a name.
- If the provider provided the addresses of DNS servers, uncheck the Obtain DNS server address automatically box and enter the data in the Primary DNS server field manually.
As a rule, these parameters are enough.
If you need to additionally configure the router, go to the expert settings mode by moving the toggle switch in detail, at the bottom of the page.
Checking Internet Availability
Here you can check access to Internet resources.
Internet access check
In the Result section, the result of checking the WAN connection and the cause of possible problems are displayed. To check again, click the Recheck button. At the end, click Next. Next, the setup page for the Wireless Wizard opens.
Wireless Setup
The D-link DIR-300 router has three wireless wifi network modes.
Router modes
- If you do not plan to use a wifi network, put a check mark on the Off. Click Next and then the Apply button.
- If you plan to use a wifi network to connect devices, you need to set the label to Access Point.
- If you plan to connect the router to another wifi network then check the box client.
Access point mode
In the SSID field, create and insert your network name. For input, you can use numbers and Latin letters.
In the next step, you can change the security settings of your wifi network.
IMPORTANT: Basic settings will not provide sufficient security for your local wireless network. We recommend that you configure security in your own way.
In the “Set Security Mode” window, in the “Network Authentication” list, leave the value “Secure Network” active, and in the “Security Key” field, enter the secret word or combination of letters and numbers - the password for accessing the wifi network distributed by your router. Numbers and letters of the Latin alphabet will do.
If you select the Open network value, the “Security key” field is blocked, and you can connect to the wifi network without entering a password.
Wifi network security
The next page will display the settings of the D-link DIR-300 router you have set. Verify that they are correct, and then click Apply.
IPTV setup
The D-link DIR-300 router allows you to configure IP-TV. To do this, go to the IPTV Setup Wizard section.
On the settings page, select the LAN port to which you want to connect the IPTV set-top box.
It happens to organize access to the Internet and IPTV services, the provider uses virtual networks (VLAN ID). In this case, configure access to the IPTV service as advised by the following instructions.
- In the left menu, select Advanced, VLAN sub-item.
- Create a port group with a VLAN ID value and set the type to Transparent.
- Specify the port for the connected IPTV set-top box.
- To save the settings, click Save.
The D-link DIR 300 router has two interface themes. The article described a light theme. We suggest you take a look at the video on how to configure the same router, but already in the usual interface theme.
In this article, we will configure the D-Link Dir-300 router and similar series. Setting up takes some time and attention, so be careful, and the article also turned out to be not small.
If you decide to organize a local area network with Internet access, consisting of several computers, or organize a wi-fi connection at home or in the office, this can be easily implemented using. Today, routers are available at very reasonable prices. In this article we will analyze the question how to set up a D-Link Dir-300 router. Configuring the D-Link Dir-300 Router will be in the form of step-by-step instructions. In my opinion, this is one of the most popular routers, which is easy to configure and also not expensive - within $ 50.

First, make sure that our device is fully equipped. We will need:
- the device itself (black box with bulbs);
- power Supply
- cable (supplied in blue) for connecting a computer to a router.
What do we need:
- cable Internet (well, of course, if we want access to the Internet);
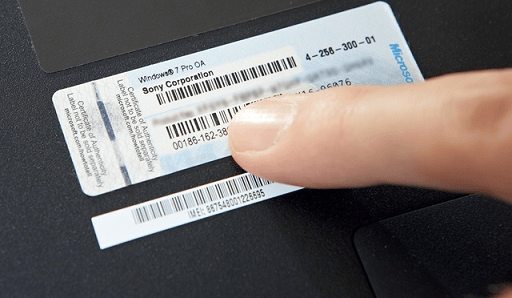
- the device itself;
- a piece of paper with settings from your provider;
- a little time and patience.
So let's get started.
We take the device out of the box. We connect one end of the blue cable to the LAN 1 port, the other end to the network card on the computer (to where the cable from the Internet was stuck before). We connect the Internet cable to the WAN port (INTERNET). We connect the power.

I want to note that if you have already tried to configure the router yourself and nothing worked for you, then you should reset it to the factory settings and start all over again. To reset the settings, there is a small button on the back panel of the device that can be pressed with a toothpick or some sharp object. After clicking, give the router a time to reboot - 1-2 minutes.
At this stage, in the network connection settings, you should specify "Obtain an IP address automatically."
There are two options:
1. If you connect the router using a patch cord (blue cable) through a network card, then in the connection properties on the local network, you must specify "Obtain an IP address automatically." To do this, go to Start\u003e Control Panel\u003e Network Connections\u003e right-click on “Local Area Connection” and select “Properties”\u003e in the properties of the TCP / IP Internet Protocol, set “Get IP address automatically” and “Get DNS server address automatically” .


2. If you connect to the router via wi-fi, then after the router boots into your wireless networks, an insecure dlink network will appear. Select this network and in the properties of this connection in the TCP / IP protocol, select "Obtain an IP address automatically" and "Obtain a DNS server address automatically."


I would like to say that the settings are similar in different operating systems, be it Windows XP, Windows Vista or Windows 7. This also applies to the router itself - all D-Link routers are identical and therefore this configuration guide can also be applied to such models, like DIR-320, 400, 100, 615, 650 and 120.
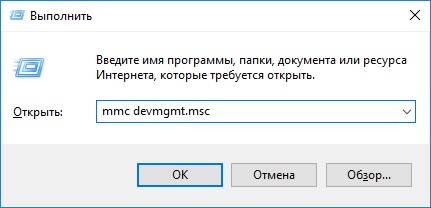
Now open any browser and enter in the address bar - http://192.168.0.1/, after which the window for entering the administrative section of the router will open. In the "User Name" line, enter admin, leave the Password line empty. Click Log In and get into the admin settings interface of the router.

Now go to the next step.
If the appearance of the admin panel of your router is different, see setting up D-Link DIR-300 new versions - http://remontka.pro/router/.
By entering the username and password (we left the password field blank) we get to the main page of the router settings control panel.

Sections are located at the top, and the sections menu is on the left.
Briefly on sections:
Setup - basic setting
Advanced - advanced setup
Maintenance - everything related to the maintenance of the router itself
Status - The current state of affairs in the router.
Before you start configuring the router and connecting to the network, D-Link recommends changing the firmware of your devices to a more updated one.
You can download firmware at the following addresses:
To update the firmware, go to the Maintenance\u003e Firmware Update\u003e section, then click on the overview, select the required firmware file and click Upload.

We wait 2 minutes until the browser takes us to the main settings page. After that, you need to reset the router to the factory settings. To do this, go to Maintenance\u003e Save and Restore\u003e click Restore Device.

3.1. Now let's proceed directly to the configuration of connecting the router to the Internet.
I must say right away that there are several types of network connections (it depends on your provider). Here we need that piece of paper with the settings that your provider gave you. If you do not have any settings, then call or go to the office and get the settings.
In order to start setting up, go to the section Setup > Internet setup \u003e and press the button Manual Internet Connection Setup. Further:
Enable Access Point Mode - do not put a tick
My internet connection is - choose from the drop-down list " Russia PPPoE (Dual Access)»
Attention: all the settings you should have when connecting to the Internet, if they are not, again, go to the provider and ask!
StaticIP
We put the switch on StaticIP (depends on the provider, if you are not sure what your IP is, then call and find out);
IP Address - enter your IP address;
Subnet mask (subnet mask) - enter your subnet mask;
Gateway (main gateway) - indicate the main gateway (usually starts at 10 and looks like an IP address);
DNS - enter your DNS;
MACAddress Clone MAC Address);
Server IP / Name(VPN) - enter the VPN address;
PPTP Account
PPTP Password - enter the password;
PPTP Confirm Password - repeat the password;
Maximum idle time - 5 minutes;
MTU - leave 1400;
Connectmodeselect - network connection mode. There are several options: “Always-on” - permanent connection; “Connect-on-Demand” - connect to the network as needed, i.e. when we decide to connect to the Internet, the router will automatically establish a connection, and if not within the specified time in the "Maximum Idle Time" will be disabled; Manual - connecting and disconnecting to the network is done manually.

Click Save settings.
DynamicIP
We put the switch onDynamic ip
MACAddress - leave it empty (if the provider has a MAC Address’s binding, click the button Clone MAC Address);
Server IP / Name(VPN) - enter the VPN address;
PPTP Account (username) - enter the username;
PPTP Password - enter the password;
PPTP Confirm Password - repeat the password;
Connectmodeselect - network connection mode and as mentioned above there are several, see options above.

Click SaveSettings.
After the selected settings, a network connection should appear.
3.2. Wireless Setup - Wi-Fi
To start setting up a wireless network, go to Setup\u003e Wireless Setup and click on the “Manual Wireless Connection Setup” button.

After that we get to the next page.
First section « Wi— FIPROTECTEDSETUP"- it’s better to uncheck it, because not all wireless adapters supportwi-Fi Protected Setup technology.

Next section ""
- Enable Wireless - naturally you need to put a tick;
- Wireless Network Name - your network name (by default d-link), this name will be displayed in the list of networks;
- Enable Auto Channel Selection - auto channel selection, check the box for automatic channel selection;
- Wireless Channel - channel number;
- Transmission Rate - here we do not change anything, let it be the factory setting;
- WMM Enable - also removed, leave the factory settings;
- Enable Hidden Wireless - if checked, the network will not be displayed on the air. Better not to tick, because not all devices can connect to hidden networks.

We pass to the Wireless Security Mode section. In this section, we will configure the security of our network.
- Сipher Type - TKIP;
- PSK / EAP - PSK;
- Network Key - here you should think up and enter a password for authorization in the network, the password must be 8 characters long and consist of Latin letters and numbers.

After all the settings entered, click " Save Settings. "
3.3. Configure DHCP server and LAN
To configure the DHCP server, go to Setup\u003e LAN Setup
Router Settings:
- Router IP Address - the IP address of the router is 192.168.0.1;
- Default Subnet Mask - subnet mask, this parameter defines as the IP itself; router, and the entire subnet of the local network. You can leave the factory settings;
- Local Domain Name - leave blank;
- Enable DNS Relay - check the box.
DHCP Server Settings - DHCP server setup
- Enable DHCP Server - check the box, if you want the router to distribute addresses to all devices automatically, if you configure everything by hand inside the local network, you can leave the box unchecked;
- DHCP IP Address Range - the range of distributed addresses, you can leave the factory settings;
- DHCP Lease Time - lease time of the issued address;
- DHCP Client List - a list of clients that received addresses from your router.
25 - DHCP Reservation - a list of reserved addresses. This setting is necessary in order to assign specific addresses with a MAC address to specific network cards.

3.4. Set time and time zone
To set the time and date, go to Setup\u003e Time and Date and we have three sections:
1. Time and Date Configuration - setting time and time zone
- Time - shows the current time of the router;
- Time Zone - time zone, you can select your zone;
- Enable Daylight Saving - accounting for the transition to winter and summer time;
- Sync / your computer’s time settings - this button is activated when automatic synchronization is turned off.
2. Automatic Time and Date Configuration - here you can configure the router to automatically synchronize with the time server
- Automatically synchronize with D-Link’s Internet time server - check the box if you want to automatically synchronize with a temporary server;
- NTP Server Used - select a time server.
3. Set the Time and Date Manually - here we set the time manually. This item is available when automatic synchronization is turned off.

After all the settings made, do not forget to save the settings - Save Settings.
A modern router, or as it is customary to call a router, is used to combine the necessary networks into one common network. This very difficult device has become especially relevant recently. This subject, bearing the English name route, guarantees perfect data exchange not only between several installations, but also between networks. Undoubtedly, professional routers are specifically different from their siblings. Professional models exchange a huge amount of information between corporate networks. Naturally, their sizes are corresponding. Household routers, by no means, are endowed with compact sizes and special grace. They are able to provide not only information routing, but also some additional functions. Home Internet centers have combined everything you need to merge all your devices into a single network that seamlessly connects to the global network.
Why do I need a router?
The main thing in the operation of the router is the concept of IP addresses, specially created to save the main Internet address. IP addresses are not visible from the Internet and can simultaneously provide services to several private local networks. That's it, for the implementation of this connection, routers were developed - indispensable assistants.
D-link DIR 300 review
One of such assistants is the D-link DIR 300 router. This small but multi-functional device guarantees a common wireless network in the premises. The Internet is easily connected to the model via Ethernet and then freely distributed via Wi-Fi. In addition, through the router you can share and ADSL Internet. However, he is not directly able to connect to the telephone line. But it's not a problem. There is such a scheme: our router is a DSL 2500U, but without the use of Wi-Fi. But it is guaranteed to work if from the very beginning there is a simple device without Wi-Fi. And if, for any reason, a failure occurs in the operation of one device, then you will remain out of work. Therefore, it is best to have 1 device that meets all the requirements. And such is the D-link DIR 300 router. The model is endowed with four port switches that seamlessly connect your personal devices via Ethernet adapters.
Install and connect the router
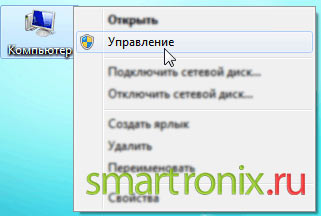
Installing and connecting the DIR 300 router is so easy that even a lamer can handle it. To get started, choose the best place for the model. Do not install the router in the utility rooms, as the presence of additional walls can significantly reduce the broadcast area. Then, connect the model to the computer. And this is not a difficult task. An Ethernet cable should be inserted into any of the four LAN ports, originating from the network card of your PC. And in the INTERNET connector we connect the provider cable. After turning on the power, it remains to wait for the model to load. Connection parameters are checked on the local network. To do this, log in to Windows 7, then “Start” and “Control Panel”. There we go “Network and Internet”, “Network and Sharing Center,” click on “Change adapter settings”. A new tab will appear, in which you need to go to "Properties". Version 4 protocol is highlighted here and the selection is confirmed by clicking on “Properties”.


Basic router settings
After a successful connection, it is the turn of the DIR 300 router settings. To do this, you need the order of numbers 192.168.0.1 in the address bar of the browser and press Enter on the Key. In the window that appears, type the username admin leave the password field empty.

After the changes, feel free to enter your version. Do not forget that the first time you enter the settings of the router, you need to update the firmware, since there were malfunctions due to the old firmware.
To configure the Internet in the D-link DIR 300 in the horizontal menu, click on the Setup tab, and then - Internet Setup.


Next, by pressing the "Manual Internet Connection Setup" button, we confirm our choice. After opening the next window, special attention is paid to the section Internet Connection Type. This is where the type of Internet connection is selected. There are several types of connection to the World Wide Web: Dynamic IP, PPPoE, PPTP, L2TP, Static IP, Russian PPPoE, Russian PPTP. Each connection is made in its own way, but it will not be able to mislead you. Everything is very simple.
A router (from the English word route - path, route) is a device that allows for high-speed connection of a home network to an external network, acting as a gateway for it. In simple terms, a router (or a router, which is one and the same) is a kind of cell tower, with only a much more modest range of “broadcasting”. This device evenly distributes the Internet received from the provider to all devices in the private network, allowing you to connect to the network immediately, for example, a stationary PC, laptop, tablet and smartphone.
Wifi Router d link 300 has earned a reputation as a reliable and proven device that provides excellent communication quality, and is currently one of the most popular wifi routers. If you joined the ranks of the owners of this wonderful “device”, then, of course, you will need to connect and configure it so that all your devices gain access to the Internet. It is worth noting that the “specialists” of some unscrupulous providers are asking for an absolutely disproportionate amount of money for this service, so this information can be very useful. Let's start from the very beginning.
Having opened the package, it is best to immediately verify that the router is fully equipped, if you have not already done so at the time of purchase. It must include the following components:
- The wifi router itself is d link dir 300.
- Blue Ethernet cable for connecting to a computer or laptop.
- Power adapter.
- CD with software.
- User's manual.

Preparation (first stage)

Stage two (enable and configure Wifi connection)
If all the points of the first stage of setup are completed correctly, then you should have Internet access via an Ethernet cable, therefore, now you need to configure wi-fi to connect other devices to the router. To do this, you must:
- Go to advanced settings in the admin panel of dlink routers. In the wifi section, you need to make sure that the green switch is in the on position.
- Now go to the main settings section and check the box “enable wireless connection”. Drive your username into the appropriate field, and then click the "change" button.
- You need to provide your private wireless network with protection from free internet fans and from accidental connections. Go to the “security settings” section, which is located in the admin panel of the router, then select “WAP2-PSK” in the “network authentication” field, and in the column “PSK encryption key” specify the password that was invented in advance. It must be at least eight characters long and consist of letters of the Latin alphabet and a digital code. Settings need to be saved by clicking on the “change” button in the lower right corner of the screen. Otherwise, you cannot guarantee that you are the only user of your wi-fi network.
- Further, in order to protect your router from unwanted connections over Lan networks and via Wi-Fi, it is best to set a strong password by going into the advanced settings mode on the main page.
This is important: after you have correctly configured your wifi router d link dir 300, it is best to save the settings separately on a USB flash drive or on your computer’s hard drive so that the next time you don’t repeat the whole procedure again. To do this, in the administrative panel of dlink routers, go to the section called System in the "Configuration" tab and save the current configuration in a special file with the settings in the selected location, indicating the required address. In order to restore the settings from the file, you need to choose to load the previously saved configuration, respectively specifying the path to the file or manually writing the address.
Firmware update
Each wireless Wi-Fi router has its own firmware version. Manufacturers usually have special laboratories in which they constantly test their own devices and correct minor bugs found in the work, so it is advisable to install the latest firmware version on a wifi router. For this:
- Go to the admin panel by driving the address written on the back of the device into any Internet browser.
- In the window that opens, you can familiarize yourself with all the specifications and detailed information about the device. The current firmware version is indicated between the field with the wi fi router model and its assembly time.
- After remembering or writing down the firmware numbers on a piece of paper, you need to go to the manufacturer’s website ftp://dlink.ru/pub, from where and install the latest firmware. Updating a wi fi router takes a short period of time.
Indication of the front panel of the router

- Power button If the indicator is green, then the router is turned on and working normally. In the event that it is lit in yellow, this indicates either that the router is in the process of rebooting, or a failure in its operation.
- If the Internet button on the front panel of the router is highlighted in green - it means that the connection is established and you can connect devices via wifi, if the button winks in green - data is currently being transmitted. Yellow indicates that the connection is not established.
- The wifi icon is highlighted in green - you can connect devices via wi-fi, a flashing green indicates the transmitted data.
- The green backlight of the LAN icon on the front panel of the router means that the device is connected to the corresponding port.
- The side panel of the router is equipped with a button for instantly adding a new device to a Wi-Fi network. On the button, in turn, there is an LED that, when trying to establish wi fi, the connection blinks blue, if the connection is successful, the diode lights up in blue, and if the connection fails, it turns yellow.
What else do you need to know in order to connect and configure the d link router?
- As mentioned above, the router is a kind of tower for relaying the signal of cellular networks. You probably noticed that they are usually located at the highest points in the city, so if you hide your router in the pantry, then the signal strength of wi fi will leave much to be desired.
- In order to configure a wifi network, you need to go to the admin panel of the router and go to the “basic settings” window in the wifi section. Here you can rename the access point SSID and make changes to other parameters, but it is recommended to leave them by default. Do not forget to save the settings.
- The advanced settings section allows you to change the power of the wi fi signal in the range from 0 to 100 percent. You can slightly reduce the power of Wai Fai if the connection is very good. You should not change other parameters out of simple curiosity except when you definitely know what you are doing.
- You can optionally register the address of the static routes of the router, but in most cases this is not required.
- Check that in the properties of the TCP / IP protocol in the "network connections" section, the option "automatically obtain an IP address" is selected. The DNS address must also be set to "get automatically."