The main function of protective glass is to protect the phone from shock, cracks and scratches. This element takes care of everything. Over time, it becomes unusable as it loses its attractive appearance. Because of this, the level of protection of the device is reduced. To replace it, you must first learn how to remove the protective glass from your iPhone. This procedure is simple. You just need to follow simple rules.
Why is replacement required?
Before you learn how to remove iPhone 6 and 5, you need to familiarize yourself with the reasons for the replacement:
- The appearance of the phone is spoiled.
- The protective functions of the device are lost.
- If you want to change it to a new glass.
When the phone has a new protective glass, the device looks neat. There are special accessories for the iPhone that are ideal in size. But you can also use universal ones, which need to be glued correctly.
Precautionary rules
You need to take into account one important nuance before removing the protective glass from the iPhone 5 or 6. Since the surface of the screen is perfectly smooth, the glass is securely fixed to it. It is held not only by glue, but also by electrostatic forces. The two surfaces are firmly in contact, and therefore the glass will not be removed so easily. You have to pry it off with your fingernail. If you use another object, such as a knife, for these purposes, there is a possibility of damaging the display.

One won't help here either. If it sticks securely to the damaged surface, there will be no vacuum under it and it will bounce off with force. When the grip is good, the suction cup does not come off, but another difficulty will appear.
The sensor is attached to the body with double-sided tape or glue. Their strength is less compared to the touchscreen and protective glass. If you apply force, you can tear off the entire screen module, which will damage its cables. Therefore, actions must be deliberate. Only then can you use the instructions on how to remove the protective glass from an iPhone 5s or another type of device.
Preparation
The work must be done carefully. Before removing the protective glass from your iPhone, you need to prepare everything for the procedure:
- Mediator.
- Silicone suction cup.
- Lint-free cloth.
- Wiper.
- Medical gloves.
Some glass kits include everything needed to complete the procedure. If these parts are there, then the work is easy.
Features of dismantling
How to remove the protective glass from an iPhone so that everything turns out neatly. Before the procedure, you must wash your hands with soap and dry. You can use rubber gloves. This is necessary to protect against fingerprints and streaks. The screen will look neat.

On the damaged glass, you need to find a whole corner where there are no chips or other damage. You need to attach it with a suction cup, pressing it to the device. The corner with the suction cup must be pryed off using a mediator or spatula so that the glass peels off. To do this, you need to pull the suction cup in your direction.
The procedure must be performed carefully so that the screen is not torn off before a gap forms. If there is no suction cup, you can smoothly insert the pick into the gap that appears. When peeling, you need to deepen the mediator. With a large screen you need to use two tools. Finally, you need to lift the suction cup towards you to completely remove the glass.
New glass sticker
When the user knows how to remove the protective glass from the iPhone, you can safely carry out the procedure. Then you will probably need to glue a new element. To ensure a high-quality result, work should be done in a clean room. Before gluing, you need to apply a cleaner and treat the surface with it. This is necessary to completely eliminate dust and degrease the surface.

The glass must be grasped by the edges. Hands should be washed and dried. You can work with medical gloves. Then you need to pull the tab of the protective film that is on the adhesive surface and remove it. The glass should be kept close to the smartphone to prevent dust particles from sticking during operation.
The glass is placed away from the sensor; it must be centered and leveled. You need to make sure that all the holes match. The product must be lowered onto the display, pressing it slightly. Bubbles must be eliminated immediately by wiping the surface with a dry cloth. At the end, you need to remove the film, which served as protection for the product during transportation.
It is better to immediately eliminate dust particles that have fallen under the glass. It is necessary to carefully peel off the glass, removing any debris. To do this, you can use a napkin or tweezers. Then the glass is put in place. After this, the phone will again be protected from damage. The procedure for removing and gluing glass is the same for all iPhones. You just need to choose the right accessory.
Sooner or later, the service life of the protective glass on the iPhone 6 ends with the appearance of cracks after a fall, or the appearance of chips on the end edge. Further use of a smartphone with armored glass of this quality can end in disaster, both for the gadget’s display and for cuts to the fingers.
To avoid consequences after the glass chips or cracks appear, we advise you to replace the protective glass with an iPhone 6 of better quality. For example, one of the popular and durable ones is the sapphire series, with full display coverage and rounded edges.
Quick removal of protective glass using the example of Apple iPhone 6
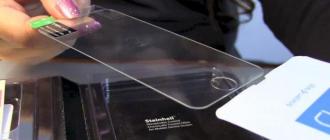
Before replacing the armored glass, the glass must be removed. It's easy to do. We will need only 2 plastic cards (bank cards, discount cards, etc.).
Carefully and alternately pry the edge of the glass on one side and the other. Place plastic cards into the resulting air gap, as shown in the photo.
Advice. To pry the glass most safely, try to use thin but durable objects. A plastic ruler or small fingernails work well for this.
After the plastic cards are placed under the protective glass, carefully slide them into the bottom of the iPhone 6. There is no need to rush.
Attention! After cracks form on the glass, micro fragments may appear that will scratch the smartphone screen on the back side. That is why the process of peeling off glass should be carried out carefully and effortlessly.
Removing the glass from an iPhone 6 is quite easy and will not be difficult even for a beginner. If you have already selected or purchased a protective cover for your Apple iPhone 6, be sure to use our instructions for replacing it.
Details Benks Created: August 11, 2017 Updated: August 11, 2017Protective glass is a special coating made of high-strength chemical glass that is resistant to mechanical damage, scratches and chips. By installing additional protection on the screen of your IPhone, you will protect the display from possible impacts, thereby extending its service life.
Features of protective glass
Comparing protective glass and film, there are a huge number of advantages on the side of the glass coating.
- with a thickness of only 0.25 mm, a high level of strength;
- a special oleophobic coating eliminates the appearance of fingerprints and other greasy contaminants;
- many types of glass have a nano-coating, thanks to which the smoothness of the glass prevails even over a conventional display;
- the glass is attached to the screen using a silicone base - shifts and air bubbles are excluded;
Among the varieties of protective flexible glass, there are models with and without folded edges. In the first case, the edges of the protective coating are rounded, this makes the glass almost invisible, and the edges of the glass do not crumble upon impact.
How to remove the protective glass?
Despite the fact that the service life of protective glass is many times longer than the life of the film, there comes a time when the coating needs to be changed. The silicone-based glass is firmly in contact with the main display, so removing the protection will require some skill.
Tools you will need to remove the protective glass:
- Microfiber cloth (small).
- A strong floss or a special one for cleaning teeth.
- Needle.
The process of removing the film itself is not difficult, but you need to be as careful as possible, otherwise the flexible glass will constantly stick again.

Pry the thread under one of the edges that is more convenient for work. To do this, carefully move the edge of the glass with a sharp needle and immediately place a napkin so that the base does not stick again. For convenience, it is better to remove glass with a partner; you will be able to remove the old protective coating more quickly and efficiently.
It is worth noting that this number of tools is designed to remove intact glass. But if the surface is cracked, then more painstaking work and additional items are required. If you are afraid to remove damaged glass yourself or do not have experience, contact a professional. The company that repairs Apple equipment in Nizhny Novgorod, “MakeMeApple,” will help you with this. You can leave a request using the website or by calling.
The main purpose of a protective glass for a smartphone is to protect the screen from falls, bumps, and scratches. Such glass can serve for a very long time, but over time, chips, cracks, and scratches still appear on it and not only the appearance of the phone deteriorates, but also its functionality - the viewing angle of the smartphone decreases, the sensor may not work correctly. In this case, it is necessary to remove the old glass and stick on a new one, but the removal process is not the easiest task if you do not know all the nuances.
What you need to remove the old protective glass from your phone
It is almost impossible to remove the glass without having anything on hand. And if a regular film can be picked up with a fingernail and peeled off, this will not work with glass. You will need:
- medical gloves – desirable, but not required;
- a flat object, such as a plastic card or guitar pick;
- alcohol-containing glass cleaner or other alcohol-containing substance (vodka, cologne, perfume, etc.);
- lint-free napkin;
- silicone suction cup – preferable.
With this kit, removing the protective glass from your smartphone screen will not be difficult, and the whole process will take 5 minutes. Often, the kit with protective glass already contains all the necessary accessories.
How to remove protective glass from a phone - precautions
The protective glass and the smartphone screen are two perfectly flat surfaces that stick very firmly to each other, and the reason for this is electrostatic forces (with rare exceptions, glue). It is almost impossible to peel them off from each other using a flat object (for example, a knife), but there is a possibility of seriously damaging the smartphone.
It is also unlikely that you will be able to remove the protective glass using only a suction cup, although the chances are greater than in the case of a knife. If the glass is damaged, then most likely the suction cup will simply bounce off without any effect. This is the best case scenario. In the worst case, the sensor will move away from the body, and then you will have to change the entire matrix of the phone, which will be very expensive.


Removing the old protective glass from the phone
- First of all, put gloves on your hands, or if you don’t have them, wash your hands thoroughly with soap and wait until they dry. This will save you from unnecessary streaks on the screen.
- Find the most intact corner of the glass, if it is damaged, away from chips and cracks, and attach a suction cup there.
- Under the glass in the corner where the suction cup is located, insert a card or pick. To do this, pull the suction cup slowly and smoothly, but not sharply, otherwise you may tear off the sensor or screen entirely. If there is no suction cup, then try to carefully make a gap using a card.
- Next, you need to smoothly move the card deeper, peeling off the glass. This needs to be done slowly; if the screen is very large (for example, on a tablet), then it is better to work with two or three cards at the same time.
- When the glass has almost completely come off, pull the suction cup towards you and it will come off.
As you can see, this is not a very complicated procedure, the main thing is to follow the rules.


Gluing new glass to the phone screen
- When the old glass is disposed of, you can begin the process of gluing the new one. This should be done with clean hands in a dust-free room. Wash your hands thoroughly, clean your phone screen with alcohol, and get a new screen protector.
- Remove one film from the side that you want to stick directly to the phone. Keep the glass as close to the surface of the phone as possible. Line it up carefully, making sure all the holes line up, and only then lower the glass completely onto the screen.
- If bubbles appear, they can be easily squeezed out by running a dry cloth over the glass. The last step is to remove the second film and your phone is protected.


It’s quite simple to remove and stick on the protective glass, and for this you don’t have to go to a mobile phone store; you can quickly do everything yourself.