In general, working with contacts on Android is both easy and difficult at the same time. The thing is that most people use applications installed by the manufacturer, and these can be either standard ones from the Android supply, or programs as part of proprietary shells. So to begin with, let's consider the general situation using one of the examples.
Android contacts are in the application of the same name. As a rule, shell developers for Google OS put it on the first home screen, so it is not difficult to find it.
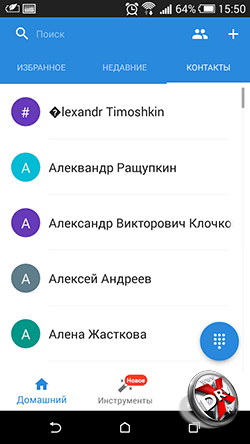
The interface of the Contacts application is simple and intuitive. At the top there is a menu of Phonebook sources, icons for searching and creating a new contact, as well as the menu of the application itself.

By swiping left and right, you can quickly go to contact groups, the speed dial screen, and even the call log.

The phone book sources menu allows you to choose which contacts to show in the application. There are options: SIM, Skype and other instant messengers, Google accounts and the actual phone book of the device. The user can check or uncheck the boxes next to each source. Useful advice: if you are annoyed that Android pulls up email addresses, nicknames from Skype and turns the phone book into a mess, then just turn off the corresponding sources.

The search for contacts in the application has auto-selection. To find the right person, it is not necessary to type his full name. It is enough to specify the first letters and the application will select all matches.


When creating a contact, the user selects its location, then indicates the number (you can choose from 6 options), e-mail. A contact can be added to a group. In addition, for each contact, you can specify additional fields: from a birthday or other significant events to an arbitrary note.


The application menu includes eight items. We will dwell on some of them later. The settings mainly concern the way contacts are displayed in the app. You can also set up synchronization with accounts, view the capacity of the SIM card, and select the tabs that will show when you scroll left and right.
How to Transfer Contacts from Android to Android
Unlike iOS, Android offers a large selection of native options by default for transferring contacts from one device to another.


Every Android smartphone is linked to a Google account. To transfer contacts using Google, you just need to make sure that the synchronization of contacts with your Google profile and Gmail is enabled on your old smartphone. To do this, go to Settings - Account and Sync - Google - Gmail. Next, click on the account name and select Contacts there. Depending on the settings made earlier, they will be synchronized automatically or when clicked. Further, on the new device, it is enough to do the same for the contacts to appear on it. It is important that the gadgets are connected to the Internet.

You can also transfer contacts from Android to Android using a SIM card or VCard file. To do this, in the Contacts application, go to Menu - Manage Contacts - Import / Export Contacts. Here you can export contacts to the SIM card, memory card or phone memory.
Then the SIM is inserted into a new phone, you can also rearrange the memory card there. On the new device, the same actions are performed, only instead of Export, you need to select Import from the appropriate location.
If the user has exported contacts to the phone's memory, then he will then need to transfer the VCard file from there. This can be done by connecting the phones to a computer - most Android phones are defined as removable drives, either emailed to itself (but it's more logical to use the Gmail sync described above) or transferred via Bluetooth. Then, on the new phone, you need to repeat the steps already described for importing contacts.

You can also transfer contacts from phone to phone using Bluetooth. True, this method is only suitable for a small number of entries - and once you can send no more than 10 pieces. To do this, go to the Contacts application menu and select the Send contacts option. Then mark the necessary entries with a checkbox and then select the sending method - Bluetooth. You must first establish a Bluetooth connection between the phones.
Also, the Send contacts item allows you to send them by e-mail, via SMS or MMS, but these methods are not relevant when transferring contacts from phone to phone.
How to Transfer Contacts from iPhone to Android
There are two ways to transfer contacts from iPhone to Android, syncing with Gmail and using a VCard file. Both will require some effort.

By default on iPhone, contacts are synced to iCloud. You need to switch synchronization to Gmail and not lose your phone book. To do this, go to iPhone Settings - Mail, addresses, calendars - Accounts / iCloud and turn off Contacts synchronization. A pop-up window will appear. In it you need to select the option "Leave on the phone." This is how we save contacts to the iPhone. If you select another option, contacts will be deleted from iPhone.

Now you need to make Gmail the default account for iPhone Contacts. The setting is done in the Settings - Mail, Addresses, Calendars section. In the Contacts sub-item, one of the last ones will be the Default account. You need to select the item and mark Gmail. After a while, the contacts will be synced with Gmail. If it already has contacts, then they can be duplicated.

Next, you need to activate your Gmail account on Android. After a while, the contacts will appear on your phone. If this does not happen, then you need to look in the sources menu in the Contacts application, which sources are activated. Your Gmail account may have been unchecked. You may also need to force the sync to start. This is done in Settings - Account and Sync - Google - Gmail.
To transfer contacts from iPhone to Android, you can use the VCard file. You can only make a file in iCloud. Therefore, first of all, you need to make sure that the contacts are synchronized with the cloud.

To make a vCard file, you need to select all contacts using ctrl-AWindows or Command-A on a Mac, there is an Export vCard option in the settings menu of the iCLoud web application. Save the file to your hard drive or flash drive. In any convenient way, write it to the memory of an Android device.
We have already described the next steps. In the Contacts application, you need to go to Menu - Manage contacts - Import and export contacts, select Import contacts, and then the location of the VCard file - in the phone's memory or on an SD card. The Contacts application will copy all the data from the file to the device's memory.
Instead of writing a VCard file to an Android phone, you can import contacts from it into Gmail and then sync it with your gadget. To do this, in Gmail you need to select Contacts, and there - the Import item. In the pop-up window, select the last item. It remains only to synchronize the device with Gmail.
How to Transfer Contacts from Windows Phone to Android
There are several ways to transfer contacts from Windows Phone to Android. You can use applications that allow you to make a VCard file. Since the contacts of Windows Phone users are synced with a Microsoft account, they will be located in Outoook.com by default, you can add an Outlook account to Android. Finally, you can transfer contacts from Outlook using a csv file.

To transfer contacts from Windows Phone to Android by syncing with Outlook.com, you need to add an account to your phone. To do this, go to Settings - Accounts and sync and click +. From the proposed selection, click on Outlook, then enter your account information and select sync contacts. This method has some disadvantages. In some cases, Outlook does not allow you to edit contacts on third-party devices, so it's better to make contacts "native" for Android by transferring them through a file
On Outlook.com, select People from the menu. Then click on the Manage button, and in the new menu - Export for Outlook.com and other services. Contacts will be saved to a CSV file. It needs to be saved to your computer.

Next, in Gmail, as already described above, you need to select Contacts. There is an Import item in the menu. If you click it, a pop-up menu will appear in which you need to choose to import from a CSV or VCard file. It remains to select a file on your hard drive, contacts will be uploaded to Gmail, and then synchronized with Android.
How to Transfer Contacts from Android to Computer
It is very easy to transfer contacts from Android to computer. It is enough to generate a VCard file. Microsoft Outlook or Windows Contacts programs, as well as other applications, can work with it.

To export contacts to a VCard file on your phone, you need to go to the Contacts application: Menu - Manage contacts - Import and Export contacts and select the item you need: Export to SD card or Export to phone memory.
All contacts will be saved to VCard file. Then it can be written to the computer's memory and opened in the appropriate program for working with contacts. The file can be stored as a backup on a computer. However, it will not sync with Android. Therefore, it is advisable to sync Android contacts with Gmail.

By the way, you can also export contacts from Gmail. To do this, select the export contacts item in the menu. They can also be saved to a VCard file.
When opening a VCard in Windows programs, there may be problems displaying the Cyrillic alphabet. VCard is saved with UTF-8 encoding by default, while Windows uses Windows-1251 encoding, however, in recent versions of the OS, Microsoft has expanded support for Unicode. However, if there is still a problem, then you need to open the file in any text editor, for example, Notepad 2, that supports changing the encoding. Change it and save. In fact, VCard is a plain text file.
Sync Android Contacts with Google
Android contacts are synced with Gmail and Google by default if the corresponding account is added to the phone. And without an account, it is impossible to fully use Android.

To add an account, you need to go to Settings - Accounts and Sync. Here, click on the Plus and select from the list of the Google list. Next, enter your account information or create one.

Google will now appear in the list of added accounts. If you go into it, then there will be the name of the mailbox "хххх@gmail.com". By selecting an account, you can manually start the synchronization of various Google data and services. Contacts are at the very bottom of the list.
In the menu item Settings - Accounts and Synchronization at the very top there is an Auto-Sync switch. If you activate it, then all accounts will be synchronized automatically. If it is disabled, then synchronization must be started manually, as described in the paragraph above.
Import Contacts to Android
Importing contacts on Android is organized quite simply.
In the Contacts application, you need to go to Menu - Manage contacts - Import and export contacts.

A menu will open with three options for importing contacts. Import from SIM. It must be selected in order to transfer contacts from the SIM card to the phone's memory. Import sSD card and Import from phone memory must be selected to overwrite contacts from contact files, such as VCard. Android does not need to specify the location of the contacts file. The system itself will find all supported files and prompt you to select the one from which the data will be imported.
If it is not physically possible to connect the phone to a computer in order to write a VCard file to the phone, it can be sent by mail, via Bluetooth, uploaded to the cloud and then downloaded to the device.
You can also import contacts to Android through the Google Contacts app. You can access it from Gmail. In the Extras menu item, select Import contacts. Further, to transfer contacts to Android, it is enough to synchronize contacts with Gmail.

In the new version of Gmail, Import is in the More section, not Advanced. It also supports importing contacts from Yahoo mail, Outlook, AOL and others. Therefore, if contacts are synchronized with other mail services, you can pick them up from there directly. It is enough to enter the access data to the mail. True, Google warns that for a number of services, the contact import function is implemented at the expense of third-party developers, so it is up to everyone to decide whether to trust their credentials to third-party service providers.
Where are contacts stored in Android
Contacts in Android are stored in the contacts.db or contacts2.db file. It is a SQLite database. It is easy to find software on the Internet that can read such files. However, the files themselves are not so easy to find.
To access them, you must have root rights. If they are not there, the user simply will not see this file, he will not see the folder in which the database is located. Only if you have root rights, you can go to Android/data/data/com.android.providers.contacts/databases/, where the contact files are located.
Export Contacts from Android
You can export contacts from Android using the built-in functionality of the Contacts app.
In the application menu, select Manage contacts and then Import and export contacts. There are three options for exporting: save contacts to SIM, save to memory card or phone memory. When saved to a memory card or phone memory, contacts will be exported to a VCard file, which can then be used to import contacts, both on Android and iOS, mail services, cloud, desktop applications.
How to Recover Android Contacts
The solution to this problem depends on whether the contacts were synchronized with Gmail, whether a backup copy of the VCard was made.
If the contacts have been synced with Gmail, then just sync them to your phone. However, it may happen that the contacts have been accidentally deleted from the Android smartphone. It synced with Gmail and the contacts there also disappeared. It's not a problem.

Google stores contacts for up to 30 days. In Gmail, in the Advanced / More section, select Restore Contacts. A menu will appear in which you can select a date for restoring contacts. After they are restored to Gmail, they can be synced to your phone.
If a backup was made to VCard, then to restore it, it is enough to load the file into the device's memory or onto a memory card and import contacts from it, as described in the previous sections.
How to delete contacts on Android
There are several ways to delete contacts on Android, depending on how many contacts you need to delete and how securely.

To delete one contact, you can open the Contacts application, select the desired Contact and tap on it while holding your finger at one point. A context menu will appear with the Delete item.

You can also go to the contact and click on the three dots in the upper right corner. This is the contact menu. There is also a delete option here.

The Delete contacts item is also in the menu of the Contacts application itself. When clicking on Delete contacts, the user will be offered a list of contacts in which he can mark contacts for deletion, or select all. Next, click on the Delete button.
You can simply reset all phone data. This is done in Settings - Backup and Reset.
Backup Contacts on Android
Android offers several ways to back up contacts at once
The first method is simple and reliable, but it will be difficult to keep your contacts backup up to date. It is about exporting contacts to a VCard file. See Exporting Android Contacts above for how to do this.
The second way is to sync contacts with Gmail. It is often enabled by default. How to manage synchronization is described above.


Choosing an account for Android backup
The third way is to enable backup for the entire phone on Google servers. This is done by Settings - Backup and Reset. When backup is activated, Android will make a copy of the phone on Google servers, not only contacts will be saved there, but also all personal data, application data, etc.
Android contacts apps
The Contacts app for Android has good functionality and is quite convenient, so there is not much point in third-party solutions, but we will still consider some applications.
Contacts
- Developer: AndloRD.
- Grade: 4,1.
- Number of installations: 1 million.
This application is an alternative to the standard Android Contacts. It does not differ in extended functionality, but rather interesting in a different approach to storing the phone book. Where Google Contacts stores all information in a database, VCF Contacts store all information in a vCard (vcf) file. It is this file that can be obtained as a result of export.


When the app is installed, it takes an existing vCard file as a basis or creates one based on the Android phone book. As a result, the user always has an up-to-date vCard file in the phone. This can literally save in the event of a sudden system failure.
Contacts can be sorted, sent by mail, via messengers. Unfortunately, the functions to add to Android and to another vCard file are only available in the paid version.
Contacts+
- Developer: Contact Plus team
- Grade: 4,1.
- Number of installations: 50 million.
Makes contacts more fun. All contacts are presented with avatars. This representation simplifies calling the desired subscriber - choosing by faces is faster. There are advanced search functions: you can search not only by name or phone, but also by mail, SMS, etc.


Themes and various design options for the phone book are supported. Contacts+ also have a call log and SMS.
Contacts are stored in encrypted form.
The application has a separate backup function. True, in the free version, you can only save up to 2000 contacts, calls or SMS. Copying is configured separately for each category of information.
Save contacts to TXT
- Developer: Viked.
- Grade: 4,3.
- Number of installations: 15 thousand.
On Android, contacts can be exported in vCard format. This application allows you to save them in txt. You can save all contacts, individual entries or several in a text file.

It also allows you to customize which fields will be saved in the file.
In the future, the file can be used at the discretion of the user. You can also send it by email.
Simpler Contacts Dialing
- Developer: SimplerApps
- Grade: 4,3.
- Number of installations: 5 million.
First of all, it is an alternative to the standard Android phone implementation. Not only the phone book is supported, but also the dialer, Caller ID, work with SMS. However, the application has some interesting features for working with contacts. The most important one is backup. You can make both a local copy of contacts and save it in the application cloud. You can set up automatic backups. The search for duplicates in contacts is carried out by the application constantly in automatic mode.


Another interesting feature is Facebook photo search. The application prompts the user to compare his friends on the social network with the list of contacts and, if there are matches, use Facebook profile photos for the Caller ID.
In addition, you can use different themes for the application interface.
SA Contact Lite
- Developer: sapp.
- Grade: 4,0.
- Number of installations: 1 million.
Applications for exporting and importing contacts in Excel files. Excel is the best source to import to Outlook.
The application allows you to customize which fields will be exported to Excel. You can transfer all contact fields, including a photo. The only exception is a personal ringtone assigned to a contact.


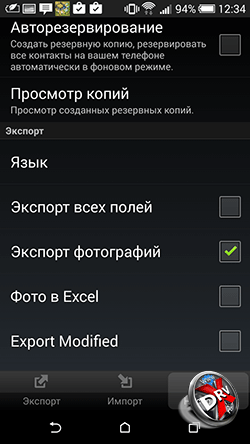

The application also automatically converts encodings according to the requirements of Windows and Microsoft applications so that names in contacts are displayed correctly.
The exported file can be stored on a memory card, sent by mail, uploaded to cloud services.
The limitation of the free version is that you can only export the first 300 contacts. You will have to pay for a larger phone book.
Conclusion
Working with contacts in Android is well organized. There is practically no need to turn to third-party applications if you read our guide. With Android tools, you can perform all possible actions with contacts.
However, if you want to decorate and diversify the dialer or phone book, then there are enough applications in the Play Market. True, you need to be careful when choosing them. It's all about personal data.
Articles and Lifehacks
The question of how to change a contact in Android does not arise often, but it occurs periodically. Of course, an article on this topic is unlikely to interest experienced users, but beginners may well find it useful.
Why change contact and how to do it right
It makes no sense to list the numerous reasons why a user may want to change contacts on their phone.The most banal of all possible - you initially set an incorrect name during the initial save, maybe you were just in a hurry.
Or the subscriber changed his surname in connection with certain events in his life.
Or maybe you have to change the name of the contact for the purpose of secrecy from the ubiquitous prying eyes. Yes, you never know what else it could be.
In order to make changes to the saved data of a contact, you must do the following:
- Open the "Main Menu" of the phone;
- We find "Contacts", open them;
- In the list provided, we find the contact whose data we want to change;
- Inside the contact we find the line "Change contact";
- In the drop-down window, we make the necessary replacements, or make possible additions;
- After making changes, click "Save".
Changing and adding a contact
Often, telephone users have the task of not only changing the already entered contact information, but also adding additional information (for example, email address, date of birth, place of work, postal address, or simply making notes).
Keep the following in mind when adding new data:
- If contacts are not stored in the phone memory, but on a SIM card, then it will not be possible to add extended subscriber data to them, except for the first name and last name and phone number.
- But you can always copy a contact to your phone and use advanced features.
- Be careful when making changes to contacts, do not lose important information.
25.05.2017 21:27:00
After acquiring a new phone, the user inevitably raises the question of how to transfer contacts from the old gadget. In the case of photo and video files, everything is simple - the data is simply copied to the SD card. But what to do with hundreds of numbers in the phone book?
Manual rewriting of numbers is unlikely to work here. This is too long, and there is a possibility that you will make a mistake in one or another figure. In case of transferring contacts, a computer or laptop will come to the rescue. But how to transfer contacts from phone to computer? You will find the answer in our article.

There are three main ways to move contacts to a PC:
Method 1: Through a Google Account
Each user of an Android smartphone must have a Google account, through which applications are installed and updated. Through your account, you can copy numbers in two stages.
Before you transfer contacts from your phone to your computer, you need to synchronize:
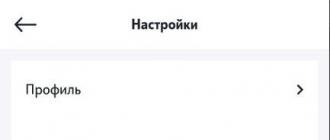
- Enter smartphone settings
- Select "Accounts"
- Click on the Google item or add it using the command in the list
- Set the switch opposite the "Contacts" item
- Click on the menu in the upper right corner
- Click "Synchronize"
 |
 |
 |
After that, you can proceed directly to copying the numbers. This happens using the settings of the system application "Contacts". This program has an export and import function. All numbers are packaged in a vcf file, which can then be sent via email:
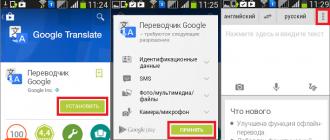
- Start the Internet on your smartphone
- Open "Contacts"
- Click on the drop down menu
- Select Import/Export
- Specify a SIM card or internal memory as the export source
- Choose an email address
- Specify contacts to transfer
 |
 |
 |
 |
After a few seconds, all contacts will be reset to mail. They can be left in the email box or transferred to the PC memory.
By the way, numbers from the phone book in the form of a vcf file can also be copied to an SD card, and then transferred to a computer hard drive via a card reader. In this case, it is important that no applications are installed on the card, which will be deleted after it is removed.
Method 2: How to transfer contacts from your phone using USB via a computer
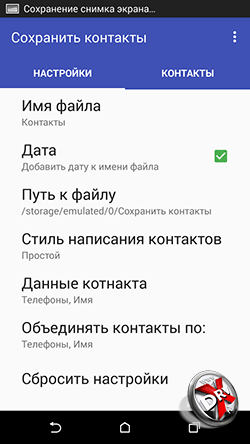
If contacts from the phone need to be transferred urgently, while there is no time to synchronize with a Google account, it is possible to copy the phone book to a PC via USB. To do this, you first need to move all the numbers to the memory of the mobile device:
- Open Contacts in Android settings
- Choose Import/Export
- In the "source" field, select a SIM card
- Designate phone memory as a storage location
Now you can transfer contacts from the phone memory to the SD card as a vcf file. Make sure that the copying went well and connect your phone to the PC using a USB cable:
- In the USB start menu on your phone, assign file transfer
- Open the disc folder on the PC
- Find your phone in the list
- Go to internal memory
- Copy the business card file to the PC memory

Method 3: How to copy contacts through third-party programs
The "Applications" section on the Play Market contains hundreds of programs with which you can copy phone numbers to your computer. Despite the difference in settings and interface, all these applications have one thing in common - the principle of creating a vcf file, into which contacts are packed for sending to a PC.
After trying several programs for transferring contacts, we decided to recommend to our readers the AirDroid service, which allows you to remotely control your phone from a PC. An account in this service is created in three steps:
- Open the official website of the service and register
- Install the AirDroid app on your mobile device
- Login to your account


Contacts Optimizer is an application for managing and sorting contacts. Now you will never lose phone numbers and all the data stored in the phone book can be synchronized with the cloud storage and share the necessary data. Thanks to android, your phone book will be under strict supervision, and all duplicates and similar numbers can be edited and combined into one.
Despite the fact that standard tools allow you to fine-tune contacts, Contacts Optimizer significantly expands the list of settings and management. Organize the most comfortable list, remove empty and duplicates, incorrectly filled in and contacts with missing information. With just one touch, you can download the necessary data, highlight several people and create groups.
The main advantage is automatic saving and sharing of contacts with all your devices, quick addition of data, translation of numbers into international format, finding incorrect and incomplete lists. Digitization, easy editing, easy addition, classification. Now, changing the device, OS, in case of breakdowns and loss, you can not worry about contacts.
Peculiarities:
- Delete all duplicates and similar contacts;
- Function optimization;
- Editing contacts with transfer to another account;
- Mass transfer of selected contacts between accounts;
- Transferring all contacts is a powerful feature for sharing between accounts. You can combine your contacts from Phone Memory to Google to sync them and remove all duplicates;
- The ability to quickly delete individual contacts that you no longer need;
- Contacts optimizer fixes phone number format;
- Locates potentially invalid contacts that you cannot connect to;
- Finds all important contacts with empty fields;
- Clean contacts by deleting those that have empty fields;
- Complete international prefixes and country codes where necessary;
- Save contacts from messages and calls if you don't have them yet;
- Edit, delete, select contacts at any time.
Download program for managing contacts and sorting them - Contacts Optimizer for Android you can follow the link below.
Developer: Compelson Labs
Platform: Android 4.0 and above
Interface language: English
Condition: Pro (Full Version)
Root: Not Needed
It is difficult to imagine your life without a mobile phone, even more difficult to imagine a mobile phone without a camera. Modern smartphones allow you to take pictures of excellent quality, which are suitable not only for publishing on social networks, but also for printing. True, not all frames are perfect, some need editing and processing. To do this, it is not necessary to transfer photos to a computer and use complex programs like Photoshop. Mobile applications allow you to edit photos directly on your phone.
So, what can you do with a photo in a smartphone?
First, crop, play with brightness and contrast, add sharpness, on the contrary, blur some details or apply ready-made color filters. Secondly, put the photo in a frame or use it in a postcard template. Thirdly, you can add an inscription or funny stickers.
There are a lot of mobile applications for photo editing. We tested four apps with different features for iOS.
- PixelPoint. Is free. The PRO version costs RUB 169/$4.8
- Pho.to Lab. Is free. The PRO version costs RUB 175/$4.99
- PhotoSticker. Is free.
- bokehpic. Is free.
PixelPoint
This program can be safely called a small Photoshop. It has the most necessary functions: crop image, increase-decrease brightness, adjust contrast. My favorite features of this application are sharpening or adding blurry areas to a photo. The "saturation" button allows you to make all the colors in the picture deeper and brighter. Another useful option is vignette (when the image is darkened at the edges, thus gaining “depth”).
The PixelPoint app also has pre-made effects. For example, filters like those on Instagram. Only PixelPoint has more of them - color and black and white. The free version of the program has a limited number of filters, the rest must be purchased. Each costs about 33 rubles. True, free options were enough for me to process photos.
Editing in the PixelPoint app: applying preset filter effects (left) and adjusting contrast (right)
Well, the PixelPoint app has all the basic editing features you could possibly need. If you need to correct the composition, even out the colors of the picture, or just got tired of Instagram filters - this app is what you need!
Pho.to Lab
I studied the Pho.to Lab program for several days. And each time I found new effects that I immediately wanted to apply to my own pictures.
The application is an unusual editing tool. With the help of it, we do not so much change the picture itself, but rather create a new reality around it. The app category names speak for themselves: Face Photo Montage, Styling Effects, Drawing and Painting Effects, Magazine Covers, Background Changer, Banknote Photo, Caricatures, Cartoons, etc. .
The resulting photo postcards can be sent to friends, posted on Instagram or used as a desktop background on a smartphone. Some functions of the application are available only in the paid version, which can be purchased as a whole or separately to buy the options you like. And now I'll show you what I got in the process of testing the application.
Such postcards can be made using the Pho.to Lab application
If you need to pass the time, there is nothing to do at your leisure - I advise you to download the Pho.to Lab application. True, there is a risk that you may not have free time at all.
PhotoSticker
In this application, I was not left indifferent by the bright menu and its ease of use. I'm sure PhotoSticker will impress you with backgrounds, frames, cartoon stickers and captions that can be easily placed anywhere in the picture. I did find one downside though. At first glance, stickers and frames are enough, but in the process of using them, they quickly get bored.
You can save the finished postcard directly from the program to an album on your phone or upload it to Facebook.
Stickers and backgrounds in the PhotoSticker app
I thought of using PhotoSticker to edit pictures for printing and placing in a family photo album. Funny postcards and collages with stickers will dilute ordinary printouts!