Graphic images placed on a Web page not only contribute to a better perception of information, but also make the pages brighter and more memorable. You can prepare graphic images yourself or use the services of designers. You can also use libraries of graphics files of software products such as Microsoft Office, CorelDraw, etc.
Let's place a graphic image from the Clip Art library included with Microsoft Office on the home page of the Web site we are creating. To do this, follow these steps:
- Open the website you just created.
- Open the home page by double clicking on the index.htm file name in the panel Folder list(Folder List).
- On the menu Insert(Insert) select command Drawing Pictures(Clip Art). A panel appears in the FrontPage window. Insert picture(Insert Clip Art).
- In this panel, select the command Collection of pictures(Media Gallery). A dialog box opens allowing you to select a graphic image (Fig. 15.8).
Rice. 15.8.
In the upper part of the dialog box, in addition to buttons that control the display of objects shown in the window, as well as copying and deleting objects, there are assignment buttons (see the table).
- Panel List of collections contains folders of your computer with multimedia files, as well as clip art library clip art files. Open the folder of the category of pictures you are interested in. Images of this category will appear in the working area of the window. When placing the cursor on an image, a hint is visible indicating the name, size of the image and the file in which it is contained, as well as the format of the graphic image (Fig. 15.9).
- Click the arrow button on the right side of the selected image. A context menu appears.
- Select the command from the context menu Copy(To Soru.)
- Go to a Web page and paste an image from the clipboard into it using any convenient tool. For example, press the key combination
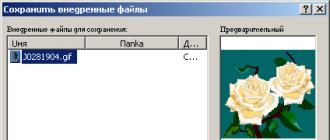
+. - Save the web page with the graphic image located in it by clicking the button Save(Save) on the standard toolbar. A dialog box appears Saving embedded files(Save Embedded Files) (Fig. 15.10), offering to save the image placed on the page in the folder images Web site under the name with which the file was located in the library. This window contains buttons for the following purposes:
- Rename(Rename) - allows you to rename the file.
- Change folder(Change Folder) - opens a dialog box Change folder(Change Folder) containing the folders of the current Web site, allowing you to select a different folder to save the file.
- Action(Set Action) opens a dialog box Setting an action, allowing to change the value Save(Save) of the Action column on Do not save(Don "t Save). When selecting a value Save the picture is saved in the folder of the Web site you specified, otherwise the link to the image in the Clip Art library will remain on the Web page.
Region Drawing(Picture preview) shows the image being hosted. By setting in the dialog box Saving embedded files desired parameters, click OK. The graphic file will be saved in the folder of the Web site you specified.

Rice. 15.10.
Placing a graphic image from a file
We've covered placing a graphic from the Clip Ait library on a Web page. To place a graphic image from a file on a page, do one of the following:
- On the menu Insert(Insert) select command Drawing(Picture), and then in the opened submenu - the option From file(From File)
- Click the button Add picture from file(Insert Picture From File) on the standard toolbar
- Click the button Add picture from file(Insert Picture From File) on the toolbar Drawings(Pictures)
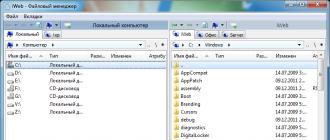
When you do any of these actions, a dialog box opens. Drawing(Picture) (fig.15.11). Use this window to find the required graphic file and click the button to place it on the Web page. Insert(Insert). The dialog box closes and the image is placed on the page.

Rice. 15.11.
Setting image properties
After placing the image on the web page, you need to configure its properties using the dialog box Picture properties(Picture Properties) (fig.15.12). To open it, click on the image, and then do one of the following:
- On the menu Format(Format) select command Properties(Properties)
- Select the context menu command Picture properties(Picture Properties)
- Press the key combination
+
Dialog window Picture properties contains three tabs: General(General), Video recording(Video), View(Appearance). Let's consider in more detail the possibilities of setting using this dialog window.

Adding an image takes place in two stages: first, a graphic file is prepared in the required format and size, then the file is displayed on the page using the element Two formats are widely used for web graphics - PNG and JPEG. Their multifunctionality, versatility, a small amount of source files with sufficient quality for the site, served them positively, in fact, defining them as a standard for web images. In addition to them, the sites use GIF and SVG formats. PNG-8 (Portable Network Graphics) is a free format created to replace GIF, which has long used proprietary algorithms.
.
File formats
PNG-8 format
Peculiarities
- It uses an 8-bit palette (256 colors) in the image, for which it received the number eight in its name. In this case, you can choose how many colors will be saved in the file - from 2 to 256.
- Unlike GIF, it does not display animation.
Application area
PNG-24 format
PNG-24 is a format similar to PNG-8, but using a 24-bit color gamut Like JPEG, preserves the brightness and tints of colors in photographs. Like GIF and PNG-8, preserves image details such as line drawings, logos, or illustrations.

Peculiarities
- Uses approximately 16.7 million colors per file, which is why this format is used for full color images.
- Supports multi-level transparency, this allows you to create a smooth transition from transparent to colored areas of the image.
- Due to the fact that the used compression algorithm preserves all the colors and pixels in the image unchanged, when compared with other formats, PNG-24 has the largest final size of the graphic file.
Application area
Photos, drawings containing transparent and semi-transparent areas, drawings with a lot of colors and sharp edges of images.
JPEG format
JPEG (Joint Photographic Experts Group) is a popular image file format widely used in website development and for storing photographs. JPEG supports 24-bit color and keeps the brightness and color tones in your photos unchanged. This format is called lossy compression because the JPEG algorithm selectively rejects data. Compression can distort an image, especially if it contains text, fine detail, or sharp edges. The JPEG format does not support transparency. When you save a photo in this format, the transparent pixels are filled with the specified color.

Peculiarities
- The number of colors in the image is approximately 16.7 million, which is enough to preserve the photographic quality of the image.
- The main characteristic of the format is "quality", which allows you to control the final file size. Quality is measured from 0 to 100, the higher the value, the better the picture is, but the file size also increases.
- Supports a technology called progressive JPEG, in which a low-resolution version of an image appears in the viewer until the image is fully loaded.
Application area
Used primarily for photographs. Not very suitable for pictures containing transparent areas, small details or text.
GIF format
GIF (Graphics Interchange Format) is a graphics file format widely used in the creation of animated images. GIF uses 8-bit color and effectively compresses solid color areas while preserving image detail.

Peculiarities
- The number of colors in the image can be from 2 to 256, but it can be any color from the 24-bit palette. A GIF file can contain transparent areas. If a background other than white is used, it will show through the “holes” in the image.
- Supports frame-by-frame change of images, which makes the format popular for creating simple animations.
- Uses a lossless compression method
Application area
Text, logos, illustrations with sharp edges, animated drawings, images with transparent areas, banners.
SVG format
SVG (Scalable Vector Graphics) is a vector format in which the image does not consist of pixels, but of objects and curves. For this reason, it is not suitable for raster photographs consisting of dots, but it is great for illustrations with distinct outlines.
Peculiarities
- Images in SVG format can be scaled as needed without loss of image quality.
- The file size is usually small.
- Supports animation and interactivity.
Application area
Text, logos, illustrations with sharp edges.
Adding an image
To add an image to a web page, use the element , the src attribute of which defines the address of the graphic file. The general syntax for adding an image is as follows.

Both src and alt attributes are required.
The src attribute sets the path to the graphic file; you can use either an absolute or a relative address to specify it. Next, let's look at a few different ways to determine the path to an image for placement on a web page. As an example, let's take a file named target.png, which is stored in the images folder of the site root.
http://example.ru/images/target.png
If the address begins with the protocol (http: // or https: //), then we are talking about an absolute address. The image will always be downloaded from the specified Internet address, even if the web page is saved to the local computer.
//example.ru/images/target.png
This is the absolute address of the image without specifying the protocol. The browser will automatically substitute the required protocol on which the site is running (http: // or https: //). Please note that this kind of address does not work on local web pages, but only on the Internet under the control of a web server.
/images/target.png
If there is a forward slash (/) at the beginning of the URL, it means that the images folder is located at the root of the site. One folder can be nested inside another, so the path can get longer. For example, /assets/images/target.png means that the assets folder is located at the root of the site, it contains the images folder, inside which the target.png file is located.
../images/target.png
Two dots with a slash at the beginning of the address (../) indicate that the folder with the image is one level higher in the folder structure relative to the HTML document. In fig. 1 shows the source.html file in which you want to insert the target.png image.

Rice. 1. Placement of files
images / target.png
The folder name without any dots at the beginning of the address indicates that the HTML document and the image folder are on the same level (Fig. 2).

Rice. 2. File placement
target.png
The single filename indicates that the image and the web page are in the same location (Figure 3).

Rice. 3. Placement of files
Example 1 shows several ways to add a graphic to a web page.
Example 1. Adding images
![]()
![]()


Alternative text
Alternative text is an important part of images and is intended for visually impaired people who cannot see the images and receive information from the site through hearing. Special screen readers read the text from the site, and instead of images they say the text written in the alt attribute. In conventional browsers, alt content is shown only when images for some reason are not displayed on the web page.
The alt attribute should describe the content of the image, and if the image performs a decorative function and does not carry any meaningful meaning, then leave the alt blank (example 2).
Example 2. Using alt
![]()

If images require a visible tooltip, then you should use the global title attribute, which can be added to any element, not just images. When you hover over the image, text will appear containing the value of the title attribute (example 3).
Example 3. Using title

The appearance of the tooltip depends on the specific browser and cannot be changed. In fig. 2 shows the tooltip in the Firefox browser.

Rice. 2. Type of tooltip
Resizing a picture
To resize the picture of an element the attributes width (width) and height (height) are provided. Pixels or percentages are used as values. Example 4 shows adding these attributes to
.
Example 4. Dimensions of the picture
![]()
The width and height attributes are optional, after the image is loaded, the browser will automatically set its original size. These attributes are mainly used for the following purposes:
- reserve space for a picture;
- reduce the size of large photos;
- improve image quality for Retina displays.
If the dimensions of the image are specified explicitly, then the browser uses them in order to display the empty area corresponding to the image during the loading of the document. Otherwise, the browser waits for the image to be fully loaded, and then changes the width and height of the image. In this case, text reformatting may occur, since initially the size of the picture is not known and it is automatically set to small.
The width and height of the image can be changed both up and down. The browser will remove the extra pixels on its own, or vice versa, complete the missing ones in order to get an image of the appropriate size. The quality of the resulting picture is highly dependent on its content, in any case, one must remember that it is possible to infinitely enlarge the image without loss of detail only in cinema.
Retina displays have high pixel density and image detail, making regular images appear slightly washed out. To improve their quality, pictures are prepared with doubled size. For example, if a web page requires a 400 pixels wide photo, we take a 800 pixels wide photo, but leave the width at 400 pixels wide.
The width and height attributes do not have to go together. If any of these attributes is not specified, then the browser will independently substitute the desired value based on the aspect ratio of the image.

Due to the fact that we independently substitute the width and height of the picture, we can deliberately distort its proportions by stretching the picture vertically or horizontally.
![]()
In addition to pixels, it is permissible to use percentage notation as dimensions. In this case, the width is relative to the parent element.

There are difficulties with the height in such cases, because the height of the image as a percentage is calculated only if the height of its parent is explicitly defined. If the height of the parent element is not specified in any way, then an entry like height = "100%" is ignored.
Hello dear blog readers! In this article, you will learn everything about how to insert image into html page... Do you have several images that you want to put on your page or do you want to put a logo on your website? All this is easy. After reading this article, you will be able to insert images into your html pages without any difficulties. To do this, we will talk in detail about img tag and its attributes, take a quick look at graphic file formats such as gif, jpeg, and png, and see the new HTML5 features that make it easier to insert video and audio into your site.
Due to the fact that graphic data and html text cannot be combined in one file, a different approach is used to display them on the site than with other elements of html pages. First of all, graphic images and other multimedia data are stored in separate files. And to embed them in a web page, special tags are used that contain links to these individual files. In particular, such a tag is img tag... Having encountered such a tag with an address, the browser first requests the corresponding file with an image, audio or video from the Web server, and only then displays it on the Web page.
All graphic images and, in general, any data that are stored in files separate from the web page are called implemented page elements.
Before inserting pictures and looking at the "img" tag in detail, it is worth learning a little about graphic formats.
Graphic image formats.
There are many different graphic formats, but browsers only support a few. Let's take a look at three of them.
1. JPEG format(Joint Photographic Experts Group). Quite a popular format used for storing images. Supports 24-bit color and keeps all halftones in photos unchanged. But jpeg does not support transparency and distorts small details and text in images. JPEG is mainly used for storing photographs. Files of this format have the extensions jpg, jpe, jpeg.
2. GIF format(Graphics Interchange Format). The main advantage of this format is the ability to store several images at once in one file. This allows you to create whole animated videos. Secondly, it supports transparency. The main drawback is support for only 256 colors, which is not good for storing photos. GIF is mainly used to store logos, banners, images with transparent areas and containing text. Files of this format have the extension gif.
3. PNG format(Portable Network Graphics). This format was developed as a replacement for the legacy GIF and also, to some extent, JPEG. Supports transparency, but does not allow animation. This format has the png extension.
When creating sites, they usually use images in the JPEG or GIF format, but sometimes they use PNG. The main thing is to figure out in which cases which format is better to use. In short:
- GIF is used primarily for animation;
- PNG is the format for everything else (icons, buttons, etc.).
JPEG is best used for storing photographs or grayscale images that do not contain text;
Inserting pictures into html pages
So how do you embed an image on a web page? Insert an image allows a single img tag... The browser places the image where it encounters the img tag on the web page.
Embed an image in html the page looks like this:
This html code will place an image on the web page, which is stored in the image.jpg file, which is located in the same folder with the web page. As you may have noticed, the address of the picture is indicated in src attribute... What I have already told you. So, the src attribute is a required attribute that serves to indicate the address of the file with the image. Without the src attribute, the img tag is meaningless.
I will give some more examples of specifying the address of a file with an image:
![]()
this html code will insert a picture called image.jpg into the page, which is stored in the images folder located at the root of the website.
The src attribute allows you to specify more than just relative image links. Since images are stored on the web along with html pages, so each image file has its own url. Therefore, the url of the image can be inserted into the src attribute. For example:
This code will insert an image from the mysite.ru website into the page. A URL adpec is usually used when you are pointing to an image that is on another site. For images stored on your site, it is best to use relative links.
The img tag is an inline element, so it is better to place it inside a block element, for example, inside the "P" tag - a paragraph:
Let's practice and insert an image from the previous articles on html into our page. I will create a folder "images" next to the html file of my page and put a file with a picture "bmw.jpg" there, which looks like this:

Then the html-code of the page with the inserted image will be like this:

And we look at the result of displaying in the browser:

As we can see, there is nothing difficult in placing images on web pages. Next, let's look at a few other important attributes of the "img" tag.
The alt attribute is a fallback
Because image files are stored separately from web pages, the browser has to make separate requests to retrieve them. And what if there are a lot of images on the page and the speed of the network connection is low, then it will take a lot of time to download additional files. And even worse if the image was removed from the server without your knowledge.
In these cases, the web page itself will load successfully, only white rectangles will be displayed instead of images. Therefore, in order to inform the user of information what the image is, it is applied. This attribute specifies the so-called replacement text, which will be displayed in an empty rectangle until the image is loaded:
And something like this looks like this:

Size the image
There are still a couple of img tag attributes that you should be aware of. These are a couple of attributes width and height... You can use them to specify the dimensions of the image:
Both attributes indicate the size in pixels... The width attribute tells the browser how wide the image should be, and the height attribute how tall. These two attributes can be applied together or separately. For example, if you specify only the width attribute, then the browser will pick the height automatically in proportion to the specified width and also in the case of using only the height attribute. If you do not specify these attributes at all, then the browser will automatically determine the size of the image before displaying it on the screen. It is worth noting that specifying the size of the images will slightly speed up the browser when displaying the page.
This is about inserting images into pages for now, then we will consider how to insert audio or video into the site ...
Embedding video and audio using HTML 5
The new html5 specification introduces several new tags with which you can very easily embed media files. This primarily applies to video and audio.
To insert audio HTML5 provides a paired tag AUDIO... The address of the file in which the audio clip is stored is specified using the already familiar src attribute:
The "audio" tag creates a block element on the page. By default, the browser will not play the audio clip. In order for him to do this, a special attribute must be specified in the audio tag. autoplay... Special because it doesn't matter. The presence of this attribute in a tag is enough for it to take effect.
By default, the audio clip is not displayed in any way on the web page. But if you put an attribute without value in the "audio" tag controls, the browser will display in the place of the web page where the audio tag is set, controls for playing the audio clip. They include a play / pause button, a play bar, and a volume control.
Lesson objectives:
expanding and deepening the understanding of the hypertext markup language HTML;
formation of skills to create web pages with graphics;
development of logical thinking, skills to analyze, compare, systematize, generalize.
Lesson type: a lesson in the assimilation of new knowledge and skills.
Students should be able to:
create a web page in Notepad editor
with graphics.
Software and methodological support of the lesson:
Notepad editor;
textbook "Informatics 11", § 3 ( p. 3 .2); annexes to lesson 6;
ESU W eb11 6.
1. Testing the knowledge of the previous lesson (reproductive teaching method, individual and frontal forms of work).
Completing individual assignments on a computer: arrange the text on the web page suggested by the teacher in accordance with the figure in the exercise for§3 ( item 3 .1) benefits or ESU W eb11-5 .
Suggest u Often to answer the questions: What is the hypertext markup of documents? What is the structure of an HTML document? What is the tag for a paragraph? New line break? What are the tags for bold and italic characters? How do I set the background and text color of an entire web page? What tags and attributes define the font, size and color of characters? It is possible to use a test (appendix to lesson 6; ESA W eb11 5).
2. Actualization of knowledge and motivation of students to study new material ( frontal form of work).
Before starting to explain the new material in the form of a frontal conversation, discuss the role that graphic objects play in the design of web pages: photographs, drawings, background images (wallpapers), dividing lines. They not only make pages more attractive and visual, but in many cases are the main sources of information. Show examples ( ESU W eb11 6).
Emphasize that images intended for web pages can be created and edited in various image editors. They can be obtained using a digital camera, scanner or from the Internet. Most preferred graphic formatsgif , jpg and png , files which are small, which allows you to speed up the download process. Remind you that in the formatjpg usually save photographs. Format gif supports animation and transparency.
3. Explanation of the new material (explanatory-illustrative teaching method combined with partial search , frontal form of work).
Start the explanation with the question: are images stored on the web page itself? NS Please point out that all images that we see on a web page are stored in separate files, and the HTML code contains only links to them. The tag is intended for displaying pictures.< img> , the inherent attribute of which is the name of the graphic file.
Next, demonstrate the effect of some of the tag attributes < img>. So, the height and width of the image displayed on the screen are set by the values of the attributesheight and width, and the thickness of the border around the image by the value of the attributeborder. In low-level classrooms, this is done by the teacher using a video projector. With sufficient preparedness of students, you can offer them to conduct an independent research, followed by a frontal discussion of the results.
It is important to emphasize that specifying dimensions allows you to increase or decrease only the image visible on the screen (while the original drawing and the file in which it is stored remain unchanged). If dimensions are not specified, the position of text and other objects on the screen may change as the picture is loaded. Therefore, it is good practice to always explicitly set these attributes. Attribute valuesalignindicate the alignment of the text with respect to the picture, or how the text flows around.
Using the attributealtyou can set the text of the messageI am, which will be displayed instead of the picture if it is not found or the display is disabled in the browser. In addition, this message is shown as a tooltip when the mouse cursor moves over the picture. Demonstrate the utility of explicitly specifying attributesheight, width and altyou can by unchecking the default checkboxShow images in the tab Additionally dialog boxInternet Options.
Finally, demonstrate using an image from a file as the background of a web page using the attributebackground tag< body>. additionally offer to create a greeting card (example 3 from §3 ( p.3.2) benefits, ESA W eb11 6 .
5. Summing up the lesson
Students demonstrate the created pages. The stages of work and the difficulties of the students are discussed.Features are briefly formulated using images on web pages,
6. Homework
Explore the material§ 3 ( NS. 3 .2 ) study guide, answer questions 1 3,prepare for the practical implementation of one of the tasks of exercise 2
HTML images are added to web pages using a tag ... The use of graphics makes web pages more visually appealing. Images help to better convey the essence and content of a web document.
Using HTML tags
Inserting images into an HTML document
1. Tag ![]()
Element represents the image and its fallback content, which is added using the alt attribute. Since the element
is inline, it is recommended to place it inside a block element, for example,
Or
Tag has the required src attribute, the value of which is the absolute or relative path to the image:

For tag the following attributes are available:
| Attribute | Description, accepted value |
|---|---|
| alt | The alt attribute adds alternative text for the image. It is displayed at the place where the image appears before it is loaded or when the graphics are disabled, and is also displayed as a tooltip when you hover the mouse cursor over the image. Syntax: alt = "(! LANG: image description" . !} |
| crossorigin | The crossorigin attribute allows you to load images from resources on a different domain using CORS requests. Images uploaded to the canvas using CORS requests can be reused. Allowed values: anonymous - The cross-origin request is made using an HTTP header and no credentials are passed. If the server does not provide credentials to the server from which the content is requested, the image will be corrupted and its use will be restricted. use-credentials - Cross-origin request is performed with credentials passed. Syntax: crossorigin = "anonymous". |
| height | The height attribute sets the height of the image in px. Syntax: height = "300". |
| ismap | The ismap attribute indicates that the picture is part of a map-image located on the server (map-image is an image with clickable areas). When you click on the map image, the coordinates are sent to the server as a URL query string. The ismap attribute is only allowed if the element Syntax: ismap. |
| longdesc | The URL for an extended description of the image, in addition to the alt attribute. Syntax: longdesc = "http://www.example.com/description.txt". |
| src | The src attribute specifies the path to the image. Syntax: src = "flower.jpg". |
| sizes | Sets the size of the image depending on the display parameters. Works only when the srcset attribute is specified. The attribute value is one or more strings separated by commas. |
| srcset | Creates a list of image sources to be selected based on screen resolution. Can be used in conjunction with or instead of the src attribute. The attribute value is one or more lines separated by commas. 
|
| usemap | The usemap attribute specifies the image as an image map. The value must start with a # character. The value is associated with the value of the name or id attribute of the tag |
| width | The width attribute sets the width of the image in px. Syntax: width = "500". |
1.1. Image address
The image address can be specified in full (absolute URL), for example:
url (http://anysite.ru/images/anyphoto.png)
Or via a relative path from document or root directory site:
url (../ images / anyphoto.png) - relative path from the document,
url (/images/anyphoto.png) is the relative path from the root directory.
This is interpreted as follows:
../ - means to go up one level, to the root directory,
images / - go to the folder with images,
anyphoto.png - Points to an image file.
1.2. Image dimensions
Without setting the image size, the drawing is displayed on the page in real size. You can edit the dimensions of the image using the width and height attributes. If only one of the attributes is set, the second will be calculated automatically to maintain the proportions of the picture.
1.3. Graphics file formats
JPEG format (Joint Photographic Experts Group)... JPEG images are ideal for photographs; they can contain millions of different colors. Compresses images better than GIFs, but text and large areas of solid color can become smudged.
GIF format (Graphics Interchange Format)... Ideal for compressing images with solid color areas, such as logos. GIFs let you set one of the colors to be transparent so that the background of a web page can appear through part of the image. GIFs can also include simple animations. GIFs contain only 256 shades, making the images appear blotchy and unrealistic in color, like posters.
PNG format (Portable Network Graphics)... Includes the best features of GIF and JPEG formats. Contains 256 colors and allows you to make one of the colors transparent, while compressing images to a smaller size than a GIF file.
APNG format (Animated Portable Network Graphics)... Image format based on PNG format. Allows to store animation and also supports transparency.
SVG format (Scalable Vector Graphics)... An SVG drawing consists of a set of geometric shapes described in XML format: line, ellipse, polygon, etc. Both static and animated graphics are supported. The set of functions includes various transformations, alpha masks, filter effects, the ability to use templates. SVG images can be resized without quality degradation.
BMP format (Bitmap Picture)... It is an uncompressed (original) bitmap patterned with a rectangular grid of pixels. A bitmap file consists of a header, palette, and graphic data. The header contains information about the graphic image and the file (pixel depth, height, width and number of colors). The palette is specified only in those Bitmap files that contain palette images (8 or less bits) and consist of no more than 256 elements. The graphical data represents the picture itself. The color depth in this format can be 1, 2, 4, 8, 16, 24, 32, 48 bits per pixel.
ICO format (Windows icon)... The storage format for file icons in Microsoft Windows. Also, Windows icon is used as an icon on sites on the Internet. It is a picture of this format that is displayed next to the site address or bookmark in the browser. One ICO file contains one or several icons, the size and color of each of which is set separately. The size of the icon can be any, but the most common icons are square icons with sides of 16, 32 and 48 pixels.
2. Tag
Tag
The name attribute is available for the tag, which specifies the name of the map. The value of the name attribute for the tag

Element
3. Tag
Tag describes only one hotspot within a client-side image map. The element has no end tag. If one hotspot overlaps another, then the first link from the list of scopes will be implemented.
| Attribute | Short description |
|---|---|
| alt | Specifies alternative text for the active area of the map. |
| coords | Determines the position of the area on the screen. Coordinates are specified in length units and separated by commas: for circle- coordinates of the center and radius of the circle; for rectangle- coordinates of the upper left and right lower corners; for polygon- the coordinates of the vertices of the polygon in the desired order, it is also recommended to indicate the last coordinates, equal to the first, for the logical completion of the figure. |
| download | Complements the href attribute and tells the browser that the resource should be loaded the moment the user clicks on the link, instead of, for example, pre-opening it (like a PDF file). By giving a name to the attribute, we are thus giving a name to the loaded object. It is allowed to use the attribute without specifying its value. |
| href | Specifies the URL for the link. An absolute or relative link address can be specified. |
| hreflang | Specifies the language of the linked web document. Used only in conjunction with the href attribute. Accepted values are an abbreviation consisting of a pair of letters denoting a language code. |
| media | Determines what types of devices the file will be optimized for. The value can be any media query. |
| rel | Supplements the href attribute with information about the relationship between the current document and the linked document. Accepted values: alternate - a link to an alternative version of the document (for example, a printable page, translation, or mirror). author - link to the author of the document. bookmark is a persistent url used for bookmarks. help - link to help. license - a link to the copyright information for this web document. next / prev - indicates the relationship between individual URLs. Thanks to this markup, Google can determine that the content of these pages is linked in a logical sequence. nofollow - prohibits a search engine from following links on this page or a specific link. noreferrer - indicates that following a link, the browser should not send an HTTP request header (Referrer), which records information about which page the site visitor came from. prefetch - indicates that the target document should be cached, i.e. the browser in the background loads the content of the page to its cache. search - Indicates that the target document contains a search tool. tag - indicates the keyword for the current document. |
| shape | Sets the shape of the hotspot on the map and its coordinates. It can take the following values: rect - active area of rectangular shape; circle - active area in the form of a circle; poly - active area in the form of a polygon; default - the active area occupies the entire image area. |
| target | Indicates where the document will be loaded when following the link. It takes the following values: _self - the page is loaded into the current window; _blank - the page opens in a new browser window; _parent - the page is loaded into the parent frame; _top - the page is loaded into the full browser window. |
| type | Specifies the MIME type of the referenced files, i.e. file extension. |
4. An example of creating an image map
1) We mark the original image on the active areas of the desired shape. The coordinates of the areas can be calculated using a photo processing program, for example, Adobe photoshop or Paint.
 Rice. 1. An example of image markup for creating a map
 2) Set the name of the map by adding it to the tag
Jpg "alt =" (! LANG: flowers_foto" width="680" height="383" usemap="#flowers">
!}
 Rice. 2. An example of creating a map-image, when you press the mouse cursor on a flower, you go to a page with a description