To reduce the number of inaccuracies in data entry, I often use lists based on a range of cells. Let's consider the use of this tool on the example of timesheet maintenance.
For starters on separate sheet(this is not necessary) place the list of valid values in one column or one row (Fig. 1a); see also Excel file, List sheet.
Rice. 1. List of surname: (a) in no particular order; (b) alphabetically.
Download in format, examples in format
This list of last names will appear in the drop-down list in the order in which they appear in this column. It is clear that for the convenience of searching, it is better to sort them alphabetically (Fig. 1b).
Let's give our list a range name. To do this, select a range; in our case, this is the area A2: A21 and enter the name of the range, as shown in Fig. 2; in our case, these are "surnames":
Rice. 2. Assigning a name to the range
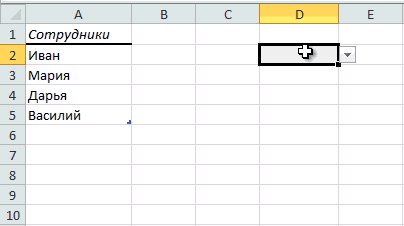
Let's select the area in which we will enter the surnames (see Excel file, “Input” sheet). In our example - A2: A32 (Fig. 3). Let's go to the Data tab, the Work with data group, select the Data Validation command:
Rice. 3. Data validation
In the "Validation" dialog box, go to the Parameters tab (Fig. 4). In the "Data Type" field, select "List". In the field "Source" we indicate: (a) the area of cells in which the list is stored; this option is suitable if the list is located on the same Excel worksheet; (b) the name of the range; this option can be used both when the list is located on the same Excel sheet, and if the list is located on another Excel sheet (as in our case). In both cases, make sure that there is an equal sign (=) in front of the link or name.
Rice. 4. Selecting a data source for the list: (a) on the same sheet; (b) on any sheet
And about two more options on the "Parameters" tab:
- Ignore empty cells. If checked, Excel will allow you to leave the cell blank. If the checkbox is unchecked, then you can leave the cell only after selecting one of the names of the list. The feature of this option is that Excel will allow you to move between cells (for example, using the Enter key or up / down arrows), but you cannot start typing, then erase all characters and move to another cell.
- List of valid cells. If there is no check mark, then when you place the cursor in a cell for input, the list icon will not appear next to the cell, and, accordingly, you will not be able to select from the list. Although all other properties of working with a list will work, and Excel will not allow you to enter an arbitrary value into the cell.
Let's go in the window "Validation of entered values" on the tab "Messages for input". Check the box "Show hint if cell is current". Let's enter the title and text of the message in the corresponding fields (Fig. 5). Subsequently, when the user stands on one of the cells of the input area (in the example in Fig. 5 - in cell A6), the message we have created will be displayed.
Rice. 5. Setting the Message for Input
In the "Checking the entered values" window, go to the "Error message" tab (Fig. 6). Check the box "Display error message". In the "View" field, select the message type. Let's enter the title and text of the message. The message we created will appear whenever the user tries to enter an invalid value.
Rice. 6. Setting Error Messages
Allowed types of error messages (Fig. 7):
- Stop- prevents the entry of invalid data; button Repeat allows you to return to the input, the button Cancellation Repeat.
- A warning- warns about the input of invalid data, but does not prohibit such input; button Yes allows you to accept invalid input; button No allows you to continue typing (the value previously typed in the cell becomes available for editing); button Cancellation clears a cell and allows you to start over or move to other cells; by default the button is selected No.
- Message- notifies about the input of invalid data; although it allows them to be entered. This type of message is the most flexible. When the appearance information message user can click a button OK to accept invalid input, or click Cancellation to cancel input; by default the button is selected OK.
Rice. 7. Selecting the type of error message
Some remarks. 1. If you entered too long text in the Message window of the Error message tab, the error message window will be too wide (as in Fig. 7); use line break Shift + Enter at the place of the message where you want to separate lines (Fig. 8).
Rice. 8. Reduced width error message box
2. The width of the drop-down list is determined by the width of the cell for which data validation is applied. Leave the input cells wide enough to avoid clipping valid entries that are wider than the dropdown. Otherwise, you can make the wrong choice based on the first letters of the word.
3. Maximum number The number of entries in the drop-down list is limited, though not too much :), namely, the number of 32,767.
4. If you do not want users to edit the checklist, place it on a separate sheet, then hide and protect this sheet.
Working with VB project (12)
Conditional formatting (5)
Lists and Ranges (5)
Macros (VBA procedures) (63)
Miscellaneous (39)
Excel bugs and glitches (3)
Related dropdown lists
Download the file used in the video tutorial:
("Bottom bar" :( "textstyle": "static", "textpositionstatic": "bottom", "textautohide": true, "textpositionmarginstatic": 0, "textpositiondynamic": "bottomleft", "textpositionmarginleft": 24, " textpositionmarginright ": 24," textpositionmargintop ": 24," textpositionmarginbottom ": 24," texteffect ":" slide "," texteffecteasing ":" easeOutCubic "," texteffectduration ": 600," texteffectslidedirection ":" left "," texteffectslidedistance " : 30, "texteffectdelay": 500, "texteffectseparate": false, "texteffect1": "slide", "texteffectslidedirection1": "right", "texteffectslidedistance1": 120, "texteffecteasing1": "easeOutCubic", "texteffectduration1": 600 , "texteffectdelay1": 1000, "texteffect2": "slide", "texteffectslidedirection2": "right", "texteffectslidedistance2": 120, "texteffecteasing2": "easeOutCubic", "texteffectduration2": 600, "texteffectdelay2": 1500 textcss ":" display: block; padding: 12px; text-align: left; "," textbgcss ":" display: block; position: absolute; top: 0px; left: 0px; width: 100%; height: 100% ; background-color: # 333333; opacity: 0.6; filter: a lpha (opacity = 60); "," titlecss ":" display: block; position: relative; font: bold 14px \ "Lucida Sans Unicode \", \ "Lucida Grande \", sans-serif, Arial; color: #fff; "," descriptioncss ":" display: block; position: relative; font: 12px \ "Lucida Sans Unicode \", \ "Lucida Grande \", sans-serif, Arial; color: #fff; margin-top: 8px; "," buttoncss ":" display: block; position: relative; margin-top: 8px; "," texteffectresponsive ": true," texteffectresponsivesize ": 640," titlecssresponsive ":" font-size: 12px; "," descriptioncssresponsive ":" display: none! important; "," buttoncssresponsive ": "", "addgooglefonts": false, "googlefonts": "", "textleftrightpercentforstatic": 40))
If you have to work with an Excel workbook in which the same list of data appears constantly, or maybe you simply do not want to use the action many times Copy > Insert, it would be very convenient to have a pre-configured and saved list so that Excel can help you with your work. Using custom lists is good decision for a given situation. Next, I'll show you how to create a custom list in Excel.
How to create a custom list in Excel
I'll demonstrate this with a list of school clubs. I need to keep track of the money on the balance sheet of each of them, as well as outline a daily budget. I started by typing in the names of the clubs - this is the information that I will need all the time.
At this point, I would also run a spell checker, this is done by simply pressing F7.
Then I selected this area, clicked on the button Office and at the bottom of the menu that opens, clicked on Excel Options(Excel Options).
In chapter Popular(General) You will find the item Create lists for use in sorts and fills sequences(Create lists for sorting and filling) - click on Edit Custom Lists(Change lists).

If you are working in Excel 2010, then you need a different route. Open the tab File(File) and click Options(Options). Then scroll down to find the button Edit Custom Lists(Change lists).
Next, a dialog box will open in which you can add information that you plan to use repeatedly. If you look at the lists already prepared by Microsoft, you will see among them those that everyone uses so often. They cannot be changed or removed. However, if you want to delete or change the list you have created, you can do this at any time. To do this, click on your list and do whatever you want with it.
Building a list from scratch
I have two ways how to create a custom list. I can create it manually by typing each value into the field List entries(List items) and clicking Add(Add). If you choose this path, you will face some limitations. Field List entries(List Items) allows you to enter a maximum of 255 characters. Be careful how many characters each of your entries consists of!
Prompt: If you plan to enter a list in the field List entries(List items) manually, do not put extra spaces between items. If the spaces come before or after the element, then Microsoft will simply not take them into account, and if between the words of one element, then all of them will be preserved.
Creating a list from an existing data range
Another way to add items to a custom list is to import data. If you select them before opening the menu window, the selected range will be automatically inserted into the corresponding field. You just have to click Import(Import) and Excel will create a list from the text in the cells. If you have not selected the text in advance, place the cursor in the field next to the button Import(Import) and select the data cells for the new list.
Remember, we had a limit on the number of characters that can be entered in the field List entries(List items)? Not when importing! Now maximum size the list is about 2000 characters! Click on OK to close the window with the list parameters, and again OK to close the Excel Options window.
For a custom list, you can only import text values... If you need to create a custom list with calendar dates or numbers, you will have to use the field List entries(List items).

Here are some points you need to know about customizable lists ... All lists are tied to your computer. Their settings are saved on the computer on which you are in this moment working. If you take a file from your work computer to work with it at home, you will have to create the same custom list on home computer... If you used a custom list to sort, then its items will remain in Excel cells, but it will not be shown among the lists.
Using custom lists in Excel
So, our custom list is ready to use. Select a cell and enter any item in this list from the keyboard. Click on the autocomplete marker (small square in the lower right corner of the cell), and drag on it to continue the sequence. Slightly to the right, I entered “Monday”, then clicked on the marker and pulled to the right, Excel filled in the cells automatically.
The wonderful thing about this function is that Excel fills both the column and the row equally, both forward and backward, you start from the first item in the list, from the middle or from the last item ... As soon as you click and start dragging mouse, Excel will determine what you want to do and will insert the appropriate data.

Sort by custom list
One of the nice things about working with custom lists is the ability to organize your data by any of the lists stored on your computer. Click on one or more columns, then click Sort & Filter(Sort & Filter), expand the dropdown menu Order(Order) click Custom List(Custom List) and select the list you want to sort by.
A sort can include more than one column. If you want to add another level and sort first by month, and then by account number, you can click Add Level(Add a level) and define how the data should be displayed. When done press OK... The information is now sorted according to the selected list!

It's simple enough! The use of custom lists is very convenient especially for those who want to avoid multiple copying and pasting of data. If you know there is a dataset that you might need at any time, why not make a custom list out of it? Who knows, maybe this will save you much more time than you can imagine ... and leave the boss thinking that you had to work hard. Let him think so.
If you need that when you click on one of the cells in the table Excel document, a list with possible options values, then you've come to the right place. In this article, we will tell you about the most common and popular ways to do this. It doesn't take long. You do not need special knowledge and skills. Only desire, attentiveness and clearly follow the written instructions. So let's go!
Method 1. Standard.
First, you need to set the range of values that you want to see in your drop-down list. For example, let's talk about a cell "program". Let's create a list that we should drop out of the cell.
Enter values for the dropdown list
If you have Excel 2003, then you need to follow these steps. Stand on the cell you want to make as a drop-down list, select the menu Data - Validation.

Select the future combo box
In Excel 2007 and higher, this window is called through the tab " Data» -> « Data checking».

List in a cell in MS Excell 2010
You have a dialog box with a check, where you need to enter range of values.

Specifying a range of cells with list values
We set a specific type of input values, in our case we consider the element "List".
To specify the values of the drop-down list, there is a specific field - "a source"... Here you specify the range of cells from where the values for the drop-down list will be taken from. This is done by clicking on the icon at the end of the line. Next, select a range of cells and press "Enter".
Here's the final result.

A ready-made cell with a drop-down list
In order for the field " A source" do not set a constant range of values. You can combine these values into one category, assign a name to it and write this name in this column.
We indicate a specific list of values that should fall out. We go in, perform the following steps.
- Step 1 - select the menu - "Insert";
- Step 2 - go to the menu "Name";
- Step 3 - open the dialog "Assign".

Create a constant with list values
If you have an English version then so
- Insert;
- Name;
- Define.
If you are working with the seventh office version or newer Excel 2007. Then the tab will help you Formulas - Name Manager (NameManager), and choose create. The choice of name is not limited by anything. You can write, for example "Overview".

Create a name for a range of values in Excel 2010

Specify the name of the created range
Pay attention to this moment. The data source can be any named range of data, for example, a price list.
In this case, when the price catalog is added with new items, they are automatically highlighted in the drop-down menu. Also, one important point for such lists, creation of linked dropdowns is considered. In such cases. When the content of one element changes, the other automatically changes and updates the structure.
Method 2 - Control element.
In this method, the option of adding a new object and binding it to a specific range in an Excel file is considered. What steps need to be taken:
If your version is 2007 and later, then select the Developer menu. If the version is early then View - Toolbars - Forms.

Opening the toolbox
In the ActiveX controls dialog box that appears, find the combo box icon "Combo box". We bring the element to the document page.


List item format
In this menu, enter the range of values and bind data to the cell.
Dropdown list in Excel is pretty convenient function, which will help create more complex documents and make the work easier for the visual perception of the user.
A few of the most common types of dropdowns you can create in Excel program:
- With multi-selection function;
- With filling;
- With the addition of new elements;
- With drop-down photos;
- Other types.
Make a list in Excel with multi-select
You can create a list in a program cell using the built-in control panel tools.
Let's take a closer look at all the main and most common types, and the process of their creation in practice.
Advice! The classic pop-up list of the program has a multi-selection function, that is, the user, by clicking on the corresponding group, can select the corresponding option for it.
Multi-selection is necessary when using one list you need to set a value for several cells in a document.
To create one, follow the instructions:
- Select cells. If you look at the picture, you need to select from C2 to C5;
- Find the "Data" tab, which is located on the main toolbar in the program window. Then press the data check key as shown in the picture below;

- In the window that opens, open the very first tab and select the item as shown in the figure. This will create a list in these locations. In the text box, specify the range of cells that will be populated each time you select items.

NSFill ID:
This will create a classic horizontal list with a multi-selection function.
However, in order for it to be filled in automatically, you need to create a macro with the following source code, which is shown in the figure.

Create a list in Excel with filling
A standard filled list will allow you to automate the process of entering information. When you click on it, a selection of its possible values will appear.
The user only has to select the required value for filling.
The easiest way to create such a list is to use program smart tables.
With their help, you can easily and quickly format the types of lists with filling you need:
- Select the required cells and click on the "Format as Table" button in the main tab;