Did you know that the Microsoft Excel spreadsheet editor allows you to set a password for changing both a whole workbook and a separate sheet? This is very convenient if you need to protect content from users, prevent them from making changes to the table, or even block access to it. This is especially true in some companies, where a single file-trash can is organized on the server, which is available to everyone and where all users dump their documents. By protecting the entire XLS or XLSX file with a password from unauthorized access. At the same time, for those who really need access, you can issue a password on an individual basis.
Let's take a closer look at how to password protect data in Excel.
Setting a password on an Excel sheet
At the bottom of the window, find the list of sheets and click on the desired one with the right mouse button to bring up a menu where you need to select the item "Protect sheet":

A separate window "Sheet protection" will appear, in which you must specify a password, as well as use the checkboxes to set the rights that will be available to users:

After you enter the password, another window will appear in which you must enter it again to confirm:

Now, when trying to change the contents of a protected sheet, the user will receive the following message:
And if he tries to remove the protection of the sheet, then Excel will require him to enter the password:

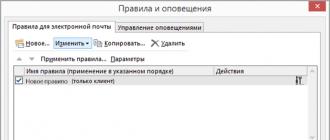
Note: You can also call the "Protect Sheet" window through the main menu in the "Review" section. See the video for more details:
How to put a password on an Excel workbook
Now let's look at how Excel works to protect a workbook with a password. In the main window of the program and call the menu "File". Such a menu will appear, in which you need to open the "Information" section:

The first item is "Book protection". Click on it and see this menu:

We select the item "Encrypt using a password". Excel will ask for a password:

Enter and click "OK". After that, you will see a message that a password is required to open this book.
Password for Excel file
This method of data protection implies that you want to set a password for the entire XLS or XLSX file so that an unauthorized person cannot open it at all, and if you try to do this, you will be prompted to enter a security key:

To do this, when saving the Excel file, click on the "Service" button. This menu will appear:

We select the item "General parameters" in it. A small window will open with fields for entering a password for opening and changing:

After you click the "OK" button, a password confirmation window will pop up twice - first to open an XLS or XLSX file, and then to change.
After that, you can be sure that your data is well protected.
From time to time during work, it becomes necessary to set or remove a password for the Excel file. In this article, we'll look at how this can be done in different versions of Excel.
If you need to set a password in Excel, then you can do this in a special dialog box. The location of this window is different in different versions of Excel.
The password must be set after all changes in the file before saving it. To do this, go to the section Service → Options
This will open the Excel Workbook Options dialog box, you need to select the tab Safetywhere you can enter either password to open the file Excelor password to change it in the appropriate field
After entering the password, you must click OK, and a window will open in which you need to confirm the password you entered. This is necessary in order for you to be sure that the first time you entered the password correctly and remember it. Changes will take place after saving the file.
You can set or remove a password in Excel using the method described below.
Set or remove password in Excel 2007 and 2010
Setting a password in Excel 2010 is a little different from 2003, and now we will show you how you can do it. You can set a password just before saving the file. To do this, select the dialog box for saving the file: File → Save as
After that, a window will open where you need to select the item Service → Common parameters

19.02.2017
The Excel spreadsheet processor was developed by Microsoft back in 1985, since then its functionality has significantly expanded, and the interface has become more convenient. The program is actively used by both financiers, accountants, analysts, and ordinary users. The functionality allows you to create complex tables and make calculations according to the formulas available in the program or entered by the user yourself, to build graphs and diagrams. The work takes place on the so-called sheets, which are included in the workbook (one Excel document).
Removing password protection from Excel
Microsoft understands that the file can fall into the wrong hands, so they give the user the opportunity to set a password to access a specific sheet or the entire document. It is even possible to block individual cells from editing and / or viewing. But what if you forgot your password, but the file contains important data? You can remove the password yourself using standard Windows programs.
Method 1: Remove password using archiver
This method works best with older versions of the program (up to the version from 2010). In recent versions, there is a risk of data loss due to new security settings. The essence of the method is to access each sheet separately. To do this, you will need any archiver that can work with zip files and a code editing tool (even a standard Windows notebook will do).
You can only work with .xlsx files, so pay attention to the format in which the document is saved, because older versions of Excel save the document in .xls format. If the file has the extension .xls, then resave. To do this, open it in Excel and select the file in the top menu, and from the drop-down menu "Save as", further in the section "File type" choose "Excel workbook (.xlsx)".

Next, you need to change the extension .xlsx to .zip. To do this, right-click on the file and select rename. At the end of the name, change the extension to .zip. Example: "Table1.xlsx" rename to "Table1.zip".

If, when you try to rename a file, you do not show the extension, then do the following procedure:

After the performed procedure, you can easily mark the extension of any file manually.
Next, open the archive and go to the folder "Xl", after in "Worksheets"where the sheets are in .xml format. Sheets in this case are called "Sheet" and are numbered by creation date (sheet1, sheet2, etc.). You need to open the file using standard notepad or a special code reactor (for example, NotePad ++).

In the file that opens, find the snippet "SheetProtection"... Because there will be a lot of code in the file, it is recommended to use a quick search in the content using a keyboard shortcut Ctrl + F... Find the required block with the given structure ““ SheetProtection variable1 \u003d ”” variable2 \u003d ””… ”, you can see in more detail in the screenshot below. To reset the password, delete this entire block.

If you perform this procedure with a sheet that was saved in the program version 2010 and higher, you will lose all data. As a solution to this problem, delete not the entire block, but only the value of the variable "Password"... As for the version since 2016, there is no variable there "Password", therefore, it is impossible to remove the password using the archiver in this case.
When done, save your changes and change the file extension back to .xlsx in the same way as you changed to .zip.
This method allows you to remove the password only from individual sheets, so if you have a completely password-protected large Excel file with several sheets, you will have to remove protection from each manually.
Method 2: Remove password via Macro
In this case, you only need the Excel spreadsheet itself and the ability to work with the developer console. By default, the developer panel is not displayed in the file, to enable it use the following instruction:
In the developer window that opens, find the button "Macro" or use the keyboard shortcut Alt + F8.

We fill in the field with the name of the macro (you can come up with any name, but it should not contain Russian letters and spaces). Push "Create"... The system opens a window for entering the code.
Enter the following code:
Sub Password_Cracker ()
Dim t!
Dim i As Integer, j As Integer, k As Integer
Dim l As Integer, m As Integer, n As Long
Dim i1 As Integer, i2 As Integer, i3 As Integer
Dim i4 As Integer, i5 As Integer, i6 As Integer
Dim kennwort As String
t \u003d Timer
On Error GoTo err_
For i \u003d 65 To 66: For j \u003d 65 To 66: For k \u003d 65 To 66
For l \u003d 65 To 66: For m \u003d 65 To 66: For i1 \u003d 65 To 66
For i2 \u003d 65 To 66: For i3 \u003d 65 To 66: For i4 \u003d 65 To 66
For i5 \u003d 65 To 66: For i6 \u003d 65 To 66
kennwort \u003d Chr (i) & Chr (j) & Chr (k) & Chr (l) & Chr (m) & Chr (i1) & Chr (i2) & Chr (i3) & Chr (i4) & Chr (i5 ) & Chr (i6)
For n \u003d 32 To 126
ActiveSheet.Unprotect kennwort & Chr (n)
MsgBox "Done in" & Format (Timer - t, "0.0 sec")
Exit Sub
nxt_: Next: Next: Next: Next: Next: Next
Next: Next: Next: Next: Next: Next
Exit Sub
err_: Resume nxt_
End Sub
Close the window while saving the changes. In developer mode, use the Alt + F8 keyboard shortcut again to see the generated macro. Select it and click "Run" in the right corner.
The macro will run for approximately 10-60 seconds depending on the power of your computer and the size of the document.
Conclusion
To remove a password from an Excel spreadsheet yourself, you do not need to have the skills of a professional hacker or download additional software. The latter is strongly discouraged, since you can catch a virus that will cause serious damage to the system.
Many people put passwords on certain documents. If the file has not been used for a long time, then the secret word may be forgotten. It is not always possible to remember it, but there are still ways through which it will be possible to open the document.
Let's take a look at how you can remove the password in an Excel file.
Remove the password in the Excel file using a script
You can open a password-protected document using the free VBA script Excel Password Remover. After downloading the program, you need to run it. The utility will immediately integrate into Excel, which will display a message about the start of the macro. You can safely run it, after which you should open your password-protected file and select "Straxx" from the Excel menu.
It is important that the script does not attempt to crack the Excel password by guessing random phrases, it disables the challenge of protection in the document from the inside, which is much easier. The whole procedure takes about 2 minutes.
Remove password from Excel document manually
You can remove the password in the Excel file and manually.
- To do this, you need to open the document, go to the "File" tab, select the "Information" item, and then in the drop-down list the heading "Permissions".
- In the new window, click "Encrypt with password", after which a window will open in which the previously entered password will be displayed. You need to delete it and click on the OK button.
- Close the document. The application will ask you about the need to save the changes, you must click on the "Yes" button.
- Run the document again, and you will see that Excel does not require a password.
How to Crack Excel Password: Easy Way
The issue of data protection is especially relevant today. The network is full of intruders who can easily take over unprotected information. In addition, it is not uncommon for the user to simply want to protect it from prying eyes, for example, if several people use the same computer. In general, now we will not find out the motive for such a desire, but rather talk about how to password-protect an excel file. In this article, Excel 2007 and 2010 turned out to be targeted, because the principle of setting a password will be identical. So, for everyone who wants to protect an Excel document, I suggest using one of two methods. Which ones? Find out further!
Method one
In fact, both are extremely simple and equally functional, so it doesn't matter which one you choose. It's also easy. So, let's start with the algorithm for executing the first method:
- Let's imagine that the required document is ready, all that remains is to password-protect it. To do this, press the large "Office" button in the upper left corner of the program.
- In the context menu that opens, click "Save As".
- A new window will open, your task is to pay attention to the small "Service" button located next to "Save" and "Cancel". Click on it, and a small menu drops out, select the line "General parameters".
- Then you can set passwords for two cases: to open a document and change it. Enter the required code and click "OK". From now on, every time a document is opened, each user will be prompted to enter the set password. It is better to write down passwords somewhere else, if you forget, you will have to rack your brains.
Method two
In addition to the above, I can offer another option for setting a password for an Excel document.

Adhering to such simple rules, you can install protection on any Excel file in no time. Note that this feature is based on AES 128-bit encryption, which is considered the standard method for protecting a file.
Video to help