Nowadays, few people can imagine their life without a phone, especially since modern smartphones are not only a means of communication, but also for accessing the Internet, a camera, an e-reader and much more. This article will help you understand any gadget on Android.
Turning on your smartphone
Before using a smartphone on Android, a beginner needs to turn it on. The button is usually located on the top or side of the device, depending on the device model.
When you boot for the first time, you need to define the basic operating system settings. After selecting your language, you will be asked to create a Google account to which the device will be linked, or log into an existing profile. This can be postponed, however, it is better to do it right away, since a Google account is required to download applications, synchronize, use email and other functions.
Creating a Google profile will take just a few minutes: you need to come up with an email name and fill out basic information about yourself. After this, you can proceed to further configuration of the smartphone.
How to call
Modern phones have an intuitive interface. Having turned on and unlocked the device, you will immediately see the bottom panel of icons, where the most necessary functions are located.

For example, even if you don’t know how to use a smartphone, a beginner will still understand that to make a call you need to touch the green icon with the image of a handset. In the menu that opens, you can view the latest calls made, dial a number on the keyboard, and also view contacts stored in the phone and SIM card memory. For experienced users, these operations take a couple of seconds, while for a beginner it is unusual to use a smartphone at first, largely due to the different keyboard. At first, it may be more convenient for you to simply scroll through the list of contacts, but if there are a lot of numbers in the smartphone’s memory, then it is better to resort to a search.
How to write SMS messages
Let's figure out how to use an lg smartphone. A beginner needs to learn how to write SMS messages. To do this, just click on the envelope icon, and then on the symbol of a new message (usually this is an image of a pen and paper). The first step is to select a recipient from your contacts list or enter a new number in the To field. Then type the message itself using the keyboard or, if necessary, you can insert an emoticon through the additional functions menu. Click “send” and your message will be sent to the recipient.
How to take photos and videos
Almost all modern gadgets can take high-quality photos and videos. How can a beginner use a smartphone with a built-in camera? Here are some simple tips.

Always keep the outside of the lens clean. Otherwise, the pictures may turn out unclear and blurry.
Try not to shake your hands. This rule applies to any camera, but modern smartphones use fairly long shutter speeds, so this is especially true.
Set the quality settings to maximum. Photo and video files will take up more space, but this problem can always be solved by installing an additional memory card.
Take multiple pictures. All professional photographers use this technique, and you should take note of it too. Even if one shot is blurry or the focus doesn’t work, there’s a chance that others will turn out great.
Explore the settings available on your smartphone. Various scene programs, color effects and white balance will allow you to take decent quality pictures even in poor lighting.
How to use the Internet

Before using an Alcatel smartphone, a beginner needs to know that it and other gadgets have data transfer enabled by default. Therefore, if your tariff plan does not provide unlimited traffic, then it is better to disable this option through the settings (the “Wireless Networks” item) or deactivate the “Data” icon on the quick access panel, which is lowered by smoothly moving your finger across the screen from top to bottom.
When you need to go online, turn on this feature and find the built-in browser in the menu. If desired, you can install any browser adapted for the Android platform, as well as additional applications for social networks and instant messengers.
In addition, Android smartphones usually have a Google search bar right on the home screen and support voice queries. Just say “Hey Google,” wait for the characteristic sound signal and clearly speak your request.
How to set up personalization
Having become familiar with how to use the Fly smartphone, a beginner will probably want to customize the device to his liking. Modern devices support customization based on many parameters. Once you enter the gallery, you can always set any image or photo as your desktop background. To do this, call up and select “Set as - Desktop Background”.
The “Settings - Sound” menu allows you to adjust the volume and ringtone for calls and incoming messages, as well as the mode and intensity of vibration of the device. You can use both basic ringtones and download them from the Internet.
In addition, you can move frequently used applications to your desktop for ease of access. Just hold down the desired icon and drag it to the main screen. Many users like to group icons into folders based on their functionality. For example, in one folder you can collect all clients for social networks, in another - games, in a third - third-party programs for processing photos, etc.
Another popular feature for Android smartphones is widgets, which are also placed on the desktop. The widget can display news feeds from websites or your accounts on social networks, show the weather forecast, track currency fluctuations, etc.

Important apps for your smartphone
Now that you have figured out how to use a smartphone as a beginner, we will tell you a few applications that you need to install on your device.

Antivirus. "Android" is the same as a computer, and it can be affected by a virus. Therefore, it is important to take care of anti-virus protection and not install applications from dubious sources.
Battery saving application. Such a program will promptly terminate unused applications, tell you where exactly the battery power is being spent, calculate how long the battery will last, etc.
Application for cleaning "garbage". With such a program, your smartphone will not slow down or freeze. It will help you clear your device's cache, remove unnecessary residual files, and also see where your smartphone's memory is being used.
By following these simple rules, you will easily learn how to use your smartphone. The names of the functions listed above may vary depending on the phone model, but since even the most sophisticated device has an intuitive interface, you will not have any difficulties.
Nowadays, few people can imagine their life without a phone, especially since modern smartphones are not only a means of communication, but also a multifunctional device for accessing the Internet, a camera, an e-reader and much more. This article will help you understand any gadget on Android.
Turning on your smartphone
Before using a smartphone on Android, a beginner needs to turn it on. The button is usually located on the top or side of the device, depending on the device model.
When you boot for the first time, you need to define the basic operating system settings. After selecting your language, you will be asked to create a Google account to which the device will be linked, or log into an existing profile. This can be postponed, however, it is better to do it right away, since a Google account is required to download applications, synchronize, use email and other functions.
Creating a Google profile takes just a few minutes: you need to come up with an email name, a strong password and fill out basic information about yourself. After this, you can proceed to further configuration of the smartphone.
How to call
Modern phones have an intuitive interface. Having turned on and unlocked the device, you will immediately see the bottom panel of icons, where the most necessary functions are located.
For example, even if you don’t know how to use the Lenovo A328 smartphone, a beginner will still understand that to make a call you need to touch the green icon with the image of a handset. In the menu that opens, you can view the latest calls made, dial a number on the keyboard, and also view contacts stored in the phone and SIM card memory. For experienced users, these operations take a couple of seconds, while for a beginner it is unusual to use a smartphone at first, largely due to the different keyboard. At first, it may be more convenient for you to simply scroll through the list of contacts, but if there are a lot of numbers in the smartphone’s memory, then it is better to resort to a search.
How to write SMS messages
Let's figure out how to use an lg smartphone. A beginner needs to learn how to write SMS messages. To do this, just click on the envelope icon, and then on the symbol of a new message (usually this is an image of a pen and paper). The first step is to select a recipient from your contacts list or enter a new number in the To field. Then type the message itself using the keyboard or voice input. If necessary, you can insert an emoticon through the additional functions menu. Click “send” and your message will be sent to the recipient.
How to take photos and videos
Almost all modern gadgets can take high-quality photos and videos. How can a beginner use a smartphone with a built-in camera? Here are some simple tips.
Always keep the outside of the lens clean. Otherwise, the pictures may turn out unclear and blurry.
Try not to shake your hands. This rule applies to any camera, but modern smartphones use fairly long shutter speeds, so this is especially true.
Set the quality settings to maximum. Photo and video files will take up more space, but this problem can always be solved by installing an additional memory card.
Take multiple pictures. All professional photographers use this technique, and you should take note of it too. Even if one shot is blurry or the focus doesn’t work, there’s a chance that others will turn out great.
Explore the settings available on your smartphone. Various scene programs, color effects and white balance will allow you to take decent quality pictures even in poor lighting.
How to use the Internet
Before using an Alcatel smartphone, a beginner needs to know that it and other gadgets have data transfer enabled by default. Therefore, if your tariff plan does not provide unlimited traffic, then it is better to disable this option through the settings (the “Wireless Networks” item) or deactivate the “Data” icon on the quick access panel, which is lowered by smoothly moving your finger across the screen from top to bottom.
When you need to go online, turn on this feature and find the built-in browser in the menu. If desired, you can install any browser adapted for the Android platform, as well as additional applications for social networks and instant messengers.
In addition, Android smartphones usually have a Google search bar right on the home screen and support voice queries. Just say “Hey Google,” wait for the characteristic sound signal and clearly speak your request.
How to set up personalization
Having become familiar with how to use the Fly smartphone, a beginner will probably want to customize the device to his liking. Modern devices support customization based on many parameters. Once you enter the gallery, you can always set any image or photo as your desktop background. To do this, call the context menu and select “Set as – Desktop Background”.
The “Settings – Sound” menu allows you to adjust the volume and ringtone for calls and incoming messages, as well as the mode and intensity of vibration of the device. You can use both basic ringtones and download them from the Internet.
In addition, you can move frequently used applications to your desktop for ease of access. Just hold down the desired icon and drag it to the main screen. Many users like to group icons into folders based on their functionality. For example, you can collect all clients for social networks in one folder, games in another, third-party photo processing programs, etc.
Another popular feature for Android smartphones is widgets, which are also placed on the desktop. The widget can display news feeds from websites or your accounts on social networks, show the weather forecast, track fluctuations in currency rates, stock indices, etc.
Important apps for your smartphone
Now that you have figured out how to use a smartphone as a beginner, we will tell you a few applications that you need to install on your device.
Antivirus. “Android” is the same as a computer, and it can be affected by a virus. Therefore, it is important to take care of anti-virus protection and not install applications from dubious sources.
Battery saving application. Such a program will promptly terminate unused applications, tell you where exactly the battery power is being spent, calculate how long the battery will last, etc.
Application for cleaning "garbage". With such a program, your smartphone will not slow down or freeze. It will help you clear your device's cache, remove unnecessary residual files, and also see where your smartphone's memory is being used.
By following these simple rules, you will easily learn how to use your smartphone. The names of the functions listed above may vary depending on the phone model, but since even the most sophisticated device has an intuitive interface, you will not have any difficulties.
Most of us feel insecure when we have to get acquainted with a new operating system. And despite the fact that Android can be found on the vast majority of electronic devices today, there are still many users who are not familiar with it.
If you are one of these people, we will provide you with the most important information on how to understand the system and introduce its main functions. In general, here is a kind of instruction called “Android for Dummies”, which contains all the current tips on working with the platform.
Start using the Android system
Turn on the device, log into your account and establish a connection to the Internet
Following the instructions, we turn on our smartphone or tablet, after which the system desktop will appear in front of you, or, if the device is turned on for the first time, the initial setup wizard will start. For example, on a smartphone the wizard suggests doing the following:
- Select interface language.
- Connect to the Internet via Wi-Fi - if you don't have a network nearby, you can skip this step. Why does this menu appear the first time you turn it on? Due to the fact that most programs are designed to be used with a working Internet connection. This does not mean at all that a phone or tablet is useless without the Internet; this step was created rather for convenience - they say, connect to it immediately, so as not to worry about it later.
- Next, the system wizard will prompt you to log into your Google account or create one if you have not yet acquired an account. We highly recommend that you create an account for yourself, because the Android system itself is strongly tied to Google services. Without it, you won't be able to access the app store and won't be able to use email. In addition, creating an account is not difficult, but it will always be with you on all devices where you want, which is quite convenient.
- In the next menu you need to confirm the time and date, which are almost always determined automatically, or enter them manually.
- In the last window you will see items related to determining your location - it is better not to turn them off so that all services work correctly and the smartphone correctly determines the time and date.
What is the system interface?
After setting up your smartphone or turning on the device normally, even if you did not go through the wizard, you will see the desktop of your gadget.
What is he? You will be offered the following symbols and icons:
- Time and date - You may have a separate clock or calendar displayed, or this data will be located in the lower right corner, as is most often the case on tablets.
- In most cases, there are three signs at the bottom - the back button, the main menu and the context menu, where running applications are displayed.
- The desktop typically houses the most important and most used programs. They can be deleted - just press and hold your finger on the program, after a couple of seconds the icon will become movable and you can drag it onto the cross.
- There can be several desktops - they move when you perform swipe movements across the screen, if desired, they can also be added or removed - the widget can be removed in the same way as a separate program. To add another desktop, touch the screen with 2 fingers and bring them together, after which a plus sign will appear - you should click on it.
- You can add programs to desktops from the general menu list. Where can I find it? Press the main key on your tablet or smartphone, or the middle button at the bottom of the screen - we have already mentioned it. When the list opens in front of you, you can select one of the elements, hold your finger on the part of the screen where it is located, after which you can move it to any place on the desktop.
It is worth noting that on Android tablets, a quick menu opens at the bottom line, where you can turn on Wi-Fi, find out about the battery charge and other important information - to open it, just move from bottom to top in the clock area. In smartphones running this system, to open the notification menu, you need to swipe your finger across the entire screen from top to bottom.
We've looked at what the desktop looks like, now let's move on to the main Android menu.
It is made in the form of a general list with icons and program names, or in the form of several desktops with the same lists of applications - there is nothing difficult in viewing them. In the general menu you will find all the elements of your device; there are also settings for your smartphone or tablet.
Using the Internet on Android
If you have already established an Internet connection, it's time to learn how to use the browser. If Wi-Fi is turned off, you can activate it in the mentioned notification menu or through the settings that you will find in the menu. After you open the wireless connection section, activate Wi-Fi, then the device will automatically search for networks. The only thing left to do is select a network from the list, enter a password if necessary and click “Connect”.
How to access the Internet on Android?
To do this, follow these instructions:
- Select the browser installed on your smartphone or tablet and open it.
- Then you can use the browser in the same way as on a computer - you will have a line for entering an address, the ability to add tabs, and additional icons hide menus for adding bookmarks, viewing page history, etc.
In general, there is nothing difficult about working with a browser on a tablet or smartphone - if you don’t know some functions or icons, just try them.
We missed only one point - to enter the site address, you need a keyboard.
How to use the keyboard?
The keyboard will automatically open whenever you click on the line where you enter this or that text or message. Therefore, launching it is a simple matter, and if you need to remove the input tool, just click “Back”.
Here's what you need to know about using the keyboard:
- The layout of the keys here is the same as on a computer keyboard.
- The globe icon is used to change the input language.
- The transparent arrow changes the keys to capital ones; if you press them twice in a row, the Caps Lock mode will turn on.
- The arrow with a cross erases characters, the large button on the right serves to move the cursor down - like a computer Enter key.
- To move the cursor, touch the desired area on the screen.
- Some keys have multiple characters - to select an additional character rather than the main one, just hold your finger on it a little.
- As a rule, under the letters on the keyboard there are buttons to switch it to a numeric layout or a list of symbols - just click on it to open the desired set of characters.
- If you need to select text and copy, cut or move it, long press on the line where the piece you want begins, and two arrows will appear. By stretching them, you can select the required number of characters, and in the top menu select an operation for the selected text.
How to add other languages to the keyboard?
This is done in the settings, where there is a menu dedicated to input means - in it you can add languages, turn on or off dictionaries, and perform other keyboard settings.
On tablets, input means settings are available on the bottom line, next to the clock - the corresponding symbol in the form of dots appears every time you turn on the keyboard, so you don’t even have to go into the menu and search for the desired section in the settings.
How to use Google Play Market?
This service is an application where you will find thousands of various programs for your Android device. As a rule, the Play Market is by default in the menu of your tablet or smartphone; to use it you need a Google account - if you have not previously logged in, you will do so the first time you launch the store.
So, how to use this miracle? Everything is very simple - choose the application you like or find it through the search bar, click “Install”, and then the equipment will handle everything on its own.
If you need to delete a program or transfer it to a memory card, the latter is necessary when there is little space on the device itself, and you can do this in the settings. A separate section contains all the applications installed on your gadget.
File manager and how to watch movies and listen to music on Android
To view media files, there is a separate application called Gallery or Media Storage, which you will find in the main menu. There is nothing complicated in using it; photos and videos located in the device’s memory or on the card are distributed into the created folders.
If you need audio files, books and a general list of files on the device, there is a file manager for this, which on the Android system is called Explorer.
By the way, when viewing photos and pictures in the gallery, you can immediately install them on your desktop, or as an image of a contact from the phone book. In general, customizing the background, widgets and other aesthetic components is a large and separate topic.
How to set a ringtone?
If you use an Android smartphone, you probably want to hear your favorite ringtone. This is done through the settings - go to the Sound menu, click on the Ringtone line, where you can select the required file. As you can see, in this menu you can completely edit your call settings. You can also set the melody you like in the player while listening to music - you will find the corresponding function in the menu.
Thanks to this brief instruction on Android, you have learned the minimum set of the most important sections and system settings that will allow you to start confidently using your smartphone or tablet. The main thing is don’t be afraid to try and find out what you haven’t seen before. In general, using this platform will probably be simple and understandable for you, because everything in it is thought out logically and consistently.
Click "Like" and read the best posts on Facebook
After purchasing a new phone, a completely logical question arises about how to use a smartphone for a beginner.
This is relevant for cases when a person has never used such devices before and knows little about them. Of course, there are very few of them left, but they still exist.
Therefore, it makes sense to figure out what those who have just purchased a smartphone need to know so that their new device works as long as possible.
- A few simple tips
- Save battery charge
- What to install
And we'll start from the very beginning.
Here are some tips that you, as a beginner, should remember throughout the life of using your smartphone:
- Read the instructions for your device. Surely, this will shed light on many questions that may arise during use. For example, in the instructions you can often find information on how to enter the system menu, how to bypass the lock, and much more. Moreover, all this will be interesting and useful.
- Immediately after switching on, be sure to get the settings from the operator. They relate to the Internet, MMS and other functions that the SIM card provides. Otherwise, you can, for example, start using the Internet and spend a lot of money on it. Once the settings are set, you will be able to use all the functions of your smartphone with complete peace of mind.
- It is best to immediately connect to Wi-Fi in order to download all the necessary applications and not use mobile Internet, which, as we said above, can cost a lot of money.
- Try to test your new device right away. Try to take a picture of something with it, shoot a video, run games, several at the same time, and so on. All this will allow you to understand how efficient your new phone is. If there is something wrong with it, it is better to immediately take it to the store. By law, this can be done within 14 days after purchase without any reason (due to the fact that you simply did not like it).
- Close all applications when you are not using them. This means that you don’t just need to press the “Back” button, but open the list of open applications and click on the “Close all” button. For example, on Samsung it looks like shown in Figure 1.
Rice. No. 1. List of open applications in Samsung phone
2. Save battery charge
There are many ways to maximize battery life.
Here are the most effective of them:
- Do not use wallpapers with 3D effects or in HD. This is especially true if the resolution of your smartphone is not very high. Then a completely standard picture, not in HD, will do. At least don't do this when first using a new smartphone.
- If you don't need it at the moment, turn off geolocation, Wi-Fi and Bluetooth. Also, if you do not need to constantly use Viber, Skype, other instant messengers and other programs that require constant Internet, turn off the mobile network, that is, the Internet from the SIM card.
- Do not use maximum brightness. Again, at least you shouldn't do this at first. Of course, any smartphone looks very impressive in a store, because they set the screen to maximum brightness. But, unfortunately, you won’t be able to use it in the same way in everyday life. This is worth remembering.
In our article you can learn more about how to save battery power on Android. The same tips apply to other operating systems.
Rice. No. 2. Battery charge on Android
Now let's talk about what applications you need to install on your new phone.
3. What to install
Of course, in the list below we present only those applications that are most popular in the Android and iOS app stores.
It will also contain programs that users themselves most often mention on forums. But all this is just a collection of subjective opinions, which may not correspond to your idea of a “gentleman’s set” of applications for a smartphone.
So, here are the applications that you need to install on your brand new smartphone:
- Messengers. This is the same Viber, Skype and much more. Most of them are really very convenient and even if you have never used instant messengers, we advise you to start doing so. For example, if we talk about Viber, this application allows you to make free calls, even with video, and also stay in touch constantly. This is definitely very convenient!
Rice. No. 3. Viber on Android OS
- Applications related to trading platforms. In particular, we are talking about the OLX application. Again, if you have never used the services of this site, it is best to start doing so. Selling and buying using the OLX app is really very convenient. The AliExpress branded application is also very popular.
- One "cleaner". Here we mean programs that allow you to remove temporary files from the device, clean all kinds of garbage and remove everything that can slow down the device. This could be Clean Master, CCleaner and much more. But such a program must be on your phone.
- File manager. In most cases, smartphones already have some kind of programs that allow you to view files on the internal memory and microSD card. But the problem is that often they do not allow you to view everything that is on the phone. Therefore, it is better to install ES Explorer, Explorer from Maple Media or something similar.
Rice. No. 4. ES Explorer for Android
- Player for music and video. Again, initially smartphones already have standard players. But often a variety of problems arise with them. For example, sound may disappear in a video, audio may not play at all, and so on. In general, it is better to download additional players. In this blog you can see which 3 players are best for Android users to play music.
You can easily access VK or Odnoklassniki through the most common browser. There is absolutely no need to install unnecessary applications.
You can read more about which 10 applications are currently the most popular among Android users in this article.
Besides, you will, of course, want to play something. In this review you can see which games are now the most popular on Google Play.
There is not much point in this material, because the Android operating system itself carefully talks about every step taken when you turn on your smartphone or tablet for the first time. But some users want to know in advance what awaits them. It is for such people that this article was written. She also talks in detail about those steps at which certain difficulties may still arise. Our goal is to ensure that you can easily configure the device so that its use is as comfortable as possible.
Setting up your phone is divided into two stages. The most important thing cannot be missed - it occurs when you first turn on the device and after each factory reset. The following actions are usually performed here:
- Language is selected;
- Wi-Fi network is selected;
- Turns mobile data on or off;
- Enter data from your Google account;
- The current date and time is confirmed.
Sometimes this whole thing is supplemented by entering data from other accounts - Samsung, Cyanogenmod and others. So, let's take a closer look at the initial setup process:
Step 1. Typically, setting up your phone begins with choosing a language, which is logical. You will be offered a list of languages supported by this version of the operating system, from which you need to select the one that you understand. In our case it will be Russian. After selecting it, click the " Further", which in this case is depicted as an arrow.
Step 2. Typically the next step is to connect to a Wi-Fi network. Choose the one that is home for you. You can skip this step by clicking the " Further" But it is recommended to do this only if a SIM card with connected mobile Internet is inserted into the smartphone.

Step 3. Enter the password for your home Wi-Fi network and click the button To plug».
Step 4. It is quite possible that a connection check will start next. It is possible that the device will also provide the opportunity to update the firmware. The smartphone may also offer to transfer data from another device running Android. This is done using a chip . If you don't need it, click the " Skip».

Step 5. Full use of a smartphone is impossible without creating a Google account. It is most logical to enter data from the account that you used on your previous device. If you do not have such an account yet, then click on “ Or create a new account" It is not recommended to skip this step, as otherwise the Play Market will not work.

Step 6. Enter your Gmail email address, click the button Further", after which all that remains is to enter the password, again then pressing the above button.

Step 7 Click the button Accept" By doing so, you agree to Google's privacy policy.

Step 8 Next, the system will prompt you to download the applications that were installed on your previous smartphone. To do this, select the brand of the device you used, check the programs you need (you can leave a checkmark next to the “ All applications") and click the " Further».

Step 9 The system will prompt you to activate Google services. It is recommended to leave a check mark next to all items and click the " Further».


Step 11 Wait for the download and installation of all applications that were used on your previous smartphone. This can be a very lengthy process.

At this point, the initial setup can be considered complete. It should be noted that depending on the device manufacturer, the completeness of your actions will differ. Our example concerns only the “bare” version of the operating system. If you have a device from Samsung or some other company, then you may be offered additional actions. For example, you may need to set the time and date, create an account in additional services, and activate a place in Dropbox or other cloud hosting.
Second phase
In fact, we have come to the point where a smartphone can already be used. But if you want to achieve maximum comfort, then it is better to continue adjusting. In particular, you are not going to manually enter all the contacts? Much easier transfer them from your previous smartphone, using the corresponding function from Google. How this is done is written in detail in a separate article. If you repeated all the steps described above, then the entries should have already appeared in the contact book - provided, of course, you have access to the global web.
Next, you can set up your email. The Gmail email address itself will already be entered in the settings of the corresponding application. But you may have other email addresses, including from websites "Yandex" And Mail.ru. You can also add them to the Gmail app. To do this, run the program and perform the following steps:
Step 1. Pull out the curtain with the main menu from the left edge. Or simply click on the three horizontal bars in the upper right corner.

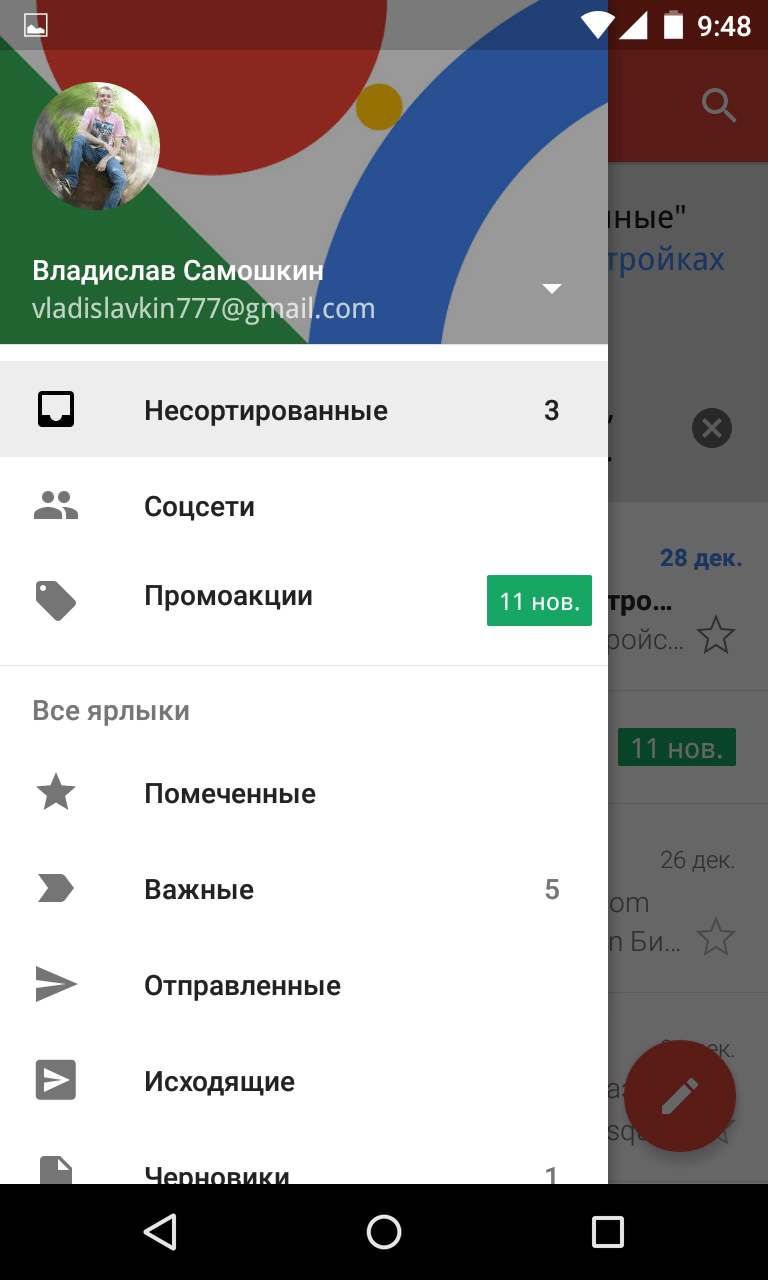
Step 2. Scroll down the list and click on " Settings».
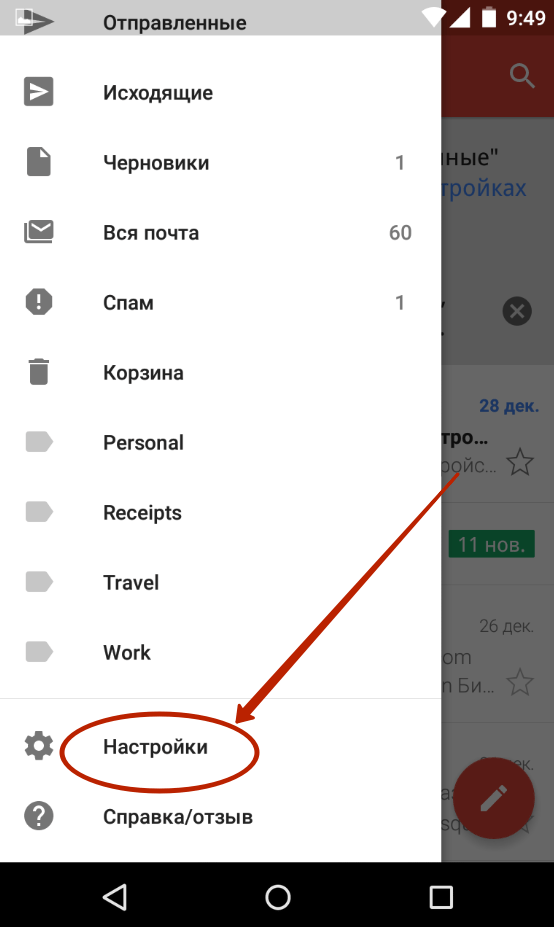
Step 3. Click on the item " Add account» and follow further instructions.

A little more detailed question mail settings on Android We looked at it in a separate guide. And we once told you about how to change the keyboard on Android. It is also recommended to do this first, because the standard keyboard may not suit you. Also pay attention to the material addressing the issue disabling T9 on Android, this is especially true for owners of very old smartphones.
Operating system management
If you have never used an Android smartphone before, you may not know what gestures are used here. Of course, the system itself will tell you about some of them at the end of the first stage of its setup. But you still only have to guess about most gestures. Or read about them below:
- Tap- simple click on the selected element. There is no need to hold your finger for a long time - the press should be once and quickly.
- Double tap- you are required to double tap on the selected element. We can say that this is analogous to double-clicking the left mouse button.
- Long tap- you need to hold your finger on the selected element for one or two seconds.
- Pinch- here you need to touch the display with two fingers and then spread them apart. Or bring them together, depending on the situation. This is a common way to zoom in and out on maps, web pages, and photos.
- Swipe- this gesture consists of swiping your finger across the screen in one direction or another. This is how most actions are performed in a mobile operating system.
As for the interface in Android, it depends on the proprietary shell used. For example, Xiaomi smartphones do not have a menu - shortcuts for all installed applications must be found on the desktop. In Samsung devices, the menu is still present, so some shortcuts from the desktop can still be removed.

Samsung Galaxy A5 desktop
The general principle of using the operating system is similar on all devices - you need to navigate the desktops or menus, tap on the application icon and use it. Quick transitions from one program to another are acceptable - for this, use the corresponding button at the bottom of the screen or even below it.
You yourself can change the interface of your smartphone. To do this, pay attention to best launchers for Android. They partially or completely change the appearance of the operating system. But you will have to pay for this with RAM - a certain amount of it will be occupied by the launcher.
Summarizing
In fact, setting up a smartphone is a vast topic. Modern devices allow you to change many parameters. But we tried to make it clear how to set up Android immediately after purchasing it. And change the wallpaper or set a ringtone It is possible after several days or even weeks of using the device.
Buying a new smartphone or tablet is a pleasant thing, but fiddling with the settings is not so much. We invite our readers to walk with us through the steps and tips on how to set up Android on a new phone or tablet.
Why set up a new smartphone for Android?
You can't just turn on the gadget and launch a game, such as Angry Birds, immediately after purchase. Unfortunately, before you experience all the delights of your device, you will have to do some steps. Especially for those who do not want to deal with the settings or have any difficulties, we describe in detail everything that needs to be done.
Many smartphones and tablets guide the user by hand while making settings. On different devices, the setup process looks different depending on the manufacturer and OS version. In general, there are no big differences; we perform all the steps described below on Android Marshmallow, the most common operating system for smartphones and tablets today.
How to set up Android on a new phone
Insert SIM card and turn it on
How to set up Android: first insert a SIM cardWe insert the SIM card into the newly purchased gadget if it supports mobile communications. If there is a removable battery, insert it and close the back panel.
We turn on the smartphone or tablet by pressing the power button, which is usually located either on the top or on the right side. You may need to charge your device before turning it on.
Choosing a language
Immediately after switching on, you will be asked to select a language. We choose the one we like. Please note that we compiled the article based on a smartphone; Sony’s creation has its own style and interface, so our screenshots may differ slightly from what you see on the screen of your gadget. And yet, the first thing you are asked to choose after turning it on on many devices is the language.
Connecting to the network and the Internet
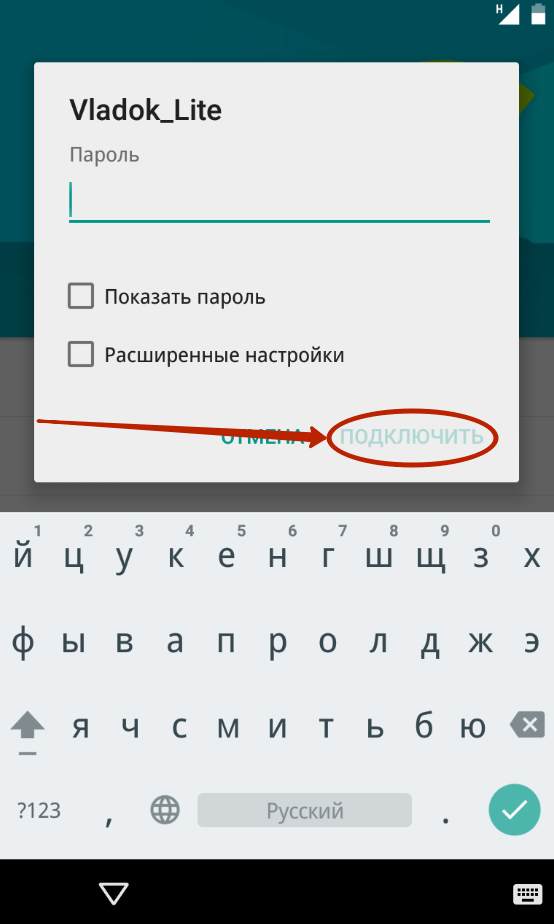
Next, we will need to decide how we will connect to the Internet: only via Wi-Fi or via a mobile network. The choice here depends on the availability of an Internet traffic package, which is usually included in the tariff plan. Those who want to go online when there is no Wi-Fi at hand will have to connect to the mobile network.
You will then be prompted to insert a SIM card, if this has not been done previously, and then select a wireless network. Select your home network from the list, enter , (the up arrow button is responsible for changing the case of letters, and if there are no numbers on the on-screen keyboard, click on the button with the numbers “123”), then click on “Connect”.
You can use a new Android smartphone or tablet without an active Internet connection, but you won’t be able to log into your Google account and access services associated with it, such as contacts and calendar notes. Well, of course, you won’t be able to download apps either.
Setting up email and social networks
After setting up the network, log into your Google account by entering your email address and password. If it doesn’t exist, we create a new one.
On some devices you will also be asked to log in to other services such as Facebook, Twitter, VKontakte, Odnoklassniki and Dropbox. You can do this now or later through the appropriate applications.
Google services and Google Play settings

Next, several options related to Google services will pop up, namely the backup and restore option, and permission to transfer data about the device’s location. Check the box next to your preferred options and click “Next”.
Then you will be asked to decide on a payment method for purchases on Google Play (to purchase applications, songs and other content on Google services). You can choose a credit/debit card or PayPal, enter your details, or to skip this step, just click on “No, thanks” (during the first purchase, you will be asked to select a payment method again). Next, select “Continue”.
Restoring programs and settings from a previous device
If you previously logged into your Google account from your old device, the data recovery option will appear. Perhaps we will choose the “Do not restore” option, since the new gadget must start from scratch, but those who want to “remember the past” need to select the device from which the data will be transferred. Please note that everything can be restored - even a game installed a year ago, which was played once and forgotten. The data transfer process will take place in the background and may take some time, the main thing is that the Wi-Fi connection does not drop out.
Owners of Nexus smartphones will be prompted to enable Google Now (this service is available on all Android smartphones, just not all of them activate it during the installation process), which provides useful information such as news, weather forecasts, sports scores, flight information and much more.
As you remember, when writing this article we did not rely on the Nexus or the Google Pixel, but the screenshot shown in the article was taken from a Nexus screen running Android Lollipop. On new versions of the OS - Android Marshmallow and the latest Android Nougat, the window view may be slightly different, but in general, during the Google Now setup process, the same question is asked. In any case, you can either enable this service or refuse its services. After that, click “Next”. You don’t have to think long about what to choose – you can always change the parameters in the device settings.
Security Settings

Many current smartphones and tablets have a fingerprint scanner, and the next screen prompts you to use it to unlock (this feature is especially useful for those who plan to use the Android Pay payment system). You can set the unlock by fingerprint, PIN or password. If you choose fingerprint unlocking, you will need to select a backup unlocking method in case the scanner starts to malfunction.
We choose to unlock the device using a fingerprint, then set either a pattern key, a PIN code, or a password as a backup option. We have chosen a PIN code. Click “Next”.
In addition to all this, you will be asked to set a PIN code, which will need to be entered every time you turn on the gadget. It's up to you to decide whether to accept or reject this option, but we think that entering a PIN code every time you turn on is an activity that can get boring very quickly. So, select “Request a PIN code when you turn on the device” or “No, thank you,” then click on “Next.”
We set a PIN code (at least four digits) that we can remember. Also, do not forget that PIN codes like “1234” and “0000” are one of the most unreliable and easiest to select. To continue, click on the arrow button.
The next screen prompts you to enter your preset PIN again to eliminate the possibility of an error. Therefore, we repeat the code again and press the same arrow key.
Setting up notifications
The next setting concerns notifications on a locked device: you can either show them completely, hide personal information, or not show them at all. If you select the first option, anyone who looks at the locked screen while receiving a message will see the sender's name and will be able to read the beginning of the message.
For those who value their privacy, it is better to select “Do not show notifications” or “Hide personal information in notifications.” On the other hand, by hiding notifications, you can miss some important message yourself. We select “Show notification in full” and click “Next”.
Setting up the fingerprint scanner
Now it's time to set up the fingerprint scanner. It is usually built into the Home button (or power button in our case) or installed on the back panel below the camera. If you can’t find it, you can turn to the user manual, look at a review of your gadget, or simply study the image on the display, which usually shows its location.
We hold the device in our hand as casually as possible, since reading the fingerprint should happen quickly, clearly and without the need to twist the finger in any special way. Then click on the scanner. To calibrate, you will need to do this procedure several times, during which you can slightly change the position of your finger so that the scanner gets as complete a fingerprint as possible. The process will be accompanied by a progress bar; once it is full, the next stage of settings will open.
On many smartphones and tablets, you can add up to five fingerprints. A useful option if you have to transfer the device from one hand to another or, say, manipulate the display with your thumb rather than your index finger.
It is also possible that another person is using the device and will also need to unlock it. But you don’t need to add all five fingerprints right now; if the need arises, you can do this later.
Update default applications

That's it: this was the last step of the initial setup, but as mentioned above, the setup process may look and proceed differently on different devices. After all that has been done, you will most likely receive a greeting from your new gadget and may receive a brief tutorial on some points, for example, how to change the screensaver, widgets and settings. It wouldn't hurt to take a look, but, of course, you can skip the process and go straight to the main screen.
First of all, it is recommended to check available updates for the gadget or. To do this, go to “Settings”, select “About smartphone” or “About tablet”, then select “System update”. To update applications, go to Google Play (its shortcut should be on the main screen), click on the icon in the form of three horizontal lines in the upper left corner, select “My applications and games” and click on the “Update all” option.
The most interesting thing is installing new applications
In “Settings” you can change the screensaver or set a different ringtone.
After sorting out the settings, you can proceed to installing different applications from Google Play. To do this, simply launch the application store, enter the name of the application or game into the search (for example, Clash of Clans or farm), find it and click on the “Install” button. Next will be a request for access to some user data, after accepting which the installation process will begin in the background.
One of the most interesting places in your smartphone's settings is the "Developer Options" menu. By default it is hidden, but this can be easily fixed. Open Android settings, then go to the about phone section. Tap on the “Build number” line seven times and you will be notified that you are now a developer.

As a result of these manipulations, a new section “For Developers” will appear in the settings. Go into it and find the option “Enable 4x MSAA”. Activating it will allow you to achieve better rendering and, as a result, a better picture in . Just keep in mind that this only works on powerful modern devices that can handle detailed graphics.
View notification history
If you inadvertently brushed off an important notification before you even had time to read it, know that Android has a special storage for notifications. Getting to it is not at all difficult.


Open the add widgets menu and find the “Settings Shortcut” item. Drag it to your desktop and select “Notification Log” from the menu that appears. Using this widget, you can open the archive of notifications at any time and view the ones you need.
Removing unnecessary icons in the status bar
In Android Marshmallow, in the settings you can activate the System UI Tuner section, which contains options for changing the system interface. To do this, you need to open the top curtain and hold the gear icon for a few seconds. After this, a new section with the options we need will appear in the Android settings.


Open System UI Tuner and go to status bar options. Here you can disable icons that you do not want to appear in the status bar. In the same place there is an option that activates the display of the charge percentage on the battery icon.
Activating night mode
Google has long promised to introduce a special night mode in Android that protects our eyes from the glow of the screen when reading in the dark. It appeared in the new version of Android, but, unfortunately, is disabled for now. However, this problem can be easily solved using a free utility.


The program has only one function: to activate the night mode hidden in Android 7.0. After applying it, a red filter enable tile will appear in the quick settings menu, and detailed settings for the night mode will appear in the System UI Tuner described above.
What little-known Android settings can you recommend?