Working with layers is one of the most powerful features of Photoshop. No serious retouching is complete without working with layers.
Layer blend modes are a large and complex topic. In this article, you can familiarize yourself with layer blending modes and their descriptions. The article will primarily be of interest to beginners and those who have just started studying the topic of layers in Photoshop, it will also be useful as a cheat sheet on blending modes.
First, let's take a look at the layers panel.

Above the layers there is a menu for choosing the blending mode, opacity and filling (Fill).
Note. I am often asked the question - how does Opacity differ from Fill. The answer is that Fill only affects the transparency of the layer's pixels, while Opacity affects the opacity of the pixels and layer effects.
- Lock transparent areas - you can only change areas filled with pixels.
- Lock Image Pixels - Prevents the pixels from changing with the painting tools.
- Lock Position - Prevents pixels from moving.
- Lock the entire layer.
Bottom of the panel:
- Creating a link between layers - you can link two or more layers or groups to each other. Unlike selecting multiple layers, linked layers retain their link until you unlink it.
- Applying effects to layers - opens a selection of effects and their control.
- Adding a mask to a layer - creates a regular, white mask, and if you hold down Alt and press the button, an opaque mask is created.
- Creating an adjustment layer - as opposed to a normal adjustment, say Curves - an adjustment layer can be modified at any time.
- Creating a folder for layers is very convenient when working with a large number of layers, to group them.
- Creation of a new layer.
- Removing a layer.
Now let's go directly to the layer blending modes.
Layer blending modes
Initially, we have such a landscape picture. At the top we have a layer with 50% opacity, below we have two layers with 100% opacity. Two opaque so that you can see the difference between the sky and grass.

Basic - Basic group

Normal - The pixels on the top layer are opaque and therefore cover the bottom layer. Changing the transparency of the top layer will make it semi-transparent and blend in with another layer.

Dissolve - Combines the top layer with the bottom using a pixel pattern. There will be no effect if the top layer is at 100% opacity. Reduce the opacity to show the effect.
Darken - Blackout group

Darken - Compares two sources and replaces the light pixel values \u200b\u200bwith the dark ones.

Multiply - Darkens the entire image. Useful when you need to increase the density of highlights and midtones. Multiply is like viewing two overlaid slides on the inside. If the top layer is white, there will be no changes.

Color burn - Produces a darker image with increased contrast. If the top layer is white, there will be no changes.

Linear burn - Stronger combination of Multiply and Color Burn blending modes, dark pixels are converted to black. If the top layer is white, there will be no changes.

Darker color - Similar to Darken mode, except that it works on all layers at once, not just one. When you blend the two layers, only the dark pixels remain visible.
Lighten - Lighten group

Lighten - The opposite of Darken, darkens dark pixels with lighter ones.

Screen - Brightens the entire image. Use it to lighten dark areas of an image, as well as to bring out detail in underexposed images.

Color dodge - The effect of the Color Dodge mode is similar to Screen, but noticeably stronger in the lighter areas due to the development of more saturated and contrasting colors of the lower layer. Based on the work of the Dodge Tool, which simulates underexposure in the photographic process.

Linear Dodge (Add) - Combination of Screen and Color Dodge modes; light values \u200b\u200bare converted to white. If the top layer is black, there will be no effect.

Lighter Color - Compares the values \u200b\u200bof all channels of both layers and displays the lighter pixels.
Contrast - Contrast increasing group

Overlay - Darkens dark pixels (Multiply) and lightens (Screen) bright ones, which leads to increased contrast without clipping shadows and highlights. If the top layer is 50% gray, there will be no effect.

Soft light - A combination of Dodge mode, which lightens light pixels, and Burn mode, which darkens dark pixels. Increases contrast slightly less than Overlay and Hard Light modes. If the top layer is 50% gray, there will be no effect.

Hard light - Uses the same method as the Overlay mode, but the effect is stronger. If the top layer is lighter than 50% gray, then the top layer is lightened through Screen, and if it is darker, then it is darkened through Multiply. If the top layer is 50% gray, there will be no effect.

Vivid light - If the top layer is lighter than 50% gray, then the top layer is lightened by reducing the contrast (Color Burn), and if it is darker, then it is darkened by increasing the contrast (Color Dodge). If the top layer is 50% gray, there will be no effect.

Linear light - Similar to Vivid Light mode. If the top layer is lighter than 50% gray, then the top layer is lightened by increasing the brightness (Linear Burn), and if it is darker, then it is darkened by decreasing the brightness (Linear Dodge). If the top layer is 50% gray, there will be no effect.

Pin light - Combines Darken and Lighten modes to replace pixel values. If the top layer is lighter than 50% gray, the pixels are lightened through the Lighten mode, and if it is darker than 50% gray - the Darken mode is darkened. If the top layer is 50% gray, there will be no effect.

Hard mix - Lightens bright pixels and darkens dark pixels to threshold values. This leads to extreme posterization. The glow of the upper layer is blended with the color of the lower one.
Comparative - comparison group

Difference - Represents identical pixels as black, similar pixels as dark gray, and opposite pixels as inverted. If the top layer is black, there will be no changes. A practical application of this mode can be seen in the article.

Exclusion - Similar to Difference, but with lower contrast. Blending on black does not change anything, while blending on white pixels inverts the compared values, rendering them gray.
HSL - Image Component Group

Hue - Combines the Luminance and Saturation of the lower layer with the Hue of the upper one.

Saturation - Combines the Luminance and Hue of the bottom layer with the Saturation of the top layer.

Color - Combines the hue and saturation of the upper layer and the luminance of the lower layer.

Luminosity - Opposite to Color mode. Combines the Luminance of the upper layer and the Hue and Saturation of the lower layer.
This article will give you an overview of blending modes. Blending modes are used for various purposes, for example, to blend an object into the background, apply texture, or tint an image. When using blend modes, layers begin to interact with each other, you can also change the opacity and fill of a layer, which results in an interesting effect. Many people simply run the layer through all modes in search of the best option. Of course, it will be much more convenient, at least a little to understand these modes and understand what each of them is for.
When we set the blend mode, the layer that we changed the mode starts to interact with the one below it. Now let's take a look at the different blend modes, which are divided into groups by horizontal lines.
1. Basic modes (Basic)
Normal
Already from the name of this mode it becomes clear that this is the normal state of the layer. There is no interaction between layers (active and subordinate). The pixels of the underlying layer are completely replaced at 100% opacity.
Dissolve
At 100% opacity, the top layer completely overlaps the bottom layer, just like in the Normal... And when lowering the opacity, this mode randomly removes some pixels of the active layer, which gives the effect of porosity or noise. For example, we have a chalk effect with an opacity of 70%:

2. Dimming modes (Darken)
In the entire Dimming group, white is ignored.

Darken
This mode only reveals the darker shades of the top layer on the bottom. It is used to overlay one layer on top of another. If you want to darken, then it is better to use the next mode in the list - Multiplication.
Multiplication
This is one of the most common modes. It overlays the colors of the upper layer with the colors of the lower one. The color becomes thicker, from this the image darkens. This mode can be used to restore very light photos by duplicating the base layer and setting the top layer to Multiplication.
Darkening base (Color burn)
By enhancing saturation and contrast, this mode has a powerful effect. It also darkens a little, be careful with this mode, as colors take on an unnatural look with it, and your printer will not be able to display them correctly.
Linear burn
This mode darkens the bottom layer to show the color of the top layer by decreasing the brightness.
Darker color
Here, only pixels that are darker than the pixels of the lower layer remain visible.
3. Lightening modes
Black is ignored when using Dodge modes. With these modes, you can remove the black background, leaving other colors untouched, and for overlaying textures on a black background.

Replace with light (Lighten)
With this mode, we get the opposite action to the mode Darken... Reveals bright pixels.
Screen
This mode performs the same calculations as the mode Multiplicationbut uses the inverted values \u200b\u200bto show the end result. This mode brightens the image. It can be used to lighten dark photos by duplicating and setting the top layer to this mode.
Color dodge
Similar to the regime Screen, but the black on the top layer does not affect the result, and the other colors will light up the lower ones slightly, by increasing the saturation and decreasing the contrast to find a suitable tone. Good for strong effects.
Linear Dodge (Add)
The colors are combined here by increasing the brightness, the lighter colors are replaced by lighter ones. It is a combination of modes Screen and Color Dodge.
Lighter Color
Only pixels that are lighter than the pixels in the lower layer remain visible.
4. Contrast modes
For all modes in this group, the ignored color is 50% gray (except for the Hard displacement (Hard Mix)).

Overlay
This mode evenly blends the colors of both layers, lends itself well to changes in transparency. It filters out the light parts and multiplies the dark ones. With a low transparency level, it is similar to the Normalbut with more intense colors. Good for texture mapping.
Soft light
This mode lightens and darkens the colors in the image based on the color of the top layer. This is almost the same as a diffuse light filter. Good for adjusting tones, enhancing contrast in images with low contrast, and lowering opacity will give an even more sophisticated effect.
Hard light
Similar to the previous mode. Almost never used, since Soft light more controlled. It will darken the image if it is dark at the top, lighten if it is light, and increase the contrast.
Vivid Light
This mode darkens or lightens the colors in the image depending on what the colors are on the top layer. It seems that different contrast values \u200b\u200bhave been added to the image.
Linear light
If the top layer is bright, then the bottom layer will lighten, if dark, then darken.
Pin light
With this mode you can get different results, it works by moving the colors in the image depending on whether the light or dark colors are on the active layer.
Hard Mix
Gives a similar result, blends the brightness of the upper layer with the color of the lower one, contrast is at maximum here. The result is a very bright image, and in large pieces. Creates a posterized image limited in colors.
5. Comparative modes
The resulting image directly depends on the difference between the two layers.

Difference
Suitable for creating various effects. It reverses tones and colors, the brightness here depends on the pixel difference.
Exclusion
A softer version of the regime Difference, the contrast is small. Typically used for toning an image by overlaying a solid color and drastically reducing the opacity.
Subtract
The brightness of the upper layer is subtracted from the lower one. When the brightness of a pixel on the top layer is greater than or equal to that of the bottom layer, the resulting color changes to black.
Divide
Similar to the previous mode, only with stronger lighting.
6. Component Modes (HSL)
The result depends on the brightness and color of the layers. These modes are commonly used for toning and recoloring objects in an image.

Hue
Here, the colors of the upper layer are blended with the saturation and brightness of the lower layer. This has a strong effect. An alternative mode is Color.
Saturation
With this mode, the saturation levels of the lower layer are changed to the corresponding pixels of the upper layer. Useful for making an object take on the color or texture of another.
Color
Here only the brightness of the bottom layer is used, and the color and saturation come from the top layer. Suitable for repainting images.
Luminosity
Only the brightness of the light remains from the top layer, and the color and saturation come from the bottom layer. If this mode does not work, try another of the 3 above.
Now, to consolidate the material, I advise you to conduct your own experiment, so you will quickly understand the properties of each mode and see if the definitions of the modes are similar to your result or not.
See you in the next lesson!
The blend mode in Photoshop is just an amazing feature of the program. This feature should become a must-have part of your toolbox.
Where can I find the blend modes?
One of the main reasons blending modes are not popular is their location. They are located right in the layers palette.
They are easy to miss, although they are always right in front of your eyes. Just select the layer and then the desired mode.
All blend modes in Photoshop can be conditionally divided into several groups in accordance with how they are located in the drop-down menu. Each group is separated from each other by a separator. So, there are the following groups: darkening, lightening, saturation, subtraction and color.

Now that you know what a particular group of modes means, it is much easier to understand when and why to use each of them.
Applying blend modes
Blending modes have a wide range of uses that might seem overkill along with some of the filters available in Photoshop. The example below shows how you can use blend modes to create a tint:

Instead of using a Hue / Saturation filter or other filter, we can apply blending modes to create the desired hues. You can use the arrow keys to view all the options, or select the one you want right away.
Blending modes are not customizable elements, i.e. they cannot be edited. But this is not required! The intensity of the effect from one mode or another can be adjusted by filling ("Fill") and opacity ("Color").
Other uses for blending modes
It is also possible to blend multiple layers to get amazing effects. To show this, examples are given below.
Using, for example, the "Hard Light" blending mode and changing the "Opacity" parameter, you can get some pretty interesting effects with the ability to endlessly edit them.

Plus, blend modes can be stacked! Below is an example from the 3 previous layers.

The possibilities for using the blend modes are endless. They give much more flexibility than using static effects such as Нue / Saturаtion, for example, to get the same toning effect or something else. Try to play around with the blend modes and find what works best for the moment.
Examples of
Using photography and textures, we'll show examples of how each mode works.
Remember that the texture in the layers palette must be directly above the main image. The opacity is either 100% or 50%.

Texture:

More on blending modes
Now let's take a look at each Blend Mode individually and learn a little more about them!
Normal ( Normal) 50%
Uses the blending percentage of layers. 100% uses the blended image entirely, and 0% means it is not used at all.

Attenuation ( Dissolve) 50%
An arbitrary pixel is selected from the superimposed image and added to the base one. As in normal mode, 100% is used completely overlay and 0% that it is not used at all.

Blackout ( Darken)
The superimposed image is compared with the base image and is selected depending on which pixel is darker.

Multiplication ( Multiply)
It receives information from each pixel, multiplies 8-bit color values \u200b\u200bin each of the channels (RGB) and divides by 255. As a result, the color will always be darker, except for white: (0 X 0) / 0 \u003d 0.

Shading base ( Color burn)
Takes the value of the 8-bit color of each channel of the base layer and divides by the overlay. The result is a higher contrast image, generally darker.

Linear Burn
Adds two 8-bit color values \u200b\u200bper channel divides by 255, resulting in dark areas being much darker and lighter areas getting higher contrast.

Darker ( Darker Color) 50%
Instead of using an 8-bit value for each channel, all channels are used and the dark values \u200b\u200bare stored.

The mode is the opposite of the previous one, it keeps only the light pixel of each layer.

Flips the image multiple times and the overlay is multiplied by the base layer.

Lightening the base ( Color dodge)
Divides the base layer into an inverted overlay.

Adds an 8-bit color to the value channel from each layer. Comparable to the effect of Screen mode, but with a higher contrast effect. If the base layer is black, there will be no changes.

Works like Light Replace mode, but looks at all channels.

Uses a combination of Screen and Multiply modes, while increasing the contrast of the image.

Similar to the Overlay mode, but with less contrast.

Similar to the Overlay mode, but with greater contrast.

Combines the Color Dodge and Color Burn modes and uses the overlay as a reference.

Similar to High Light mode, but with higher contrast.

Combines the pixels of the overlay image using the Light Replace mode, and the dark pixels of the base image using the Shade mode.

The brightness of the overlay is added to the base color.

Displays the tonal difference between the blended layers, removing light pixels from any layer.

This layer blend mode is a softer version of the Difference mode.

Subtracts 8-bit color values \u200b\u200bfor each channel of each pixel of each layer. In case of a negative result, he shows it in black.

Divides the 8-bit color value of each layer by each other.

Uses the hue of each pixel in the overlay, but preserves the hue, saturation, and luminance of the base.

Retains the brightness and hue of the base layer, but uses the saturation of the overlay.


Uses the color of the base layer and the brightness and saturation of the overlay.
Preserves the chroma and hue of the base layer and applies the luminance of the overlay.

We've covered all of the blending modes in Photoshop. I hope this tutorial was useful to you!
We found out, now it's time to explore the blend modes of layers in Photoshop. First, let's figure out what it is and what it is eaten with.
From English "blending modes" translates as Blending Modes and if translated strictly according to the dictionary, then in Russian it will sound like "blending modes". Some lessons use this translation option. Essentially, blending modes are blending of the layer above with the layer below. The blending mode you choose determines how much the layers interact with each other.
Layer blending modes are used for many purposes: blending an object into the background, shading, texture mapping, and more. By changing the modes and adjusting the opacity and fill of a layer, you can achieve interesting effects.
Where are the blend modes in Photoshop?
A drop-down list with layer blending modes is in the upper left part of the layers panel :

At the moment, Photoshop exists 27 blending modes (in earlier versions of Program 25), they are divided into six groups using horizontal lines:

1. Basic modes (Basic)
2. Dimming modes (Darken)
3. Lightening modes
4. Contrast modes
5. Comparative modes
6. Component Modes (HSL)
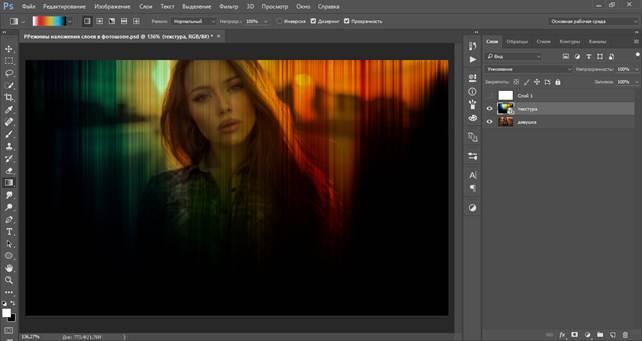
Let's move from theory to practice and, using the example of a photo of a girl and a texture, try to tone the image. I warn you right away that when using some blending modes the result will be, to put it mildly, not pleasing to the eye, but we remember that we can always lower the opacity and / or fill to reduce the effect.
Basic modes (Basic)
Basic modes (Basic) - completely replace the pixels of the underlying layer.
Let's open a photo with a girl in Photoshop, File-Open (File— Open) ... Place a bright texture File-Place (File— Place).
This is what the working canvas looks like at the moment:

By default, all new layers and placed files have Normal.
Blending Mode Normal ) the most commonly used mode. When 100% opacity the upper layer completely overlaps the lower one, when the opacity decreases, the lower layer becomes partially visible.
100% opacity:

50% Opacity:

Blending Mode Dissolve
When 100% opacity the upper layer completely overlaps the lower one, as in the mode Normal, but when the opacity is lowered, some of the pixels of the upper layer in a random order lose their opacity and this allows you to see the lower layer.
100% opacity:

50% Opacity:

Dimming modes (Darken)
Blackout modes (Darken) - darken the underlying layer. White areas of the overlying layer have no effect, they become invisible.
Blending Mode Darken
The values \u200b\u200bof both layers in each channel are compared and if the pixel of the upper layer is lighter than that of the lower one, it is replaced with a dark one from the lower layer, as a result, the darkest parts of both layers remain visible.

White as in the whole group Dimming modesis ignored. Let's turn off the visibility of the texture layer for a while (by clicking on the "eye" in layer panels) and create a new layer filled with white. Change to Dimming (Darken):

As you can see, nothing has changed, the bottom layer is completely visible, its color, contrast, brightness have not changed, and the top white layer "disappeared", thanks to the blending mode Darken... Looking ahead, I will note once again that this will happen if you change layer blend mode with white to any of the group Dimming modes.
Blending mode Multiplication (Multiply)
Multiplies the colors of the upper and lower layers and darkens the image. Multiply mode often used to darken light areas in a blown out image.
Blending Mode Color Burn
Increases the saturation of medium colors, giving a stronger darkening than the previous one.

Blending Mode Linear Burn
Uses the same principle of operation as base shade mode,but has a stronger darkening effect.

Blending mode Darker color
Has similarities with darken mode, only the colors are compared channel by channel, as a result, only pixels that are darker than the pixels of the lower layer remain visible.

Lightening modes
Lightening modes - lighten the underlying layer. The black color when used Brightening modes becomes "invisible". Lightening modes are often used to blend textures on a black background, with these modes you can easily and easily remove the black background, leaving other colors intact.
Blending mode Lighten
Opposite to the regime Blackout). Compares the colors on a channel-by-channel basis, and if the pixels of the upper layer are lighter than the pixels of the lower, they remain unchanged. In case the pixels of the upper layer are darker than the pixels of the lower one, they are replaced by the pixels of the lower one.

In a group Brightening modes ignored color - the black... Our texture has a black color, but for the purity of the experiment, let's check. Fill a new layer black color and change the blending mode to one of the highlights group modes:

Black is completely invisible.
Blending Mode Screen
The principle of operation is the opposite mode Multiplication (Multiply), it multiplies the colors of the upper and lower layers, brightening the image. The mode can be used to brighten dark photos.

Blending Mode Color Dodge
Its effect is the opposite mode Blackout base (Color Burn). Colors fade, midtones are saturated. The mode is used to give a glow effect.

Blending mode Linear Dodge (Add)
Combined with modes Screen) and Lightening the base (Color Dodge).Light colors are replaced by lighter, almost white ones. 
Blending mode Lighter (Lighter Color)
Compares the value of both layers on all channels, leaving lighter pixels in the resulting image.

Contrast modes - increase the contrast of the underlying layer. For all modes of this group except for the mode Hard displacement (Hard Mix) ignored (invisible) colour – 50% gray.Check again by filling a new layer 50% gray

Blending mode Overlay (Overlay) - brightens light areas and darkens dark areas, increases the contrast of the resulting image.

Blending Mode Soft Light
Similar to the previous mode, but with a softer effect. Ideal for enhancing contrast in low-contrast images due to the fact that colors and shadows are not knocked out.

Blending Mode Hard Light
The algorithm of actions is similar with Soft Light modes and Overlay,but the effect is stronger. The contrast is increased very strongly.

Blend Mode Vivid Light
Combined with color Burn modesand Lightening the base (Color Dodge). Has a stronger effect than Hard Light.

Blending Mode Linear Light (Linear light)
Combined with modes Linear Burn and Linear Dodge.The contrast of the light areas decreases and the contrast of the dark areas increases. It has opposite properties to the previous mode, but at the same time is very similar to it.

Blending Mode Pin Light
Includes modes Darkenand Replacement with light (Lighten). Blends light pixels using the first mode and dark pixels using the second mode.

Blending Mode Hard Mix
Blends the brightness of the upper layer with the color of the lower one. Creates a posterized image limited in colors.

Comparative modes - the resulting image directly depends on the difference between both layers.
Blending mode Difference )
Compares the brightness value of both layers. Blending with white inverts the base color values; blending with black does not change anything.

Blend Mode Exclusion
The action is similar to the previous layer, but with a softer effect and less contrast. Blending with white inverts the base color values; blending with black does not change anything. Often used for toning an image by overlaying a solid color and dramatically reducing the opacity.

Blending mode Subtract
The luminance value of the overlying layer is subtracted from the underlying layer. If the pixel brightness of the upper layer is greater than or equal to that of the lower layer, the resulting color will change to black.

Blending mode Divide
Similar to the previous mode, but with stronger lighting. Due to the fact that the mode works per channel, the colors are greatly distorted.

Component Modes (HSL)
Component Modes (HSL) - the result depends on the brightness and color of the layers. Modes in this group are often used for toning a photo or recoloring objects in an image.
Blending mode Hue
The resulting image has the hue of the overlying layer, and the saturation and brightness of the underlying. Gives the effect of drawing with watercolors.

Blending mode Saturation
The resulting image has the saturation of the overlying layer, and the hue and lightness of the underlying.

Blending mode Color
Maintains the hue and saturation of the upper layer and the brightness of the lower one. The lower layer is "recolored" in the colors of the upper one. This mode is great for changing the color in an image.

Blending mode Luminosity
The opposite of the previous mode. The hue and saturation of the lower layer and the brightness of the upper layer are preserved.

So we figured out the layer blending modes in Photoshop. The theoretical part is certainly good, but I still recommend that you experiment with blending modes and observe their interaction. This way you will quickly memorize the properties of each mode, and also find your favorites among the blending modes, which will become your faithful assistants in creating beautiful works.
Greetings, readers of the site. Today we will talk about blending modes in photoshop (sometimes referred to as blend modes). I assume you have already familiarized yourself with what it is. If not, then I advise you to read about the blending modes in Photoshop in the tutorial.
Yes, this is the same Blend Mode that I repeat about in almost every Photoshop tutorial. The blending modes are located in the layers panel, here:

However, their sphere of influence is not limited to this, and find the blending modes also possible in layer styles:

The Photoshop user is free to choose from 27 blending modes:
As you can see, all modes are divided into 6 groups, according to the principle of influencing the lower pixels: standard modes, dimming, lightening, contrast modes, comparison modes and color modes.
Let us now dwell on each group in more detail.
For each blending mode, I will give an explanation, as well as a visual illustration in the form of overlaying this texture here:

To this image:

Standard Modes
Normal (Usual). This mode is the default and has no specific blending options.
Dissolve (Dissolution). "Dissolves" the current layer, i.e. removes some of the pixels in a random order, resulting in a scattering effect. To see this mode in action, you need to lower the layer's opacity:

Dimming modes
The blend modes of this group darken the image, as well as, the white pixels become transparent.
Darken (Replace with dark) - Compares the brightness of the pixels of the current layer, and the pixels of the layer that is located below. All pixels on the current layer that are darker than those below remain, while the rest become transparent.

Multiply (Multiplication) - The name speaks for itself, this blending mode makes intersecting colors 2 times darker. It is usually used to darken a very light image or to add depth.

Color burn (Color Darken) - Same effect as Multiply, but increases the saturation of the image.

Linear burn (Linear Blackout) - Similar to Multiply, except that it darkens intersecting points more than twice.

Darker color (Darker Color) - Compares all color channels, emphasizing the base and composite colors, and then displays the color with the lowest value.

Lightening modes
Blending modes in this group lighten the image and replace black pixels with transparent ones.
Lighten (Replace with light) - Works directly opposite to the Darken mode, that is, it leaves those pixels of the current layer that are lighter, and removes the rest.

Screen (Screen) - Makes overlapping colors 2 times lighter. One of the use cases is to lighten the photos (duplicate the layer with the photo, and apply this blending mode)

Color dodge (Dodge Base) - Makes the blacks invisible, and the rest of the colors lighten the image on the layer below. Increases the saturation of the image.

Linear Dodge (Add) (Linear Base) - Same as Color Dodge, only increases brightness, not saturation.

Lighten Color (Lighter color) - Opposite to Darker Color (displays the color with the highest value).

Contrast modes
The blending modes of this group take into account both light and dark pixels, unlike the previous two. And the modes of this group work with image contrast.
Overlay (Overlay) - Blends pixels on the current and bottom layers, removes highlights, and multiplies dark ones.

Soft light (Soft light) - Darkens or lightens the color on the lower layer, depending on the current color.

Hard light (Hard light) - Similar to the previous one, but the effect is stronger. Darkens the lower colors if the current layer is dark, and lightens if it is light.

Vivid light (Bright Light) - Almost the same as Soft Light, but adjusts the contrast value.

Linear light (Linear Light) - Depending on the color of the current layer, it strongly overexposes or darkens the image. Can be used to simulate image flare.

Pin light (Point light) - Depending on what colors (dark or light) are on the active layer, moves the colors on the layer below.

Hard mix (Hard mix) - Blending in brightness, the output is a very bright image 🙂

Compare modes
Difference(Difference) - Blends the top and bottom images on top of each other. The colors are reversed and their brightness depends on the difference.

Exclusion(Exception) - Same as Difference, but much less contrast.

Subtract(Subtraction) - Subtracts 8-bit colors from the base channels of each pixel on each layer. If the result is negative, black is displayed.

Divide(Divide) - Divides the colors of the top and bottom images.

Color modes
This group of Photoshop blending modes allows you to blend just one parameter (such as color or brightness) without touching the others.
Hue (Hue) - Superimposes the bottom layer with the hue of the top layer, leaving all other parameters of the bottom layer untouched.

Saturaion (Saturation) - Same, only for saturation,

Color (Color) - the same for color,

Luminosity (Brightness) - and for brightness.

In general, blend modes give immeasurably more freedom and flexibility when working with images in photoshop than simply changing parameters. And when combined with Layer Styles and Masks, this is perhaps the most powerful tool for creating stunning effects.
We have considered all mixing modes layers in photoshopI hope this photoshop tutorial was useful for you, do not forget to leave comments. With this, I wish you success, and say goodbye to another meeting in the next lesson.


