Open Broadcaster Software hereinafter (OBS) is an open source program. Its purpose is to broadcast various multimedia information to the Internet. At the time of publication, there are 2 versions OBS Studio and OBS Classic, in short we can say that OBS Studio developed by developers, and OBS Classic now not supported and of course it is better to give preference OBS Studio.
This program is not the only one of its kind, however, it compares favorably with analogues. The thing is that OBS is quite easy to use and has only a few tools that allow you to concentrate on the main task and not waste your time studying many settings. With the help of the options that the program has, you can adjust the quality of video and sound transmitted to the Internet, set the screen resolution, assign a URL and carry out many other manipulations. In the event that the material will be used more than once, it can be saved on the hard disk of the computer. Another important advantage of OBS is that an interrupted broadcast can be resumed using a special option.
As mentioned above, the program compares favorably with its counterparts. So, for example, unlike Xsplit, it provides a better quality of content that is broadcast, and also creates less load on the operating system. Thanks to open source, absolutely anyone can take part in the development and improvement of OBS. Program updates are regularly posted on the developer's twitter. Supported features include:
- Encoding with H264 (x264) and AAC.
- QSV and NVIDIA NVENC support.
- Unlimited scenes and sources.
- Live RTMP streaming to Twitch, YouTube, Dailymotion, and many other services.
- Output file in MP4 or FLV.
- GPU support for capturing games for high performance streaming video.
- Support for capturing DirectShow devices (webcams, capture cards, etc.).
- Bilinear or Lanczos3 resampling.
How much is it?
OBS is completely free to download and install! No subscription or license, no fees at all. OBS is available to everyone, with source code, and publicly available on GitHub for those who can contribute. You can donate to the project to support the development efforts of the developers on the project website.
Plugins
OBS has an API that allows developers to create their own unique plugins, giving them complete control over their experiences. Some popular plugins include: Simple Scene Switch, Video Source, Browser Source ... and more!
Open Broadcaster Software (OBS studio for short) is a special software for creating videos and live broadcasts (streams) on the Internet. OBS is open source and free. Anyone can download it from the official website obsproject.com.
In this article, we will explain in detail how to download and install Open Broadcaster Software on your computer. We will also take a closer look at how to use it and set up OBS studio to create videos and streams on twitch.tv and YouTube. Thanks to the step-by-step instructions, you can independently create streams for broadcasting games to Twitch and YouTube services, as well as simply record videos from your screen.
- You can download Open Broadcaster Software for free from the official website obsproject.com.
- In the middle of the screen, you will see a large green "Download" button, click on it.

- There will be 3 versions of the program: for Windows 7+, Mac OS 10.10 and Linux. If your PC is running Windows, then click on the button labeled "Windows 7+".

- The archive with the OBS studio program will start downloading, it takes up 98 MB. Wait for the download file to download to your computer.

- If you are using the Google Chrome browser, the file will be located in the Downloads folder. Go into it, find the OBS-Studio-20.1.3-Full-Installer.exe file and click on it 2 times for the program to start the installation.

- A dialog box will appear, click “Next” to continue.

- Then a window with a license agreement will appear, you must click "I agree".

- In the next step, we indicate the path for installing the programs, here you can not change anything, but agree with the default address, it will be drive C. Click on the "Next" button.

- Now you need to select the components for installation, specify as in the picture and confirm "Install".

- The OBS studio program will begin to install, wait until the complete installation is complete, usually it takes 1-2 minutes.

- After that, a window will appear confirming the completion of the installation of the program. To start using it right now, click "Finish" and leave a checkmark in the "Run OBS Studio" item.

- After that, the program will automatically start on the computer, and such a shortcut will also appear on the desktop, with which you can launch the program in the future.

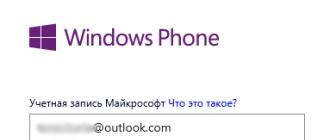
- When you start OBS studio for the first time, you need to give your consent to the license agreement, it will look like this, click "OK".

- After starting the program, the main window will look like this.

- Now you can go to the settings: fully record video, start live broadcasts using Twitch and YouTube services.
How to set up OBS studio for video recording

Setting up OBS for streaming
In addition to the usual screen recording, OBS studio allows you to make live broadcasts (streams). Most often, streams are in demand for broadcasting various games on the Internet. With OBS, you can stream the game directly to viewers from your computer screen.
To conduct live broadcasts, only OBS software is not enough, you must additionally use special services for organizing video broadcasts. The most popular streaming sites are twitch.tv and YouTube. Let's take a closer look at the OBS settings for each service.
Setting up OBS for Twich Stream
In the top horizontal menu of the OBS studio program, select the "Settings" item. A drop-down menu will appear, in which you must also select the "Settings" item. 
General- select a language and set a name for the profile. The profile name will be further linked to certain settings. In the future, for streaming, it will be enough to select a specific profile and get the automatically made settings. For streams, you can create different profiles with different settings. To save the changes, click on the "Apply" button at the bottom of the screen. 
Coding- the main item "Maximum bitrate", the indicator in it depends on the quality of your Internet. To set the bitrate correctly, you need to use the speedtest.net website. Set the speed unit "Kilobits" at the very bottom of the page. 
The service will determine the quality and speed of your Internet and will give you the result. Of all the parameters, only one is needed - this is the "baud rate". 
It is this figure that must be entered in the "Maximum bitrate" item in OBS. To save the changes, click on "Apply". 
Broadcast- select "Live" and set the servers for the stream. It is better to choose the ones that are closest to your location. If you live in the European part of Russia, you can choose Prague, London or Stockholm. 
In the “Stream Key” box, paste your Twitch key and click “Apply” at the bottom of the screen. Where to get and how to copy. 
Video- select a video card. If you have only 1 video card, then it will be installed by default. The base resolution can be set based on the size of the monitor. Scale resolution - at this point we specify the resolution that viewers will see during the stream. You can leave it unchanged, leaving your screen resolution the same. Click "Apply" and move on to the next item. 
Audio- on this page, we leave almost everything by default. If viewers complain about the lack of word endings, then the delay can be increased from 200 to 400. 
Extended- here you need to change the buffering time, set 400 and click "Apply". 
It is not necessary to touch the rest of the tabs, to complete setting the settings, click "OK" at the bottom of the screen. Everything is ready and now you can go directly to the start of the stream on Twitch.
If you want to conduct several different types of streams, for example, stream different games, then you need to create a separate scene for each game. To do this, in the "Scenes" item, add a new one by clicking on the "+". Come up with a name for the new scene and save it. 
Now you need to create a source. To do this, add a source for this scene in the Sources section. Click in the window with the right mouse button and select "Add scene". Come up with a name and click "OK". After that, one or two prices will appear, for each of them you can later set different sources. Thus, switching between scenes, you can conduct live broadcasts for different games, using different sources. 
From the proposed list, select the "Game" item, enter the name of the game and click "OK".
Next, you need to expand the "Application" item and select the required game from the list. 
In order for the game to appear on the list, it must first be launched on a computer. Until the game is running, it will not appear in the list of applications. Start the game on your computer and click on the "Refresh" button.
The game appears in the list, select it and click "OK" at the bottom of the screen.  The game should now appear in the Sources section.
Before you start broadcasting on Twitch, click on "Preview". 
A picture of the screen will appear, which the viewers of your stream will look like. While watching, you can check if the microphone is working well and the sound quality. 
To start live streaming, click Start Stream. 
After that, the data from OBS studio will go to Twitch and the stream will be available for viewing. To see with your own eyes how the stream will look, open your personal account on twitch.tv in a separate browser window. Make sure the live stream is up and running. 
Setting up OBS for YouTube Stream
- Open the Open Broadcaster Software on your computer.
- In the top menu, go to the "Settings" section and select the "Settings" item.
- A screen with additional tabs will appear, following them you need to make the following changes.
- Coding- you need to install the encoder (it is best to specify Nvidia) and the maximum bitrate. You can make basic settings according to the photo below.

- Broadcast- select the "Live" mode and the "YouTube" broadcasting service. In the “Stream Key” column, you need to insert a special code - you can copy it in the “Stream name” line in the YouTube broadcast settings.

- To do this, you need to create a YouTube live stream in advance to get a stream link for the OBS studio. The stream name for each YouTube broadcast is different each time. Therefore, before each stream to YouTube, you need to copy the link to the stream again and paste it in the OBS settings.

- Video- it is necessary to set the highest possible video quality and specify the resolution scaling. Set the settings as in the picture below.

- Audio- most of the settings can be left unchanged.

- Extended- can also be left by default. To return to the main window of OBS studio click on "OK".

- Now you need to add a "Scene".

- Give it a name, for example "Test" and click "OK".

- Select this scene and go to the Sources section. Click in the window with the right mouse button, the "Add" button will appear. Hover the mouse over it and, in the drop-down menu, select the "Game" item.

- Give it a name and click OK.

- A window with additional settings will open, where you need to select the desired application from the list. Select the game you want to stream to YouTube and click OK. For the game to appear in the list of applications, it must first be launched on the computer. Only then can the game be specified in the OBS studio settings.

- All settings are done. Now you can go to the preview. Click on the "Preview" button in the bottom panel of the program.

- A preview of the future stream will be displayed in the OBS window - make sure that the picture and sound are present, they are of proper quality. After that, you can stop previewing and start broadcasting.

- Click on "Start Broadcast" located in the bottom menu of OBS.

- Now go to your YouTube broadcast settings. In the top bar, click on "Broadcast Control Panel".
- If everything is fine, you will see the corresponding notification on your screen. It will say that everything is in order and the quality of the stream is high.

- By clicking on the broadcast link, you can see what the stream itself and chat looks like for viewers who will join your live stream on YouTube.

Open Broadcaster Software is a simple, convenient and free software for recording video from the screen and organizing live broadcasts from your monitor on the Internet. We tried to tell you in detail and step by step in this article about the main OBS settings for recording videos and organizing streams on Twitch and YouTube. If you still have questions about the OBS studio program or want to leave your feedback about it, then write to us in the comments.
- Open Broadcaster Software today it is the best and absolutely free tool for streaming images from your monitor (TV, webcam) for everyone who wants to see this image. Of the real competitors, this program currently only has XSplit. The latter is provided to users for free in the form of a seriously cut demo version, and for all the features that are available in OBS, you will have to pay, and not so little. A few years ago, there was no alternative, in the realm of monopoly streamers had to give money to the XSplit developer. Today XSplit with its policy is gradually disappearing into oblivion, and the hero of my guide is the regularly updated OBS. I will not prejudice the merits of Nvidia and note that its GeForce Experience not so long ago also learned to stream without any additional costs. But, firstly, only from Nvidia 600 and 700 series video cards, and secondly - exclusively on twitch.tv. Nice, but not a competitor for OBS due to the narrow target audience.
Video guides on how to properly set up OBS for streaming on Twitch
New video guide 2016
To start using OBS, go to the program website and download it. While installing, first of all go to this page and select the approximate configuration of your PC, then click Recommend Settings. The evaluator will offer his vision of the optimal program settings for your hardware:
Leave this tab open, or copy the suggested settings somewhere, such as notepad. After OBS is installed, launch it. We immediately go to Settings and get to the General tab: OBS
OBS
Here we select the language if Russian does not suit you. For convenience, you can create another profile in order to quickly switch between different sets of settings. The tray icon and minimizing the program are not needed if you have a second monitor. It's better to control the streaming process with your own eyes, and not annoy viewers with constant alt-tabs. You should turn off the display of the cursor if you are showing any video or movie; in all other cases, I see no reason to hide it. Go to the next tab Encoding: OBS
OBS
I strongly advise against putting a "daw" on CBR (constant bit rate), even if the program requires the opposite with red warnings. The enabled option obliges the viewer to download your broadcast at a set speed of 2000-5000 Kbps throughout the entire stream. While you are away from the computer or in any other way transfer a static image, such values are not needed even close. And in general, a viewer with an unstable connection (3G modem, for example) or with limited traffic will not be happy with your constant bitrate. We set the quality to 6-8. It's not worth it to happily put 10, you won't notice any difference visually, and the stream may start to “squat” more strongly. We set the maximum bitrate to 2500-3500, I do not recommend it higher. Firstly, streaming services are still extremely reluctant to accept a high value (there will be packet losses, stream lags), and secondly, above 3500 is needed only with a Full-HD stream. More on that later. The values of the maximum bitrate and buffer size must be the same, respectively, do not set the label to Another buffer size. In Audio, leave everything as in the screenshot above. Go to the Broadcast tab:
There are two modes: live broadcast and local recording. Local recording is a great opportunity to evaluate the quality of the future stream for yourself after the initial setup, without unnecessary "pale" in front of the audience. Upon completion of reading the guide, I recommend using it first before starting to stream. Especially if you plan to hang pictures, userbars and other unnecessary garbage over the image. We indicate the path, set the hotkey and by clicking Start broadcast in the main OBS window, the stream will not go to the Internet, but to your computer. Also, obviously, the option can be used as an alternative to programs such as Fraps.We go back, put back Live. There are about a dozen broadcasting services offered in the latest versions of the program, but I recommend Twitch.tv and Cybergame.tv. The first is the most visited bourgeois portal of this kind, the second is for the Russian audience. Both services are (so far) unobtrusive in terms of their monetization and are dedicated to the gaming theme. For Twitch server, choose Amsterdam, Frankfurt or London. It often happens that one of them is overloaded, lags and receives less of our packages, in which case you will have to choose another server. There are no special options offered for Cyberheim - donate and regular servers. To get the Play Path \ Stream Key, you need to register on Twitch.tv or Cybergame.tv and go through the process of creating your channel. Everything is accessible and understandable there. In the profile, you will be shown the key for your channel (On Twitch, from the main page, click at the top on your nickname -> dashboard -> Stream Key), which must be entered into this line. Leave the rest as in the screenshot and go to Video:

Choose your video card and resolution. You can simply select Monitor, then the program will use the resolution of the selected monitor. I recommend scaling up to 1280x720. HD is more than enough for streaming a game or video. Full HD will require more fine-tuning of the program in order to find the optimal balance between the bit rate, the capabilities of your hardware and the receiving ability of the streaming service. We leave the filter bilinear, because other options besides the extra load visually do not really give anything. To set the FPS value, first we look in a notebook and remember what value the Appraiser suggested OBS... In my case, this value was 30. I want to note that the set FPS of the transmitted image is most noticeably responsible for the load of iron. If during a stream you notice strong brakes on your dead PC - underestimate this value. Without prejudice to the viewer's eyes, you can reduce to 25 FPS, not worth lower. Aero should be turned off to relieve unnecessary load if you have no plans to use it in the stream. Moving to Audio:
If you want the viewer to hear what you hear yourself, check that the playback device matches your default settings in the Windows Soundbar. Press to Talk if you want the microphone to be activated by a hotkey. If you are hard to hear on stream, set the microphone gain value higher. If on the contrary, increase the volume of the applications accordingly.In the Advanced tab, I do not recommend changing anything without experience using the program. When such an experience appears, you yourself will understand which of these settings you need to tweak. Unless, I recommend making sure that the x264 CPU Preset is set to veryfast. In general, this will be optimal. My settings:

We ignore the Noise Gate tab, once again confirm our settings and go to the main program window. The Scene area allows you to right-click to create shortcuts for different combinations of Sources to quickly switch between them. In the Sources field, press RMB - add and see various options. In general, we use the Window option labeled "specific area", where we set the required screen area or set the resolution of your monitor to show the entire screen.If you are going to stream a game, it is much easier to choose the appropriate source template. Start the game, select in OBS source Game and in the window that appears, select the required application that you intend to broadcast In subsequent restarts OBS will pick it up on its own.
Also in the sources you can put pictures, text, video, etc. All this is positioned using the Scene Change by dragging the elements with the mouse to the desired area of the screen. The priority of the output is set by the position of the Sources in the list from top to bottom. For example, if you are streaming a game and you want some kind of picture to hang over it, then the source with the game should go in the list lower than the picture. That is, the picture will have a higher output priority, and the game will be shown “under it” as the second layer. If you set the positions the other way around, then the picture will simply disappear under the larger game window.
And in conclusion, briefly my experience of using the OBS program. At the moment, my config is: Nvidia 680GTX video card, i7-3770k processor, 16GB of memory, SSD drive. This hardware allows you to stream any PC games with high quality graphics in the settings on the OBS settings 30 fps, 3500 bitrate, HD. You can easily switch to Full HD and increase the FPS, but nobody needs it. Moreover, the streaming process is practically not felt, the games do not slow down, the FPS does not sag, and in general everything is very cool. Earlier, when I had i5 and 560GTX, everything was not bad either, but unpleasant sensations and slowdowns were still observed, albeit occasionally. If you have a question about upgrading your PC for streaming, then the priority should be on upgrading the processor, not the video card (well, if not very old).
I hope this guide will help all novice streamers understand the basics of a wonderful program. Open Broadcaster Software.
The modern market for digital services, advertising and broadcasting is starting to gradually move to a streaming format. That is, users are increasingly starting to shoot how they play a game, conduct training or choose a topic for conversation, and all this is broadcast live, posted in recordings, etc. Therefore, it is important that the user can understand this issue and know which the program is the best in this direction. Who knows, maybe some of you decide to become one of the members of a large community of bloggers, or maybe you start shooting games or just start your own small broadcasting company on a specific topic.
Therefore, we will analyze the following questions: "what kind of OBS program", "how to set it up" and "what is it for at all". It is imperative to know this, since it is quite complex and has some nuances. The most important thing to know is what kind of quality to set up on your video, taking into account the technical characteristics of your computer and provider. Therefore, let's not waste time and get down to consideration.
What is this program?
But before we answer the questions about what kind of OBS program is, how to set it up, etc., first it is worth taking apart the software itself. So, OBS is the best development for streaming, which has the maximum set of settings, is able to create various videos, edit them, manage quality and then upload them to the network. In addition, this software has a convenient management interface, has a powerful technical basis and allows you to achieve the desired result without any problems. Therefore, if there is a need to create a stream or shoot a video, then you can safely choose this program. As for the very understanding of the capabilities of the OBS program, how to customize its elements and other things, it will soon cease to be a secret and something inexplicable for you.

What is it for?
Despite the abundance of a variety of programs, sometimes you need to choose exactly those that will allow you to achieve the desired result without any problems. At the same time, do not forget that you need simple settings and a stable technical basis. OBS fits this description perfectly, you can start exploring the nuances and basic structure of the program right now without any problems. We remind you that the program will come in handy for organizing streams or making videos of various formats. Yes, the program does not have a full-fledged editor, but it is quite capable of creating the desired video content. The main thing is to figure out how to set up OBS for recording games and other material.

Is it difficult to use it?
It should be noted right away that the program has a completely friendly interface, convenient functional buttons and other aspects of the software. But at the same time, it has deep settings that cannot be immediately understood. You don't need to worry about how to set up OBS for recording games and other material, we will definitely figure it out. For now, let's just note that everyone can use the program. You just need to spend some time and not be afraid to test all sides of the program. In addition, you can easily capture not only your screen, but also yourself using your webcam. The main thing is to understand how to set up OBS for streaming, and personally prepare for such a serious job.

How much is?
It is not surprising that many users have become interested in the cost of some programs, so it is worthwhile to figure out how much this software costs. You will be surprised, but OBS is a completely free software plug-in for the computer that is available to absolutely everyone. There is no need to look for a catch, as the OBS program was created specifically to provide users with this opportunity. The only thing left to do is figure out how to set up OBS Studio.

Setting process
So, for sure you are already ready to study OBS further, so it's time to disassemble all the elements related to this issue. To set certain indicators, you just need to go to the program settings and mark the following indicators:
- Set the language to Russian first to make each point clearer. It is not difficult to find this setting, since it is located at the very beginning.
- Then check the boxes next to "CBR padding" and "CBR constant bitrate".
- then go to the item "Maximum bitrate", in it we enter the indicator of 80% of the speed of your Internet. Please note that the recording format has Kbit / s, we indicate exactly the same value in the "Buffer size" item. If the indicator reaches 3000 or more, then you can be sure that your video will be of high quality.
- In the "Audio" item, you must install the ACC 64-128 codec. We set the channel to Stereo, and it is desirable to set the format to 44.1 kHz.
- The next item is "Broadcast", in it it is necessary to set the live broadcast in the "Mode" sub-item, leave the "Server" by default, set the auto-reconnection delay to 10 seconds. The rest of the indicators can be set at will.
- The last item is "Video", in it opposite to the sub-item "Video card" you must leave it by default, in the "Base resolution" specify the resolution of your monitor, and in the item "Frames per second" it is desirable to set 30 FPS. But if you have powerful hardware, you can set it to 60 FPS.
Basically, this data is enough to understand how to set up OBS 0.16 or any other version. Follow our recommendations carefully and you will surely achieve success, which will allow you to shoot and receive the desired video content.

How to stream?
In principle, there is nothing complicated about this, if you set all the above settings, then you will only have to start the stream, specify the microphone and webcam. But there is one more point regarding how to set up OBS for Twitch. It is necessary in the item "Broadcast" to set the Twitch indicator in the sub-item "Broadcasting service". These settings will be enough to start recording a stream or simple video recording.

Communication with other services
A question may arise as to what services this program can be connected to. In fact, the integration and the possibility of combining is indicated in the settings themselves, it is enough just to familiarize yourself with them. And regarding how to set up a stream through OBS, you already know all the necessary recommendations. It remains only to test your settings and you can continue to use them. Do not forget to create a special profile for using the program, so that in the future your settings will not get lost even after reinstallation.
Additional software
How do I set up OBS recordings? This can be done using the "File" item, there is all the functionality and settings for saving records. But a question may arise regarding the use of additional software, it all depends on your desire and purpose. In principle, OBS has all the necessary settings and functionality that allows you to carry out additional design and add additional recordings to the video material. But if you need to somehow edit your video, then just use the Sony Vegas program.
True, if you are streaming and uploading the recording directly to the Internet portal, then it will be impossible to edit it if you only reload the video. Otherwise, you will not need to make any adjustments, the standard functionality will be enough.
Similar options
Naturally, before using OBS, many will consider making a list of alternative programs. There are a huge variety of them, and each is ready to provide something of its own, certain functions and other interesting elements. But no matter how hard the third-party developers tried, they failed to technically organize and achieve the quality of OBS. In addition, those same developers are trying to promote their software development for real money, and this is already a big disadvantage for OBS's competitors.
Therefore, you should not think for a long time about the sides of certain products, but simply use what is really worthy of your attention. In addition, now you have all the necessary knowledge and advice to achieve not only good quality, but also a stable connection. In general, you will definitely not regret that you decided to use this program.
Now you know what kind of OBS program is, how to configure its functionality and what you should pay attention to during functional manipulation. Now you can easily use a special program that will provide you with all the necessary features and functions. Do not worry, you will succeed and you will not experience problems, you can immediately achieve the desired result. But do not rush, since everything needs to be done thoroughly and carefully, any mistake in the settings can significantly reduce the quality or cause trouble during streaming. Therefore, we advise you to simply test each of your changes in the settings.
And as soon as you can record a couple of test videos and are sure everything works, you can start your initial career. You will definitely succeed if you approach this business with creativity, work hard and just try to be better. We agree that not everyone is capable of creating high-quality video content, but over time, the skill will appear. Most importantly, don't forget to follow our guidelines and practice.
Open Broadcaster Software (OBS) is a free software for live broadcasting with ability to manage audio and audio sources.
You can download Open Broadcaster Software using this link: http://obsproject.com/download
Getting Started and Setup
After downloading OBS, navigate to your settings by clicking Settings> Settings or clicking Settings on the bottom right button menu. A screenshot demonstrating this is below:
"General" settings.
1. Select your language, and set a profile name.

Encoding Settings
1. Check "Use CBR"
2. Check "Enable CBR padding"
3. Max bitrate should be 3300 or 80% of your upload throughput, whichever is lower. Recommended bitrates for different resolutions are listed below.
4. Buffer Size is recommended to be equal to the max bitrate. Setting this lower will have the encoder closer to the targeted bitrate. We do not recommend changing this unless you know what you are doing.
- Recommended bitrate for 1080p: 3000-3500
- Recommended bitrate for 720p: 1800-2500
- Recommended bitrate for 480p: 900-1200
- Recommended bitrate for 360p: 600-800
- Recommended bitrate for 240p: Up to 500
Audio Encoding:
1.We recommend AAC with a bitrate of 64-128, although this is up to personal preference and bandwidth constraints. This is an example of what it should look like after you are done:

Broadcast Settings
1. Mode: Live stream
2. Streaming Service: Custom
3. Server: rtmp: / /live.site/live
4. Play Path / Stream Key:

1. Autoreconnect: Recommended checked.
2. Auto-Reconnect Timeout: 10 seconds
3. Delay: 0, but if you need delay set locally you can do this to prevent "ghosting." We do NOT recommend delay.
4. Minimize Network Impact: Unchecked. If you are an advanced user, or are having issues with your network settings, use this setting.
5. Save to file: We HIGHLY recommend you keep local recordings on your computer as we make changes to our VOD storage, to ensure you always have easy access to your broadcasts.
6. File Path: Select a file path for where you want to save your local files. Not needed if you do not save a local file.
7. Start Stream Hotkey: Custom key to start stream with.
8. Stop Stream Hotkey: Custom key to stop stream with. An example of what this would look like is below:

Video settings
1. Video Adapter should be set by default. If you have more than one, select the adapter you are playing your game on.
2.Base resolution typically is your monitors resolution. You can alternatively select a monitor to default this.
3. Resolution Downscale is the resolution that you send our servers. Lower resolutions will consume less bandwidth overall, and use much less processing power.
4. Filter should be "Bilinear" unless you have issues with blurring in your downscaling. Bicubic and Lanczos are both supported, but will take additional processing.
5. FPS is recommended to be 30. Note that 720p at 60 frames per second for some games will look better than low bitrate 1080p at 30 FPS.
6. Aero is recommended to be disabled only if you are using monitor or screen capture.

Audio settings
1. Desktop Audio Device: We recommend that this be set to your "Default" playback device. To change this, right click on your volume slider, then click playback devices. Then, right click on the audio device you "d like to make default and select" Set as Default Device. "Two images will show that process below:


2. Microphone / Auxiliary device: Set this to your headset or microphone if you have one.
3. Use Push to talk: Set this if you want push to talk set to a custom key.
4. Push to talk delay: Time after key is released and OBS is still recording your mic.
5. Mute / Unmute mic hotkey: User preferred hotkey to toggle mute settings for the Microphone / Auxiliary device.
6. Mute / Unmute Desktop Hotkey: User preferred hotkey to toggle mute settings for the Desktop Audio Device.
7. Force Microphone / Auxiliary to Mono: If you want this to only use one channel. We do not recommend this.
8. Desktop Boost (multiple): Force OBS to boost your desktop audio. 1 is "100%"
9. Mic / Aux Boost (multiple): Force OBS to boost your microphone audio. 1 is "100%"
10. Mic Time Offset (ms): Default 0. Use this if you have sync issues. An example of this page filled out is below:

Advanced tab
1. Use multithreaded Optimizations: Checked
2. Process Priority Class: Normal. Changing this higher will make OBS get CPU before other programs and can cause lag on many systems. Scene Buffering Time (ms): 400
3. Disable encoding while previewing: Unchecked unless you have lag while previewing your stream.
4. Allow other modifiers on hotkeys: Checked Video
5.x264 CPU Preset: This will set the encoding level. We recommend "veryfast" unless you have no bandwidth and beastly computer. Then, set it to be slower. Warning: setting your stream to a lower setting when at a high resolution is very CPU intensive.
6.x264 Encoding profile: This setting changes what profile you record on. Some devices (notably tablets and phones) may have issues with decoding streams with "high" profiles, so we recommend main if you want to have the highest compatibility at the sacrifice of some quality.
7. Use CFR: Checked
8.Custom x264 Encoder Settings: Default (blank)
9. Keyframe Interval: Set this to 2
10. Allow 61-120 FPS entry in video settings: Unchecked. We don "t recommend users going above 60FPS for any game.
11. Use Quicksync: If you have certain Intel processors (Sandy Bridge / Ivy Bridge), you can use this alternative method of encoding to use less CPU (it will use the hardware video encoder on your integrated GPU). There are quality differences due to the change of encoding. This nullifies x264 presets, but you can set the custom encoding settings if you want by checking "use custom x264 settigns for Quick Sync"
12. Use Nvidia NVENC: Similar to quicksync, this uses an alternative encoding method, with quality differences (usually lower at the same bitrate) due to the change of encoding. There are several presets you can choose from with this using the NVENC Preset dropdown.
13. Sub-options of Use Quick Sync and Use custom x264 settings for QSV should remain unchecked.
1.Force desktop audio to use timestamps as a base for audio time: Check this if you are having problems with syncing only.
2. Global audio Time Offset (ms): Set this to the number of ms you "d like to offset this to. We recommend 0 unless having issues with sync.
3. Use Mic QPC timestamps: Use this only if having sync issues.
Network
1. Bind to Interface: Default. You can select another network adapter here if you need to.
2. Automatic low latency mode: Check this only if you "ve talked to a OBS developer or Twitch staff as very few users would need this.
3. Latency tuning factor: Set this only if you "ve talked to a OBS developer or Twitch staff as very few users would need this. An example of what this would look like for a user is below:

Microphone noise gate settings
This setting allows users to set an automatic threshold for their mic being turned on and off. You can select the decibel level of the Close and Open thresholds here.
1. Attack Time: This is the time it takes for your mic to "spin up" to reach hold to output.You generally do not modify this.
2. Hold time (ms) how long the gate will stay open after it falls below threshold. You generally do not modify this.
3. Release time: Inverse of attack time. You generally do not modify this. Our recommended "off" settings are found below:

Now, you are ready to add scenes, and then sources to those scenes.
Scenes and Sources
Scenes and sources within OBS are fairly simple to add, and highly customizable. Generally, we recommend that you add as little dynamic content such as screen regions as possible due to the fluctuating nature of whats on your screen. Broadcasting a game directly or through a window is the recommended setup, although this is not compatible with every game or system.
1. To add a scene, right click the blank space under "Scenes" in the main OBS window, then click "Add Scene"
2. Enter a descriptive name such as "League of Legends in Game"
Next, make sure you have your scene selected, and right click the white space under the Sources header.
Source: Window Capture
1. Make sure that Aero is enabled, as this will not capture a specific layered window if not enabled.
2. Add a descriptive name like "Microsoft Paint"
3. Window: Under the window dropdown, select the correct program. In our example, it will be Untilted - Paint.
4. Innter / Outer Window: We want to select the header / title as well as whats inside the box, so we will select Entire Window. If you don "t want the outside edge of the window, select Inner window.
5. Capture Mouse Pointer: Check if you want a mouse pointer in the source.
6. Compatibility mode: This generally is for when you don "t want certain programs being caught with your stream. Leave this unchecked unless you have programs with 3rd party programs like Stream Privacy or performance issues.
7. Gamma: You can adjust the gamma of the scene. Recommended to leave this at 1.
8. Use point filtering: Use this if you are wanting to upscale your source in OBS only.
9. Opacity: You can set the transparency / opacity of this source in OBS. Sub Region:
10.Sub-Region: This is an option to capture only a certain portion of a window. Check this if you only want part of a window, such as the drawing portion. We will leave this unchecked since we want the whole window as previously noted.
11. If you do want it, you can select the region using the mouse pointer, or select the coordinates manually.
Color Key:
1. This is also known as a chroma key. Use this to select parts of windows based on their color.
2. Color: Select the color you want to select in your window
3. Similarity 1-100: Select the similarity. IE blue to sky blue, royal blue, turquoise, etc.
4. Blend: Select the sharpness of the chroma key edges. Finishing up and looking at it: Click "Ok". Click "Preview stream" on the bottom right button menu in the main OBS screen. Note that the window is not taking up the entire screen. Click "Edit Scene" on the bottom right button menu in the main OBS screen.
Example of our Paint Window Capture:

Source: Monitor Capture
Monitor Capture is a capturing tool that allows you to capture a monitor "s output. This is useful for quickly getting started streaming, but is generally not recommended outside of ease of use due to several security (information shown) and production issues. Do NOT use Aero when using this as a primary capture means, as it has significant performance drawbacks when using Aero.
1. Monitor: Select the monitor you "d like to capture, listed by number.
2. Capture Mouse Pointer: Check if you want a mouse pointer in the source.
3. Compatibility mode: This generally is for when you don "t want certain programs being caught with your stream. Leave this unchecked unless you have programs with 3rd party programs like Stream Privacy or performance issues.
4. Gamma: You can adjust the gamma of the scene. Recommended to leave this at 1.
5. Use point filtering: Use this if you are wanting to upscale your source in OBS only.
6. Opacity: You can set the transparency / opacity of this source in OBS.
Sub Region:
1. Sub-Region: This is an option to capture only a certain portion of a window. Check this if you only want part of a window, such as the drawing portion. We will leave this unchecked since we want the whole window as previously noted.
2. If you do want it, you can select the region using the mouse pointer, or select the coordinates manually.
Source: Image Slideshow
An Image slideshow is a set of pictures that change periodically. This is usually used for advertisements, although serves many different purposes.
1. Time between images (seconds): Time between changes in photos.
2. Disable fading: Check this if you want a cut to the next image rather than a fade.
3. Fade in Only: Uncheck if you want it to fade out and in.
4. Randomize: Check this if you want the next picture shown to be random.
5. Add Button: Add to select pictures
6. Remove Button: Remove images from queue
7. Move up: Change order of a picture upwards in queue
8. Move Down: Change order of a picture downwards in queue
A screenshot below demonstrates the slide show in action and the settings used.

Source: Text
Text sources are about what they sound like: text with manipulation.
1. Font: Font for your text
2. Color: Color of your text
3. Opacity: Transparency / Opacity of text
4. Scroll Speed: How fast text will scroll across the screen. Higher speeds are hard to read!
5. Background color: Set a background color for the text to be on (rectangular). Background opacity: Transparency / Opacity of background color
6. Use Outline: Set a outline for the text (not background box). Outline color: Color of the outline around text. Thickness: Thickness of the outline. Opacity: Transparency / Opacity of outline
7. Font Size: Set size of the text. We recommend larger fonts downscaled as opposed to upscaled small fonts.
8. Bold / Italic / Underline General text settings
9.Vertical: Place letters vertically stacked as opposed to horizontally across screen
10. Use custom text extents: Check this if you want your long text to be constrained to a smaller source size, or if you want your small text. We recommend this only for dynamic (scrolling or dynamic files) text. Size is size of extent in pixels. Wrap checked is if text wraps in side extent. For example: (start of extent) testing 123 testin (end of extent). Align: Align text to left / center / right. Only supported if using extent and wrapping.
11. Use text from File: Select this to have text come from a file. Useful for chatting capture or other dynamic data. This is an example (and properties) of a text source.

Source: Video Capture Device
These are webcams, DV cameras, and notably most capture cards will have output in this source.
1. Device: Select device here
2. Flip Image Vertically / horizontally: Flip image either mirrored down, or sideways
3. Deinterlacing: If your source has lines or computorized disortion in it, select this and a method. Methods are dependent on the video source, and vary widely. Top Field / Bottom Field first: Start deinterlacing from top or bottom. We recommend top generally.
4. Custom Resolution: Select only part of a camera or video source here.
5. FPS: We recommend 29.97 for most source inputs. This depends on your capture card or camera "s settings however. Please use native framerates.
6. Use output formats: Change how the video source is output. Some cameras have additional functions if set to certain output formats.
7. Use Buffering (ms): Buffer video. Recommended not turned on unless you are having major issues and are technically inclined.
8. Chroma Key: Use this to select parts of windows based on their color. Color: Select the color you want to select in your window. Similarity: Select the similarity. IE blue to sky blue, royal blue, turquoise, etc. Blend: Select the sharpness of the chroma key edges. Spill Reduction: Use this if you "re getting reflections off of objects onto normally not color keyed objects such as a background tinting someone" s hair.
9. Audio: Audio Input Device: Have a secondary audio feed from your video source. Generally recommended for capture cards if only if you are capturing console output. Not recommended on for video and webcams or PC output. Output Audio to stream only: Set it to capture internally to stream. Output audio to desktop: Externally capture it to your desktop audio devices.
10. Gamma: Set this to adjust gamma. We recommend playing with this to make sure that it "s correct, as video sources sometimes need adjusting vs other sources.
This is an example of a video taken from a super old DV camera connected via i1394 and it "s settings.

Source: Game Capture
This is a source that directly captures your video output. It is very efficient when using Aero, and only captures the game itself. If you have difficulty getting your game to capture, try to use 32-bit OBS as this sometimes will solve it. Note: You should not have to do this anymore, but we recommend to test before submitting any bug reports to them.
1. Select Application: Select the game you want to capture.
2. Use / set hotkey: Use hotkey to capture to capture current game. Some settings below alter how this is done. Stretch image to screen: Check if you want the game to be fullscreen on stream, but not on your own screen. Ignore aspect ratio: Ignore games aspect ratio. Capture mouse cursor: Uncheck if you do not want a mouse cursor. Useful for games played with keyboard only. Invert cursor on click: Invert the color of the cursor when you click something.