An SSD is different in its properties and way of working from a hard HDD, but the process of installing Windows 10 on it will not be very different, a noticeable difference is only in preparing the computer.
Preparing the disk and computer for installation
Owners of SSD disks know that in previous OS versions, for correct, durable and full-fledged disk operation, it was necessary to manually change the system settings: disable defragmentation, some functions, hibernation, built-in antiviruses, swap file and change a few other parameters. But in Windows 10, the developers took these shortcomings into account, the system now performs all disk settings itself.
Especially it is necessary to dwell on defragmentation: it used to badly harm the disk, but in the new OS it works differently, without harming the SSD, but optimizing it, so you should not disable automatic defragmentation. The same is with the rest of the functions - in Windows 10 you do not need to configure how the system works with the disk manually, everything is already done for you.
The only thing, when splitting a disk into partitions, it is recommended to leave 10-15% of its total volume as unallocated space. This will not increase its performance, the write speed will remain the same, but the lifespan may slightly extend. But remember, most likely, the disk will last longer than you need without additional settings. You can free up free interest both during the installation of Windows 10 (during the process in the instructions below we will dwell on this), and after it using system utilities or third-party programs.
PC presetting
In order to install Windows on an SSD drive, you need to switch the computer to AHCI mode and make sure that the motherboard supports the SATA 3.0 interface. Information about whether SATA 3.0 is supported or not can be found on the official website of the company that developed your motherboard or using third-party programs such as HWINFO (http://www.hwinfo.com/download32.html).
Switch to SATA mode
- Turn off your computer.
- As soon as the power-on process begins, press the special key on the keyboard to enter the BIOS. Typically the Delete, F2 or other hotkeys are used. Which one will be used in your case will be written in a special footnote during the inclusion process.
- The BIOS interface in different motherboard models will be different, but the principle of switching to AHCI mode on each of them is almost identical. First go to the "Settings" section. To move between blocks and points, use the mouse or arrows with the Enter button.
- Go to advanced BIOS settings.
- Navigate to the “Onboard Peripherals” sub-item.
- In the "SATA Configuration" section, find the port to which your SSD is connected and press Enter on your keyboard.
- Select the AHCI operating mode. Perhaps it will already be selected by default, but you had to make sure of this. Save and exit the BIOS settings, boot the computer to proceed to preparing the media with the installation file.
Preparing installation media
If you already have a ready-made installation disk, you can skip this step and immediately proceed with installing the OS. If you don't have one, then you need a USB stick with at least 4 GB of memory. The creation of an installation program on it will look like this:
- We insert the USB flash drive and wait for the computer to recognize it. We open the explorer.
- The first step is to format it. This is done for two reasons: the memory of the flash drive must be completely empty and split in the format we need. Being on the main page of the explorer, right-click on the flash drive and select the "Format" item in the menu that opens.
- We select the NTFS formatting mode and start the operation, which can take up to ten minutes. Please note that all data stored on a formatted medium will be permanently erased.
- Go to the official Windows 10 page (https://www.microsoft.com/en-us/software-download/windows10) and download the installation tool.
- Launch the downloaded program. We read and accept the license agreement.
- Select the second item "Create installation media", as this method of installing Windows is more reliable, because at any time you can start all over again, and also in the future use the created installation media to install the OS on other computers.
- Select the system language, version and bit depth. You need to take the version that suits you best. If you are a regular user, then you should not load the system with unnecessary functions that will never be useful to you, install Windows at home. The bit depth depends on how many cores your processor is running: one (32) or two (64). Information about the processor can be found in the properties of the computer or on the official website of the company that developed the processor.
- In the media selection, check the USB device option.
- Select the USB flash drive from which the installation media will be created.
- We are waiting for the media creation process to finish.
- Reboot your computer without removing the media.
- During power-on, we enter the BIOS.
- Changing the boot order of the computer: in the first place should be your flash drive, not the hard disk, so that when you turn on the computer starts to boot from it and, accordingly, starts the Windows installation process.
Windows 10 SSD installation process
- Installation begins with the choice of language, set the Russian language in all lines.
- Confirm that you want to start the installation.
- Read and accept the license agreement.
- You may be asked to enter a license key. If you have it, then enter it, if not, then skip this step for now, activate the system after installing it.
- Proceed to manual installation, as this method will allow you to configure disk partitions.
- A window will open with the configuration of disk partitions, click on the button "Disk settings".
- If you are installing the system for the first time, then all the memory of the SSD drive will not be allocated. Otherwise, you need to select one of the partitions for installation and format it. Divide the unallocated memory or existing disks as follows: allocate more than 40 GB to the main disk on which the OS will be located, so that in the future you will not face the fact that it is clogged, leave 10-15% of the total disk memory unallocated (if memory is already allocated, delete partitions and start forming them anew), we give all the remaining memory for an additional partition (usually disk D) or partitions (disks E, F, G ...). Don't forget to format the main OS partition.
- To start the installation, select the drive and click Next.
- Wait for the system to install in automatic mode. The process may take more than ten minutes, in any case do not interrupt it. After the end of the procedure, the creation of an account and the installation of the main parameters of the system will begin, follow the instructions on the screen and select the settings for yourself.
Video tutorial: how to install Windows 10 on an SSD
Installing Windows 10 on an SSD is no different from the same process with an HDD. Most importantly, do not forget to enable ACHI mode in the BIOS settings. After installing the system, you do not need to configure the disk, the system will do it for you.
SSD is a digital information recording device based on flash memory - microcircuits, which implies the absence of mechanical elements. High performance, a fairly high price and a limited number of rewriting cycles are the main differences between SSDs and magnetic platters. The latter feature primarily excites the minds of owners of solid state drives or those who are going to purchase such a device to install Windows 7 or 10 x64 on it in order to improve the performance of the computer. A similar procedure is practically the same in both systems. Therefore, it can equally be considered that the SSD setup in Windows 7 is absolutely identical to Windows 10.
In the proposed article, we will figure out how the SSD is configured, the operating system is installed on it and some Windows 7 or 10 settings are configured to extend the operating time of such a drive. The fact is that a "seven" or "ten" in the process of work repeatedly refers to the system partition, not only to read any files, but also writes temporary files to the disk, the paging file and performs indexing. These and other similar actions will consume the working resource of the SSD at a significant rate and the disk will wear out faster than expected.
Transferring temporary files
The "Temp" directory is a directory for storing files with intermediate calculations during the operation of Windows 7 or 10. This service folder must be transferred to the hard disk after the installation of Windows 7 or 10. This action will slightly slow down the computer, which will be virtually invisible, but will increase the lifespan of the SSD.
This is done as follows:
- Go to the "My Computer" context menu and call it "Properties". Or right-click on the "Start" button and select "System" from the drop-down menu.
- In the left frame, click on the "Additional parameters" tab.
- Go to the "Advanced" tab and click on the "Environment Variables ..." button, as in the screenshot.
- Next, the new values \u200b\u200bof the environment variables are set.
- Select the "Temp" directory and click "Change".

- In the "By default" line, set the full path to the directory where temporary files will be stored. It is recommended to transfer them to the first disk in the list of HDD partitions.
- We do the same for the "Tmp" directory.
From now on, the magnetic disk will store Windows 7 or 10 x64 service files, saving the SSD from unnecessary wear and tear.
Disable sleep mode
Sleep or hibernation - shutdown the computer and write the contents of RAM to the system disk in the hiberfil.sys file. This mode gives you the ability to quickly turn on a PC with Windows 7 or 10. For computers with a large amount of memory (8 GB or more), this factor of SSD wear becomes even more relevant. In order to avoid unnecessary overwriting of unimportant information to the solid-state drive, it is necessary to properly configure the operating system. For the sake of increasing the life of the drive, it is worth abandoning hibernation, especially since 7 or 10 starts instantly anyway.
- Disabling hibernation is performed by the "powercfg –H off" command entered into the command line launched by administrator privileges.

- It is launched via the command "cmd" in the Start search bar or via the desktop context menu.

Disable paging file
The paging file is used by Windows 7 or 10 to write under-used data in the event of a shortage of RAM until they wait their turn. The speed of information exchange between HDD and RAM depends on many factors, but is significantly inferior to the operating time of RAM. The paging file not only slows down the work on a PC with a small amount of RAM, but also requires repeated operations of writing information to the solid-state disk .
If you want to extend the operating time of an SSD on Windows 7 or 10, turn off the paging file (it is better to buy a bar of RAM, it will never be superfluous). To squeeze the maximum speed out of your computer, you will have to sacrifice the working resource of the drive.
Disabling the paging file is as follows.
- We go to "Additional parameters", as in the previous method.

- In the "Performance" tab, click on the "Parameters" button.

- In the tab, as in the screenshot, click "Change".

- Uncheck the "Automatically select ..." option.

- Move the trigger switch to the "No paging file" position,
- If you want to use a paging file, select the HDD partition, preferably the first one, and set pagefile equal to the amount of installed RAM.
Disable drive optimization
Defragmentation is the process of collecting fragments of a file scattered over the surface of a media together. Fragmentation occurs while writing information to disk due to imperfections in the NTFS file system. A high degree of fragmentation negatively affects the performance of the drive due to the fact that the reading magnetic head has to perform significantly more movements than if the file fragments were in neighboring clusters. But on SSD, document fragmentation practically does not affect performance, therefore it is not recommended to defragment it and you must turn off scheduled defragmentation (configuring and disabling SDD defragmentation in Windows 10 occurs automatically).
- We go into the properties of the SSD-disk and go to the "Service" tab.
- Click "Run defragmentation".

- Click on "Configure Schedule" and uncheck the box next to "Run as scheduled."

Indexing
Indexing is the procedure for adding data about files stored on disk to a special list called an index. This data is needed to search for information on a PC with Windows 7 or 10. If your SSD does not store hundreds or thousands of personal files and you rarely need to search for something on the disk (you can use the Total Commander functionality or other applications for this), it is reasonable to deactivate indexing. This will slightly reduce the number of requests to the drive in write mode. The setting is done as follows.
- Select the disk and select "Properties" from the context menu.
- Uncheck the box next to the "Allow indexing ..." item, as in the screenshot.

Program cache
Many applications, such as Internet browsers, use data caching to get quick access to it next time. The situation here, as with the swap file and temporary directories: if you want maximum speed - donate the SSD resource, expensive storage - transfer the cache or install the browser itself on the hard drive .
Alternatively, the use of free RAM to create a RAM disk in it, which will store the cache of the browser and other programs. Setting up and creating such a disk is a simple process, but it looks different for each application, which is beyond the scope of this article.
Recovery points
Disable the creation of rollback points in Windows 7 or 10, which will also have a positive effect on the service time of the SSD.
- To do this, go to the "Properties" directory "My Computer".
- In the "System Protection" tab, select the system disk and click configure.

- Move the switch to the position "Disable system protection", click "Delete" and save the changes.
Simplifying the setup process
When using SSD Mini Tweaker, setting up Windows 7 or 10 to use a solid state drive is carried out in a few steps.
- Download, install and run the application.
- Checking the boxes next to unnecessary options is carried out using the knowledge gained above.

- Click "Apply Changes".
- Setting new parameters will take effect after restarting the PC, so restart the system.
Setting most of the parameters in SSD Mini Tweaker is also done manually, but through the program, the setting windows open with one click.
(Visited 11,681 times, 1 visits today)
Migrating your system to an SSD is an efficient way to organize your computer.
Content:Note, the transfer methods may vary depending on the version of Windows and the settings of the purchased flash drive.
What data can be transferred toSSD
Storing the operating system on an SSD not only speeds up its operation, but also increases the response of other programs and files that are stored on the disk.
The user can move the following types of data to a flash drive:
- Operating system ... It is added to the SSD with all the ready-made drivers and settings. In fact, a duplicate of it is created, which was previously stored on the HDD;
- Programs - choose yourself which applications you want to add to, and which you want to leave on (HDD). We advise you to leave voluminous programs for video editing and software development / testing on your computer - this way they will work many times faster;
- User files ... It can be any of your documents, photos, music, videos and other types of data.
Components to move
To add a Windows used to an SSD, the following objects are required:
If you only work with OS resources, you do not need to install a third-party utility to transfer.
Computer Requirements
Before performing any OS transfer steps, make sure that your device meets all the minimum requirements that allow the utility to interact with an SSD and transfer large amounts of data.
The minimum requirements are shown in the following table:
| Parameter name: | Minimum value: |
|---|---|
| OS | · Windows XP (only 32x); · Windows Vista (all bit sizes); Windows 7 (all bit sizes); Windows 8 \\ 8.1 (all bit sizes); Windows 10 (all bits). |
| RAM | At least 1GB |
| Types of discs that you transfer | GPT or MBR |
| Copied sections | Standard. Non-portable RAID arrays |
You can compare the settings of your computer with the above specifications using the About System window.
It displays the correct data about the main hardware and software components of the device:
We use the built-in capabilities of Windows
Follow the instructions to transfer the operating system to the flash device:
- Open the window "Disk Management"... To do this, in the run window, write the command diskmgmt.msc and confirm the action;

Figure 3 - Launching Disk Management
- Now we need to reduce the amount of OS on the disk. You can perform the action using the "Shrink Volume" function. All data will remain in the same state, only the occupied space on the HDD will decrease. Right-click on the "System" section, and then on "Shrink Volume";

Figure 4 - Compressing the volume
- After successfully reducing the OS size, a free partition will appear in the disk layout. This means that everything was done correctly;
- Connect the drive to your computer and restart the window "Disk Management";
- Now click on the "Master" tab and select "Transfer OS SSD" from the list;

Fig.5 - "Master" tab
- The standard utility for. Click on the "Next" button to go to the settings;
- Click on item "Unoccupied space" and go to the next window;

Fig. 6 - disk space selection
- Now you can independently change the size of the future disk or leave all parameters unchanged;

Fig. 7 - resizing a disk partition
- After clicking on the "Next" button, the wizard will start moving the system. After completing the action, you can turn off the computer and select the OS that is on the SSD at the next boot.
Windows will also remain on the hard disk. You can delete it or use it as a backup when you need to restore your system.

Fig. 8 - the result of a successful move of Windows
Do not forget to click on the "Apply" button in the upper left part of the window "Disk Management"otherwise, all changes made will not be saved.
If during the transfer there were windows with errors or freezes, you should reset the settings, restart the PC and try to transfer again.

Figure 9 - Applying Changes
Instructions forSSD fromSamsung
The company has released an official utility that allows you to quickly move the OS from your hard drive to a purchased flash drive.
The utility is called Samsung Data Migration. You can download it for free from the official website of the company (section "Memory" - "SSD") or using the disk that is included with the device.
The initial program window looks like this:

Fig. 10 - Samsung Data Migration utility window
Immediately after starting the utility, connect the SSD to the computer using the appropriate adapter. Click on the "Start" button.

Fig. 11 - Analysis of a disk with an installed copy of Windows
After the analysis, the program will automatically detect the SSD connected to the computer and show it on the screen:

Fig. 12 - Reconciliation of the source and destination disk
If the space that Windows takes on the HDD does not exceed the available space on the SSD, you can start transferring immediately by clicking on the "Start" button.
All components will automatically move. The procedure can take from 30 minutes to 1.5 hours, depending on the version of Windows you are using.

Figure 13 - Successful System Migration
As a result, you will receive a success notification. Close the window and delete all Windows data from the HDD.
The advantage of using Samsung Data Migration is its simple interface. The program will do all the work for you and minimize the likelihood of errors or bugs after the OS transfer.
What if during the analysis phase you find that there is not enough space for the OS on the SSD? In this case, you need to clean Windows from unused data and applications.
You can do this directly in the Samsung Data Migration utility window.

Fig. 14 - Error. Insufficient space on SSD
After the error text appears (highlighted in red), click on the "Next" button and in a new window delete all library files that litter the system.
Clean the OS until the text appears in the main utility window Ready to Clone to SSD.

Fig. 15 - Successful cleaning of unnecessary files
Acronis True Image Utility
Acroins is the most popular utility for transferring OS to removable media. It recognizes all brands of SSD. The app is supported by all versions of Windows, so there won't be any compatibility issues.
Remember, you can only use the application if your PC hardware has a disc from the manufacturer Acronis.
If the component is missing, the utility will not start, and the user will be notified that it is impossible to work with the program.

Fig. 16 - the main window of the Acroins application
To move the system, connect the removable media to the computer and in the program window, click on the tile "Cloning a disk"-"Copying Sections".
In the window that opens, select the automatic movement mode. It is suitable for all tasks and quickly copies data.

Fig. 17 - selection of clone mode
All sections will be copied to. All data that was on the SSD before cloning will be deleted.
The disk itself will become bootable and can only be used to run the operating systems installed on it.

Fig. 18 - copying process
Having become the owner of a solid-state drive - SSD, users immediately install an operating system on it to obtain the advantages that drives based on memory chips have over magnetic platters of a hard drive.
Today we will look at how the installation of new editions of Windows is performed using the example of 10 (in the "seven" and "eight" the process is similar) and old Windows XP on an SSD. Although XP is used less and less every year, it is still a classic for office and old home PCs and laptops, especially given the current economic situation.
Aligning sections by matching them to blocks
In an SSD, information is read and written in larger blocks than in an HDD. Because of this, the performance of the solid-state media decreases and it wears out faster. Since Windows XP, unlike Windows 10, is not able to align partitions, in relation to the architecture of the SSD, we will do this manually.
Let's do this on a computer where Windows 7 - 10 has already been installed.
- We attach the SSD and start the computer.
- We go to the "Control Panel".
- Launch the "Disk Manager" located in the "System \\ Security" section.


- Select SSD and click "Shrink Volume" in the context menu.

- Set the size of the first volume and click "Compress".
- Select the unallocated space and create a partition of the required size for installing Windows XP.

It is not recommended to store files on an SSD, so create one partition to install XP on it. If you want to use your SSD as storage for multiple OSes, divide it into two or more partitions, each of which will later install Windows.
- We indicate the size and letter label of the section.

- We format in NTFS and select the cluster size, no more than 1024 kb.

- Click "Next", then - "Finish."
BIOS setup
In order for the installation of Windows XP on the SSD to be possible, it is necessary to switch the functioning of the SATA controller to AHCI mode.
- We reboot the PC and go to the BIOS.
- In the "Advanced" menu we find the "SATA mode" option and select its value as "AHCI".

Installing XP on the SSD is carried out by the most common method - we will not dwell on the process. The main thing is to use the original image, and not one of the many assemblies, even optimized for installation on an SSD and with an integrated AHCI driver.

Configuring Windows
For XP to run optimally on solid-state media, several OS settings need to be configured.
- We go to the "Properties" of the computer.
- On the Advanced tab, go to Environment Variables.

- Select the Temp and Tmp directories and transfer them to the hard disk using the Change button.

Deactivating document indexing
Indexing is used to increase the speed and efficiency of search in Windows XP - 10. To disable it, call the "Properties" of the system partition and uncheck the box next to the option, as in the screenshot.

Disable the swap file
If you have enough RAM to run XP, the paging file should be disabled in order to extend the life of the SSD. This is done through the "Advanced" tab in the properties of the "My Computer" directory.

We go to the "Parameters" of performance, where in the "Advanced" tab we move the switch to the position "Without swap file".

Click "OK" and restart the system.

Turn on caching
Go to XP Device Manager and call SSD properties. Go to the "Policy" tab and move the trigger switch to the second item "Optimize for execution".

Mini Tweaker utility
All the proposed actions and several less effective methods to increase the performance of the SSD when installing an operating system on it are offered by the developers of the SSD Mini Tweaker.
Launch the program, check all the boxes or the options you need, click "Apply changes" and restart the computer. Everything is simple and, most importantly, fast. But the program works in XP (unlike the "seven" and "ten") is not always stable, so some options will have to be changed manually.

Solid state drive and "ten"
In principle, installing Windows 10 on an SSD does not differ from installing this OS on a hard drive. The main thing is that the motherboard has the new SATA version 3 interface standard to get the maximum advantage of the speed of the solid state drive.
- We connect the drive to the computer.
- We go into the BIOS and specify the mode of operation of the solid-state drive as AHCI.
The option is located in "Integrated Peripherals", "Peripherals" or "Advanced".

- Press F10 to exit with saving parameters.
- The next step is the normal installation of Windows 10.
If necessary, divide the SSD into several sections in order to install other operating systems on them.
As with XP, when using an SSD as storage for Windows 10, the OS needs to be properly configured.
Defragmentation
Unlike its predecessors, Win 10 does not defragment solid-state drives, but optimizes them using TRIM technology. It notifies the storage controller about which blocks of information have been removed from the file system and are free to write new data to them. Therefore, all the stories about the need to turn off defragmentation or SSD optimization in Windows 10 are nothing more than a legend or the opinion of users who did not understand anything.

Deactivating indexing will insignificantly affect the performance of the Windows search engine, but will only slightly extend the durability of the drive, which is much more important. You can always use Total Commander as a search program, which does not require indexing, during which a large number of write operations are performed.
We call the "Properties" drive and uncheck the box next to the last option, then click "OK".

With at least 4 GB of RAM (it is enough for everyday applications, and the paging file will not provide the functioning of heavy packages) it is better to disable the swap file. When used, Win 10 performs an incredible number of operations with the pagefile.sys file, reducing the duration of the SSD.
In the search box, write "Performance parameters" and select the item corresponding to the request. In the "Advanced" tab, click "Change".

We select the option "Without swap file" and save the parameters.

Disable hibernation
When the computer goes to sleep, all data stored in RAM is overwritten to the system partition in hiberfile.sys. Since the fast startup technologies implemented in Windows 10 allow it to boot instantly, using sleep mode, which reduces the lifespan of an SSD, is ineffective.
The simplest method to deactivate hibernation is to enter the command "powercfg -h off" in the search bar and then restart the PC.
File history and the creation of restore points when using the SSD in the "top ten" should be disabled, because in the process of work Windows constantly copies system files and creates shadow copies of modified documents. Also, the background copying process consumes hardware resources and slows down the computer.
The option is disabled in the system parameters in the "System protection" tab.

As it becomes clear, there are no difficulties and nuances in installing Windows on an SSD, except for switching the operating mode of the drive and a properly configured operating system.
(Visited 18,096 times, 1 visits today)
More recently, all computers worked with HDDs, with low speed and low efficiency. But they were replaced by a new generation of drives, the so-called SSDs, which work much faster than their old counterparts. Like all new devices, they were expensive at first, and their volumes did not differ in large capacity.
But over time, manufacturers began to increase their volumes, and due to competition, the cost began to decline. It would seem, what else does an ordinary user need? But they have one person
ness: excessive overwriting of data can completely disable it. But tweaking Windows 7 to run optimally with your SSD will help you avoid the hassle, and this will lead to increased SSD service life.
Why is OS customization needed?
All flash drives have their own memory, it is based on microcircuits. They do not have the moving parts that are found on the HDD, and therefore they are not afraid of any shock. SSD memory consists of many cells, which can wear out with a lot of overwriting.
And a very important point is setting up the OS to transfer data to a flash drive, since calling some services and operations from the drive is slow if you do not configure windows.
The setting will reduce the use of space, accesses to it, which will certainly lead to an increase in the lifespan of removable media. If an SSD is used normally, it can last for a decade, and if you use it actively, then the period is reduced to 2 years.
To install windows on a drive, you need to prepare the system. We check:
- go to the website of the computer or SSD manufacturer, check the relevance of the versions. If you intend to reflash it, then you can erase all data, and you should be aware of this before installing the OS. Find information about the update, download it to your computer;
- we transfer the system startup in the BIOS setup to AHCI, that is, we set the removable drive first. Use newest modes, otherwise it will work with glitches;
- removable media must be formatted. You can use windows tools, it can handle this task;
- you should check the system boot from removable media, connect it, create logical partitions on it. If it was previously split, then update them, delete the old split, and split again. Now install the latest version of the disk controller driver downloaded from the manufacturer's website on it.
Video: Optimizing SSD Drives
Disable services and functions
Many services and functions enabled by default in windows 7 really slow down the system startup from an SSD, we will tell you how to disable them correctly, and which services are not rational to disable. Since running services consume a lot of computer resources, disabling them will speed up the start, and the operation of the removable media itself.
Indexing and Caching
To disable cache entry, do the following:

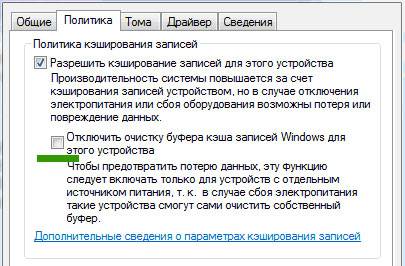
The option of creating a write cache in windows 7 constantly accesses the device's RAM and records the most requested commands, and then they will be executed on removable media. But SSDs are much faster than HDDs, and this option is superfluous.
Indexing is useful only for the system to work with HDD, but for removable media it is not effective: it will not affect the speed, and the disk will serve much less, since the index data will be constantly updated.
Disabling this feature will not affect the database, and therefore the shutdown operation will go unnoticed for the system to start:
- my computer;
- storage device;
- properties.
In the window that opens, uncheck the "enable indexing" option, and if the system gives you a warning about an error, then you do not need to return everything back, and still uncheck the box.
Defragmentation
Disable defragmentation in automatic mode, this function is not needed, it will only reduce its capabilities.
We carry out:

Hibernation
Windows has useful power saving features such as sleep and hibernation. These features are specially designed for notebook computers that require a power saving mode.

Hibernation is the preservation of computer data when it enters hibernation mode, Windows writes them down and saves them in the Hiberfil.sys folder on the HDD. When you exit this mode, all data is unloaded, and the computer starts from the place where it was stopped.
If you disable this mode, then you can significantly increase the space, and if you start the system from it, then there is no need for them.
The system will start up much faster, and you can turn it off from the start menu:

You should start the service as a computer administrator, right-click, a command line opens: enter:

After these steps, the service will be disabled.
System Restore
With this function, you can roll back the system if any glitches began. Windows creates restore points, writes everything to a separate file, which takes up a lot of space. You can disable this feature, but it will be better if you limit the size of the file intended for system recovery.
To do this, open the folder "my computer":

Prefetch and SuperFetch
SuperFetch is responsible for caching the most requested files, and this service is not needed to run from a drive and should be disabled.
The Prefetch service is responsible for loading programs into the computer's RAM, and in our case it is useless, and we disable it:

Video: Disk Setup
Moving the paging file
It is advisable to do this if the OS is 32-bit, the paging file needs to be moved to another location, you should run a number of commands:
- Control Panel;
- System;
- Additionally;
- High-speed performance;
- Parameters;
- Additionally;
- Virtual memory

If your computer has 64-bit windows with more than 8GB of RAM, then you can safely disable the paging file option:

Is TRIM enabled?
With the TRIM command, the OS sends important information to the SSD about unused data blocks, which can be cleared by it itself. Since the option to format and delete files can lead to poor performance of the drive, this function allows you to reduce the number of unnecessary files and clean it.
This is one of the most basic commands that must be enabled, otherwise the recording level will be low, which will lead to reduced disk space functionality.
To make sure this feature is enabled:

Setting up windows 7 for an SSD disk, SSD Mini Tweaker program
If you are not a computer genius, and you want to transfer the OS to an SSD, then use a small utility SSD Mini Tweaker. The program does not take up much space, but copes with its task quite quickly, and is relevant for those users who are going to transfer the launch of Windows 7 32 and 64 bit to SDD.
The window of the launched program looks like this, and you can immediately configure the necessary parameters.

Many functions for transferring Windows are not needed, they can only slow down the process itself:

The program will help you to configure about 13 parameters that will increase the performance if it starts from an SSD. The goal of optimization is to reduce the number of calls to removable media, which prolongs its performance.
Your operating system can be activated by running it from an SSD drive, and Windows 7 is perfectly adapted to run from a solid state drive. Even if you have a lot of power-hungry programs installed, with proper optimization, you can debug it to run from SDD, paying particular attention to Superfetch / Prefetcher and defragmentation.
If you have a lot of RAM, then this is even better: you can successfully optimize it, which will only lead to the speed and long service life of removable media.
SSDs are getting cheaper every day, and let's hope this trend does not change.
Many new computer models already contain this type of storage, the manufacturers themselves have optimized the operating system to work efficiently with a solid-state drive.
Of course, you need to choose the optimization method yourself, and we only gave the most important tips on how to do this without losing important data when transferring the system to an SSD.


