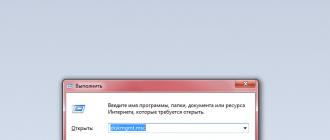
If you have installed on your computer antivirus program Can scan all files on your computer, as well as each file individually. You can scan any file by right-clicking on the file and selecting the appropriate option to scan the file for viruses.
For example, in this figure it is highlighted file my-file.marker, then you need to right-click on this file and select the option in the file menu "scan with AVG". When you select this option, AVG Antivirus will open and scan the file for viruses.
Sometimes an error may occur as a result incorrect software installation, which may be due to a problem encountered during the installation process. This may interfere with your operating system link your MARKER file to the correct application software, influencing the so-called "file extension associations".
Sometimes simple reinstalling Unknown Apple II File can solve your problem by linking MARKER to Unknown Apple II File correctly. In other cases, problems with file associations may result from bad software programming developer and you may need to contact the developer for further assistance.
Advice: Try updating Unknown Apple II File to the latest version to ensure you have the latest patches and updates.

This may seem too obvious, but often The MARKER file itself may be causing the problem. If you received a file via an email attachment or downloaded it from a website and the download process was interrupted (such as a power outage or other reason), the file may become damaged. If possible, try getting a new copy of the MARKER file and try opening it again.
Carefully: A damaged file can cause collateral damage to previous or existing malware on your PC, so it is important to keep your computer up-to-date with an up-to-date antivirus.

If your file is MARKER related to the hardware on your computer to open the file you may need update device drivers associated with this equipment.
This problem usually associated with media file types, which depend on successfully opening the hardware inside the computer, e.g. sound card or video card. For example, if you are trying to open an audio file but cannot open it, you may need to update sound card drivers.
Advice: If when you try to open a MARKER file you receive .SYS file error message, the problem could probably be associated with corrupted or outdated device drivers that need to be updated. This process can be made easier by using driver update software such as DriverDoc.

If the steps do not solve the problem and you are still having problems opening MARKER files, this may be due to lack of available system resources. Some versions of MARKER files may require significant amounts of resources (e.g. memory/RAM, processing power) to properly open on your computer. This problem is quite common if you are using fairly old computer hardware and at the same time a much newer operating system.
This problem can occur when the computer is having difficulty keeping up with a task because the operating system (and other services running in the background) may consume too many resources to open the MARKER file. Try closing all applications on your PC before opening Unknown Apple II File. Freeing up all available resources on your computer will provide the best conditions for attempting to open the MARKER file.

If you completed all the steps described above and your MARKER file still won't open, you may need to run equipment update. In most cases, even when using older versions of hardware, the processing power can still be more than sufficient for most user applications (unless you're doing a lot of CPU-intensive work, such as 3D rendering, financial/scientific modeling, or intensive multimedia work) . Thus, it is likely that your computer does not have enough memory(commonly called "RAM" or random access memory) to perform the task of opening a file.
The Elder Scrolls 5: Skyrim is a computer fantasy role-playing game where the action takes place in the fictional world of Tamriel. An abundance of interesting quests, picturesque locations, a variety of monsters and characters have helped Skyrim gain recognition throughout the world. Inspiring professionals and fans to create add-ons and mods for an even more exciting experience.
To fully open the entire map in Skyrim, there are three ways:
First way the most difficult and lengthy (it will take about three hundred hours or more). This is a normal walkthrough, where one area after another will open up sequentially. In addition to the story missions, the player will have to complete all side quests, carefully search chests, open all doors and scrupulously study caves, tombs and even corpses, start conversations with everyone he meets, read all diaries, notes and books. Additional tasks can be in the most unexpected places and for different characters. Diaries, notes and books can be invaluable in finding new places in Skyrim.
Second option much simpler and does not require a full exploration of Skyrim on foot. You need to download and install the Cartographer 2.0.1 mod. Thanks to him, a card seller will appear in the game in locations. You can find merchants in Whiterun, next to the stables, in Riften near Helga and in the tavern in Raven Rock. Unfortunately, even if you open the entire map in Skyrim using the Cartographer, you will not be able to get to all locations quickly; you will still have to complete tasks sequentially. But the positive side of the mod is that the player will not miss a single location that may contain valuable artifacts and knowledge.

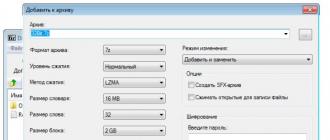
In order to install the mod, you should download all additional archives for the game, depending on which version the player has installed and the additions to it. Move the Data folder from the archives to the Skyrim folder and confirm replacing the folder. All that remains is to open the game Launcher, go to the File folder and activate the plugins in it. After completing this procedure, card sellers should appear in the game.
Last option, which will allow you to open the entire map in Skyrim is the simplest. To do this you need to use a cheat code. This path not only shows all locations, but also allows you to quickly travel to an unexplored area.
The cheat code can be deactivated at any time and continue to explore the area as usual, opening location after location.
In order to activate the cheat code, you need to open the console window by pressing the tilde (~) key, then enter the code tmm 1 into the command line. After this operation, the entire map in the game will be open, and all hidden ones will appear on it location markers. In order to cancel the actions of the code, you need to enter the code tmm 0 into the console line.
These three options, how to open the entire map in Skyrim, can be used depending on the situation. The player is presented with a choice: go through the entire Skyrim game, with all the accompanying difficulties and challenges, or choose the easy way with the help of mods and cheat codes.
Marker
A marker is a small picture that is associated with a specific location on the map.
Example of creating a marker:
// Create a marker in Novosibirsk with a default image:
var marker = new DG.Markers.Common((geoPoint: new DG.GeoPoint(82.927810142519,55.028936234826) ));
// Add a marker to the map:
myMap.markers.add(marker);
As a result, we will see a marker on the map for a point with coordinates: longitude - 82.927810142519, latitude - 55.028936234826. In this case, the default image will be used for the marker. In the future we will look at the DG.Markers.Common class in more detail.
Marker groups
Each marker must belong to a specific group. This makes it possible to perform group operations.
For example, let's say we have two types of markers: one for high-rise buildings, the other for private houses. By placing the former in one group and the latter in another, we can explicitly manipulate each set of markers.
The group object provides the most comprehensive arsenal of methods for managing tokens. Any operations with markers in the group are immediately displayed on the map.
Marker Manager
The manager is responsible for managing the groups. And the groups, in turn, manage the markers. At the same time, for convenience, some methods for working with markers are also available in the manager.
The marker manager is available as the markers property of the map object:
// Initialize the map object:
var myMap = new DG.Map("myMapId");
// Token Manager:
myMap.markers;
Any operations with markers in the manager are immediately displayed on the map.
Marker class DG.Markers.Common
Below we will take a closer look at the constructor and all the methods of the marker class. For clarity, let's assume that myMarker is a marker object.
Constructor
Options:
| Name | Type | Required | Description |
|---|---|---|---|
| options.geoPoint | DG.GeoPoint | Yes | |
| options.icon | DG.Icon | No | Marker picture. The class is described in more detail below. If icon is not specified, then the default image is used. You can also use the getAdaptiveMarker() function to create a smart marker that adapts to the device's screen. Open example in new window |
| options.clickCallback | Function | No | Open example in new window |
| Object | No | The context for calling the click handler function. Open example in new window |
|
| options.hoverIcon | DG.Icon | No | The icon that will be shown when you hover over the marker. Open example in new window |
| options.clickIcon | DG.Icon | No | The icon that will be displayed when you click on the marker. Open example in new window |
| options.hint | String | No | |
| options.draggable | Boolean | No | Open example in new window |
| options.dragStartCallback | Function | No |
|
| options.dragStopCallback | Function | No |
|
Var options = (geoPoint: new DG.GeoPoint(82.927810142519,55.028936234826) );
// The marker class takes a single parameter - the options object
var marker = new DG.Markers.Common(options);
While options.geoPoint and options.clickCallback are clear, options.icon requires some explanation.
The icon parameter is of type DG.Icon. The constructor of this class takes 4 parameters: url, size, offset, calculateOffset.
Designer DG.Icon
Options:
| Name | Type | Required | Description |
|---|---|---|---|
| url | String | Yes | Image address. |
| size | DG.Size | Yes | The exact size of the picture. For example, to add an image with a width of 30 pixels and a height of 40 pixels, you need to create a new DG.Size(30,40) object. |
| calculateOffset | Function | No | A function that calculates the offset of the point that the marker points to relative to the upper left corner. Must also return an object of the DG.Pixel class. The default function calculates the offset so that the marker points to the middle of the bottom edge of the icon. This position is natural if the default marker image is used. But if, for example, the picture is a circle, then the user expects that the center indicates the geographic location of the object. To do this, you need to replace the offset calculation function. For example, if the circle has a size of 30x30. Then let's set calculateOffset as: function() ( return new DG.Point(-30/2, -30/2); ) The purpose is the same as that of the offset parameter, with the difference that the calculateOffset parameter is a function that can dynamically calculate the offset. The function must also return an object of class DG.Pixel. |
Methods
Get token ID
myMarker.getId()Returns:
Get token container ID
myMarker.getContainerId()Returns:
Hide marker
myMarker.hide()Show marker
myMarker.show()Get the geographic location of a marker
myMarker.getPosition()Returns:
Set geographic location of marker
myMarker.setPosition(geoPoint)Options:
Get marker icon
myMarker.getIcon()Returns:
myMarker.getHintContent()Returns:
myMarker.enableDraggable() myMarker.disableDraggable()Marker class DG.Markers.MarkerWithBalloon
Marker class with balloon. It differs from a regular marker in that it allows you to manipulate the balloon associated with the marker. Extends the DG.Markers.Common interface with the following methods.
Constructor
Options:
| Name | Type | Required | Description |
|---|---|---|---|
| options.geoPoint | DG.GeoPoint | Yes | The geographic location of the point to which the marker points. |
| options.icon | DG.Icon | No | Marker picture. The class is described in more detail below. If icon is not specified, then the default image is used. |
| options.clickCallback | Function | No | A handler that is called when the mouse clicks on the marker. Function call context: if clickCallbackContext is not set, then the marker itself; if given, then clickCallbackContext . The function can take two parameters: First: click event (DG.Events.Mouse object) Second: the marker on which the click occurred. |
| options.clickCallbackContext | Object | No | The context for calling the click handler function. |
| options.hoverIcon | DG.Icon | No | The icon that will be shown when you hover over the marker. |
| options.clickIcon | DG.Icon | No | The icon that will be displayed when you click on the marker. |
| options.hint | String | No | A tooltip that will be shown when you hover over the marker. |
| options.balloonOptions | Object | Yes | An object that contains the parameters of the balloon associated with the marker. |
| options.balloonOptions.showLatestOnly | Boolean | No | Indicates whether to hide the balloon associated with a marker when displaying the balloon of another marker that has the showLatestOnly option enabled. Default value: true, the balloon is hidden. |
| options.balloonOptions.shouldHideIcon | Boolean | No | Whether to hide the marker icon when the balloon is displayed. Default: false. |
| options.balloonOptions.isClosed | Boolean | No | Whether to show a “cross” in the upper right corner of the balloon, by clicking on which the user can close the balloon. Default: true, the “cross” is shown. |
| options.balloonOptions.contentHtml | String | No | Contents of the balloon. Custom HTML code. Default: empty string. |
| options.balloonOptions.headerContentHtml | String | No | Contents of the balloon header. Custom HTML code. |
| options.balloonOptions.footerContentHtml | String | No | Contents of the footer of the balloon. Custom HTML code. |
| options.balloonOptions.contentSize | DG.Size | No | Fixed balloon content size. By default (i.e. when options.contentSize is not passed), the size of the balloon is automatically adjusted to the size of the content. If the parameter is passed, the width of the DG.Size object must be at least 87 pixels. |
| options.balloonOptions.adjustMapCenterToBalloon | Boolean | No | The parameter determines whether the center of the map will be changed if the balloon is located outside the visible area. Default: true , the center of the map will be shifted so that the balloon falls into the visible area of the map. False: the map center will not be shifted and the balloon will remain outside the visible area. |
| options.balloonOptions.closeCallback | Function | No | A function that is called when the user tries to close the balloon (by clicking on the “cross”). Moreover, if we define this function, then we reset the behavior of the “cross” by default. Therefore, if we want to close the balloon inside our function, we need to do this explicitly, for example, using the function: myMarkerWithBalloon.hide() , where myMarkerWithBalloon is a marker object with a balloon. |
| options.maxContentHeight | Number | No | The maximum height of the balloon in pixels when the balloon size is automatically adjusted to fit the content size (i.e. when options.contentSize is not passed). By default, the height of the balloon is unlimited. If by mistake both options.contentSize and options.maxContentHeight are specified, the latter is ignored. |
| options.maxContentWidth | Number | No | The maximum width of the balloon in pixels when the balloon size is automatically adjusted to fit the content size (i.e. when options.contentSize is not passed). By default, the width is limited to 850 pixels. Valid values are from 87 to 850 pixels. If by mistake both options.contentSize and options.maxContentWidth are specified, the latter is ignored. |
| options.draggable | Boolean | No | Enables marker drag mode. Open example in new window |
| options.dragStartCallback | Function | No | A handler that is called when the marker begins to be dragged. |
| options.dragStopCallback | Function | No | A handler that is called when the marker has finished dragging. |
Methods
Display balloon associated with marker
myMarker.showBalloon()Hide balloon associated with marker
myMarker.hideBalloon()Set new content for the balloon associated with the marker
myMarker.setBalloonContent(balloonContent)Options:
Find out the contents of a balloon associated with a marker
myMarker.getBalloonContent()Returns:
Set new header content for the balloon associated with the marker
myMarker.setBalloonHeaderContent(balloonHeaderContent)Options:
Find out the contents of the header of the balloon associated with the marker
myMarker.getBalloonHeaderContent()Returns:
Set new footer content for the balloon associated with the marker
myMarker.setBalloonFooterContent(balloonFooterContent)Options:
Find out the contents of the footer of the balloon associated with the marker
myMarker.getBalloonFooterContent()Returns:
Get the size of the area of the balloon associated with the marker
myMarker.getBalloonContentSize()Returns:
Set the size of the area of the balloon associated with the marker
myMarker.setBalloonContentSize(size)Options:
Get the contents of a marker hint
myMarker.getHintContent()Returns:
Check whether the marker balloon is currently shown or not.
myMarker.isBalloonVisible()Returns:
Enable marker drag mode
myMarker.enableDraggable()Turn off marker drag mode
myMarker.disableDraggable()Marker manager class DG.Markers
The manager is responsible for managing the groups. And the groups, in turn, manage the markers. For convenience, some methods for working with markers are also available in the manager.
Below we will look in detail at all the methods of the manager class. For clarity, let's assume that myMap is a map object.
The description of methods consists of an action (what does the method do, what is it for?) and the name of the method. At the same time, additional parameters, the return value of the method and features, if any, are presented.
You cannot create a token manager explicitly using the new keyword. It is automatically available as the markers property of the map object.
Methods for managing token groups
To create a group
myMap.markers.createGroup(groupName)Options:
Returns:
Delete group
myMap.markers.removeGroup(groupName)Options:
Returns:
Get a list of group names
myMap.markers.getAllGroupsNames()Returns:
Returns:
Get default group name
myMap.markers.getDefaultGroupName()Returns:
Get default group object
myMap.markers.getDefaultGroup()Returns:
In fact, this method is a short version of the expression myMap.markers.getGroup(myMap.markers.getDefaultGroupName()) .
Token Management Methods
Let's look at some of the methods for working with markers that can be performed in the manager. If more complex operations are required, they can be performed using the group object.
Add a marker
myMap.markers.add(item, groupName)Options:
Remove marker
myMap.markers.remove(item)Options:
Get a list of all markers
myMap.markers.getAll()Returns:
Returns:
Open example in new windowMarker group class DG.MarkerGroup
The group object provides the most comprehensive arsenal of methods for managing tokens.
Below we will look in detail at all the methods of the marker group class. For clarity, let's assume that myGroup is a group object.
The description of methods consists of an action (what does the method do, what is it for?) and the name of the method. At the same time, additional parameters, the return value of the method and features, if any, are presented.
You cannot create a group of markers explicitly using the new keyword. The correct way to do this is to use the createGroup method of the token manager.
Methods
Add a marker to a group
myGroup.add(item, index)Options:
Remove a marker from a group
myGroup.remove(item)Options:
Get a list of all markers in a group
myGroup.getAll()Returns:
Returns:
| Type | Description |
|---|---|
| DG.Markers.Common | DG.Markers.MarkerWithBalloon | Marker. |
Remove all markers from a group
myGroup.removeAll()In this case, although all markers are removed from the group, the group object itself remains untouched.
Hide group
myGroup.hide()In this case, all markers become invisible. Moreover, when adding new markers, they also remain invisible.
Show group
myGroup.show()Overrides the action of the myGroup.hide() method, all markers become visible.
Get the number of markers in a group
myGroup.length()Returns:
Check the presence of a marker in a group
myGroup.contains(item)Options:
Returns:
Get the serial number of a marker in a group
myGroup.indexOf(item)Options:
Returns:
Perform an operation for each marker in a group
myGroup.forEach(callback, context)Options:
Get group name
myGroup.getName()Returns:
| Type | Description |
|---|---|
| String | Returns the name of the group, which is specified in the group constructor when it is created. |
Version: 7-1
Language: Russian
Description:
This mod will make your markers, icons of cities and other locations on the map colored! This mod is designed for game version 1.8.151.0.7-1.9.32.0.8, and is also compatible with SkyUI 3.4 and SkyUI 4.1.
Update:7-1
- Compatible with game 1.9.32.0.8 and SkyUI 4.1
- Added support for installing the mod through the NMM manager, all variations in one installation archive
- Fixed a bug with the disappearance of the compass
- Updated all files of all map variants
Changelog:
- Now the HUD interface with markers is displayed with colored icons
- Added several map color options and icons
- Compatible with game version v1.8.151.0.7
- Made some changes to markers
Notes:
This mod is not compatible with other mods for changing the map and markers
Only for mods that have "map.swf" files in Skyrim/data/interface and "hudmenu.gfx" in Skyrim/data/interface/exported
Description of folders in the archive:
"Default Markers" folder This is for those who do not have the SkyUI mod installed, inside the folder there are options:
1.EzEMarkers 1 - All markers are multi-colored, and the player marker is gray (regular)
2.EzEMarkers 1 - Green - All markers are multi-colored, and the player marker is green
3.EzEMarkersPAPER - All markers are multi-colored and “paper” (flat)
4.EzEMarkersREAL - All markers are multi-colored and “realistic” (voluminous)
5.EzEMarkersSIMPLE - All markers are gray, normal, but tasks are marked with green markers, and open cities are marked with blue markers
Folder "SkyUI" This is for those who have the SkyUI mod installed, inside the folder there are options:
1.EzE-SkyUI-Default - All markers are multi-colored, and the player marker is gray (normal)
2.EzE-SkyUI-DefaultGreen - All markers are multi-colored, and the player marker is green
3.EzE-SkyUI-Realistic - All markers are multi-colored and “realistic” (volumetric)
4.EzE-SkyUI-Simple - All markers are gray, normal, but tasks are marked with green markers, and open cities are marked with blue markers
File "MineMarkers.esp" no matter what options, this file changes the standard mine marker to a marker with a minecart, it can be installed with the “Default Markers” option or with the “SkyUI” option
Requirements:
- Skyrim v1.8.151.0.7 or 1.9.32.0.8
- or optional(in the archive there are 2 options "For SkyUI and without SkyUI)
Installation via NMM manager:
- Everything is as usual, place the unpacked archive with the mod in the downloads in the NMM manager and select the desired option from the "Default Markers - Without SkyUI" category - this option is for those who do not have SkyUI in the game or from the "Default Markers - With SkyUI" category for those who have SkyUI installed in the game
- Choose only 1 option!!! (description of options above)
- And if desired, activate the “Mine Markers Swap” option, this will replace the usual mine icon with a mine cart (see screenshot), works with marker options for SkyUI and without SkyUI
Manual installation:
- The archive contains 2 folders "Default Markers" and "SkyUI" and 1 file "MineMarkers.esp" (read the description of all options above, put only 1 of the options!!!), and the file MineMarkers.esp is optional, it will change the standard markers mines on markers with a trolley pattern
- All screenshots with the corresponding names of map options are located in the Fomod - images folder
- There is no need to install the Fomod folder itself! This is the installation folder for NMM manager
Troubleshooting:
1.If the compass disappears in the game, then delete the file "hudmenu.gfx" at: Skyrim/data/interface/exported
2.If markers disappear in the game, then delete the "map.swf" file at Skyrim/data/interface and then reinstall
3.If you have a compatibility problem with SkyUI and when you open the "M" map a window appears notifying you that SkyUI is incompatible with the map, then exit the game menu while paused and go to "Mod Settings", find the SkyUI mod and go to the settings, select category "Advanced" and uncheck the "Map Menu" option in the "Checking SWF Version" section and that's it, the message will no longer appear
Successful website promotion is almost impossible without a well-designed semantic core. The right TL should cover your entire topic and contain search queries that your target visitors are interested in. WITH h Should we start collecting it in order to get the most complete list of target queries for our site?From the selection of marker queries. We will look at what these are and how to collect them in the article.
Token requests (tokens)- these are requests that clearly correspond to the page being promoted. Most often these are the names of sections, categories, headings, etc.
For example, for a category page "Exercise bikes" From a small online store you can pick up the following markers:
exercise bikes for home
magnetic exercise bike
elliptical exercise bike
For section "Shoes" the markers will be:
children's shoes
women's shoes
winter shoes
men's shoes, etc.
What are they needed for?
Markers are the basis for further search for keys that will be generated on their basis.
For example, from the marker " magnetic exercise bike" we will receive the following requests:
buy magnetic exercise bike
magnetic exercise bike price
magnetic mini exercise bike
folding magnetic exercise bikes
The main sources for receiving marker requests:
1. Website parsing
The easiest way to get markers is by scraping the main sections of your site or a competitor’s site.
Let's look at the main methods of parsing:
— SeoTools plugin for Excel. If you are used to working with Excel, this plugin will be useful to you. Detailed instructions for installing/configuring/using this plugin.
We enter the site URL into the "Spider" tab, select URL parameters and H1 headers (these will be our markers), and perform parsing:
The output is an indicative list of markers. We manually discard the service pages and get a list of markers from which we will later collect the semantic core.
Another good source of markers is Yandex.Metrica. But this method is only suitable for your own website or if you have access to competitors’ data :).
We go to the search phrases section in the new Metrica:
We group the data by search phrases/login pages and export it to Excel:
And at the output we get a list of markers:
Getting rid of garbage.
4. Independent selection
Have you tried all of the above methods for selecting markers, but do you feel like you've missed something? It's time to take a pen, a piece of paper and select queries manually. You can ask your colleagues for help. This method is often neglected, and in vain! After all, being an expert in your field, you will certainly be able to pick up a lot of queries that can be used in the future to expand the language. Ask yourself questions: What is the topic of the site? What main products/services does the site sell? etc. And based on this, you will formulate marker queries for your site.
Advice: When selecting markers, try not to select too “broad” marker queries (for example, the query "cars" will give you too much garbage, which you will spend extra time cleaning) and "narrow" (for example, the request "torneo optimo exercise bike" too narrow and will not allow you to receive additional requests).
To obtain a complete list of marker requests, it is not enough to use only one of the above methods. Use them all. Each additional method will add new markers to you. Remember, markers are the backbone of your future NL, on the basis of which the selection of key queries will be carried out.
In the process of selecting markers using different methods, it is not surprising that markers can be repeated. To avoid duplicates, after collecting all the markers, put them in Excel in one column and delete duplicates (in "Data" tab - "Remove duplicates" button).