In order to get to the web interface of the router, you need to open your internet browser and in the address string to dial 192. 168.0.1, Username - admin. , Password - admin. (Provided that the router has factory settings, and its IP has not changed).
Changing the factory password
Default: Login admin., Password admin..
In the router interface you need to go to the tab System (System), Menu Administrator Password (Administrator Password).
In field NEW PASSWORD Enter a new password.
In field Confirm Password) repeat new password.
After that, the router will suggest re-entering its settings.

Connecting Internet Connection
On the page Advanced settings; Choose Net; ⇒WAN.;.

Click on the button Add.

Configuring PPPOE Connection
- In field Connection type: Choose PPPoe
- In field Port choose WAN-port - it is indicated as Port 5..
- Username: Your login from the contract
- Password: Your password from the contract
- Password confirmation: Repeat password
- Authentication Algorithm: AUTO.
- Keep Alive.
- MTU.
In field miscellanea NAT. and Network screen.
Enable IGMP.

Setting up L2TP connection
- In field Connection type: Choose L2TP + dynamic IP
- In the port field, select the WAN-port - it is indicated as Port 5.
- Username: Your login from the contract
- Password: Your password from the contract
- Password confirmation:repeat password
- VPN server address: Propush the address of the VPN server provider
- Authentication Algorithm: AUTO.
- Keep Alive. - put a tick for permanent connection
- MTU. - Change the value by 1450 or less
In field miscellanea Check the checkboxes NAT. and Network screen.
If the provider provides Internet television service, check Enable IGMP.

Setting up PPTP (VPN) with automatic receipt of the local IP address (DHCP)
- In field Connection Type: Choose PPTP. + Dynamic IP.
- In field Name Enter the connection name (you can not change)
- Username: Your login from the contract
- Password: Your password from the contract
- Password confirmation: Repeat password
- Connect automatically: put a tick
- MTU. Change the value by 1450 or less
- Authentication Algorithm: AUTO.
- Keep Alive. - put a tick for permanent connection
- We save the settings with the reload router button.


Setting up Wi-Fi on the router
1. From the page of extended settings we go to the tab Wi-Fi, Choose item basic settings; and install the desired name of the wireless access point SSID. After that click Change;.

2. After that, it is also recommended to install a password to your wireless network. To do this, go to Wi-Fi security settings, select the authorization type (WPA2 / PSK recommended), and then enter any password of at least 8 characters - this will help protect your wireless network from unauthorized access. Save the changes made.

That's all: now you can try to use the Internet on a wireless Wi-Fi connection from a laptop, tablet, or any other equipment.
Check the status of connecting to the Internet
If the connection is created correctly and there is no problem from the provider, then in the column " Network information", WAN connection status Your IP address will be written.

Saving / restoring the router settings
- Select Saving the current configuration, to save the current router settings, the settings file will be saved to the specified place on the hard disk.
- To restore settings from the file, you must click and select Loading early saved configuration into the device, Specify the path to the file with the settings, then click the button.
Step-by-step instruction, how setup DIR-300. It begins with the connection of the router.
Physical connection
- Turn on the D-Link DIR-300 into the socket through the power supply.
- Cable from an Internet provider Install in the appropriate port of the router.
- Connect the computer and router with a wire (patchcord, i.e. blue cable).
- For Wi-Fi, screw the antenna.
As a result, the wires on the back of the router should look something like this:

Setting on PC
On a stationary computer connected over a wire - over the start, you turn the control panel, go to the network and the Internet, then the Network Management Center and Shared Access, then go to the change in the adapter parameters. Look at your local network included. Turn on if it is disabled.

From this point on, the network earned, nothing needs to be configured in the computer. If there are some problems, you may have a driver for a network card (or for Wi-Fi), refer to our article by.
How to enter the admin
The computer itself is no longer needed to set up, the router stores all the Internet settings in itself. But to customize the network you need to go to visit the router via the web interface. You can do this only through the wire, so you have to go through either a stationary PC with a wired connection, or connect a laptop / netbook on the LAN network to the router.
- Most often at the bottom of the DIR-300, the address of the local "site" with the settings, as well as the login and password. Typically address is 192.168.0.1.

- Enter it in the browser string, and you will enter the page that the router generates.

- By default, the username and password are admin.

Setting
Primary setup and path to the main Internet settings:
- You can immediately change the language of the interface.

- And set the password from the DIR-300 router. If you forget it, you will have to drop it together with all the settings on the "default".

- To configure the Internet at the bottom, go to the Extended Settings item.

- In the network block, follow the WAN link.

- Create a new connection, for this press the Add button to add in the lower right corner.

Main network settings in the D-Link DIR-300 router:

- Here you need to choose the type of connection with the Internet. Usually it is PPPoE.
- You may have to clone the MAC address of the computer's network card to the router using the buttons with green arrows (not always necessary, only if your provider has a binding MAC address).
- Specify the username and password. These are data for Internet access from your provider (if you do not know, look for them in a contract with the provider).
- In other fields, you can leave everything by default and click the Save button.

- After that, you will redirect you to the previous page. There have a new connection you have appeared. Check if the "Round Tick" is installed on this connection to the default gateway.

- As a result, the Internet on a computer connected via LAN (i.e. wire) must earn. To check, go to any site:

- To make the settings are not reset, click on the router Save:

Congratulations, you set up the Internet in the router and connected a computer to the LAN to it.
Enabling Wi-Fi and Setup
To work on WiFi you need not only a laptop with a wireless network adapter, but also setting the length of the router. You already know how to go to the router through the computer, do it.
- In advanced settings, find the WiFi section. Check that the green switch is in the ON position. Bully below, head the link to the basic settings.

- Check on the item Enable Wireless Connection and specify the name of the network. It will be displayed as the name Wi-Fi, which can be seen by all devices (not even yours) located in the zone of the router.

- Click Change.

- We will return back, click Security Settings.

- Push the password for Wi-Fi, otherwise they will be able to take advantage of everyone who cares him.

- Save the changes to the Wi-Fi setting on the DIR-300 router.

How to connect to wi-fi
If you set up a d-link router through a laptop / netbook with a wired connection, then you no longer need it. Disable the wire physically, and in Windows, turn off the "LAN connection".
- Now turn on the wireless network connection (it must be with all drivers and software on Wi-Fi).

- In the third, the clock is displayed next to the clock with WiFi networks found. Recall how you called it in the router settings. Select and click Connect.

- Specify the password installed to you when setting up the Wi-Fi router D-Link DIR-300.

How to arouse ports on the router
What is port redirection? This is a port binding on the external DIR-300 router interface with the device port on the local network. The essence is to access the device from the Internet using a specific open port of the router.
In practice, it may look like that. There are needs to provide access to the remote control of the slave. A PC table connected to the Internet via the DIR-300 router (or another cause). To make this, the rule is created to redirect the WAN port on the home PC port.
To do this, go to the Advanced section (Advanced Settings) section, then in the Port Forwarding setting (port redirection).
How to configure:

- Select the name of the rule (so as not to get confusing better to give meaningful names).
- Select a specific public port number or suck the port range). Public is an external port for inert. To prescribe only one specific number, specify it in the form of the initial and final.
- In the test example, we opened the port 3389.
- We write the IP address of the PC (server) to which ports are prohibited. It is worthwhile to reserve this IP address for a specific computer in the DHCP backup settings on the router, then it will not be changed over time. If you do not want to reserve in the router, you can register the IP address manually in the PC network card settings.
- In the test example, an internal gray IP address was specified 192.168.1.100.
- Push the port to get incoming PC connections on the local network.
- We prescribed the default port for the test 3389.
- Do not forget to check the box on the left to enable the rules in the work.
Setup IPTV.
Setting up IPTV on routers: D-Link DIR-300, DIR-400, DIR-615 and DIR-655. Enter the admin panel (instruction at the beginning of the article), you will be the main settings menu. Click Advanced (Advanced Settings), then ADVANCED NETWORK. Specify the parameters:
- A tick on the Enable Multicast Stream so that IPTV worked on the cable.
- Tick \u200b\u200bon Wireless Enhance Mode to work IPTV on Wi-Fi.
- Save the "Save Settings" button (at the top of the page).
Perhaps the interface in your model will be slightly different from the image represented.

If the specified menu items are not in the router, it may be necessary to flash it with a new firmware supporting IGMP proxy or multicast routing. Also keep in mind that the English interface is shown here, you may have Russian.
How to turn on the router as a repeater
In order for the DIR-300 to earn, as the repeater it needs to reflash the DD-WRT program.
- Version A1 is flashing through the TFTP (so the repeater is harder from it).
- Version B1 can be fired through the web interface.
We proceed with configuration of the repeater:
- Change the subnet of the DIR-300 to another so that it differ from the main point of the source (for example, laptop). If on a laptop 192.168.1.1, then it is necessary to do here 192.168.2.1.
- Available on DHCP, for this, in the form of a gateway, select IP of the main point (192.168.1.1).
- In the WAN settings item, go to Automatic-Configuration DHCP and activate STP. Save.

Wi-Fi Setup:
- In Wireless, select Mode - REPEATER (or REPEATER Bridge if you have another firmware version).
- Other remaining settings must match the source parameters (SSID, channel, connection type).
- The channel needs to be specified, rather than AUTO, security settings should also be similar to the source parameters.
- Save.

After saving the settings, go to Status\u003e Wireless\u003e Site Survey, select the source point. Press the Connect button, and save again. As a result, your router must get an IP source and earn as a repeater.
Video settings on Rostelecom
Step-by-step video instructions D-Link DIR-300 for Rostelecom:
How to reset the settings and restart
To reset the settings to the factory (default) router must be enabled in the outlet. After that, press the RESET button. It is recessed into the housing to prevent accidental pressing, so the toothpick is needed. In some models to reset, you need to press RESET, and hold 15 seconds.

This will reset absolutely all the settings, including the password (by default it, like the username - admin).
How to restart the router:
- Go through the web interface, and click Reboot.

- For 30-60 seconds, the router will restart, at this time you will be shown a message that it cannot be turned off from power.

- After that, D-Link DIR-300 is fully ready for work with old settings.
Also, to restart the router, it is possible to physically disable it from the power of the socket (preferably seconds by 15-30).
Conclusion
You learned how to configure the D-Link Dir 300 router. And remember, the main ways to eliminate some problems with the router - reboot and flashing. Even if you have the latest firmware version, the resolution can get rid of network glitches (similar to Windows reinstalling).
The instructions will show the basic characteristics and help configure the D-Link DIR-300 router, the correct setting of even such a budget router will help organize a full-fledged local network at home, and when buying a more powerful router, D-Link DIR-300 will expand the infrastructure, becoming an excellent addition to the new device.
Before setting up D-Link DIR-300, you must connect the router by the following scheme:
- A provider cable coming from the panel in the entrance is connected to the WAN port, which may be called "Internet".
- The laptop connects to one of the LAN ports of the router. By default, these 4 ports are equivalent if this DIR-300 has not previously contained a VLAN configuration.
Reset
When connecting the former D-Link DIR-300, problems often arise both with non-working ports and with the input to the GUI interface. To correctly configure such a router, you need to start with a rollback to factory settings: Press the RESET button, which is located on the housing near the power connector, and hold it for 15 to 20 seconds.
The RESET button is soldered directly to the D-Link DIR-300 printed circuit board, therefore it is impossible to make an excessive force when you press: it will bring a router in order!
Restoring factory settings will also help if custom router settings are shot: the preset D-Link DIR-300 configuration should be downloaded only after rollback to the original installations.
A detailed description of the methods of restoring the factory configuration is represented in
Computer settings
The computer from which the modem configuration will be performed must receive its local address when you turn on the DIR-300 power. To do this, you need to bring the PC network card into the automatic configuration mode.
1. Through the connection icon, which is located on the taskbar, you can go to the OS network settings management.

2. Then, go to the local connection properties.

3. In TCP / IPv4 properties, you need to install automatically checkboxes.

Log in to the router interface
To log in to the D-Link DIR-300 settings, you need to dial the network address of the router in Chrome or IE.
If the PC setting is performed correctly, the main GUI router will be loaded and a request for authorization in D-Link DIR-300 will appear.

If it occurs difficulties when installing a computer connection with a router, you should use.
Configuring Internet Connections
D-Link DIR-300 supports all types of connections carried out by Russian providers. Before you configure the router, you need to prepare a contract to correctly enter credentials.
Connection to D-Link 300 can be performed in two ways:
1. Automatically using the Click'n'Connect utility. This option is well suited for the types of IPOE and PPPoE;

2. Manual setting will be preferable to automatic connections using the VPN server: L2TP and PPTP.

If you need to configure the D-Link DIR-300 router for providers and use these instructions.
Wi-Fi Setup
D-Link DIR-300 is equipped with a N150 wireless module with 2 DBI antenna. In a small room, the router provides a stable coating. You can configure WiFi both manually and using the built-in utility or WPS protocol.
- Manual configuration makes it possible to select a channel, high-speed mode and transmitter power, allowing you to easily configure the router for specific operating conditions.
- The WPS protocol is supported by both TVs and mobile gadgets, connecting devices to D-Link 300 without entering the password.
- Automatic adjustment of the secure WiFi network of the router is performed using the built-in "Master" D-Link DIR-300:

For more information on how different ways, the WiFi configuration in D-Link 300 is configured. It also presents recommendations for improving the coating and wireless speed of the router.
Routing
The network setting has ceased to be the prerogative of Gicks and Iustoms: a huge selection of devices designed to make a better life of an ordinary person appeared on the market.

The homemade fleet of network devices may include both "PC + smartphone + apad" and media server, game console, TV, IP camera and even a refrigerator, and the router is the heart of the home network. To configure it - it means to connect these devices to D-Link DIR-300 physically: wires or via WiFi. And then ensure interaction between them and the Internet, setting the rules for access and broadcast on channel and network levels.
The DR-300 DHCP server distributes all IP address devices and can work both in dynamic and static mode. You need to configure static addresses to register the route, since the router should not be associated with a permanent local IP address with the MAC address of the specified device.
Setting the DHCP parameters in the D-Link D-300 is made on the "Network - LAN" tab. Here are the pool of addresses and configure Mac / IP bundles.


Setting the routing rules is available on the D-Link DIR-300 D-Link Interface tab "Advanced Routing".


Setting up VLAN.
Most of the new D-Link DIR-300 modem revisions support VLAN - network separation technology to logical segments. The setting is performed on the "Advanced - VLAN" tab.


VLAN is used to combine devices into target groups, optimize traffic and access distribution.
For example, you can select a children's computer in a separate VLAN router and add a WiFi segment so that the child can connect a tablet or a phone to the D-Link DIRK 300: with any connection, it is connected to, such a router configuration will provide the view, protected content filter.
The reason for using VLAN can also be the installation of an IPTV console. If the provider supplies a taked traffic, then one of the D-Link DIR-300 router interfaces will have to be combined with a WAN port in transparent mode.
Configuring the D-Link DIR-300 router ports for this scenario is described in on the example of Rostelecom television.
Firewall and Nat.
To configure remote access to both a home computer and a network storage connected to the DIR-300, an understanding of how the router carries out network protection mechanisms.
In a broad sense, under remote access it is understood as any traffic initiated from the outside towards the home network and the router. Thus, to organize a gaming or FTP server, providing a connection from remote machines, some D-LINK DIR-300 setting should be performed.

NAT is a mechanism that broadcasting the addresses so that the Internet hosts do not see the real structure of the home network on the other side of the router, and process all traffic from local computers, seeing only an external WAN IP address. Thus, NAT in D-Link DIR-300 protects against network attacks, preventing direct access from outside to the internal addresses of devices.
But at the same time, the router will prevent if you need to provide friends with access to FTP folders with photos or to play space. To configure the broadcast rules for NAT in the DIR-300, you need to redirect ports.
To configure the ports of the router, you need to go to the D-Link DIR-300 settings to the Virtual Servers tab.

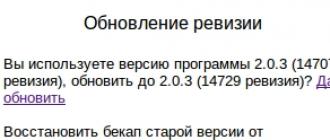
 +
+
There is another problem: the router receives a gray WAN IP provider, which is constantly changing. Having a permanent address, connect to the D-Link DIR-300 remote computer will not work, since the destination address is always different.
To solve this problem, DDNS technology is used to assign a dynamic permanent domain name. The DDNS service in real time updates information about changing WAN IP and provides continuous binding to the domain name.
Firewall is a set of traffic filtering rules based on criteria such as: address, port, protocol direction. The filtering of the D-Link DIR-300 firewall is carried out after decapsulation, routing and NAT processing.
Remower the firewall router allows on the "Firewall - IP filters" tab.


Network Expansion
Wi-Fi router D-Link DIR-300 supports client mode. This means that both with a cable and WiFi, you can connect the DIR-300 router to the upstream router to expand the existing network.
First you need to log in to the settings. In D-Link DIR-300, this feature is on the WiFi - Client tab.

A check mark "Enable" transfers the router to the client mode, and the "broadcast wireless" option allows you to connect WiFi devices to D-Link DIR-300 as a relay.
From the list of available networks, you need to select the appropriate SSID name of the higher router and log in, and in the network parameters set the name of the current network, password and encryption method.
If a wifi password is changed on a higher router, the D-Link DIR-300 client settings will have to reinstall. Therefore, that the router worked as a client without interruptions, it is recommended to fragment a wifi network and use one of the segments as a bridge.
Now it is necessary to configure the D-Link DIR-300 router modem to the device connected to it as the device client have access not only to local nodes, but also on the Internet.
On the DIR-300 tab "Network - WAN", you must specify the ascending direction of the WAN through the WiFi-Client interface and set the routing type used on the local network.

The DIR-300 setup is accompanied by reboot notifications after each change in the configuration.

Found a typo? Highlight the text and press Ctrl + Enter

Configuring the Internet under a specific provider using firmware
Almost all Russian Internet providers represent on their official sites ready-made firmware to configure wireless routers. In the list of devices without difficulty, you can find D-Link DIR 300, whose characteristics allow you to produce fine tuning under any provider. In most cases, the Internet service provider website can also download both the firmware itself, and the program for its installation. In addition to the file set, a step-by-step instruction is always proposed. So it will not arise with automatic configuration.

With the firmware of providers, problems may arise if the settings are hidden by the developer password. The user will not have the ability to go to the settings and personally register the parameters for Wi-Fi. Therefore, before flashing the device, you need to clarify the company's representatives of such locks. Even if the router was flashed by negligence, it can always be reanimated by reducing firmware from the official website of the D-Link company.
Wi-Fi settings
In the Wireless D-Link DIR 300 control diR 300 menu, the WiFi connection settings have a separately dedicated partition in which many items.
- MBSSID allows you to create several different Wi-Fi networks. It will be useful somewhere in the office to give access to the Internet only to the authorities, and at home this function is not used.
- In the SSID field, it is recommended to register with Latin letters your own name for a wireless network.
- Wireless mode can be installed any, by the possibilities of wireless devices. If the laptop works only in 802.11g mode, then it makes no sense to install more productive
- In security settings, in the "Network Authentication" field, it is recommended to select WPA-PSK / WPA2-PSK Mixed. First, for this connection does not need a RADIUS server, secondly, the password with letters and numbers is heavier to hack.
- Encryption You need to select AES and register a password for a Wi-Fi network. On this setting is over, you can save changes and enjoy the work of the Internet via a wireless network.
Wifi hardware connection
The WiFi distribution setting in the D-LINK DIR 300 wireless access point can be carried out not only at the program level with settings through a special menu. On one of the side panels of the device you can see a huge button with the WPS inscription. Thanks to it, you can perform a quick hardware connection with a device that supports this technology. Enough, for example, on the tablet, select Connecting to a wireless Internet via WPS and in the list of wireless points that appears to select the necessary network. To complete the connection on the D-Link device, click and retain the order of 2-3 seconds hardware button to connect the device via Wi-Fi. The devices will be connected without entering the password, which is very convenient when there is no desire to transmit a password from a personal network to its guests.

However, before using this wonderful function, it must be activated in the router. To do this, in the access point management menu you need to find the WPS item and go to it. After installing the flag next to "Enable WPS" and save the function will be available for use. Advanced IT users can try to create an additional Wi-Fi network with disabilities, such as. Purely for guests who urgently need the Internet, but that their connection does not interfere with the current downloads of the owner.
Setting up network television
Many users will enjoy in the D-Link DIR 300 router, the characteristics of IPTV. Minimum settings and maximum pleasure from viewing high-quality digital video. When entering the IPTV settings menu, the wizard proposes to select the port number in the wireless access point to which the TV prefix will be connected. The main thing is to remember the selected number and always connect digital television only there. In the "Miscellaneous" section, it is recommended to enable IGMP, NAT and a network screen. Other fields are better not to touch. Naturally, you need to click the "Save" button, and you can safely begin viewing high-definition video on the computer screen. The player for viewing, the address of the server and the list of channels is obliged to provide a provider providing IPTV service.
Advantages of the router D-Link DIR 300
Judging by the numerous reviews of the owners, the advantages of the wireless router do not consider. Is it truth, otherwise where will the many positive feedback come from?
- As mentioned earlier, the main factor when buying is the price. The device on the pocket of any user.
- The presence of a four-port switch to which you can connect personal computers and a network printer, for example.
- Ability to view IPTV on multiple devices, both via WiFi and local network.
- Very convenient in D-Link DIR 300 WiFi Setup. Menu items have a description, and anyone in a few minutes will independently launch their own wireless network.

There are disadvantages in a wireless device.
You have to hear from users that the D-Link DIR 300 "crashes" during operation - that is, spontaneously reboots or hangs at an indefinite time. After studying information on specialized forums, it can be found that the problem is known to those skilled in the art and is solved by replacing the firmware. The freezing can occur due to the user's fault if you download files with multiple devices with a total speed equal to the width of the Internet. All owners of D-Link DIR 300 download speed of files, first of all it concerns torrents, it is recommended to limit 5-10% of the maximum channel width. The recommendation concerns only devices receiving the Internet on a wireless network. Work with the cable has no shortcomings. The negative can be attributed to the complaints of a small coating radius. There is no amplifier in the router without exiting the antenna. Although for such a price, what kind of access point has, it is not worth a good coating from it.

Conclusion
Deciding to purchase an inexpensive router, it is worth paying your attention to D-Link Dir 300. The WiFi setting, a local network, digital television and security will not take a long time. Not all providers provide open access to the Internet. Many use individual settings with which you can "be friends". Favorite routers. They include the most popular wireless access point in Russia from the well-known manufacturer of D-Link DIR 300 communication equipment.
Good day.
Despite the fact that today the model of the D-Link Dir 300 router cannot be called new (it is slightly outdated) - it is quite widely used. And by the way, it should be noted, in most cases, it perfectly copes with your task: provides the Internet all devices in your apartment, along the way, organizing a local network between them.
In this article, try to configure this router when using the quick settings wizard. About everything in order.
1. Connecting the D-LINK DIR 300 router to the computer
Connection, in general, usual, for this type of routers. By the way, the routers model 320, 330, 450 are similar to the settings with D-Link DIR 300 and do not differ much.
The first thing is that - connect the router to the computer. The wire from the entrance, which before you had connected to the computer's network card - connect to the "Internet" connector. With a cable that comes with a router, connect the output from the computer's network card with one of the local ports (LAN1-LAN4) D-Link DIR 300.
The picture shows the cable (left) for connecting the computer and the router.
On this actually everything. Yes, by the way, pay attention to whether the LEDs are flashing on the router housing (if everything is fine - there must be blinking).
2. Setting up a network adapter in Windows
The setting will show on the example of Windows 8 (by the way, everything will be the same in Windows 7). By the way, it is desirable to carry out the first router setting from a stationary computer, so we will customize the Ethernet adapter * (it means the network card connected to the local network and the Internet through the wire *)).
1) First go to the OS control panel at the address: " Control Panel \\ Network and Internet \\ Network Management Center and Common Access". Here, the section is interested in the change in the adapter parameters. See Screenshot below.
3) In the Ethernet properties, we need to find the line "Internet Protocol version4 ..." and will switch to its properties. Next, set the automatic receipt of the IP address and DNS.
After that save the settings.
Now, in the command line, type "IPCONFIG / ALL" and press ENTER.
You must appear the properties of all your adapters connected to the computer. We are interested in Ethernet, or rather its MAC address. On the screen below, we need to write (or remember) the "physical address" line, this is what we are looking for.
Now you can go to the router settings ...
3. Setting up router
First of all, you need to go to the router settings.
Address: http://192.168.0.1 (typing in the address bar of the browser)
Login: Admin (small Latin letters without spaces)
Password: Most likely, the graph can be left empty. If an error fabrics that password is not true, try in graphs and login and password to enter admin.
3.1. Configuring PPPOE Connection
PPPoE is a connection type that has many providers in Russia. You may have another type of connection, you need to specify in the contract or technical support of the provider ...
To begin with, go to the "SETUP" section (see above, right under the D-Link cap).
By the way, perhaps your firmware version will be Russian, so it will be easier to navigate. Here we consider English.
In this section, we are interested in the "Internet" tab (left column).
Internet Connection Type - In this column, select the type of your connection. In this example, we will choose PPPoE (UserName / Password).
PPPoE - Here you select Dynamic IP and just below, enter your login and password to access the Internet (this information is specified at your provider)
It is also important to note two graphs.
Mac Address - Remember we have previously recorded the MAC address of the adapter to which the Internet was previously connected? Now you need this MAC address to score in the router settings so that he can clone it.
Connection Mode Select - I recommend choosing Always-ON mode. This means that you will always be connected to the Internet, as soon as the connection breaks, the router will try to restore it immediately. For example, if you choose MANUAL, it will connect to the Internet only on your instructions ...
3.2. Wi-Fi Setup
In the "Internet" section (from above), in the left column, select the tab " Wireless settings«.
Here, put a tick, opposite the Enable item (i.e. included). Now omit the page just below the Wireless Network Settings header.
The main thing is to celebrate 2 points:
Enable Wireless - Put a tick (means that you turn on Wi-Fi wireless network);
Wireless Network Name - Enter the name of your network. Maybe arbitrary how you like more. For example, "DLINK".
To do this, under the Wireles Security Mode heading, turn on the "Enable WPA / WPA2 ..." mode as in the picture below.
Then, in the "Network Key" column, specify the password that will be used to connect to your wireless network.
That's all. Save the settings and restart the router. After that, you should have the Internet, a local network on your stationary computer.
If you enable mobile devices (laptop, phone, etc. with Wi-Fi support) you should see the Wi-Fi network with your name (which you specified just above in the router settings). Join it by specifying the password defined a little earlier. The device should also access the Internet and LAN.