If you still don’t know what it is, you can find detailed material about BIOS on our website, or simply by following the link. At the very beginning of this article, we talked about how to enter the BIOS, but you may notice that this procedure can only be carried out using the keyboard. Of course, all this is good if you have a keyboard and it works, but there are times when it is broken or USB keyboard support is disabled in the BIOS. In such cases, things will be a little... more complicated. Let's figure out whether it is possible to enter the BIOS without a keyboard, and if so, how and in what cases?
USB problems
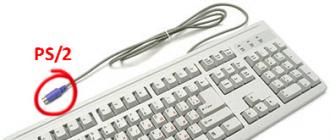
Let's start with the fact that in the BIOS settings you can enable/disable support for keyboards with USB plugs. In this case, of course, you need to somehow go into the BIOS and change the menu item responsible for initializing USB keyboards to a value opposite to the current one. This is where replacing your USB keyboard with a keyboard with a PS/2 plug will help. Looking at the screenshot, you will immediately understand what kind of connector it is.
It is important to consider here that when you connect a keyboard with a PS/2 connector, the computer initializes it only the next time it starts.
Once you enter the BIOS, look for a menu item called USB Keyboard Support (see screenshot below) and set the value of this parameter to Enabled.
Ready. Save the changes and restart the computer. Your USB keyboard will now work.
An alternative solution to the USB problem (“surgical” intervention)
Of course, you may not have a keyboard with a PS/2 plug, and you may have nowhere to get one. In this case, you can use another method, namely, returning the BIOS settings to factory settings.
So, turn off the power to the computer, open the side cover of the system unit and look inside. You need to find the trigger under which it says CCMOS (see screenshot below).

Switch it to another position for 10-20 seconds, and then return to its original position. After these steps, turn on your PC. The USB keyboard should work successfully.
For owners of some laptops
In quite rare cases (why is not clear), laptops have special buttons for entering the BIOS. By pressing it, the system will enter BIOS mode without first rebooting the device.

If you have such a button, feel free to use it.
Option for Windows 8.1 (for BIOS UEFI)
If with relatively old computers everything is quite simple, then with new models some problems may arise. We are talking about an updated version of the BIOS called UEFI. And if it just so happens that your PC has this very UEFI, and you are using the Windows 8.1 operating system, then there is a separate way for you to enter the BIOS.

In this simple way, you can enter the UEFI BIOS in Windows 8.1 without using the keyboard.
Bottom line
Here are a few methods that will help you solve the problem of entering the BIOS without a keyboard (or almost without). If none of the methods brings results, then we recommend taking the system unit of your PC to a service center, where they will tell you exactly what the problem is with entering the BIOS. That's all for us. Ask your questions in the comments if any of the methods were unclear to you or if something doesn’t work out for you. Good luck!
chopen.net
Entering BIOS without a keyboard

To enter the BIOS, you need to use a special key or key combination on the keyboard. But if it doesn’t work, then you won’t be able to log in using the standard method. All that remains is to either find a working keyboard model, or enter directly through the operating system interface.
We enter the BIOS through the OS
It is worth understanding that this method is only suitable for the most modern versions of Windows - 8, 8.1 and 10. If you have some other OS, you will have to look for a working keyboard and try to log in using the standard method.
Instructions for logging in through the operating system look like this:

Unfortunately, this is the only way to enter the BIOS without a keyboard. Also, some motherboards may have a special login button - it should be located on the back of the system unit or next to the keyboard on laptops.
Read also: What to do if the keyboard does not work in the BIOS
We are glad that we were able to help you solve the problem.
Poll: did this article help you?
Not reallylumpics.ru
Is it easy to enter BIOS?
“The Russian person is famous for his ability to find a way out of the most difficult situations, but he is even more famous for his ability to find an entrance into it.”
Stas Yankovsky

There is hardly a computer user who has never needed to use the BIOS Setup program or, as they say in computer jargon, to enter the BIOS. There can be many reasons for this - from the need to set the necessary parameters for the operation of memory, processor and disk drives to monitoring the status of equipment on a PC or laptop or setting a password for logging into the system or Setup itself. And therefore, the question of how to enter the BIOS is probably not idle for most readers.
The main option for entering the BIOS
In order to enter the BIOS, you just need to press a certain key when the computer boots. Typically this key is the Del key, but other keys or key combinations are also common. How to enter BIOS if you do not know the required key?
First of all, it is advisable to look at the documentation for your computer, especially if you are the happy owner of a laptop, since laptop manufacturers do not always comply with this standard, and in order to find out how to enter the BIOS by trial error, you will have to try too many keys. You need to press the necessary keys at the moment when computer data appears on the screen.
Typically, this startup screen displays information about the key that must be used to enter the BIOS on a desktop computer or laptop. If you do not have time to consider this information, then use the Pause/Break key - this will stop the system loading. To resume the download, you usually need to press the Esc key.
Standard keys with which you can enter Setup from various BIOS manufacturers:
- AMI – Del, F2
- Phoenix – Del, Ctrl-Alt-Esc, Ctrl-Alt-S, Ctrl-Alt-Ins
- Award – Del, Ctrl-Alt-Esc
Possible problems when entering BIOS
Very often, people make the following mistake when they try to enter BIOS Setup - they press the key at boot too late, when the start screen has already disappeared and been replaced by the Windows boot picture or the operating system selection menu. If this happens, then pressing the desired key is no longer useful - you will no longer be able to enter the BIOS. How to start the BIOS in this case? You will have to reboot the system again. Therefore, it is best to keep the desired key pressed all the time when rebooting. This will not harm the computer, but you will not miss the moment you need and will automatically enter the BIOS.
What is the best way to enter the BIOS - during a hot boot using the Ctrl-Alt-Del keys or by turning the system unit on and off? It’s easier, of course, to go into the BIOS during a hot boot, but there is a situation when some system utility installed in the operating system intercepts the Ctrl-Alt-Del key combination and does not perform a normal reboot. Therefore, it is better to use Reset.
The question of how to open the BIOS on a laptop usually causes the most difficulties. A system reboot on a laptop usually occurs very quickly, and the user is shown a minimum of information on the screen. Therefore, catching the right moment to launch the BIOS on a laptop can be especially difficult. You might be thinking - what's the big deal - all you need to do is hold down the Del key? But no, for most laptops this key does not work as a pass to the Setup program. Sometimes you can spot the desired key in the bottom line. But if you still haven’t managed to recognize the key, then to solve the question of how to enter the BIOS on a laptop, it’s best to refer to the documentation for the laptop model you need.
A lot depends on the keyboard
There may also be a situation where you cannot enter the BIOS by pressing a certain key combination simply because the keyboard is faulty or you connected it poorly. This situation can happen, for example, if you want to enter the BIOS on a new system unit. So instead of sitting and wondering “why can’t I get into the BIOS,” sometimes it’s useful to just check to see if your keyboard is okay?
Sometimes, by the way, it happens that you use a USB keyboard, even though the BIOS does not support USB mode in boot mode or such an option is disabled. In this case, it makes sense to change the keyboard, for example, to a keyboard with a PS connector.
What to do if your password gets in the way?
Sometimes it happens that a user cannot enter the BIOS if a password is set to enter the BIOS that he does not remember or the password was set by someone else. A similar password is sometimes set by a company that sells and configures computer equipment. If you want to reset it and be able to easily enter the BIOS, you will have to open the computer case and reset the BIOS CMOS memory by installing a special jumper to clear the memory on the motherboard or temporarily removing the BIOS battery. You can find out how best to carry out these activities in the documentation for the motherboard.
Conclusion
BIOS Setup is very often the first program that a computer user encounters. Therefore, computer equipment manufacturers usually make sure that the question of how to start the BIOS does not overshadow the life of an inexperienced user. We hope you don't have any problems with how to get into the BIOS on your desktop or laptop. If they do arise, we hope that this article helped you solve them.
biosgid.ru
How to enter BIOS on a computer

Comments on this post: 2
BIOS is a basic system or set of microprograms necessary for setting up hardware on the motherboard (BIOS), most often used to configure booting devices, setting the time, setting the processor, cooling, memory, turning off and turning on some devices. The BIOS's task is to prepare and test the equipment for subsequent loading of an operating system or device that has a program for installing or loading the operating environment (such as an operating system on disk).
The usual way to enter the BIOS is understood as: pressing a certain key or key combination on the keyboard during startup or reboot, before the Windows operating system itself starts. It should be mentioned that in new versions of operating systems (if they are installed in UEFI mode, Windows 8, 8.1, 10), it is possible to enter the BIOS after loading the operating system.
To enter the BIOS you usually need:
- View the keyboard shortcut for your motherboard. You can find an electronic manual for your motherboard on the Internet.
- Or usually, when you turn on the computer or when you reboot, prompts pop up on the screen regarding the keys to enter the BIOS. If the operating system starts loading immediately, then the article below describes how to disable fast boot or enter the BIOS from the operating system without using the keyboard and key combination when logging in.


Most often, BIOS uses keys such as Delete, less often Ctrl+Alt+Esc, F2 more often on laptops, Delete.
How to log in via Windows
As previously mentioned in new versions of the Windows operating system (Windows), it is possible to enter the BIOS from the system itself. Yes, yes, you understood everything correctly. You can enter the basic input/output system after loading the operating system without a keyboard, not when you turn on the computer, but after loading the operating system.
To do this you need:
- Windows 10, Windows 8, 8.1, Windows Server 2012, Windows Server 2012 R2 must be installed in UEFI mode (usually DEFAULT).
- Go to settings through the start menu. Or similar in other versions of Windows (Examples on Windows 10)


In the next menu “Options” of the Windows operating system. You should select the recovery tab, left side of the window. In the “Recovery” tab that opens. Find “Special boot options” and below the button “Restart now”

After these steps, Windows will shut down and the “Select Actions” window will appear. In this blue window, select “Diagnostics Restore your computer, return the computer to its original state, or use additional tools.”

We select the UEFI firmware parameters, then select reboot and after the reboot, instead of loading into Windows, the BIOS will appear. Let me remind you that the menu item “UEFI Firmware Settings” will be available if Windows is installed in UEFI mode.

If anyone had a question: “How to enter the BIOS using the command line?”, then I want to correct it a little. From the command line you can only call the blue menu, which is indicated above in the previous paragraph of our article, and then if the operating system is installed accordingly, you need to launch the command line.
To do this, you can enter “cmd” or “command line”, you can enter it incompletely.

Press Enter and a command prompt window opens.

Copy this name of the executable file in the system folders (if a specific path to the executable file is not specified) of the program or enter it manually:
shutdown.exe /r /o
If you are wondering what the /r and /o keys mean. (Keys are parameters to a program that is launched via the command line, written separated by a slash, in this case the key “r” and “o”)
If you want to find out what these keys are, enter “help shutdown”. After entering this command in the command line and pressing the Enter key on the keyboard, a hint will appear explaining how to use the shutdown command.

From which we learn, for example, that the /o parameter is to go to the additional boot options menu and restart the computer. And also that this option must be used with the /r option.
Thus, this is simply an alternative way to open the blue menu discussed in the previous paragraph. Only for this purpose we will not use the start and graphical interface of the toolbars, but the command line and the shutdown application with parameters.
What to do if you can’t enter the BIOS?
What could be the reason for the inability to enter the BIOS (UEFI - actually it should be called, but out of habit everyone uses the word “BIOS”).
1. First of all, this is a quick start of the Windows 10 operating system, which can be disabled; because of it, they do not have time to quickly press the BIOS entry key. For owners of solid-state hard drives, this function is very convenient; it allows you to quickly turn on the computer after pressing the power key, but if you need to enter the BIOS, you will have to either disable it or log in through Windows.
In the search near the start, type “Power Options”
Press Enter. Go to the “Power button actions” tab. And if the “Enable fast startup” checkbox is checked, then uncheck it. Now you have time to press the BIOS entry button.

2. Other reasons may be the wrong login button or key combination.
3. If the computer does not start due to the parameters previously set in the BIOS, then it can be reset by removing the battery for a while. This will reset the BIOS settings to factory settings and possibly give access to it.
4. If when you first turn on the monitor does not display a picture for a long time, during this time the BIOS screen may pass and Windows will begin loading.
AlexZsoft.ru
The keyboard does not work in the BIOS: causes of malfunctions and their elimination
Users usually notice the problem that the keyboard does not work in the BIOS when reinstalling the operating system, when it is necessary to set boot priority, or when changing additional settings of the primary input/output system. What is the reason for this phenomenon and how to deal with it will now be discussed. I would like to point out right away that not everything is so bad. There are several basic methods that can solve the problem within a few minutes. Let's look at them.
Keyboard does not work in BIOS: reasons
Many users pay attention to the fact that in a normally functioning operating system such situations, although observed, are very rare. For the most part, this applies to the BIOS.

Among the main reasons for this situation, most experts identify the following:
- physical damage to plugs and wires;
- incorrect connection;
- an old computer without support for a connected device;
- Incorrect configuration of BIOS parameters.
Issues related to physical defects or damage will not be considered at this time. As a last resort, if the keyboard does not work in the BIOS, you can check the functionality of an external device of the PS/2 or USB standard quite simply by connecting it to another computer terminal. If everything is fine on it, you need to look for the reason in your system unit (more precisely, in the sockets and ports to which the connection is made).
What to do first?
As for troubleshooting, the first thing you should do is check that the connection is correct.

In the case of USB keyboards, it is quite difficult to make a connection through the appropriate port incorrectly (although sometimes it may be that the keyboard belongs to the USB 3.0 standard, but is connected to a USB 2.0 port).

But most often, the occurrence of such a situation is more typical for keyboards of the old PS/2 standard. The connection must be made taking into account that the colors of the keyboard plug and the corresponding socket must match (they are purple). However, even in this case it is quite difficult to make a mistake.
How to enter the BIOS (the keyboard does not work)?
When trying to configure the parameters of the primary system, which can very often be the cause of failures, the question of access to them also arises, because in most cases it is impossible to do without a keyboard to call the BIOS or navigate through the settings sections.

But there is a solution. For example, we have a situation where the keyboard on a laptop does not work in the BIOS. You can enter the settings system using several methods. Some laptop models are initially equipped with special buttons on the panel, with the help of which the BIOS settings section is called up. In particular, this applies to products from Lenovo, Sony VAIO (ASSIST button), etc.
The second access option in the case when the keyboard does not work in the BIOS is to connect an external analogue via a USB port. But here you need to remember that it is advisable to connect the external keyboard without power, and only then turn on the device to boot.
Reset
The previous solutions can be called universal in a sense, however, they may not give the desired result. This can be observed when the USB keyboard does not work in the BIOS. This problem is only due to the fact that some kind of failure occurred in the system itself.

In this case, you should perform a complete reset of the installed parameters. Any, even an old desktop computer, allows you to get to the motherboard on which the CMOS battery is installed. You just need to pull it out of the slot for a few minutes, insert it back and try to enter the settings by turning on the terminal to boot.
Setting the correct parameters
But even here there are pitfalls. In the case of USB keyboards, the problem may be that support for such devices is deactivated on the primary system itself.

In this case, you will have to connect a PS/2 keyboard or, if possible, enter the BIOS on the laptop by pressing a special button, then find parameters like Legacy USB Support or USB Keyboard Support and look at the set value. If this is indeed the reason, it will be set to Disabled. You need to change it to Enabled and save the changes when you exit (F10, Y). A reboot will follow. Perhaps this is the only way to fix the problem.
What else could it be?
As reviews indicate, sometimes a keyboard failure can be associated with damage to the RAM sticks, malfunctions in the power supply, short-circuiting of some contacts directly on the motherboard, malfunction of the ports, etc. Here, you cannot do without a full diagnosis of the entire system.

Finally, there may also be a problem with the BIOS system itself, which consists of disruption of its operation or obsolescence. In this case, you will have to do a complete flashing, but this process is unsafe, and without special knowledge, an ordinary user can cause irreparable damage to the computer, as a result of which the PC will stop working altogether.
Instead of a total
Based on all of the above, we can conclude that, regardless of the current situation, not counting physical damage or defects, the problem of the keyboard not working and access to the primary system is solved quite simply.
But there can be many reasons for this phenomenon. And they are not always associated exclusively with physical defects. In most cases, for the same USB devices, it is enough to simply enable support or do a general reset. This helps 99 times out of 100.
Finally, if we talk about a global problem, when the keyboard does not work at all, you can determine it immediately on the welcome screen when you turn on the computer terminal (it will be reported that the keyboard is missing). In this case, you will either have to check the correct connection, or use the methods suggested above, including replacing the failed device with a new one.
Those users who have at least once tried to enter BIOS Setup know very well that this operation requires an input device such as a keyboard. Therefore, the situation when you urgently need to enter the BIOS, and at the same time you discover that the keyboard connected to the computer does not work when the system boots, can hardly be called pleasant. Is it possible to resolve this situation and enable keyboard input when the computer boots?
If the keyboard you use to enter the BIOS was not connected to the computer before you decided to enter the BIOS, then most likely the keyboard is not working for a reason related to itself. This could be either a malfunction of the keyboard itself, a poor connection, or a malfunction of the connector to which it is connected.
However, another situation is much more common - the keyboard that you use to enter the BIOS works fine in the operating system, but when entering the BIOS it does not work. In this case, there can be no talk of a malfunction of the input device itself. Most likely, in this case you are dealing with incorrect settings of options in the BIOS. For example, support for devices connected to the USB port may be disabled in the BIOS. There may also be a conflict with some other device connected to the computer.
Methods for solving the problem
If the keyboard you have chosen to enter the BIOS is being used for the first time, then, first of all, when faced with a situation where keyboard input does not work, you need to check the functionality of the device by connecting it to another computer.
If you have no doubts about the functionality of the keyboard, then you can try connecting a different type of keyboard to the computer. That is, if you use a keyboard that connects to a USB connector, then you can take a keyboard that connects to a PS/2 connector. Or vice versa, if the computer does not load the BIOS using a PS/2 keyboard, then you can try connecting a USB keyboard. In most cases, this option helps resolve the problem.
Also, to eliminate the possibility of a conflict between the keyboard and another USB device, you can try to disconnect all other devices connected to the USB connectors. Theoretically, there could also be a conflict between the PS/2 mouse and the PS/2 keyboard, so in this case it also makes sense to disable the mouse.
However, if all the above methods do not help enable keyboard input, then most likely you will have to reset the BIOS settings to default settings. This is done by removing the battery on the system board from its socket, or installing a special jumper. We wrote more about how to carry out this operation in a separate article.
After you manage to enable keyboard input and you enter the BIOS, do not forget to check the BIOS settings related to connecting external devices so that a similar situation does not occur in the future. For example, in the BIOS there are options similar to the USB Keyboard Function option, which block the ability to connect USB input devices. If you have this option disabled, you will need to enable it.
Conclusion
It is quite common to encounter a situation where keyboard input does not work when the computer boots and enters the BIOS. However, in most cases, the user can solve this problem on his own. As a rule, the situation is due to the fact that the BIOS blocks the ability to connect peripheral devices. In most cases, the problem can be solved by connecting to the computer another keyboard designed for an alternative interface - PS/2 instead of USB or USB instead of PS/2.
To enter the BIOS, you use the keyboard keys, and the entry itself takes place before the Windows operating system boots. In some situations, access to the BIOS without a keyboard is necessary.
The BIOS is included to configure or change some computer parameters, to select the boot priority from a specific disk, bootable flash drive or CD/DVD drive, for example, this is needed to install Windows from bootable media.
BIOS (basic input/output system) - a basic input/output system consisting of a set of chips on the motherboard with system software. BIOS is necessary to check and configure the computer hardware before starting the system; BIOS is used to load the Windows operating system.
Usually, immediately after starting the computer, when the motherboard manufacturer or laptop manufacturer's splash screen appears on the screen, you need to press a specific key, or several keyboard keys, to enter the BIOS. Which keys are used to start displaying the BIOS on the screen depends on the BIOS developer and the motherboard manufacturer, and on devices: desktop PCs or laptops, a variety of keyboard keys are used.
In some cases, the user is not able to use the keyboard to enter the BIOS on the PC. This is influenced by several circumstances:
- keyboard malfunction;
- damage to connectors or wires at the keyboard or on the system unit;
- In the BIOS settings, the USB keyboard is disabled or not supported.
If the keyboard itself is faulty, it must be tested on another computer and then replaced with a working keyboard. The same applies to malfunctions of the power cable or connection points to the computer.
If your computer does not support a USB keyboard, or support for such a keyboard is disabled in the BIOS settings, use a keyboard with a PS/2 connector, or install an adapter from a USB keyboard to the PS/2 port on the computer.
In this article we will look at how to enter the BIOS on Windows, in a running operating system, and not when loading Windows, as usual, you enter the BIOS to perform certain actions. This method works in UEFI BIOS, in the operating systems Windows 10, Windows 8.1, Windows 8, Windows Server 2012.
If, for some reason, the keyboard does not work, and the user is tormented by the question of how to enter the BIOS, a manipulator will help him: a computer mouse. In modern PCs, the UEFI BIOS supports the use of a mouse, unlike the regular BIOS (Legacy BIOS), in which you can only work using the keyboard keys.
To do this, the following conditions must be met:
- the computer uses UEFI BIOS mode;
- The Windows operating system must be running on the PC;
- A working computer mouse is connected to the computer.
In this article you will find instructions for the operating systems Windows 10 and Windows 8.1 (Windows 8).
Using the method described in the article, you can also enter the BIOS with the keyboard running, directly from the Windows operating system. For example, if when starting the computer, the user did not have time to press the required key to enter the BIOS.
How to enter BIOS without a keyboard in Windows 10
First, let's see how to enter the BIOS without a keyboard from the Windows 10 operating system running in normal mode.
On Windows 10 operating system, follow these steps:
- Go to the Start menu and open the Settings app.
- Click on "Update & Security" and then open the "Recovery" section.
- In the “Special boot options” option, click on the “Restart now” button.
- After the reboot, in the “Select Action” window, click on “Troubleshooting”.

- In the "Diagnostics" window, click on the "Advanced options" button.

- In the next Advanced Options window, click on UEFI Firmware Options.

- In the UEFI Firmware Settings window, click on the Reboot button.

After restarting the PC, the UEFI BIOS window will open, in which you need to make the necessary settings. In particular, enable USB keyboard support if it is disabled in the BIOS, or select a preferred queue for booting from computer disks.
This is a picture of Gigabyte's UIFI BIOS installed on my computer, which has Russian language support.

How to run BIOS without a keyboard in Windows 8.1 (Windows 8)
In a similar way, you can enter the BIOS from a running Windows 8.1 or Windows 8 operating system.
In the Windows 8.1 or Windows 8 operating system, to enter the UEFI BIOS without using the keyboard, you must follow these steps:
- On the Desktop, move the mouse cursor to the top or bottom right edge of the screen.
- In the sidebar, click Settings, and then select Change PC settings.
- Go to the "Update and Recovery" section and then click on "Recovery".
- In the Special Boot Options option, click Restart Now.
- The computer will restart, then in the “Select Action” window, click on the “Diagnostics” button.

- In the next window, click on “Advanced options”.
- In the new window, select UEFI Firmware Settings.

- In the UEFI Firmware Settings window, click the Reboot button to apply the settings changes.
After rebooting the PC, the UEFI BIOS will open on the computer, in which the user can make the necessary settings.
Conclusions of the article
The article discusses the question of how to enable BIOS without a keyboard on a running Windows operating system. The necessary conditions to be able to enter the BIOS are: having a working computer mouse, UEFI BIOS mode on the computer, operating system Windows 10, Windows 8.1 or Windows 8.
The main ways to enter the BIOS, in most cases, use the keyboard. But sometimes situations arise in which it is not possible to use the keyboard. And here a non-standard situation arises:
For those who have a PS type connector
In the BIOS settings you can enable/disable support for keyboards with USB adapters. In this situation, it is worth changing the settings in the BIOS. Here you will need to replace the keyboard with a USB adapter with a keyboard with a PS connector (see photo).

After connecting, go to and look for USB Keyboard Support. Change Disabled for this parameter to the opposite (i.e., Enabled).

We restart the computer. Everything is working.
If there is no PS adapter (reset CMOS memory)
It's unlikely that there will be a keyboard with a PS port anywhere. In this case, there are several options for returning BIOS settings to factory settings.
Pressing the reset button
In some cases, there is a special “Reset” button on the PC case (the computer restart button). With its help, you can return the BIOS to factory settings.
- Turn off the computer.
- We completely exclude connecting the computer to power supplies.
- Press the button for five seconds.
- Turn on the computer.
These steps are enough to reset the settings.

Removing the battery
With laptops, a number with a reset button will not work. In this case, you can use forced cleaning - remove the CCMOS battery.
- We completely de-energize the PC. It is advisable to press the power button several times (so that the capacitors are discharged).
- We find a small CR2032 battery (the size of a coin).
- Remove the battery by pressing the latch. Proceed carefully; on some boards this battery cannot be removed.
- We wait a few seconds and insert the battery into place with the same side.
Turn on the computer. The steps above will reset the settings and your keyboard will start working.

Actions with a jumper

If you do not find this jumper, then you have two contacts. In this case, close the contacts with a screwdriver (or any other conductive object), wait about 20 seconds.
![]()
Turn on the computer. Let's make sure the keyboard works.
Method 2. For Windows operating systems of new series (10, 8.1, 8)
We enter the BIOS through the OS:

In this way, you can enter the BIOS without using the keyboard.
Method 3. Special button on the laptop body
If you own a laptop from Lenovo, Sony or VAIO, then you are very lucky. These laptops are equipped with a special button for entering the BIOS on the device body.
Press the “ASSIST” button. Ready. You entered the BIOS without using hotkeys or rebooting.

Not everyone has this button; on desktop computers it is even more difficult to notice. But this method actually resorts to using the keyboard and other means.
Note! Unfortunately, you won't be able to do much without using the keyboard. The best way is to have your keyboard repaired.
Conclusion
In most cases, a general reset of the computer solves the problem (99 percent out of 100). Before you do anything, choose the most reliable and safe option for yourself. For example, if you do not understand the structure of the motherboard, you should not remove the battery yourself or change the position of the jumper. Understand the reason, then act.
Video - How to enter BIOS without a keyboard
Hello dear readers. Today's article is dedicated to the topic "Keyboard doesn't work in BIOS".
This problem occurs quite often among many computer users. There are even times when people with 10 years of experience working with computers encounter this problem for the first time and do not know how to solve it.
The keyboard is a necessary part of the “input/output devices” and therefore any work with the computer that does not support a mouse is done using the keyboard. There are several most common reasons why these problems arise.
All of the above methods are based on the fact that you are using a fully working keyboard.
What to do if the keyboard does not work
If you were careless, you could bend the legs of the PS/2 keyboard connector. The connector itself is usually purple.
USB keyboard does not work in BIOS
Most often, this situation occurs when you connect a keyboard to an old computer.
The BIOS of older computers does not support USB ports, but only PS/2. Therefore, you need to find a keyboard with a similar connector or buy an adapter. Although nowadays it is already difficult to find a keyboard with PS/2.
If your computer is new or you are sure that your BIOS supports USB keyboards, then you need to check whether the “Legacy USB”, “USB keyboard” or “USB Function For DOS” option is enabled; if it says disable, you must set the value to enable, i.e. e included. 
When exiting the BIOS, be sure to save your settings. Otherwise, all your changes will lead to nothing.
Keyboard does not work when selecting OS
If the keyboard works in the OS itself and the BIOS, but does not work when you select to boot the operating system, you need to update the OS bootloader, or it is better to use the Grub bootloader, which is installed when installing Unix.
To update the Windows boot loader, you must have a disk with the operating system installed. Your installed OS should have full functionality. This article explains how to restore the bootloader in Windows.
Alternative methods.
A few more tips that help solve the problem with the keyboard, but they are used very rarely.

If this article did not help solve your problem, then ask questions in the comments and we will try to help you.