You will need
- - 2 sheets of plain paper;
- - a sheet of thick paper (optional);
- - Printer;
- -scissors;
- -glue stick;
- - pens, pencils, glitter;
- -notebook.
Instruction
Take the notebook you want to change, measure it to determine the amount of paper. Most likely you will need 2 A4 sheets.
Find a picture you like on the Internet, pictures for backgrounds or texture ones are best suited here. They should not contain separate specific pictures, otherwise there will be no space for the signature of the notebook, or it will simply not look nice. Moreover, the entire drawing will most likely not be printed according to the format of the notebook, and then part of it will have to be cut off. In addition to the background, find a picture for the caption, i.e. sticker or tag.

So, after you have found a background or texture, as well as a picture for the signature of the notebook, you can start making the cover itself. Print the background on ordinary sheets, and the tag on thick paper. Cut out the tag. Cut the first sheet of the cover, but not according to the format, but adding 1 cm to the right, 3 cm to the left, and do not touch the top and bottom yet. Cut the second sheet, adding only 1 cm to the size of the notebook on the left side.

Glue the first sheet on the front side so that the distance that we added is right through. On the right, fold the cover (1 cm) inward and glue it; on the left, also wrap it (3 cm) on the reverse side, glue it. Now turn the notebook over with the back side, glue the second sheet to it exactly along the spine, so you have 1 cm on the left, wrap it up and glue it. Cut the top and bottom to size of the notebook. The cover itself is ready, it remains only to complete it.
Glue the cut-out picture for the signature on the cover, enter the subject or purpose of the notebook in it. Customize the cover to your liking. You can add sparkles, draw a picture if the background is light, draw a texture, or stick decorative tape. Cover
I really liked the idea, especially since the current assortment on the shelves is unlikely to satisfy all the needs of young people 🙂 And many of my friends have schoolchildren 🙂
Cover photos that can be downloaded and posted in the post as an example. In general, there are a lot of covers in the Vokntakte group
Hand made book covers
There are topics
Cartoons Movies/TV series, Phrases, Sports, Animals
and a bunch of others 🙂


How to make a cover - below under the cut 🙂
In order to fit the image for printing in the right size, you need:
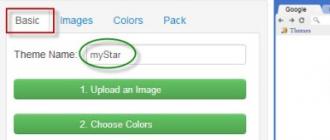
1. Go to Word.
2. Click several times on the sheet size field.
3. Select in the opened window in the tab "Fields - Orientation - Landscape"
4. In another tab of this window "Paper Size" change A4 to A3. And click OK.
The original covers for printing can be downloaded from the Vkontakte group
HERE). In the window that opens, enlarge the image by clicking on the picture with the mouse in the form of a magnifying glass and save ENLARGED! image to a computer. Otherwise, a small image will be saved!!!
6. Insert an image taken from the Contact by clicking on the "Insert" tab - Picture.
7. We click on the inserted image several times or, as in the example of Word 2007, the program itself opens the “Working with Pictures - Format” tab in the top toolbar.
8. Change here in the "Size - Height" parameter of the image by 21 cm. The Width parameter changes automatically and will be within 33.9 - 34 cm, if not, then select 34 cm.
P.S. Optionally, the "Height" parameter can be changed from 20.5 to 21 cm, depending on the size of the notebook for which the cover is being made.

In chapter Computers, Communication to the question How to create a book with a cover in MS Word so that on a regular or color printer! given by the author Sergey Ibragimov the best answer is file / Page Setup / group "Pages" there is a drop-down list from it select the item "Brochure"
Next to the preview and voila!
There is also a good program FinePrint 5.6. installs a virtual printer with advanced print settings. This printer is set as the default printer and all printing is done to it. The result is presented as a preview. Then it is possible to any other printer (including network). program tested and working
Source: Personal experience
22 answers
Hello! Here is a selection of topics with answers to your question: How to create a book with a cover in MS Word so that on a regular or color printer!
Answer from compound abbreviated
For books, IMHO, it is better not to find Abobe Acrobat Pro ....
Many workbooks are sold without signature space. We wrap some notebooks in a cover, and we also face the problem that they need to be signed. We suggest you download various signature templates that you can stick on your notebook.

A simple notebook signature template with the name of the subject
These signatures are extremely strict. An object is written on a white background of a rectangle with rounded edges. On an A4 sheet of format, 8 such templates fit. The following subjects are listed on the signatures: mathematics, history, algebra, geography, geometry, biology, computer science, physics.
The following PDF contains signature templates for such subjects: drawing, natural science, ecology, Russian literature, chemistry, English, astronomy, Russian.
Clean signatures for notebooks
After downloading and printing such a template, you can cut and paste a white rectangle with lines on a notebook, and then sign it with the desired subject, last name, and class letter.
Beautiful signature templates for notebooks in Word

If you download this DOCx and open it in Word, then you will have the opportunity to type such colorful, cute signatures for notebooks on various subjects.
Framed Notebook Signature Template
The easiest way to make this template. A sheet of A4 format is enough, and cut it into 8 equal parts.
School time is in full swing, but the child is not in the mood to learn? Bright school supplies will help to cheer up and increase interest in learning. For example, beautiful covers for notebooks, made by hand, ideally by the student himself. It's a great way to express yourself in class and get in the mood for the school day.
What you need - a list of materials and tools
To make covers, you need to prepare:
- White sheets of paper are our basis;
- Stickers or printouts of signature templates;
- Glue (preferably a pencil, but you can use PVA);
- Scissors.
For decoration we will use:
- Scrap paper (you can print your favorite background on paper for office equipment);
- Multi-colored tape;
- Multi-colored markers;
- colored paper;
- sequins;
- Double sided tape;
- Stationery knife;
- Curly scissors.

All materials and tools are specified in the general case. For each specific cover, a specific decoration set will be used.
Where to begin
A cover for a notebook should be not only beautiful, but also practical. If there are some volumetric elements on it, then writing in a notebook will not be very convenient. Therefore, we will make them flat, put on under a plastic cover.
Let's make a preparation first. To do this, we bend the white sheet so that we get a rectangle equal in size to the notebook.

Glue a piece of paper to the short side to align both parts.

The spread of the resulting sheet should correspond in size to the expanded notebook. You can make it a little longer, but the main thing is that it fits in a transparent cover.

If desired, you can make pockets on both sides. Taking into account their white sheet, they make it somewhat longer than a notebook spread.

We fix the pockets at the top and bottom with tape.

Then you get a full-fledged cover that will stick well on the notebook.

Now you can start decorating the product.
Cover Decoration - 13 Ideas
This stage depends on the imagination and the materials available. Here are 13 different cover decorating ideas that you are sure to love.
Idea 1 is the easiest
For decor, you will need scrapbooking paper and yellow tape. We cut out a rectangle from scrap paper, the dimensions of which are slightly smaller than the notebook sheet, and glue it on the front of the cover.

We glue the inscription and decorate it with decorative tape.

A simple notebook cover is ready!
Idea 2 - a bit harder
In addition to scrap paper and colored tape (in our case, blue), you also need to prepare a blue marker.
How to do:
Glue the template for the signature on the white blank at the bottom.

Glue pieces of scrap paper on top and bottom of the template, as shown in the photo.

We decorate the connection points with tape. On the sides, draw straight lines with a marker.

On the reverse side, we decorate with the remains of scrap paper, adhesive tape, traced lines.

That's all!
Idea 3 - pictorial
It is not necessary to glue the details to the base - they can simply be drawn. Of course, you will need a marker or felt-tip pen for this. But first, we will hide the place where the piece of paper was glued under the green adhesive tape and fix the signature template with it.

We will decorate with circles of different sizes and colors. We divide a sheet of paper into several strips with a simple pencil (at the end of the work it will need to be erased). Then draw circles on each stripe of your color. You need to start big.

After filling the space between them with medium-sized circles.

And the remaining territory is inhabited by very small ones.

So we color the entire sheet.

Fold in half.

Cover is ready!
Idea 4 - fun
We perform similarly to the previous option. But first, we paint the white blank with funny little men, simple drawings.

Then glue the template and decorate with adhesive tape.

You won't be bored with this notebook!

Idea 5 - delicious
For manufacturing, you will need a yellow sheet of paper, colored markers (or felt-tip pens), green tape and a semicircle stencil.
How to do:
Glue a yellow sheet onto a white blank.

We fix the connection point with tape.

Applying a stencil in different places, draw red semicircles.

We circle the lower part of the semicircle with a green marker, draw black dots-seeds. We got some cute watermelons.

Now we attach a signature template, decorate the white part with drawn curls.

We put it in a transparent cover and put it on a notebook.

Looks very nice.
Idea 6 - romantic
Girls are very romantic natures, so they like pink, animals, flowers, hearts. For them, you can make a cover with a shiny frame in the shape of a heart. You will need glitter and tape.
First you need to make a preparation. But instead of a piece of white paper, we glue red, and hide the junction under a strip of decorative tape.

On the front part with PVA glue, draw a big heart and sprinkle with sparkles.

Attach a signature template inside the heart. Decorate with tape strips.

Now it remains only to wait for the glue to dry and put the cover on the notebook.
Idea 7 - also for lovely ladies
For such an insert, you will need sparkles, double-sided and decorative tape.
First, glue the template for the signature, decorate it with pink stripes. We decorate the junction of the paper with adhesive tape, make a frame.

From small pieces of double-sided tape, cut out hearts of different sizes and glue them on the front of the product.

Remove the excess layer and sprinkle with sparkles.

In such a notebook, you will want to write neatly and beautifully.

Idea 8 - Braid
To make this version of the cover, you need to add colored paper and a clerical knife to the main materials.
Inside the workpiece on the front, draw a rectangle, stepping back from the edges by 0.5 cm. We draw parallel lines at a distance of 2 cm from each other, as shown in the photo. We cut them with a clerical knife. You also need to cut the fold line, stepping back from the edges of 0.5 cm.

From colored paper we cut out 9 strips 2 cm wide and one 1 cm wide.

We pass the strips in a checkerboard pattern so that the tips are inside the workpiece (in order to translate the tips inward, an incision was made along the fold line).

On the second, not braided part, we glue a sheet of paper to hide the protruding pieces. The ends located on the edge are bent and fixed with tape.

Flip the cover. We glue the template on the front part, decorate it with adhesive tape, and fasten a sheet of colored paper on the back.

We bend in half and admire the next masterpiece!

Idea 9 - vytynanka
Vytynanka is the art of paper cutting. Making a cover in this style is quite simple, because a geometric pattern is used for decoration, which even a schoolboy can cut out. You need to prepare a sheet of white paper, a colored sheet, matching tape and a template.
Well, now let's start manufacturing:
We fold both sheets so that one of the sides is equal in size to the notebook.

Draw a line on a white sheet with a pencil, to which the small side reaches. We fill most of it with randomly cut out figures.

Connecting sheets.

We glue the template for the inscription and decorate with adhesive tape.

Fold the insert in half.

Similarly, you can make any cover of a different color.
Idea 10 - multicolor
To implement this bright idea, you will need colored rectangles of any size. In our case - 5 x 3.5 cm.

We bend the white sheet. We glue rectangles tightly on it in diagonal rows.

Cut off the excess - you get a colored canvas. We select the rows with the help of thin adhesive strips. We glue white paper on one side, colored paper on the other, hide the junction under a strip of adhesive tape.

Attached is a signature template. Fold in half.

And we send it in a transparent cover.
Idea 11 - if there are rectangles left
If the colored pieces remain, then you can make another insert for the cover. To do this, glue the rectangles on the workpiece in any order.

Decorate around the perimeter with tape.

Glue the template and fold in half.

Idea 12 - colored fence
Here's another option for using rectangles. It is necessary to cut out a semblance of shtaketin from them (2 oblique cuts from one point in different directions) and glue them in the upper and lower parts of the workpiece, forming a semblance of a fence.

On the right side we fix the template, decorate it with adhesive tape. On the left - randomly glue the cut corners.

Fold in half.

Cover is ready!
And the last, 13th idea is also simple
With curly scissors from colored paper, cut out the stripes and glue them vertically on the workpiece.

On the right side we place a template for the inscription. We decorate it and the cover with tape. Fold in half.

Here are 13 simple bright notebook cover ideas implemented. They can be glued to a notebook, but it is better to put them in a transparent cover - when the notebook is over, then the cover can be removed and put on another without wasting time signing.